Запустить файл python pycharm
В прошлой теме было описано создание простейшего скрипта на языке Python. Для создания скрипта использовался текстовый редактор. В моем случае это был Notepad++. Но есть и другой способ создания программ, который представляет использование различных интегрированных сред разработки или IDE.
IDE предоставляют нам текстовый редактор для набора кода, но в отличие от стандартных текстовых редакторов, IDE также обеспечивает полноценную подсветку синтаксиса, автодополнение или интеллектуальную подсказку кода, возможность тут же выполнить созданный скрипт, а также многое другое.
Для Python можно использовать различные среды разработки, но одной из самых популярных из них является среда PyCharm , созданная компанией JetBrains. Эта среда динамично развивается, постоянно обновляется и доступна для наиболее распространенных операционных систем — Windows, MacOS, Linux.
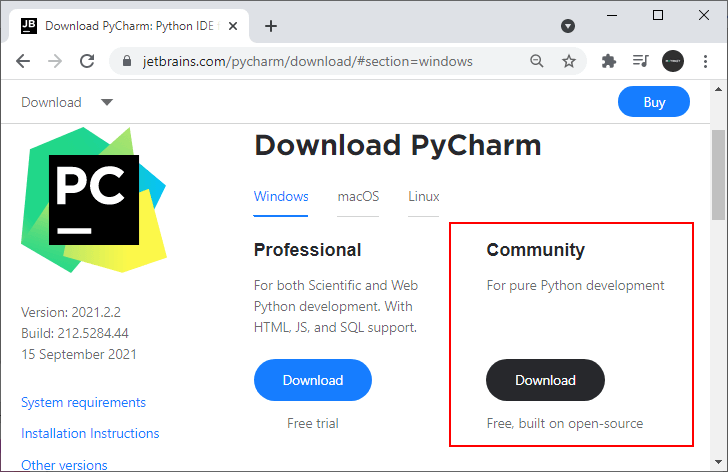
Правда, она имеет одно важное ограничение. А именно она доступна в двух основных вариантах: платный выпуск Professional и бесплатный Community. Многие базовые возможности доступны и в бесплатном выпуске Community. В то же время ряд возможностей, например, веб-разработка, доступны только в платном Professional.
В нашем случае воспользуемся бесплатным выпуском Community. Для этого перейдем на страницу загрузки и загрузим установочный файл PyCharm Community.
После загрузки выполним его установку.
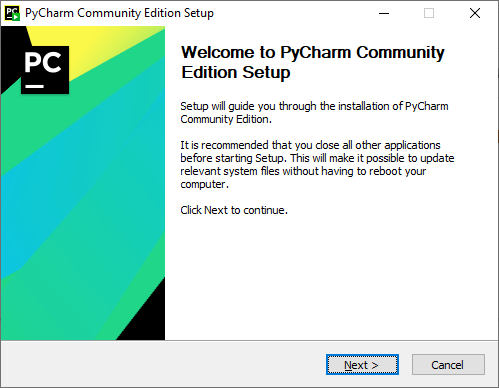
После завершения установки запустим программу. При первом запуске открывается начальное окно:

Создадим проект и для этого выберем пункт New Project .
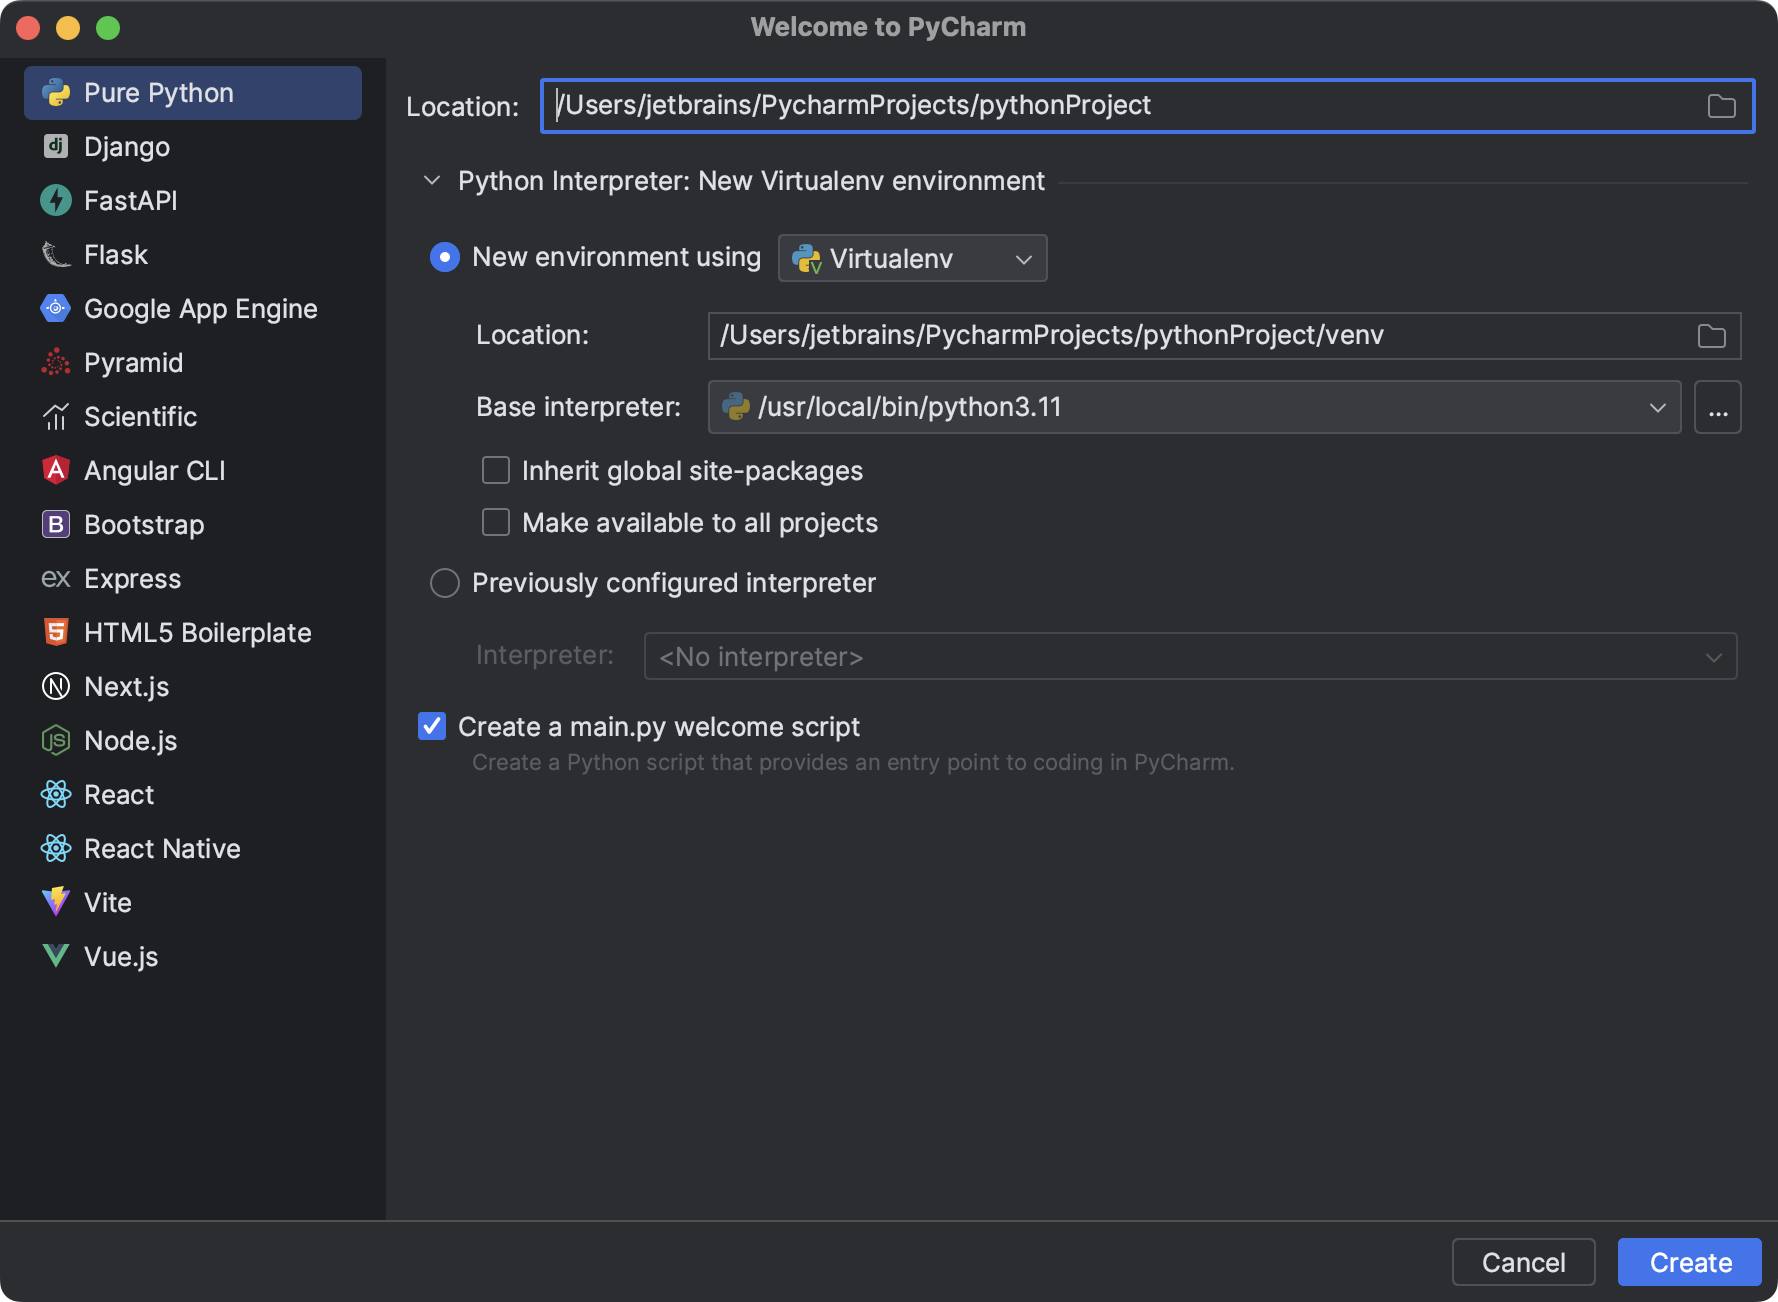
Далее нам откроется окно для настройки проекта. В поле Location необходимо указать путь к проекту. В моем случае проект будет помещаться в папку HelloApp. Собственно название папки и будет названием проекта.
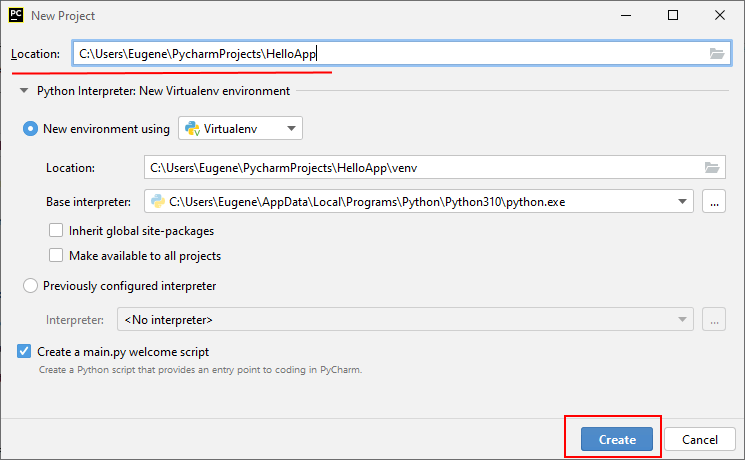
Кроме пути к проекту все остальные настройки оставим по умолчанию и нажмем на кнопку Create для создания проекта.
После этого будет создан пустой проект:
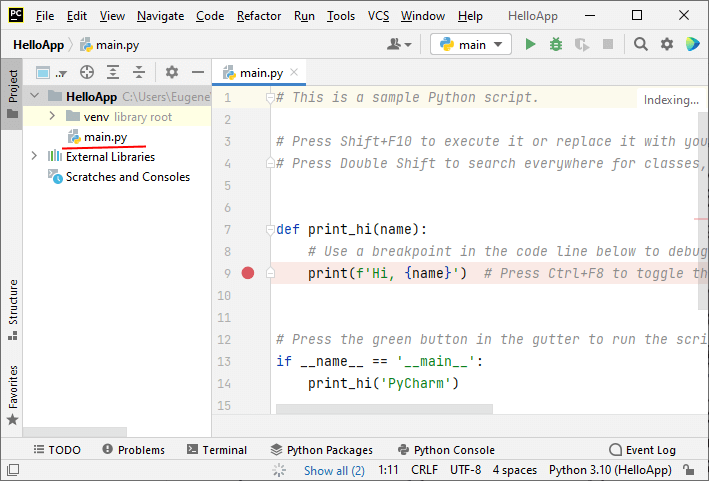
В центре среды будет открыт файл main.py с некоторым содержимым по умолчанию.
Теперь создадим простейшую программу. Для этого изменим код файла main.py следующим образом:
name = input("Введите ваше имя: ") print("Привет,", name) Для запуска скрипта нажмем на зеленую стрелку в панели инструментов программы:
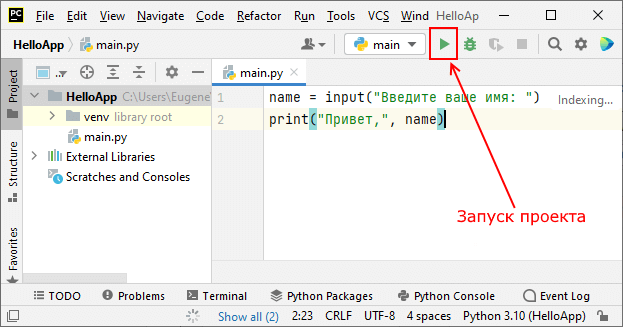
Также для запуска можно перейти в меню Run и там нажать на подпункт Run ‘main’ )
После этого внизу IDE отобразится окно вывода, где надо будет ввести имя и где после этого будет выведено приветствие:
Create and run your first project
To get started with PyCharm, let’s write a Python script.
Create a Python project
- If you’re on the Welcome screen, click New Project . If you’ve already got any project open, choose File | New Project from the main menu.
- Although you can create projects of various types in PyCharm, in this tutorial let’s create a simple Pure Python project. This template will create an empty project.
- Choose the project location. Click button next to the Location field and specify the directory for your project.
- Also, deselect the Create a main.py welcome script checkbox because you will create a new Python file for this tutorial.
- Python best practice is to create a virtualenv for each project. In most cases, PyCharm create a new virtual environment automatically and you don’t need to configure anything. Still, you can preview and modify the venv options. Expand the Python Interpreter: New Virtualenv Environment node and select a tool used to create a new virtual environment. Let’s choose Virtualenv tool, and specify the location of the environment and the base Python interpreter used for the new virtual environment. If PyCharm detects no Python on your machine, it provides the following options:
- Specify a path to the Python executable (in case of non-standard installation)
- Download and install the latest Python versions from python.org
- Install Python using the Command-Line Developer Tools (macOS only).
Now click the Create button at the bottom of the New Project dialog.
If you’ve already got a project open, after clicking Create PyCharm will ask you whether to open a new project in the current window or in a new one. Choose Open in current window — this will close the current project, but you’ll be able to reopen it later. See the page Open, reopen, and close projects for details.
Create a Python file
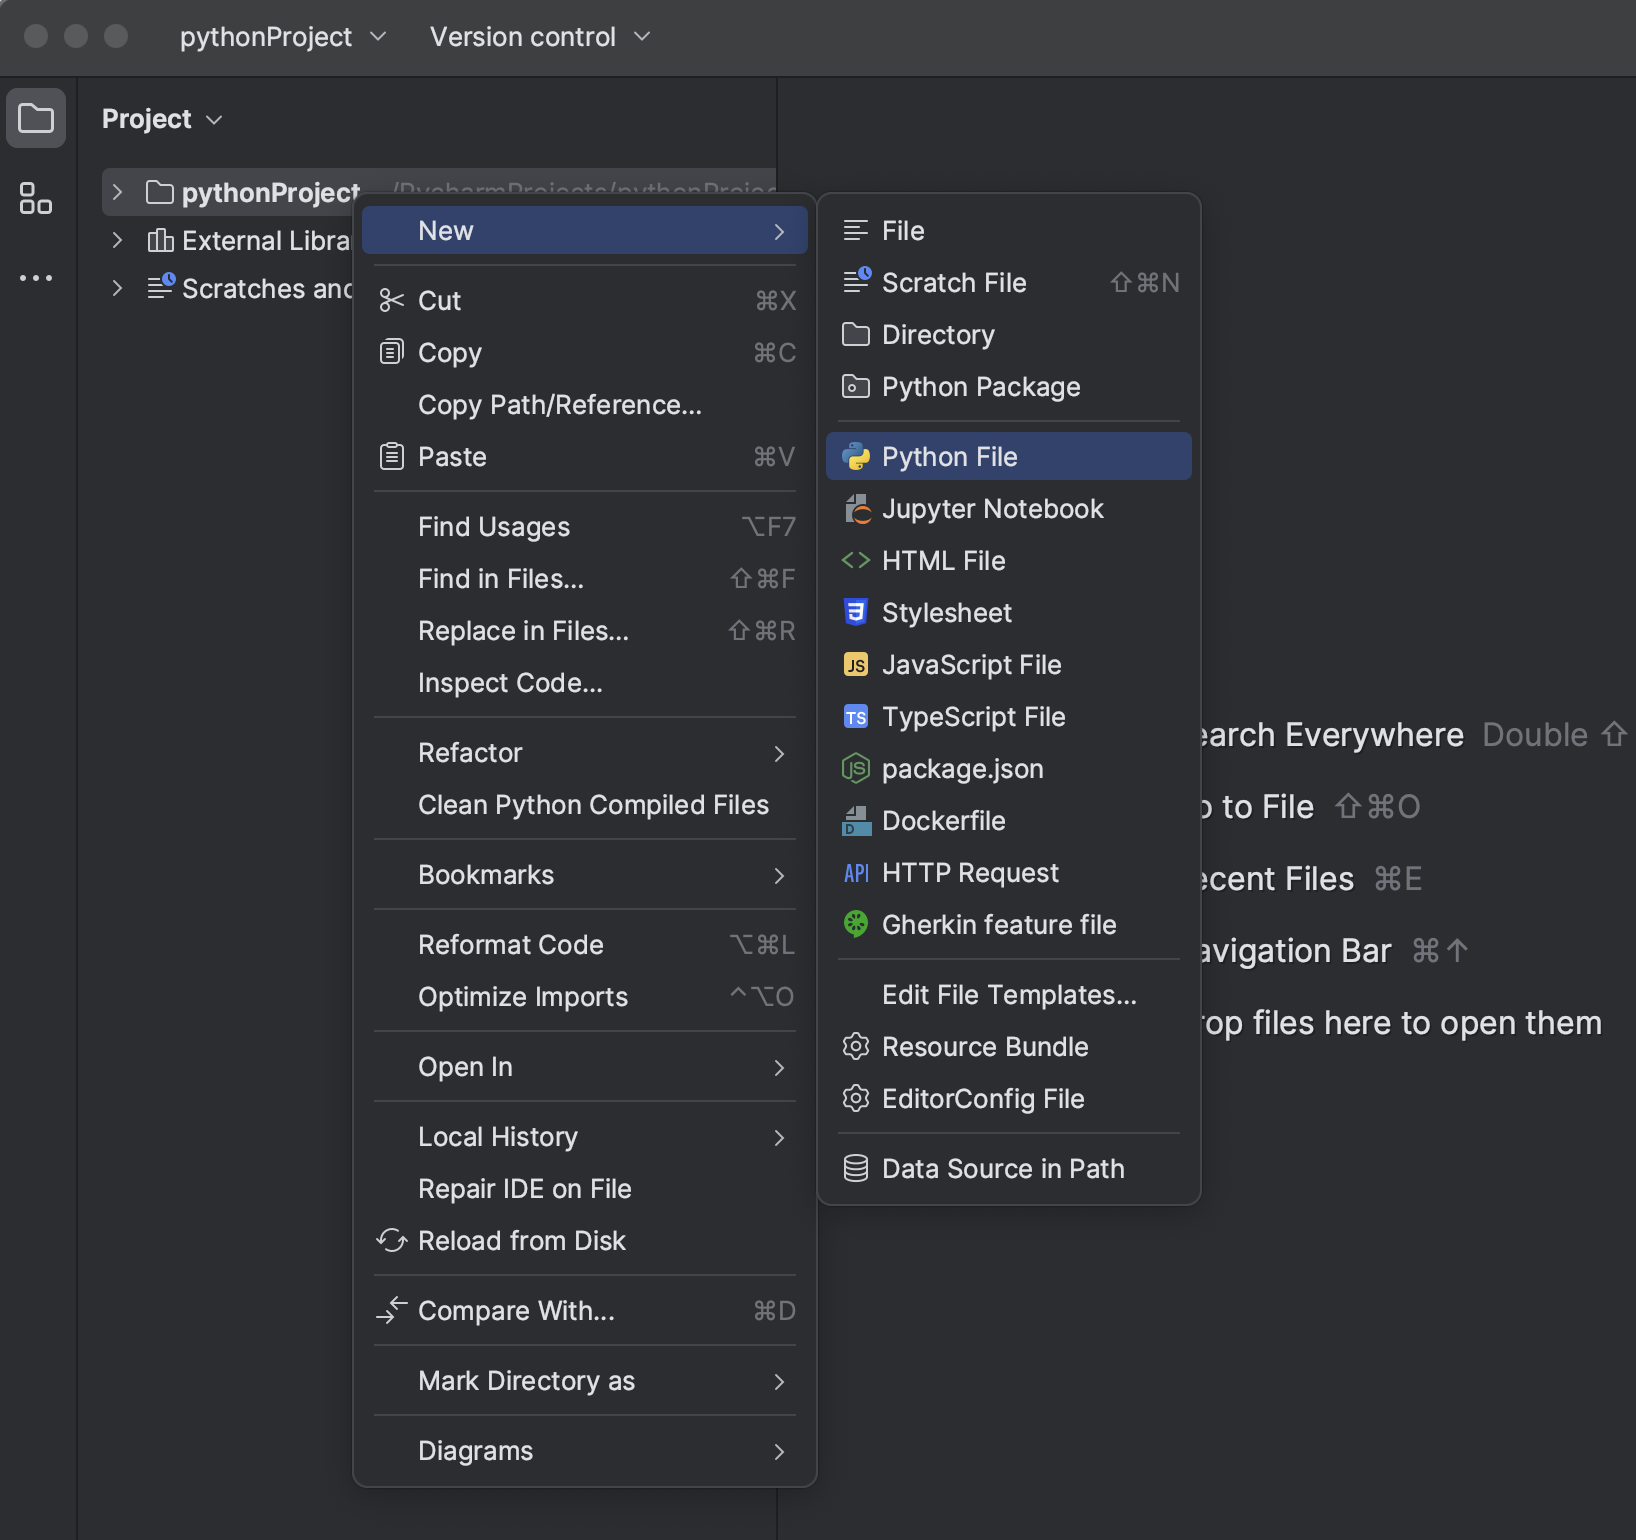
- In the Project tool window, select the project root (typically, it is the root node in the project tree), right-click it, and select File | New . .

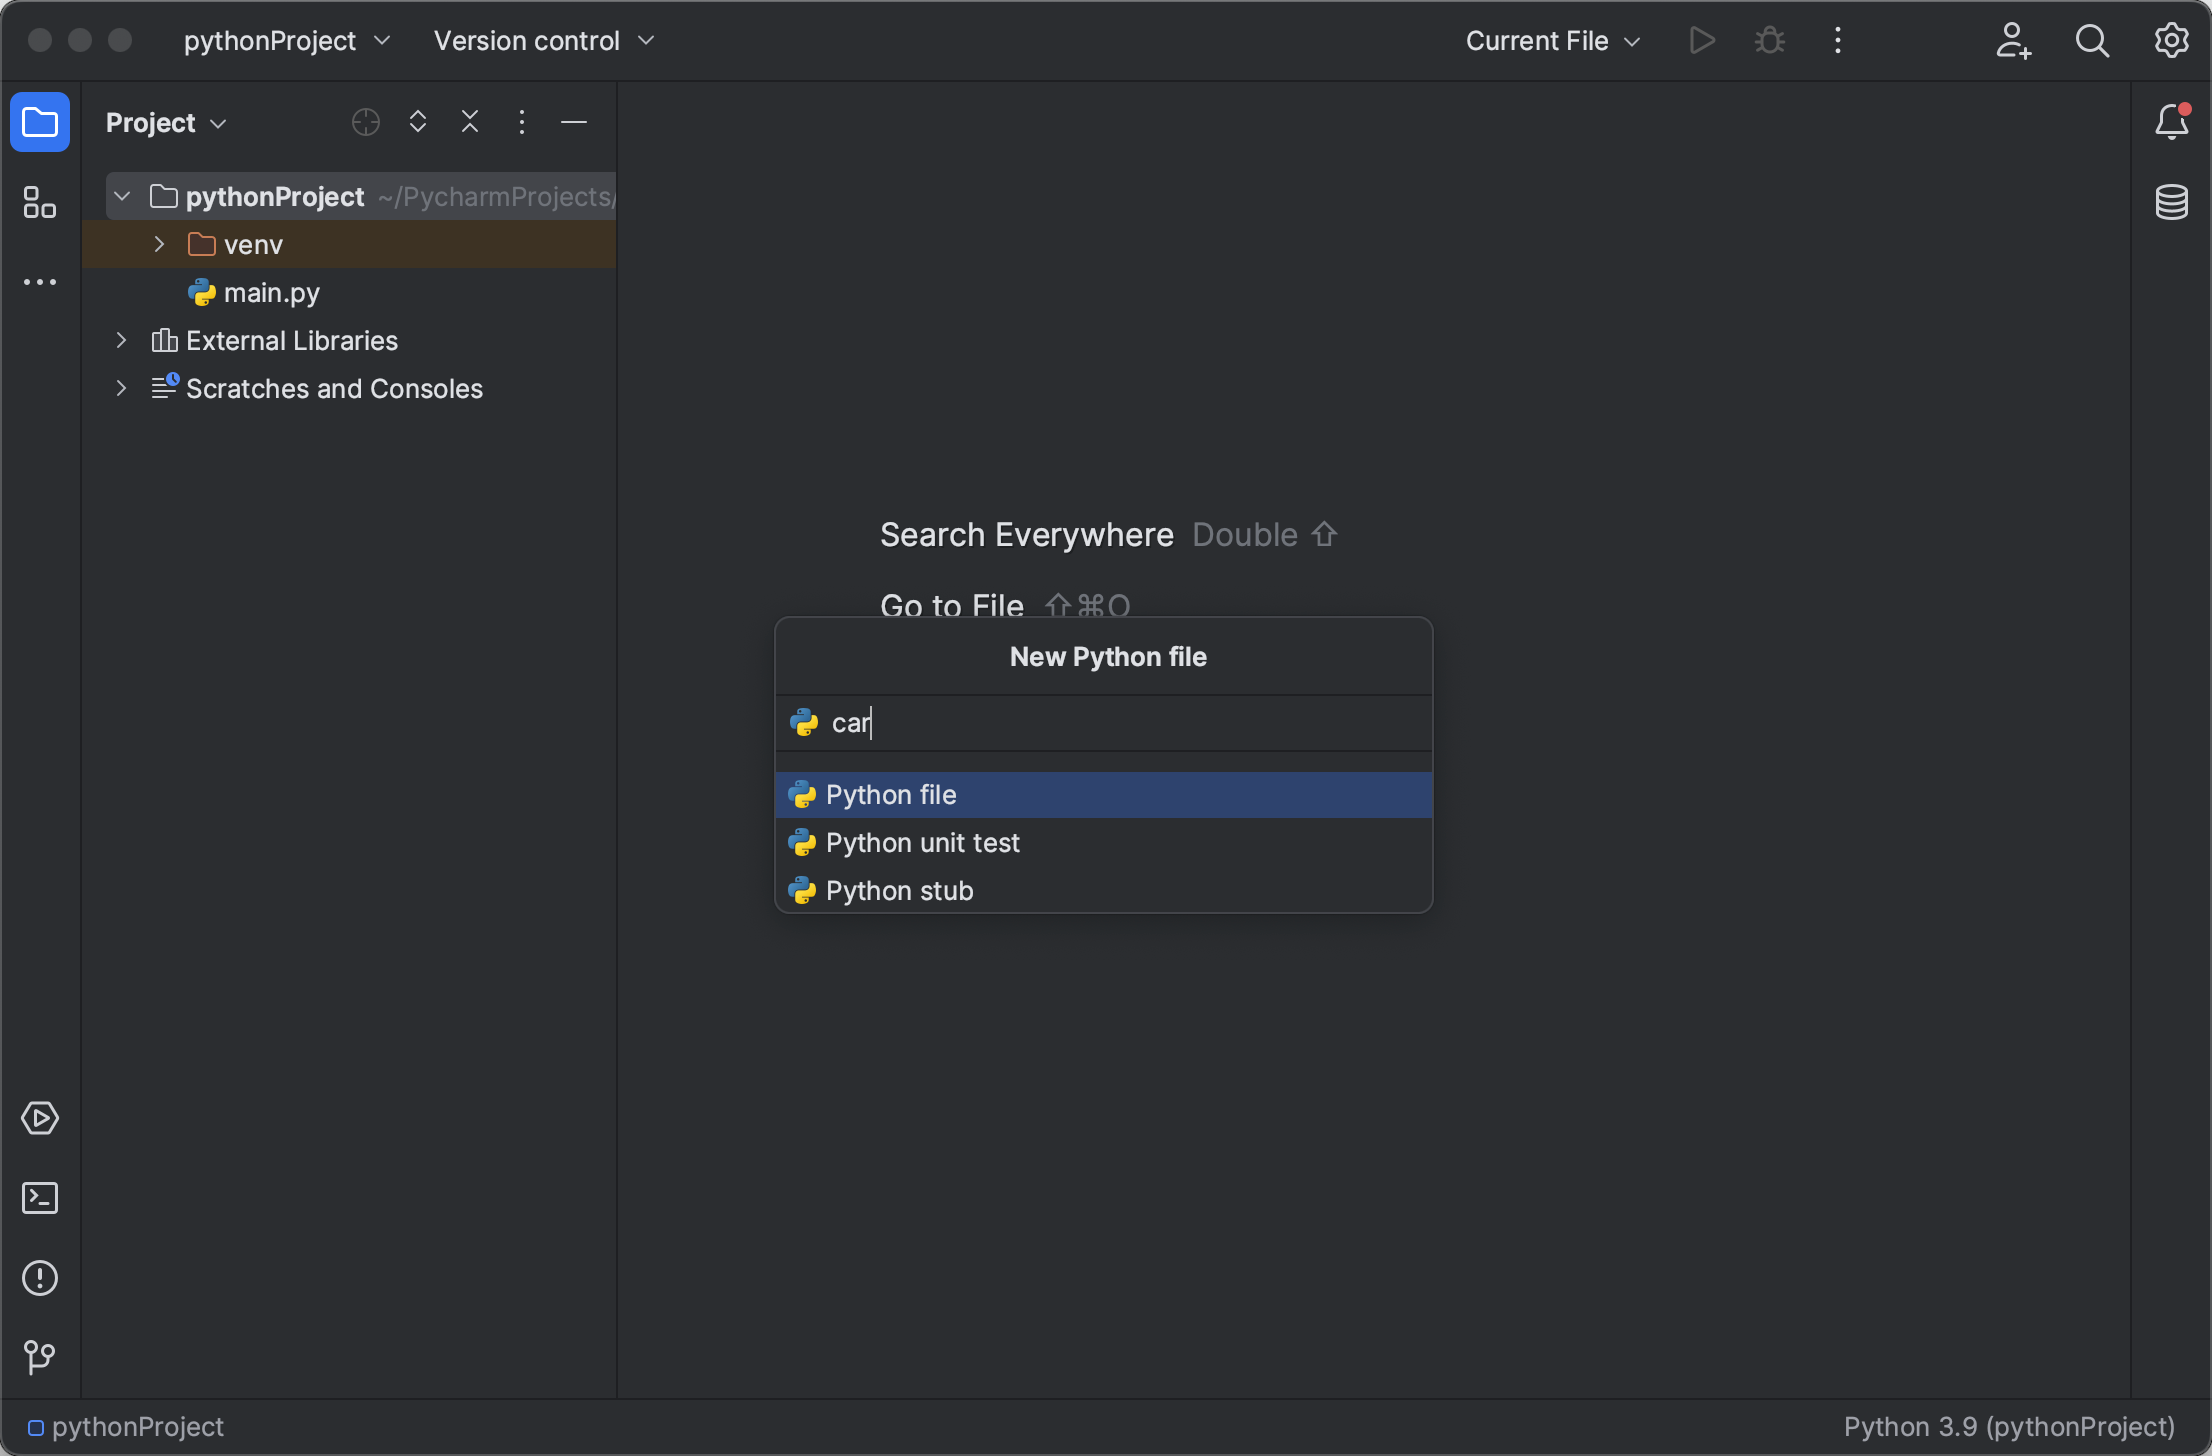
- Select the option Python File from the context menu, and then type the new filename.
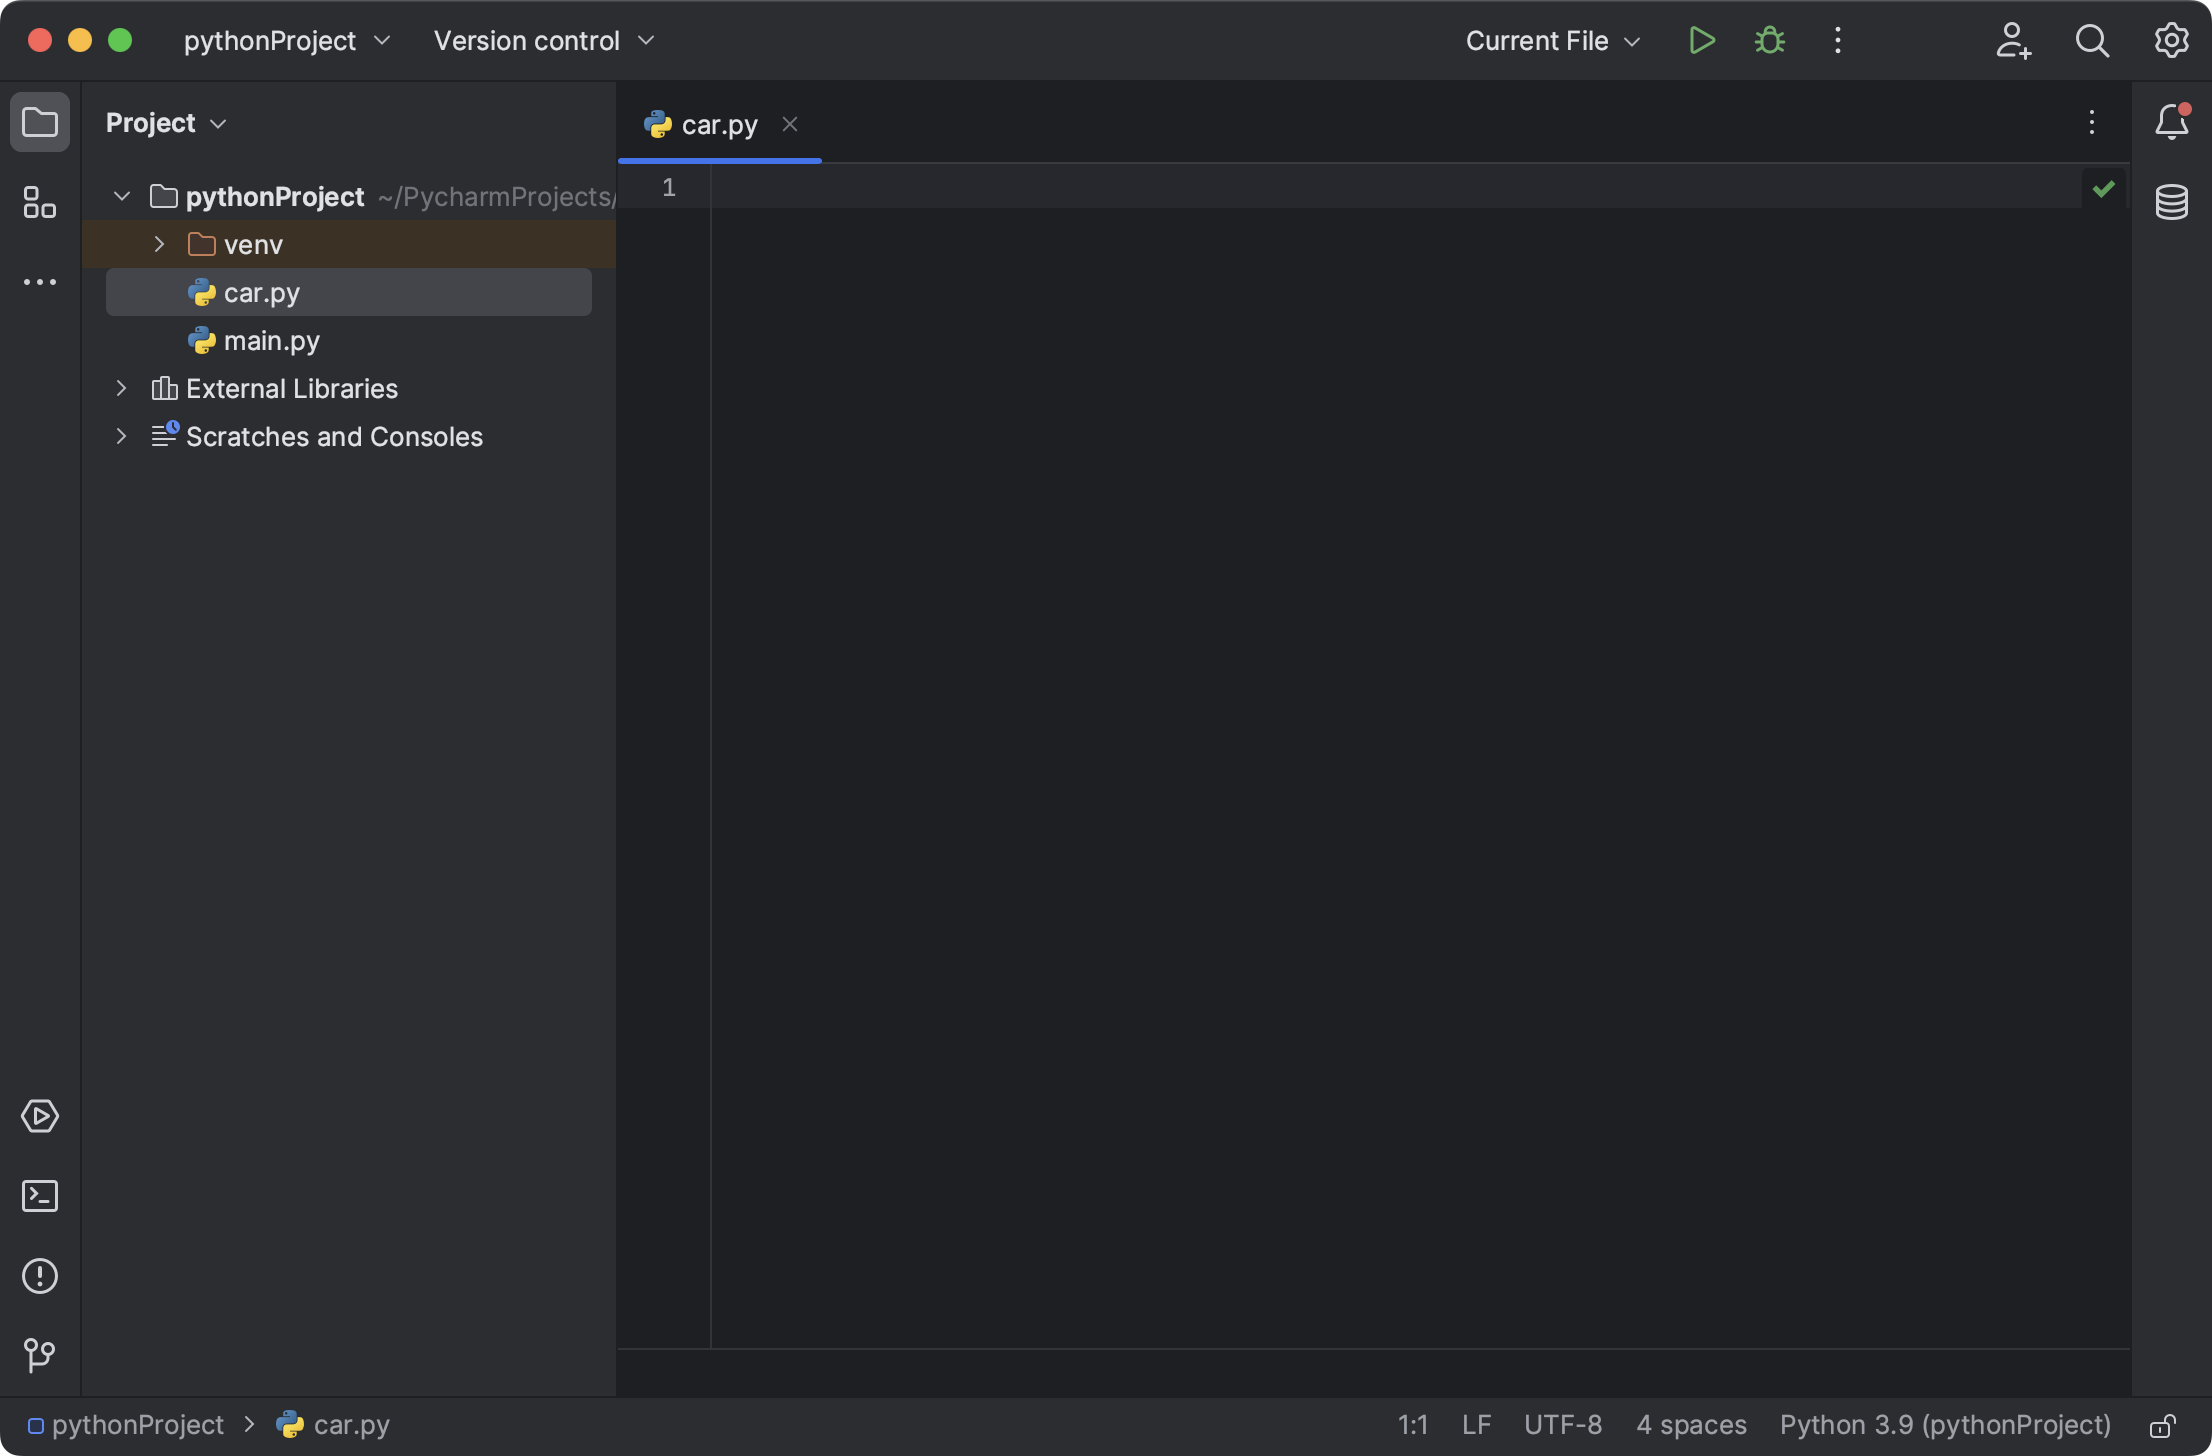
 PyCharm creates a new Python file and opens it for editing.
Edit Python code
Let’s start editing the Python file you’ve just created.
- Start with declaring a class. Immediately as you start typing, PyCharm suggests how to complete your line: Choose the keyword class and type the class name, Car .
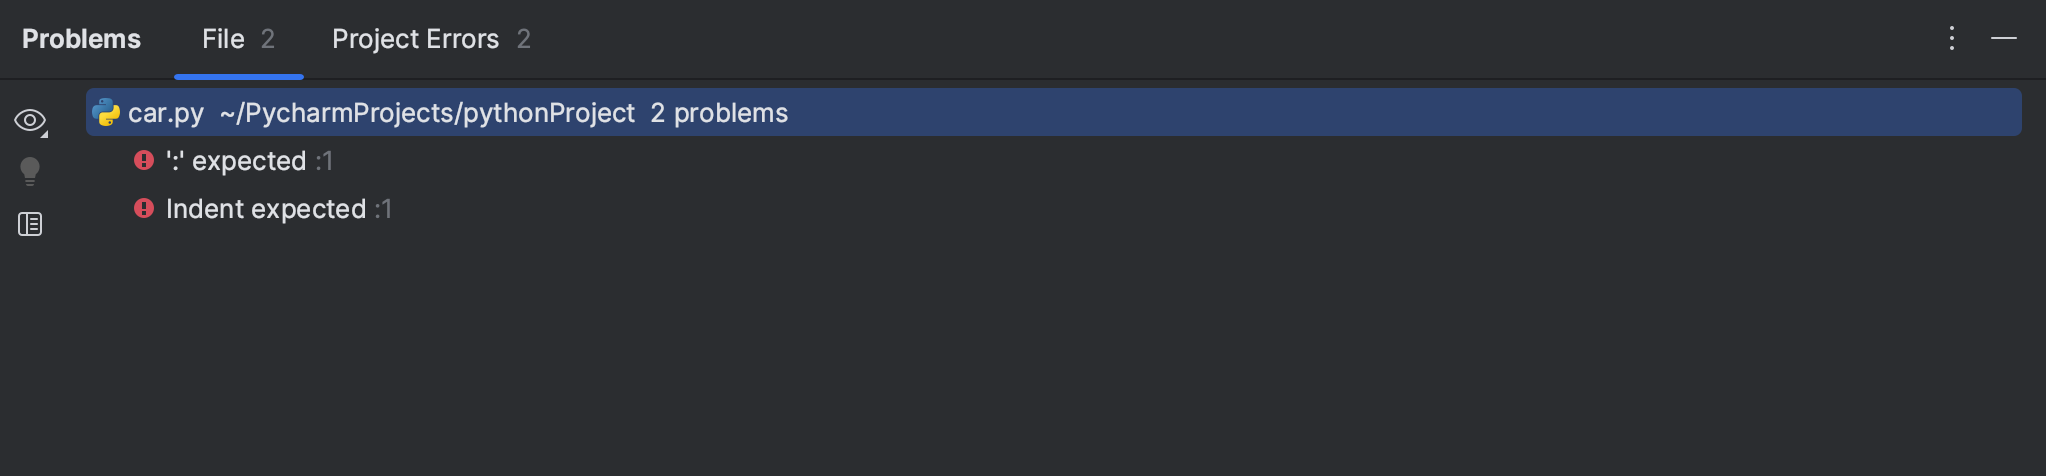
- PyCharm informs you that there are errors in your file:
 Note that PyCharm analyses your code on-the-fly, the results are immediately shown in the inspection indicator in the upper-right corner of the editor. This inspection indication works like a traffic light: when it is green, everything is OK, and you can go on with your code; a yellow light means some minor problems that however will not affect compilation; but when the light is red, it means that you have some serious errors. Click it to preview the details in the Problems tool window. There’s a missing colon, then an indentation is expected:
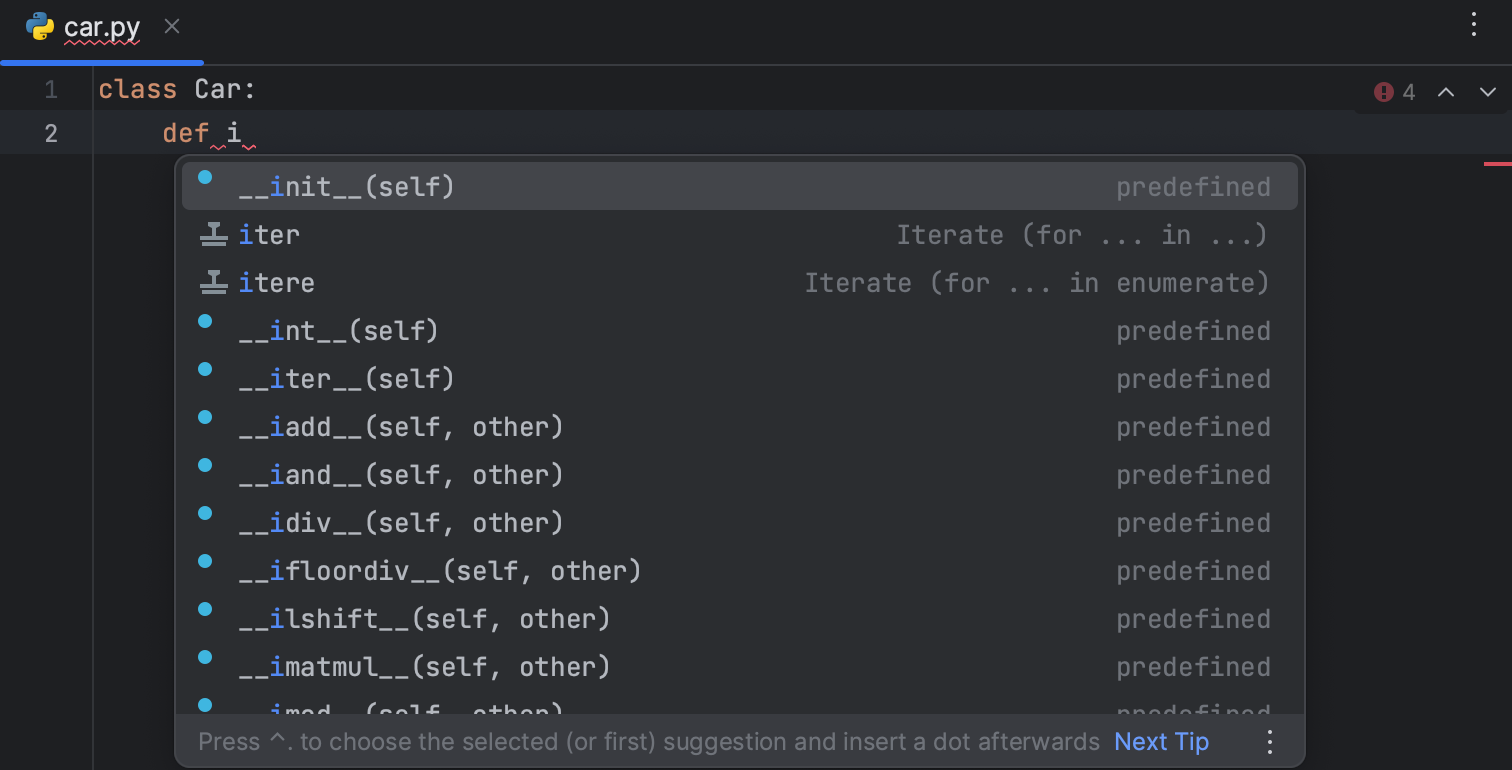
- Let’s continue by creating the __init__ function for the class: when you start typing the function’s name, PyCharm suggests pasting the entire code construct including the mandatory self parameter, the closing parenthesis, and the colon:

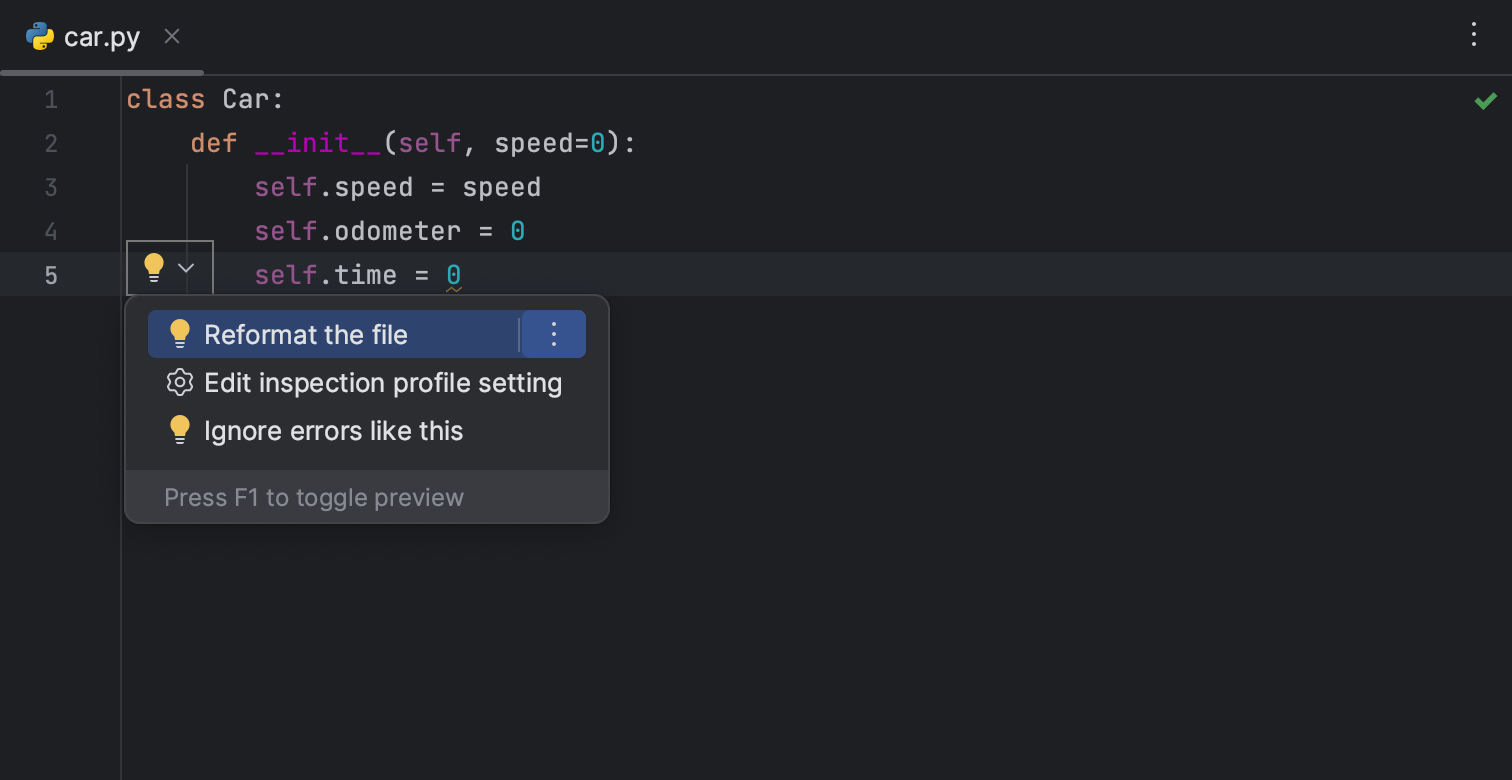
- If you notice any inspection warnings as you’re editing your code, click the bulb symbol to preview the list of possible fixes and recommended actions:

- Let’s copy and paste the entire code sample. Hover the mouse cursor over the upper-right corner of the code block below, click the copy icon, and then paste the code into the PyCharm editor replacing the content of the Car.py file: This application is intended for Python 3


class Car: def __init__(self, speed=0): self.speed = speed self.odometer = 0 self.time = 0 def accelerate(self): self.speed += 5 def brake(self): self.speed -= 5 def step(self): self.odometer += self.speed self.time += 1 def average_speed(self): return self.odometer / self.time if __name__ == ‘__main__’: my_car = Car() print(«I’m a car!») while True: action = input(«What should I do? [A]ccelerate, [B]rake, » «show [O]dometer, or show average [S]peed?»).upper() if action not in «ABOS» or len(action) != 1: print(«I don’t know how to do that») continue if action == ‘A’: my_car.accelerate() print(«Accelerating. «) elif action == ‘B’: my_car.brake() print(«Braking. «) elif action == ‘O’: print(«The car has driven <> kilometers».format(my_car.odometer)) elif action == ‘S’: print(«The car’s average speed was <> kph».format(my_car.average_speed())) my_car.step()
At this point, you’re ready to run your first Python application in PyCharm.
Run your application
Use either of the following ways to run your code:
- Right-click the editor and select Run ‘Car’ from the context menu .
- Press Control+Shift+F10 .
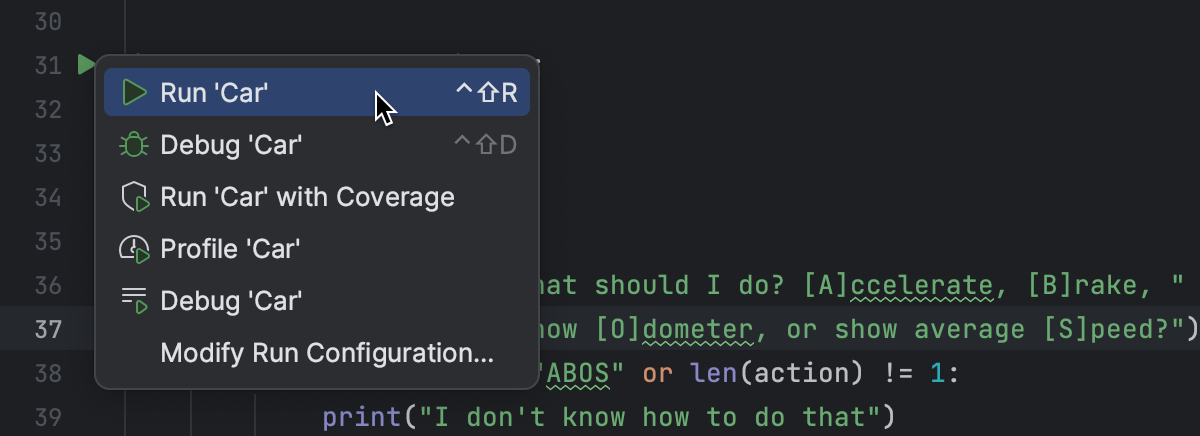
- Since this Python script contains a main function, you can click in the gutter. You’ll see the popup menu of the available commands. Choose Run ‘Car’ :
PyCharm executes your code in the Run tool window.
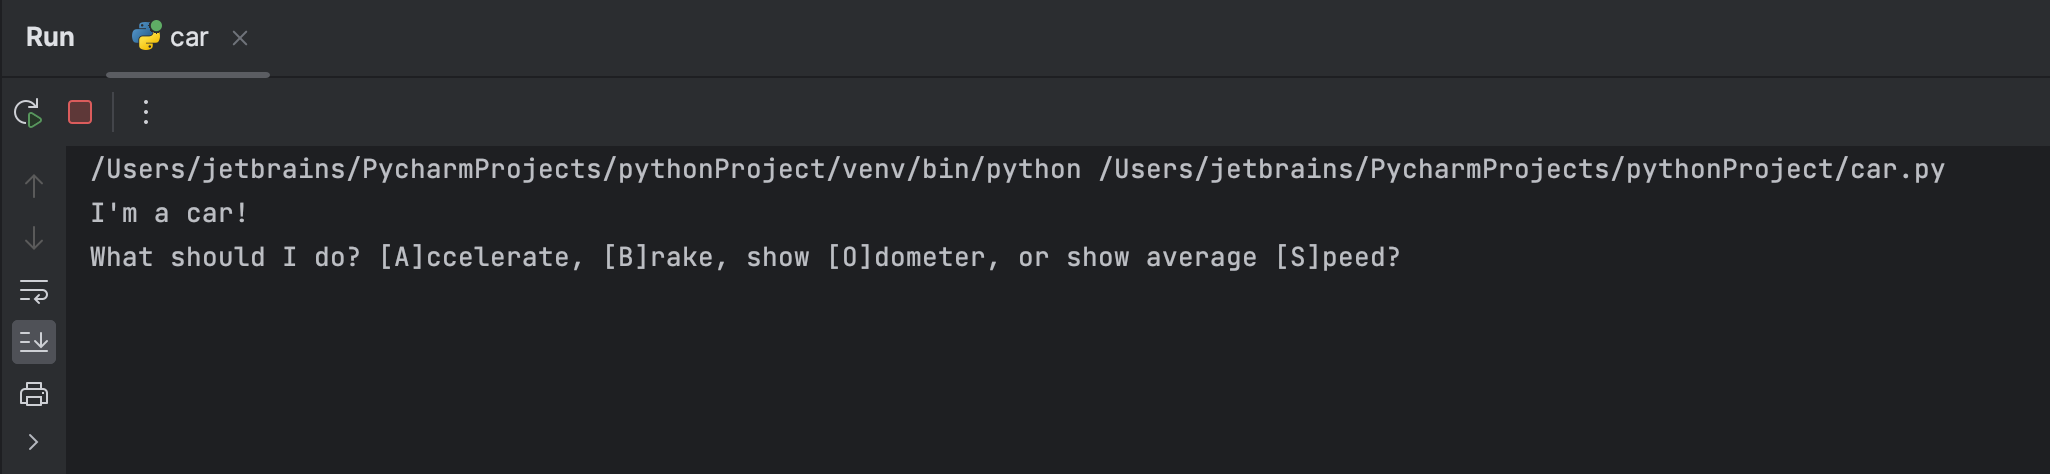
Here you can enter the expected values and preview the script output.
Note that PyCharm has created a temporary run/debug configuration for the Car file.

The run/debug configuration defines the way PyCharm executes your code. You can save it to make it a permanent configuration or modify its parameters. See Run/debug configurations for more details about running Python code.
Summary
Congratulations on completing your first script in PyCharm! Let’s repeat what you’ve done with the help of PyCharm:
- Created a project.
- Created a file in the project.
- Created the source code.
- Ran this source code.