- How to Replace a content with CSS
- Today We will learn How to Replace a content with CSS
- Text Replacement with Pseudo-elements & CSS Visibility
- Text Replacement with Pseudo-elements & CSS Display
- display: none; will not work without the extra markup
- Using Special Characters & Symbols in Replaced Text
- Как поменять блоки местами в CSS?
- Навигация по статье:
- Меняем блоки местами при помощи float
- Изменяем порядок отображения блоков
- Change Content in CSS
- Use the :after Pseudo-Element and the display Property to Replace Text in CSS
- Use the :before Pseudo-Element and the visibility Property to Replace Text in CSS
How to Replace a content with CSS
Today We will learn How to Replace a content with CSS
Replacing a content with CSS is not something I utilize frequently, but rather there are some particular situations where it proves to be useful. In the event that you can change message on the server-side, I generally suggest that first. CSS content substitution ought to be a final resort, as that is not what CSS is expected for.
In case you’re working inside the constraints of a CMS, or you don’t be able to change your markup, CSS content Replacing may be your exclusive choice.
There are a couple approaches to handle it. We should stroll through the alternatives, and clarify how they work, and why different strategies come up short.
N.B.: In the majority of the accompanying illustrations, you could utilize either pseudo-component, :before or :after
Text Replacement with Pseudo-elements & CSS Visibility
A decent contention can be made this is the best strategy. It requires the littlest measure of markup, and functions admirably for the individuals who have practically no power over their HTML markup. Here’s some HTML:
You want to replace “Original Text” with various content. Here’s how you can replace that text using only CSS.
.replaced-content < visibility: hidden; position: relative; >.replaced-content:after
Giving visibility a value of hidden hides a component, however leaves space where it would have been. As it were, it doesn’t change the design of the page. (This is different from display: none;, which we’ll cover below.) This is the reason we have to utilize positioning the pseudo-element.Without absolutely positioning the pseudo-element, the new content would show up after the spot where the first content should be. By using absolute positioning, we can place the new text in exactly the same spot as the original text was supposed to appear.
Text Replacement with Pseudo-elements & CSS Display
This method requires a little extra markup in your HTML, but uses less CSS. Like the example above, it also utilizes a CSS pseudo-element to insert content onto the page. The HTML (note the extra tag that was not in our example above):
With Pseudo-elements & CSS Display This technique requires somewhat additional markup in your HTML, however utilizes less CSS. Like the case above, it additionally uses a CSS pseudo-component to embed content onto the page. The HTML (take note of the additional tag that was not in our case above):
Utilizing the display property, you can hide the content inside the tag, and then attach a pseudo-element with your new content to the
tag. You do not need to use absolute positioning here because display: none; completely removes the element from the page, and it does affect the layout. It’s as if the text inside the element never existed.
Here’s the CSS:
.replaced span < display: none; >.replaced:after
display: none; will not work without the extra markup
If you didn’t have that extra element (in this case, the tag) inside of your
tag, you cannot use display: none;. Any time you have a parent element with display: none;, all of its child elements, as well as its pseudo-elements, will not be displayed. Even if you set the pseudo-element to display: block;
Then this CSS will not work:
Using Special Characters & Symbols in Replaced Text
You might want to replace text with special characters or symbols, like an ampersand, tilde, emdash or non-breaking space. To do so, you must using the proper character encoding for that symbol. You cannot just place the symbol inside your content: “”; declaration, nor can you use the HTML code (e.g. & & or — ).
This entity conversion chart will convert your special character, and give you the appropriate code to use with the CSS content property.
If you wanted to insert this: 29.9 = ~30
content: “29.9 \003D \0020 \007E 30”;
- \003D is the code for an equals sign (=)
- \0020 is the code for a non-breaking space ( )
- \007E is the code for a tilde (~)
Need to include spaces within each special character code, otherwise the codes run together & CSS doesn’t know where the beginning & end of each code is located.
Как поменять блоки местами в CSS?
В сегодняшней статье вы узнаете, как можно менять блоки на сайте местами, при этом не внося никаких правок в HTML или PHP код. Для реализации данной задачи мы будем использовать всего несколько CSS-свойств.
Навигация по статье:
Те приемы, которые я вам сегодня покажу, позволяют значительно упростить процесс адаптации вашего сайта под мобильные устройства. Так же эти приемы помогут вам в том случае если вы хотите переставить на вашем сайте какие-то блоки местами, но при этом у вас какая-то сложная тема, и вы понятия не имеете, в каких шаблонах находятся фрагменты кода, отвечающие за вывод того или иного блока.

Меняем блоки местами при помощи float
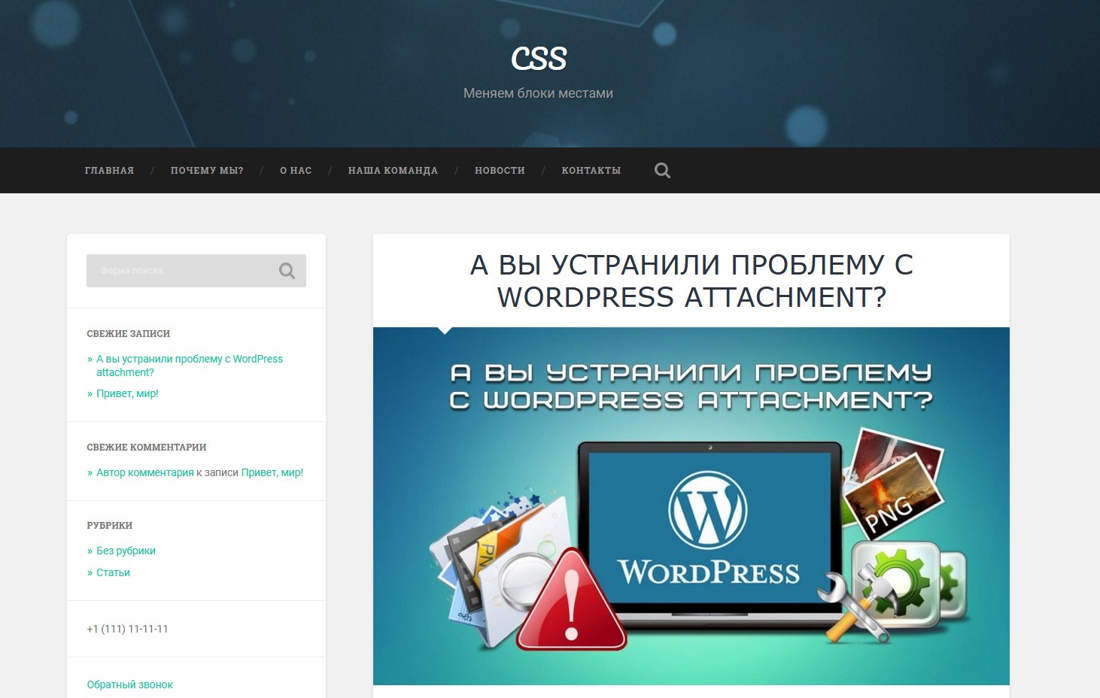
Итак, давайте рассмотрим конкретный пример. Предположим у нас есть вот такая страница сайта:
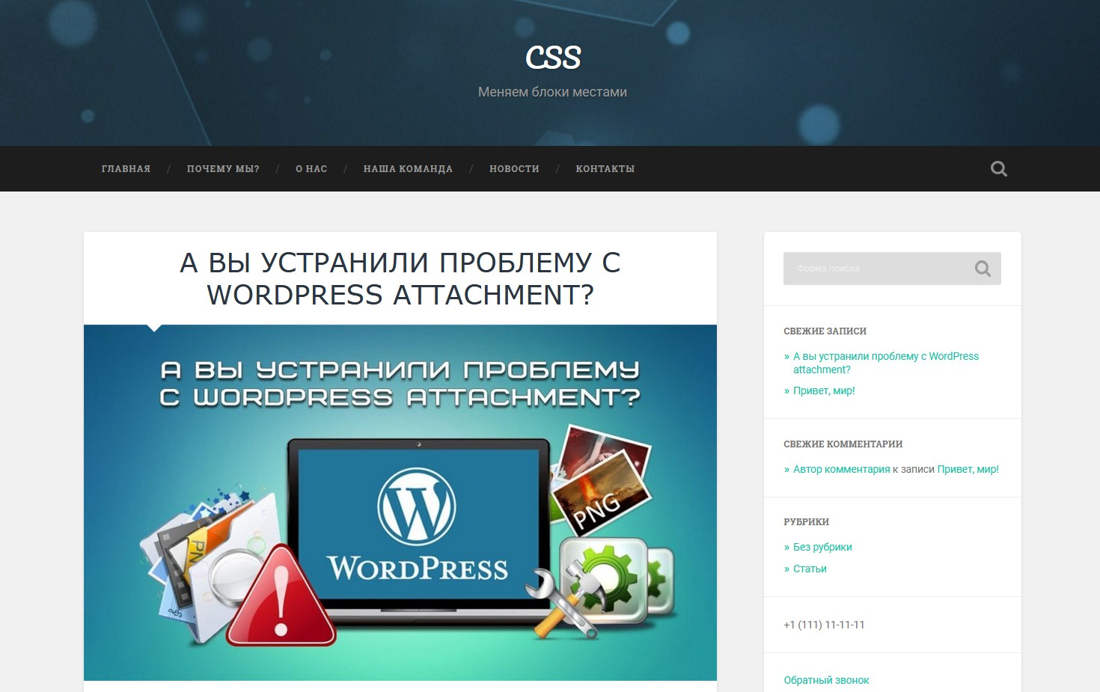
На которой блок с контентом выводится с левой стороны, а сайтбар выводится с правой стороны. Давайте поменяем местами бок сайтбара и блок контента. Сделаем, что бы они у нас располагались наоборот.
Прежде чем приписывать какие-либо CSS-свойства для блоков, нам нужно вычислить класс или идентификатор, который они имеют.
- 1. Кликаем правой кнопкой по элементу, выбираем «Исследовать элемент» и далее инспектируем его код, что бы видеть какой класс или идентификатор присваивается этому элементу.
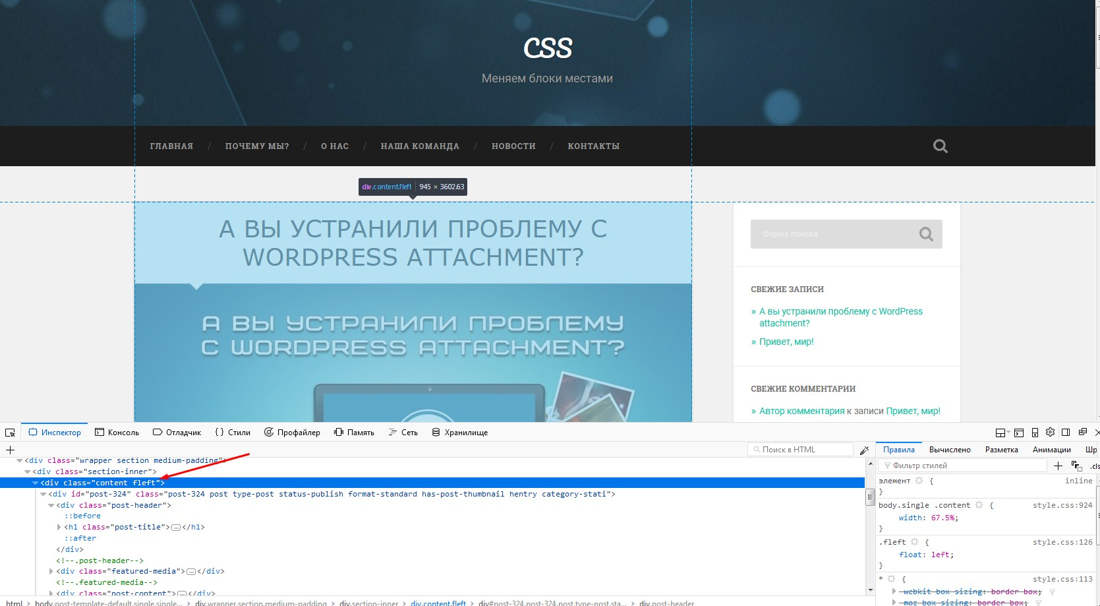
В данном случае наш элемент имеет два класса, класс content и класс fleft. Скорее всего, класс content имеет не только этот блок, но еще другие блоки на сайте. Поэтому я буду привязываться к классу fleft, потому, как он выглядит более уникалным.
По инспектированию кода и определению классов и идентификаторов элементов на сайте я делала отдельную статью, с которой вы можете ознакомиться по этой ссылке.
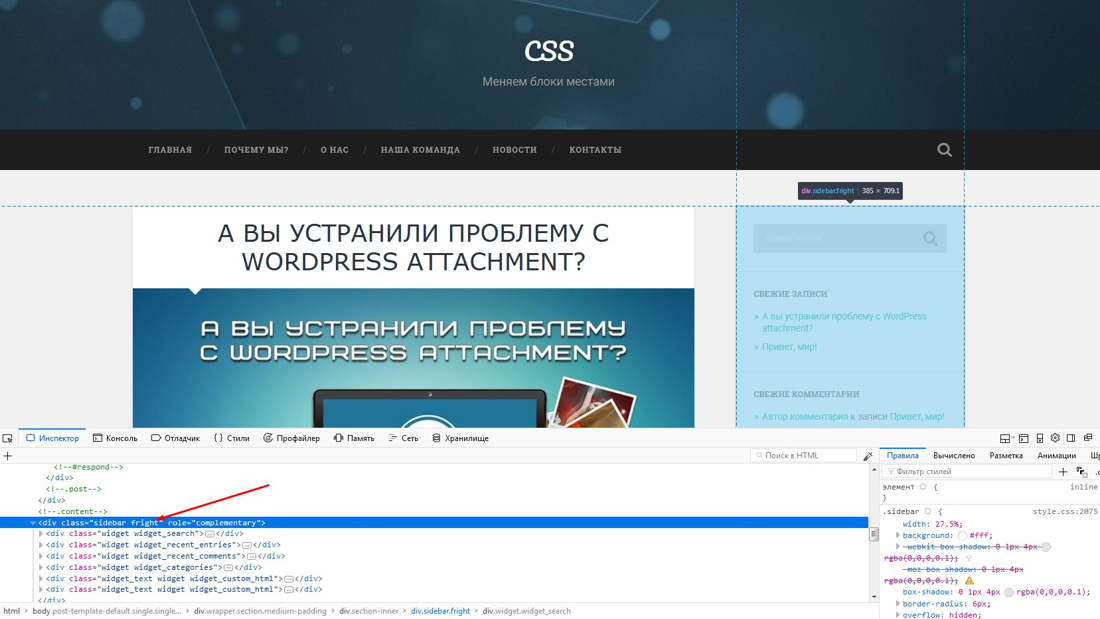
Мы видим код этого блока, и видим, что у него есть класс fright. Копируем его, и для него приписываем наоборот, обтекание по левому краю.
Вот так мы при помощи буквально нескольких строчек кода, очень быстро поменяли их местами.
Изменяем порядок отображения блоков
Теперь давайте рассмотрим еще один пример. Предположим у нас есть страница с вот такой структурой блоков:

Если мы захотим поменять местами блок с текстом и блок с изображением, нам достаточно будет использовать свойство float и задать ему значение left или right. Однако если мы будем адаптировать эту страницу под мобильные устройства, то увидим, что на маленьких экранах, после перестроения в одну колонку, у нас эти блоки выглядят не очень красиво.

У нас идет в первом блоке сначала изображение, а потом текст, во втором сначала текст, а потом изображение, в третьем опять наоборот. Было бы на много красивее и аккуратнее, если бы у нас и после перестроения все блоки выглядели одинаково.
Например, чтобы во всех блоках сначала была бы задана картинка, а затем текст.
При помощи CSS-свойства float мы уже ни как не можем повлиять здесь на порядок расположения элементов. Однако у нас есть еще одно CSS-свойство display:flex, которое поможет нам реализовать данную задачу.
CSS cвойство display:flex предназначено для гибкой компоновки дочерних элементов. Оно имеет много интересных возможностей, и очень активно используется в современной верстке. В ближайшее время я сделаю отдельную статью или видео, посвященное интересным возможностям и нюансам использования этого свойства.
Если в предыдущем примере мы задавали или изменяли CSS-свойство float конкретно для тех элементов, которые мы хотим поменять местами. То здесь нам нужно будет еще обращать внимание на родительские блоки этих элементов.
Предположим у нас есть блок, который имеет класс text-row, внутри этого блока находится еще два блока, это блок с изображением, и блок с текстом. Блок с изображением имеет класс image-block, а блок с текстом имеет класс description-block.
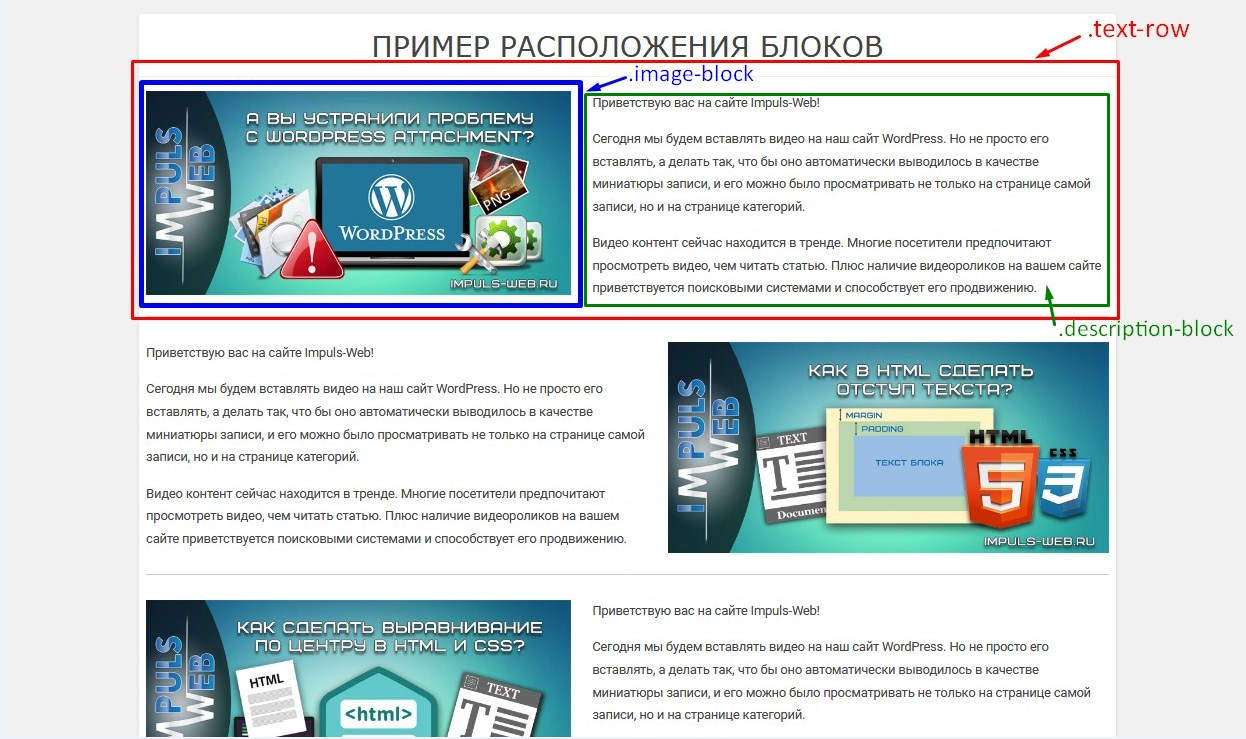
Наша задача задать для родительского блока тех элементов, которые мы хотим переставить местами, CSS-свойство display:flex и свойство flex-flow. В нашем случае это будет выглядеть вот таким образом:
Change Content in CSS

- Use the :after Pseudo-Element and the display Property to Replace Text in CSS
- Use the :before Pseudo-Element and the visibility Property to Replace Text in CSS
The tutorial will introduce a few ways to change or replace the content in CSS.
Use the :after Pseudo-Element and the display Property to Replace Text in CSS
We can use the pseudo-elements in CSS to change or replace the contents written in HTML. Then use the :after pseudo-element and the content property to achieve our goal.
Use the :after selector to append some content after the selected content. To add the content, we use the content property.
We can write the desired content as the value of the content property. To replace or change the content, we can hide the previously written content and use the content property, selecting the element with the :after selector.
This method sets the display property to none to hide the previous text.
For example, create a div with the class text . Inside the div , write a span tag and the original text inside the span .
In CSS, select the span and set its display property to none . Next, use the :after selector to select the text class.
Finally, write the content property and set its value to the changed text in the body.
When the code snippet in the example below is run, the changed text is shown. Here, the text the original text is removed from the document, and it acts like the element does not exist.
This is because the value of the content property will take its space. As a result, the new content will be shown.
div class="text"> span>the original textspan> div> .text span display: none; > .text:after content: 'the changed text'; > Use the :before Pseudo-Element and the visibility Property to Replace Text in CSS
We can change the content written in HTML using the :before pseudo-element in CSS. The :before pseudo-element works similarly to the :after pseudo-element, but the content is presented here.
Use it to write the content before the selected element. This method uses the content property as in the first method.
In addition, we can use the visibility property to hide the previous content and set it to hidden .
When set to hidden , the visibility property will make the content invisible, but the blank space will be shown in the document. But, using the :before selector will override the space with the new content.
For example, select the span element and set its visibility property to hidden in the example used in the first method.
But, remember to remove the previously applied styles. Next, select the text class with the :before selector and write the new content as in the example below.
Use display:none to hide the previous content. However, we cannot use visibility:hidden while using the :after selector as the hidden element’s space will be preserved.
div class="text"> span>beforespan> div> .text span visibility:hidden; > .text:before content: 'after'; >