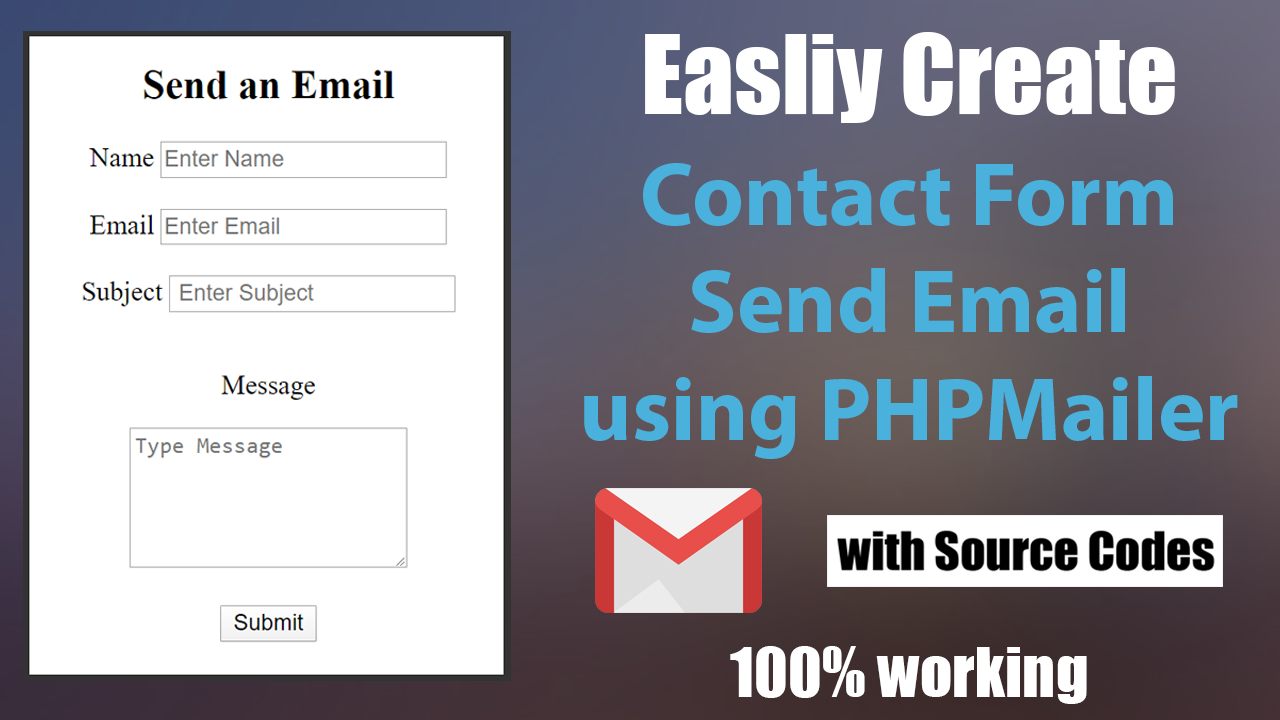
- Create a PHP Send Email Contact Form — using PHPMailer — Step by Step
- Отправка почты средствами PHP
- Smtp google
- Phpmailer
- How to Create PHP Contact form with MySql and Send Email?
- Create HTML Structure of Form
- Design the HTML Form
- Configure the MySQL Database
- Create the Contact Form PHP Script
- Create Send Mail PHP Script
- Conclusion
Create a PHP Send Email Contact Form — using PHPMailer — Step by Step
Hello everyone! In this video, you are going to learn step by step how to create a contact form to send an email to a specific email address using PHPMailer.
There is a web page on a website that allows users to make contact with the site owner called the contact page. The page has fields for filling in email, name, message and etc. On most websites, email and mail addresses are also included as more info. however, the contact form provides major space, convenient way for users to communicate with the site owner for this purposes.
Lets see how to do it according to this tutorial. First yo need to download the PHP mailer from github. Then extract that file and copy the file to the folder that you created in htdocs. Watch the video for more details. Then you have to do a important step In your gmail account (the gmail account that you are going to use to send emails) go to your account settings and in the security tab you can see «less secure app access «. In default it is turned off and you need to turn it on. It’s important. then start the apache server on your localhost. Then start to code. In the index.php file you need to create the contact form . The code the sendEmail.php file (follow the video). I think it is not hard to follow. Hope this video will be helpful to create a contact form to send emails using your gmail account.
All the source codes and source files and available to download from here. Use the download button or copy and paste the code from the text editors. My opinion is first try to do it by following the video line by line. It will help you t o understand all of it. After that, if your code is wrong or not working use the given source codes to compare with your code. It will help you to understand all of your mistakes.
Отправка почты средствами PHP

При работе моих скриптов происходят разные события о которых я бы хотел бы знать. Один из вариантов таких оповещений это отправка сообщения на электронную почту. В этой заметке я бы хотел бы рассказать как происходит средствами php отправка почты.
В моих скриптах средствами php отправка email происходит с помощью всем известного класса phpmailer и удалённого smtp сервера. Я использую smtp сервер google. Ну а теперь обо всём по порядку.
Smtp google
Ничего сложного в настройке и подключении smtp сервер google нет. Что бы получить к нему доступ достаточно создать ящик электронной почты в gmail. Логин и пароль доступа к ящику будет подходить и к серверу. Важно только знать основные google smtp настройки, которые мы будем использовать в phpmailer.
- адрес smtp сервера — smtp.gmail.com
- тип соединения — ssl
- порт сервера — 465
- логин — адрес ящика
- пароль — ваш пароль от ящика электронной почты
Phpmailer
Phpmailer это всем известный php класс для отправки email. Скачать его можно c github здесь . Обычно я скачиваю файлы class.phpmailer.php, class.pop3.php, class.smtp.php и складываю их в корень сайта. Теперь поговорим о подключении и настройке Phpmailer. Создадим в корне сайта файл index.php, в нём мы создадим подключение и настройки.
//подключаем phpmailer require_once('class.phpmailer.php'); //получаем экземпляр $mail = new PHPMailer(); //задаём как работать с SMTP сервером $mail->IsSMTP(); //адрес smtp сервера $mail->Host = "smtp.gmail.com"; //сообщения дебагера, 0-не показываем $mail->SMTPDebug = 0; //если сервер требует авторизации $mail->SMTPAuth = true; //тип шифрования $mail->SMTPSecure = "ssl"; //порт сервера $mail->Port = 465; //приоритет почты, 3 - нормально $mail->Priority = 3; //кодировка $mail->CharSet = 'UTF-8'; $mail->Encoding = '8bit'; //тема письма $mail->Subject = "Тест php mailer"; $mail->ContentType = "text/html; charset=utf-8\r\n"; //адрес почтового ящика gmail $mail->Username = "ваш_почтовый_ящик"; //ваш пароль от ящика $mail->Password = *************; $mail->isHTML(true); //текст письма $mail->Body = "привет от Phpmailer"; $mail->WordWrap = 50; //адрес, на котоый нужно отправить письмо $mail->AddAddress("адрес_получателя"); if(!$mail->send()) < echo 'ошибка'; exit; >echo 'сообщение отправлено'; Из листинга я думаю всё понятно. Если правильно прописать все настройки и запустить файл index.php, то мы отправим на указанный email сообщение «привет от Phpmailer». В принципе мне данного функционала хватает, для того что бы силами php отправить email , так что дальше копаться в классе не стал. Вот наверное и всё, по традиции написал небольшой пример, и разобрал его.
В примере имеем файл index.php. В нём есть поле с указанием email, куда надо отправить письмо и поле с текстом письма. Через ajax проискодит отправка данных из полей в файл send.php. В send.php подключается phpmailer и происходит средствами php отправка email. Так же к index.php подключается файл myjs.js. В нём происходит проверка правильности заполнения полей формы, а так же отправка данных ajax в send.php и получение ответа об отправке письма или ошибке. Пример я писал используя bootstrap для вёрстки. Классы бутстрап я убрал из листинга что бы было меньше кода. И так основной кусок index.php.
Будем считать что myjs.js подключён к index.php. Листинг myjs.js
$(document).ready(function()< //обработка клика по кнопке отправить $('.submit').click(function()< //стираем старый алерт $('.emailalert').html(' '); //получаем значение поля ввода var em=$("#email").val(); //alert(em); //шаблон регулярного выражения //для проверки правильности ввода email var emRegExp=/^\w+@[a-zA-Z_]+?\.[a-zA-Z]$/; //проверка через ф-ю .test() //соотнош рег выражения и данных в форме if(!emRegExp.test(em))< var eReg='Неправильный email адрес'; $('.emailalert').html(eReg); > //если поле пустое if(em=='')< var e='заполните поле с адресом электронной почты'; //выводим предупреждение $('.emailalert').html(e); > //стираем старый алерт $('.bodyalert').html(' '); var bd=$("#body").val(); //если поле пустое if(bd=='')< var b='Заполните поле с текстом письма'; //выводим предупреждение $('.bodyalert').html(b); > //если все поля заполнены правильно //отсылаем данные ajax в send.php if(emRegExp.test(em)&&!em==''&&!bd=='')< $.ajax(< //как будем передавать данные type: "POST", //куда передаём url: "send.php", //какие данные передаём data: , //событие перед отправкой ajax beforeSend: function()< //стираем старый вывод $('#result').html(' '); //выводим гифку $(".load").show(); >, //событие после получения ответа, //получаем массив в data success: function(data) < //скрываем гифку $(".load").hide(); $('#result').html(data); //выводим модальное окно //эта ф-я из бутстрап $('#myModal').modal(); >>); > >) >)//подключаем phpmailer require_once('class.phpmailer.php'); /*ф-я фильтрации*/ function myclear($dt) < $dt=stripslashes($dt); $dt=strip_tags($dt); $dt=trim($dt); return $dt; >if($_SERVER['HTTP_X_REQUESTED_WITH'] == 'XMLHttpRequest') < $email = myclear($_POST['email']);//фильтруем $body = myclear($_POST['body']); $mail = new PHPMailer(); $mail->IsSMTP(); $mail->Host = "smtp.gmail.com"; $mail->SMTPDebug = 0; $mail->SMTPAuth = true; $mail->SMTPSecure = "ssl"; $mail->Port = 465; $mail->Priority = 3; $mail->CharSet = 'UTF-8'; $mail->Encoding = '8bit'; $mail->Subject = "Тест php mailer"; $mail->ContentType = "text/html; charset=utf-8\r\n"; $mail->Username = "мой почтовый ящик"; $mail->Password = "мой пароль"; $mail->isHTML(true); $mail->Body = $body; $mail->WordWrap = 50; $mail->AddAddress($email); if(!$mail->send()) < echo 'Ваше сообщение не отправлено'; exit; >echo 'Ваше сообщение отправлено'; >Вот такой вот не хитрый пример как делается отправка сообщения на почту php.
How to Create PHP Contact form with MySql and Send Email?
In this tutorial, we will learn about how to create a contact form in PHP and send an email notification. We will also cover how we can save data in the MySQL database as well.
A contact form is like a communicator between two persons. It will transform the query from one to another. So almost every website has a contact us form to communicate with the website’s owner. It doesn’t matter what type of your website, it could be a blog, news, social platform, forum, store, or any other.
The contact form helps your visitor to communicate with the website administrator to ask for any information, suggestion, queries, or if they are facing any issue on your website. With the help of a contact form, visitors tell you the exact problem they had.
Even sending the email, you can also connect your contact form with the database and save all the requested using PHP. And can access them from the database using the PHP code.
So let’s start to create a simple ‘contact us‘ form with PHP and save the data in the database and send an email notification to the site’s owner.
Create HTML Structure of Form
First of all, we need to create an HTML form. So create a file ‘index.php’ and add the basic structure of HTML doctype then add the below form code inside the file. We created a .php extension file because later we will also insert the PHP code in this file.
The form has a basic structure of HTML tags and form control attributes. And also has input fields for Name, Email, Subject, and Message and one submit button to send the email and save the data into the database.
You can also have an image field to send screenshots to the site owner. For this, you have to add image upload functionality in PHP code.
index.php
As you can see the above HTML form has all the required fields that are we need to create a simple contact form with PHP and MySql.
Important Notes:
1) Make sure the form tag has the method attribute and action attribute. These attributes are required to submit the form and save the data. The method attribute is used to pass the data while submitting the form, it can be GET or POST.
2) Please double-check with your input fields have a name attribute. Because it is required to get the value of a specific input field in PHP code.Design the HTML Form
Now let’s add the style to our HTML form. We already have assigned the ID or Class to all fields but you can change it as per field convention.
Create a new file called ‘style.css’ and add the following CSS code in this file. After saving this file, link style.css file in index.php file using the tag.
style.css
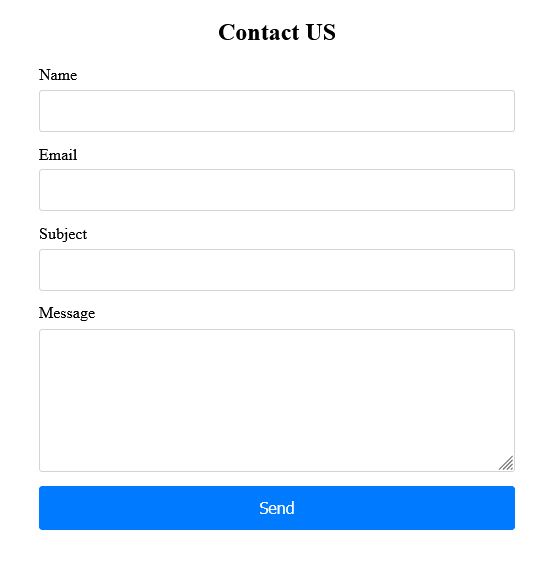
After designing adding the above CSS style, your form will look like the below image. It is just for demo purposes but you can design it as per your requirement.
Configure the MySQL Database
In this step, we will configure the MySQL database and make a connection between our PHP app and the database. Then after a successful connection, we can store the requested queries into the database table.
Create a ‘db_connection.php‘ file that we will add database detail in this detail and make a connection between PHP and MySQL.
db_connection.php
Create the Contact Form PHP Script
Now, we will create new .php file called ‘form-submit.php‘, you can give any name to it.
In this file, we will grab all the input fields value and then validate them. We have added the server-side validation code the validate the fields but you can also add the client-side validation using the ‘required’ attribute in the input field like the following example code.
The above line of example will don’t allow to submit the form without filling the fields value, because it will check on the client-side.
OK after validation, we will make functionality to store the data into the MySQL database table and then send an email to the site’s administrator.
form-submit.php
The above code will save your requested data into the MySQL database to keep the queries on track. You can also add more columns to your table based on the responses.
As I said above it will check server-side validation, if everything is correct then it will proceed to store the data queries into your database table.
Did you notice that we have added the ‘send_mail.php’ file but we haven’t created it yet? So let’s create it to work all code smooth and clean.
Create Send Mail PHP Script
In this step, we will create a PHP mail script to send an email. We will use it with our code, so visitors can communicate with the site’s administrator.
By using the PHP mail function, it will send the user’s queries directly to the site admin through email. The site admin will receive all the details about queries in his own email.
So let’s create a ‘send_mail.php‘ file and add the following PHP script and then save it. Make sure the filename is correct as you will add it into the above code.
send_mail.php
OK, after adding the all above code, now you have to add a couple of code lines in your main file (index.php). These lines will return the errors or response messages. If there was an error then it will list all the errors and if everything was good then it will return the success message.
So add the following lines of code just before the tag in the ‘index.php’ file.
So add all the code together and you can modify it as per your requirements and then run the PHP code. I hope it will help you with some ideas and you can also extend the code functionality inside it.
Conclusion
So in this tutorial, you learned about how to create a simple HTML form and design it using the CSS style and then made a PHP script to validate the input fields and store them into a database. And we also covered how to send an email to the site’s owner using the PHP contact form.
If you still have any questions, or topics that should cover in this tutorial, please let me know in the comment section below. I would like to hear suggestions from you.