- Building Website Headers with CSS Flexbox
- Introduction
- Flexbox in Action
- The Header Wrapper
- Using flex-wrap
- Exploring some header variations
- Header Variation 1
- Header Variation 2
- Header Variation 3
- Useful tips for building a header with Flexbox
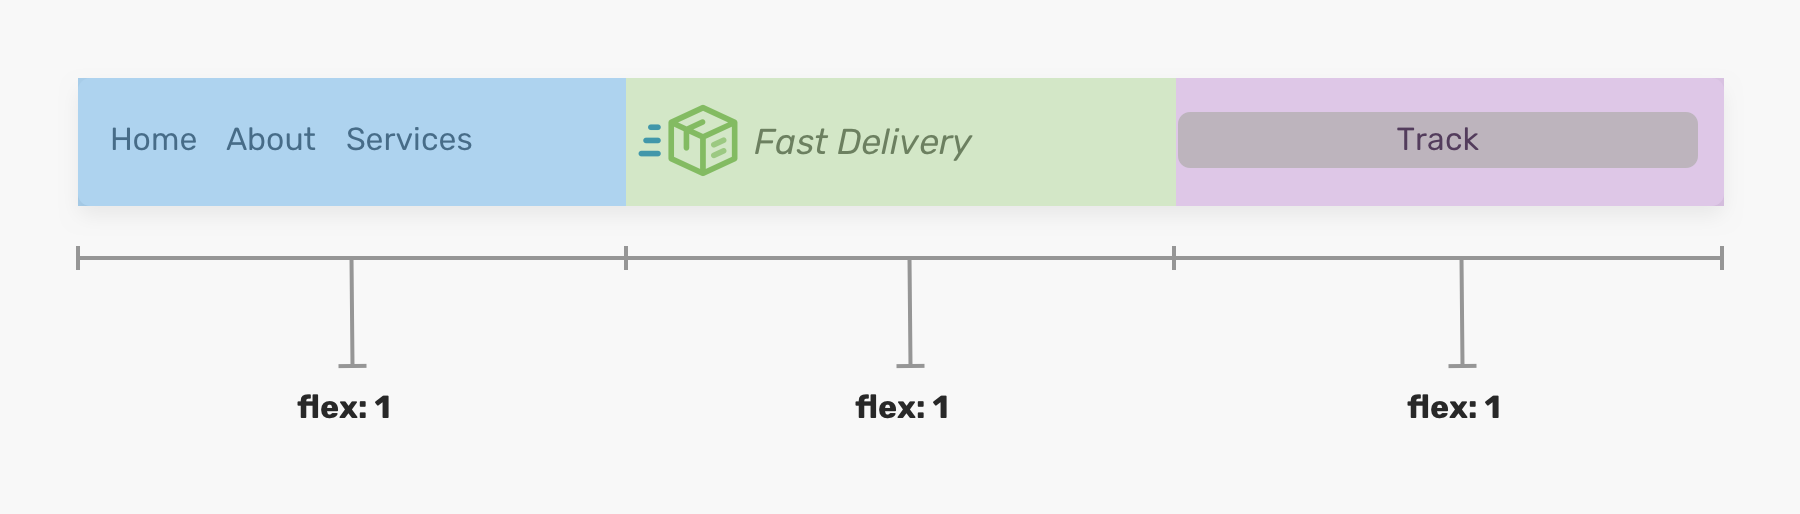
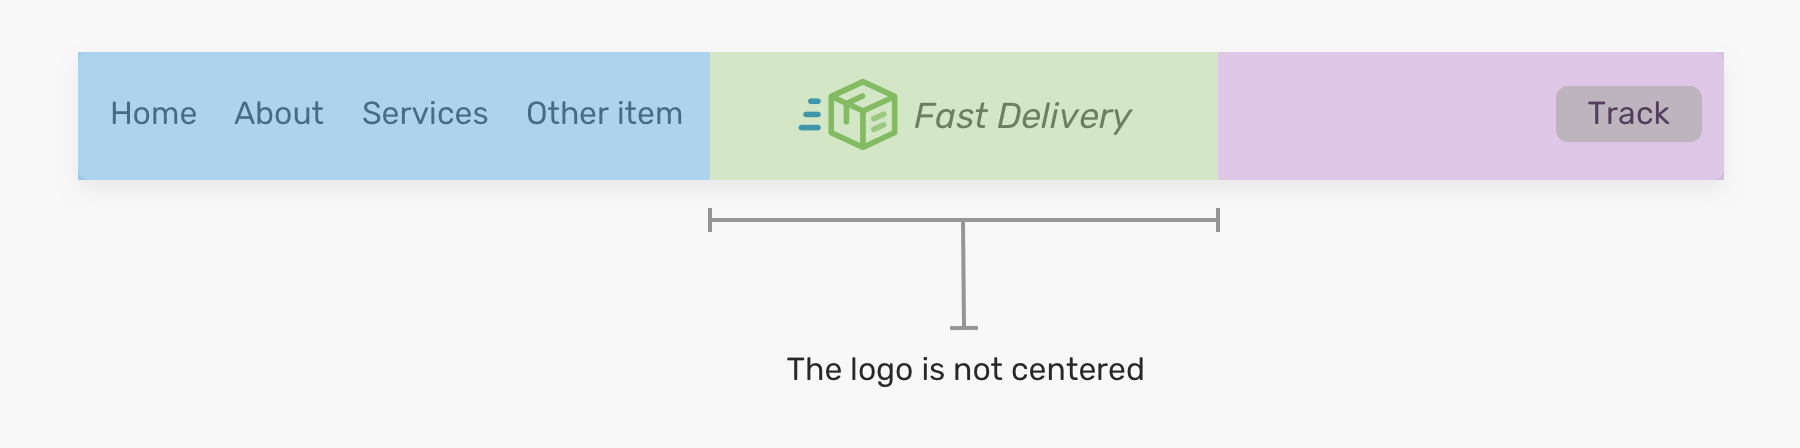
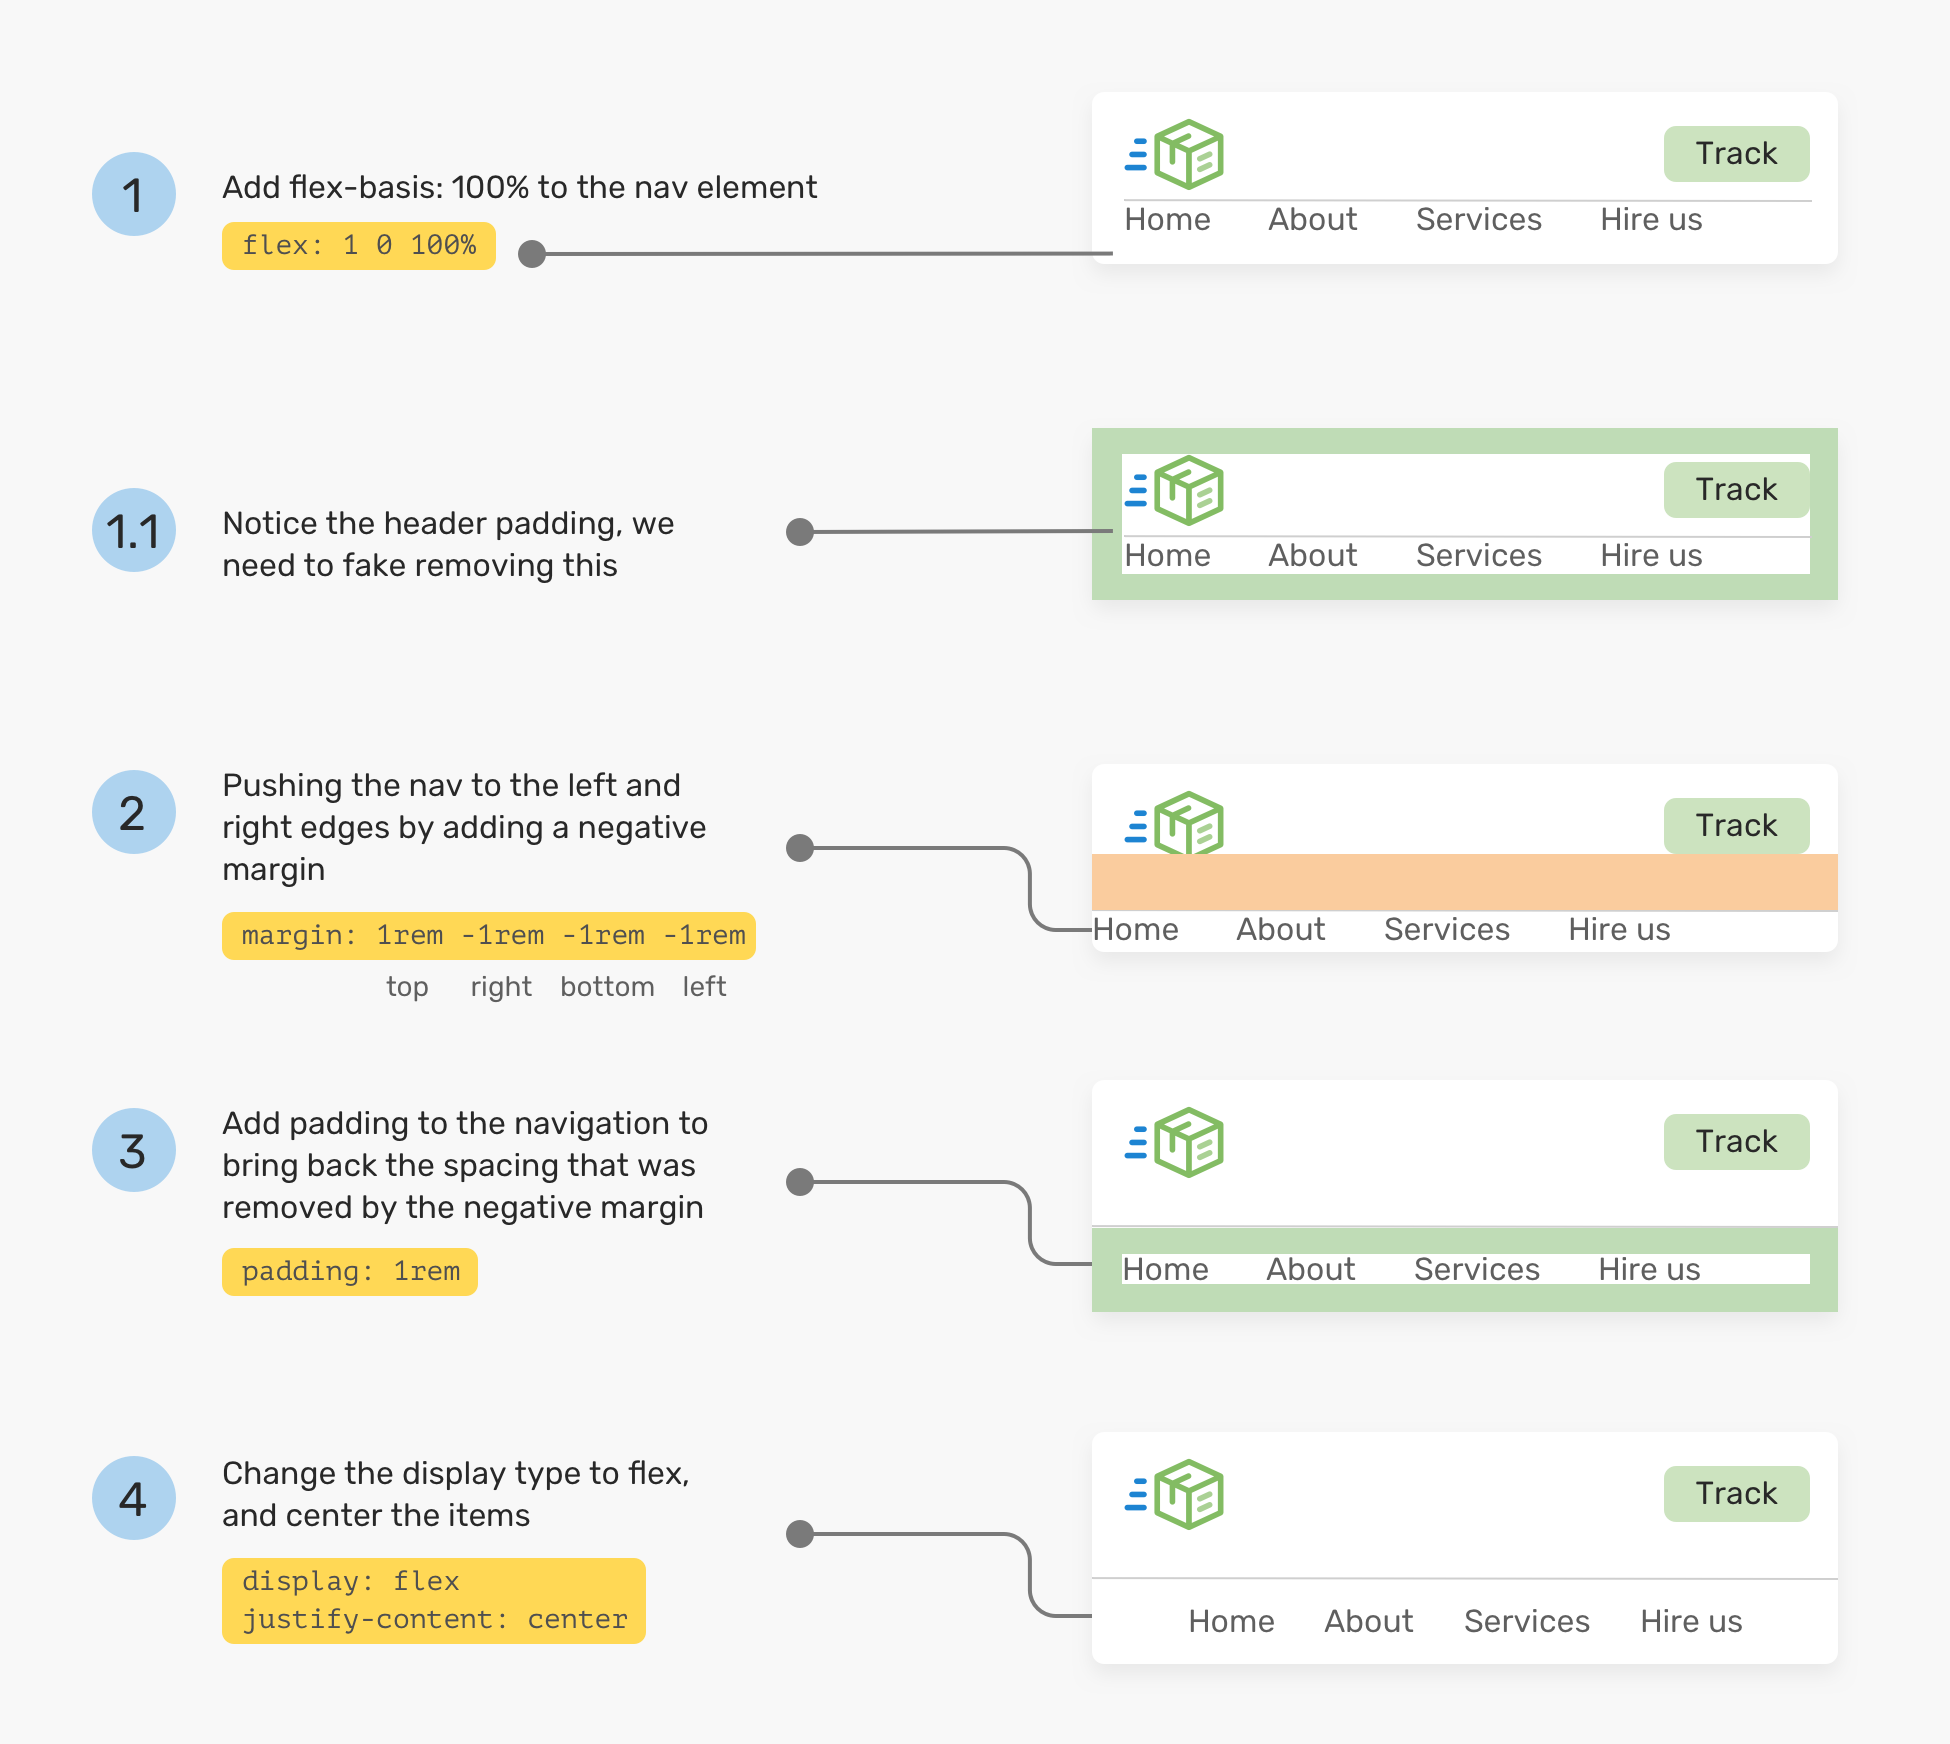
- Flex-basis
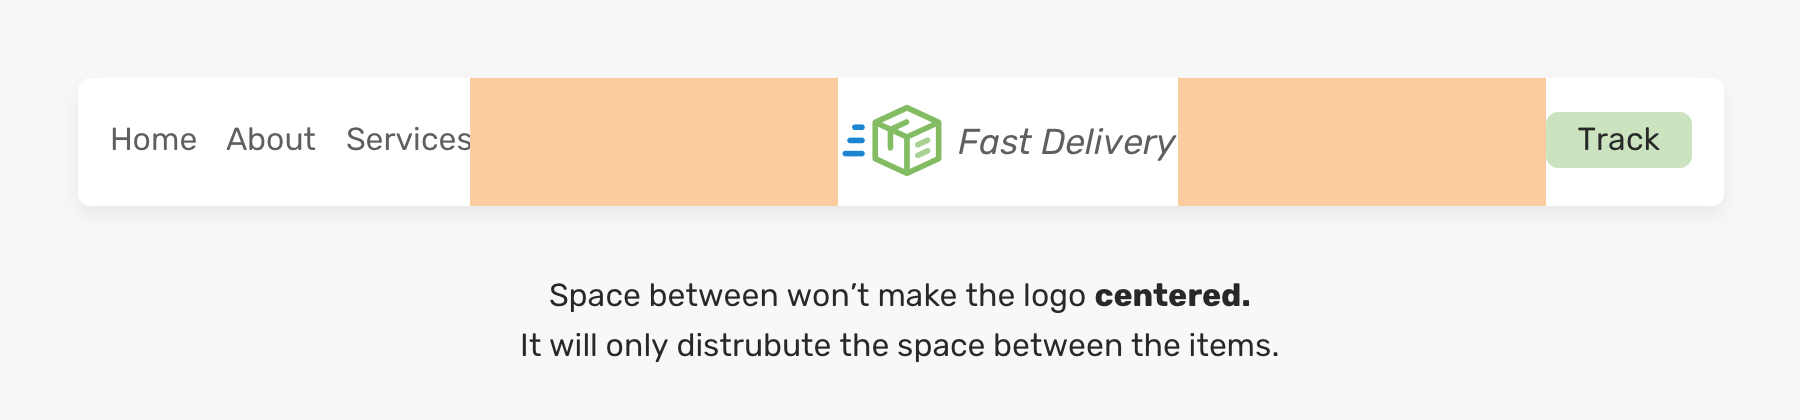
- Spacing
- Introducing Headers.css
- Related Articles
- I’m writing an ebook
Building Website Headers with CSS Flexbox
When I first learned the basics of HTML & CSS in 2014, building a website header was one of those scary and difficult tasks for me. Flexbox was still new and we were forced to use old methods like float and the clearfix technique. Today, the scene is completely different. Flexbox is widely supported and that opens up a lot of possibilities for us.
Some might argue that it’s easy nowadays to make a website header as we have modern CSS layout techniques. That’s not the case as there are some interesting challenges to tackle. I will try to highlight some of them.
In this article, I will explain how we can use CSS flexbox to successfully build a website header, and show you some of the important tips and tricks. In the end, there will be a project that was made especially for this article. Keep reading till the end as you’re in for a treat!
This article assumes that you have basic knowledge in flexbox. If you’re interested, I wrote an introduction article about flexbox on my blog.
Introduction
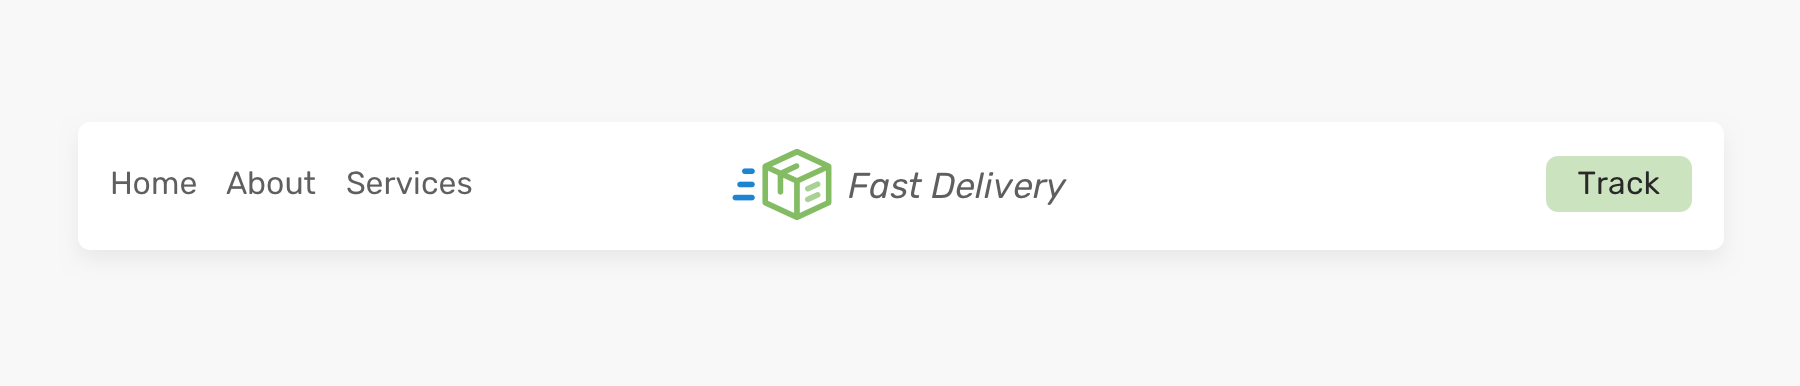
First, I need to make sure that we both are on the same page. A website header is one of the first things that the user sees when visiting a website. Usually, it contains the logo or website name, with the navigation links. Consider the following figure:
Regardless of the visual design for a header, the key elements are the logo and navigation.
Flexbox in Action
When flexbox is applied to the header element, it will make all the child items in the same line. Then, all you need is to apply justify-content to distribute the spacing between them.
class="site-header"> href="#" class="brand">Brand class="nav"> .site-header display: flex; justify-content: space-between; align-items: center; > It’s easy, right? For such a use-case, yes it is. It can get more complex than that.
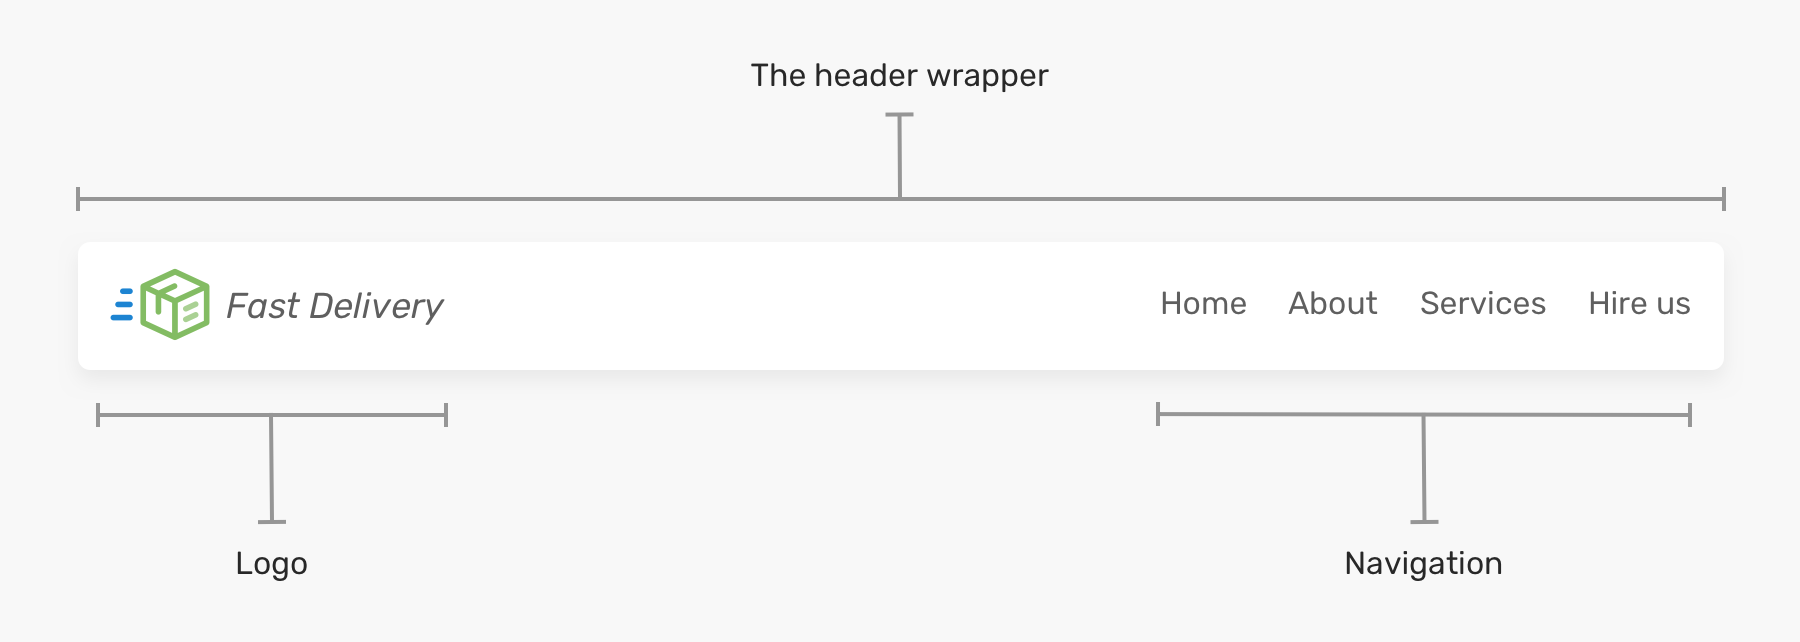
The Header Wrapper
The header above doesn’t have an inner wrapper that contains its logo and navigation elements. This can cause problems on large screens.
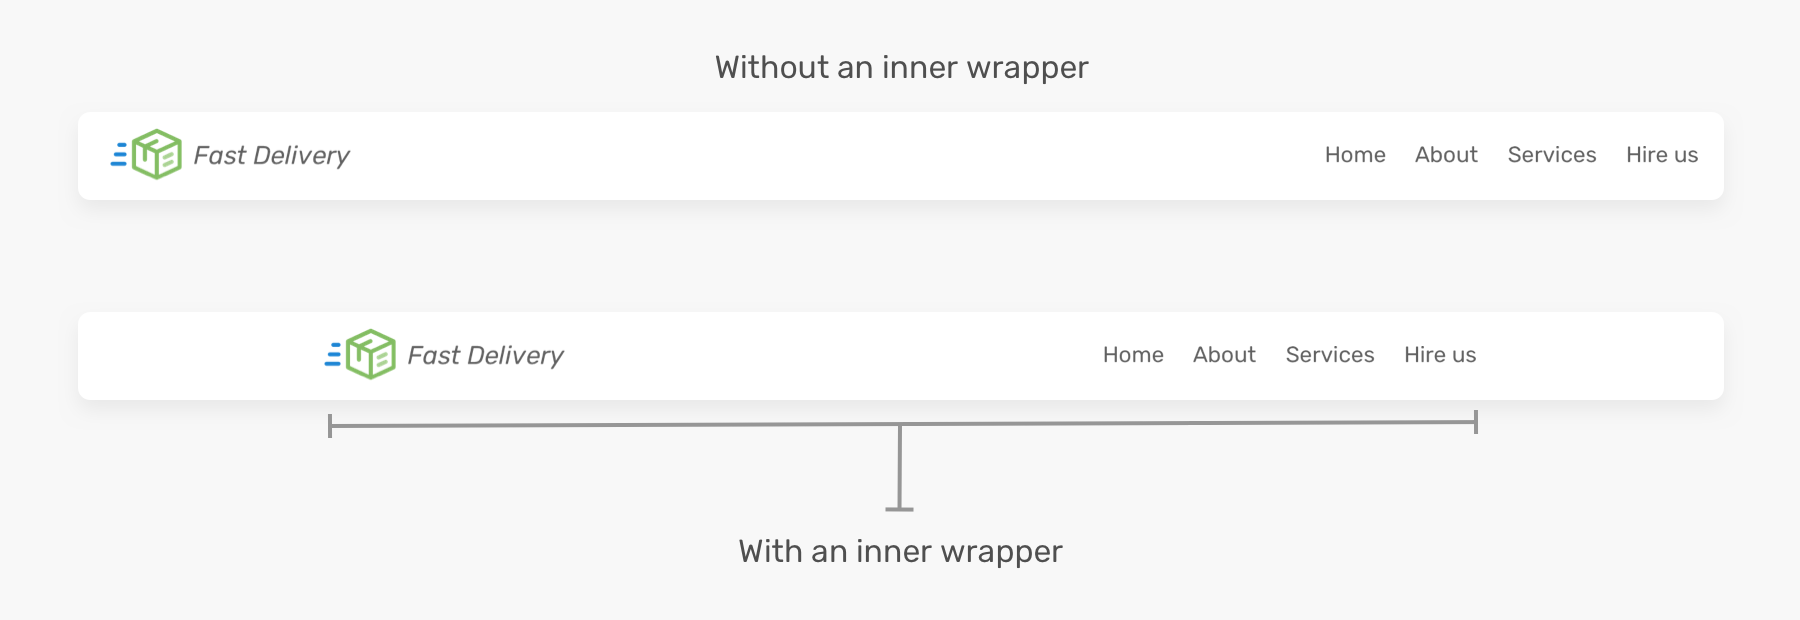
Notice how the first header is too wide because it doesn’t have an inner wrapper. While the second one looks much better. For that reason, the HTML needs to be tweaked as below.
class="site-header"> class="wrapper site-header__wrapper"> href="#" class="brand"> src="logo.svg" alt="brand" /> class="nav"> And the flexbox should be moved to the .site-header__wrapper element.
.site-header__wrapper display: flex; justify-content: space-between; align-items: center; > Using flex-wrap
This will act as a defensive CSS method. When the screen is small, there is a possibility of horizontal scrolling. See the figure below:
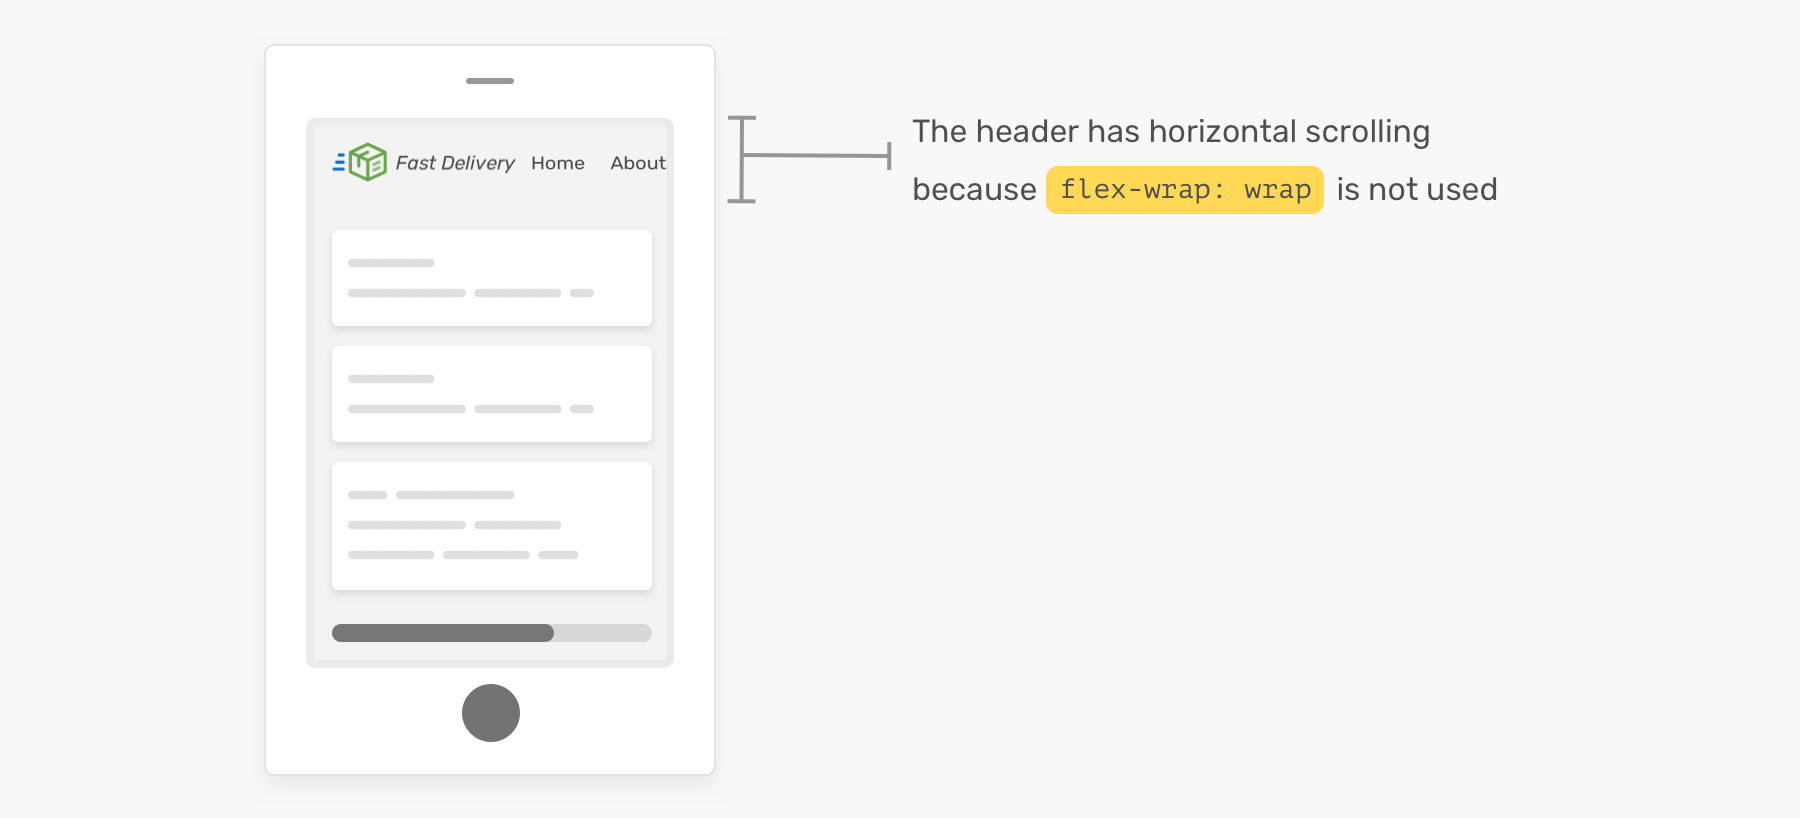
Without flex-wrap: wrap being set, there will be a horizontal scrolling. Make sure to include it!
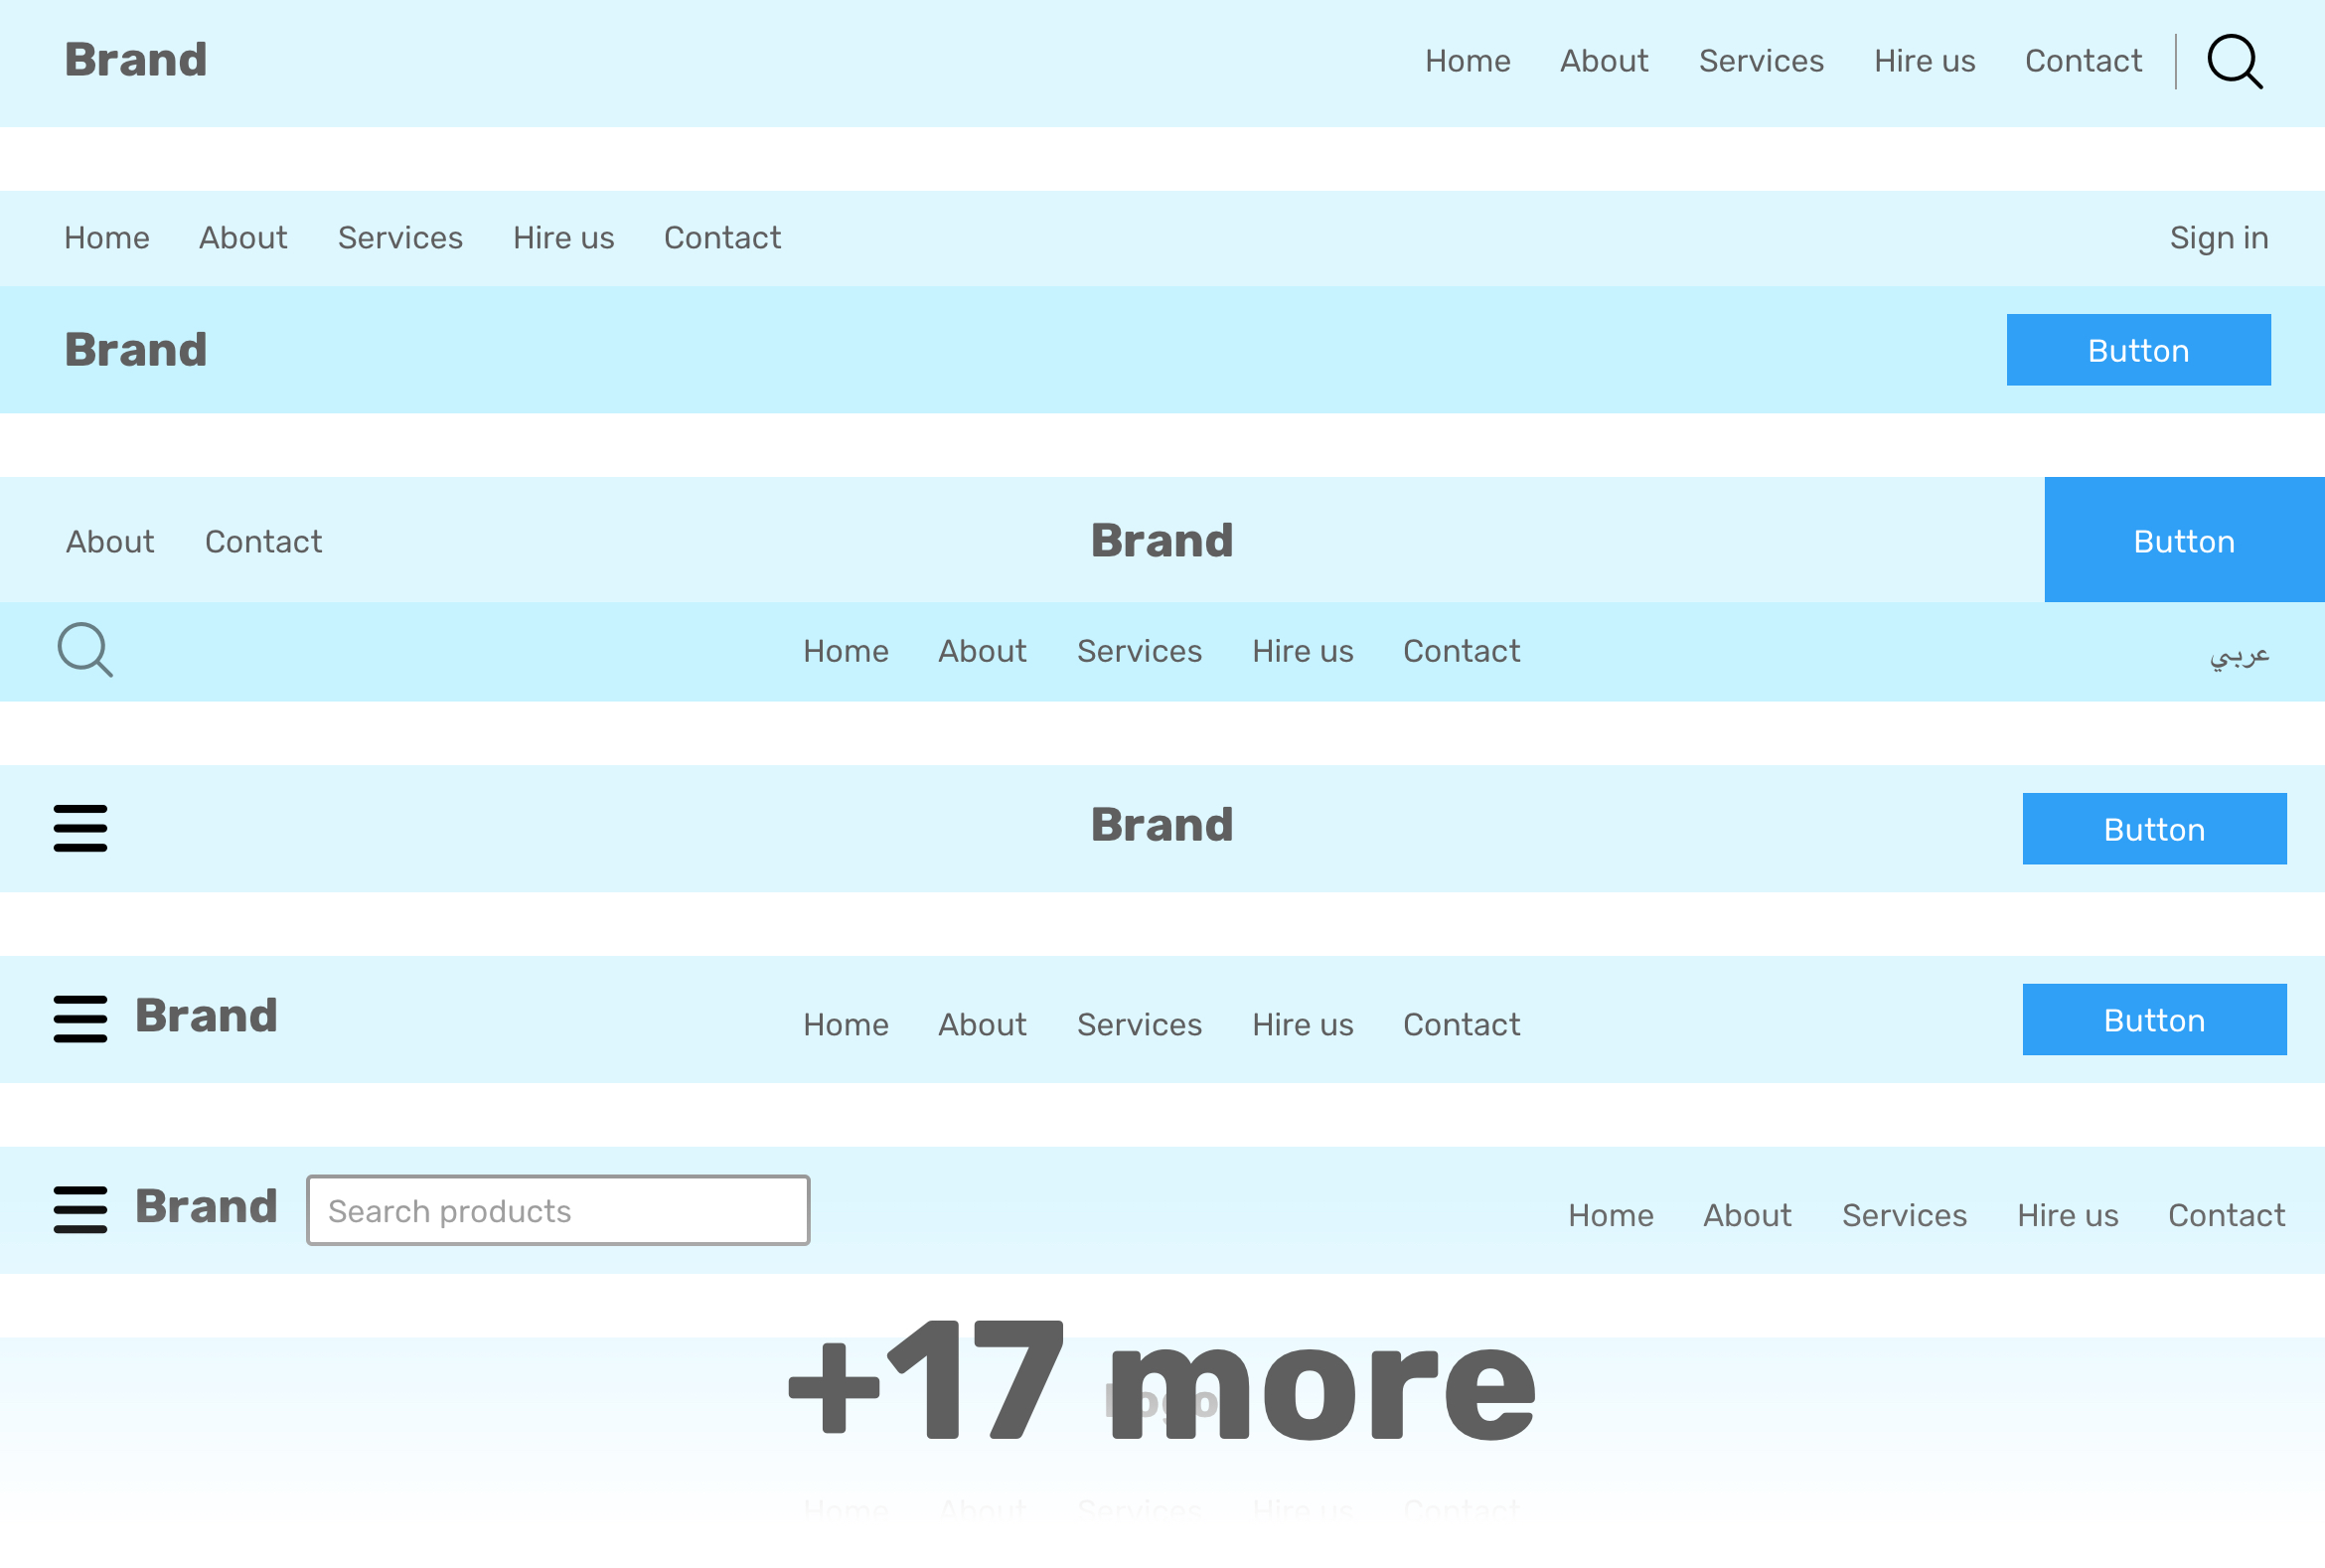
Exploring some header variations
What I like about using flexbox is that it makes it easy to handle multiple variations of a header design. Based on the previous header design, I explored some options for the header element like adding a button, search input, and changing the order of the child items.
Let’s explore how to implement them with flexbox.
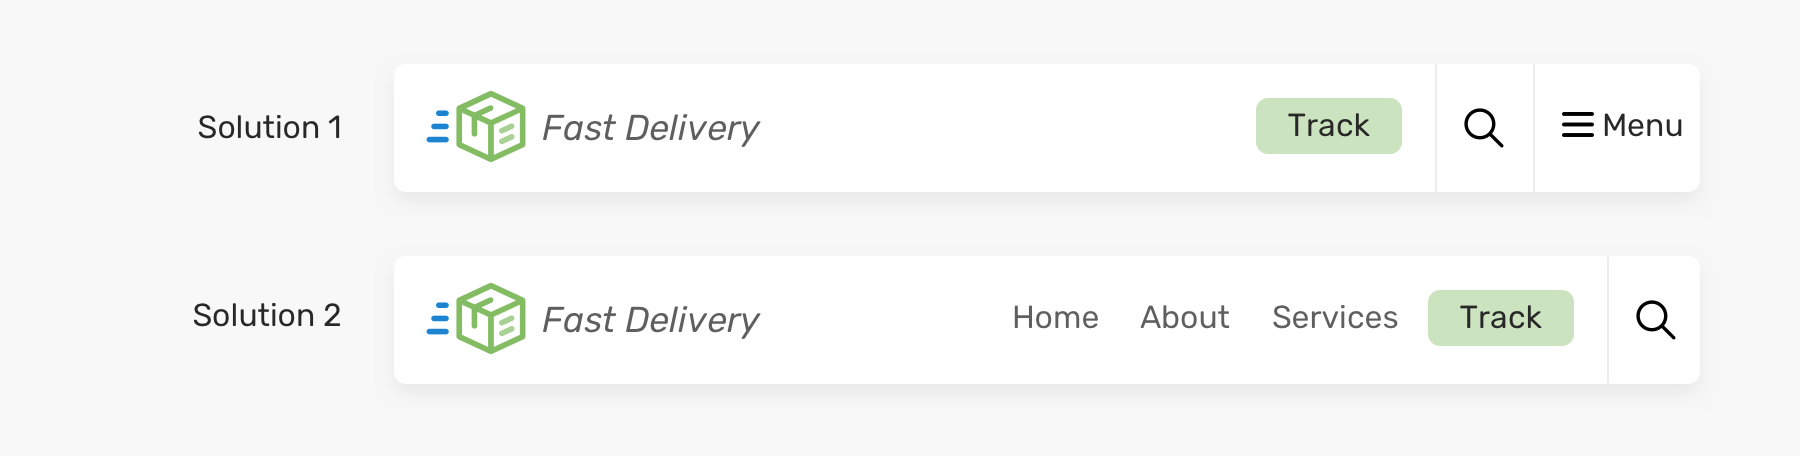
Header Variation 1
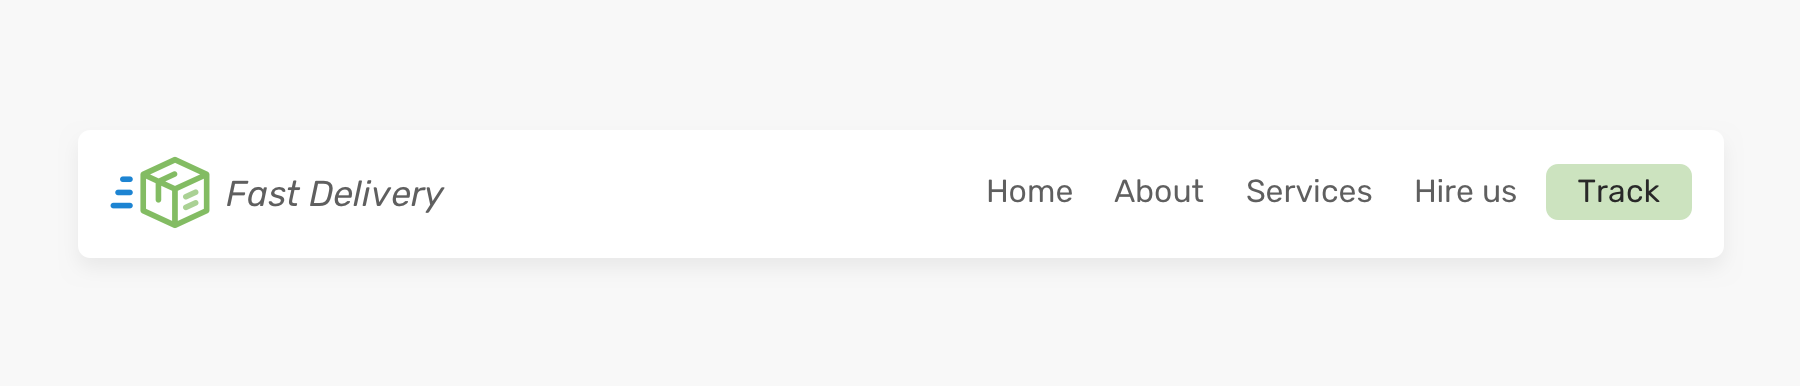
I added a button next to the navigation links. How this should be handled? Should we add it inside the navigation as a link? Or it should be separated from the navigation? I would go for this.
class="site-header"> class="wrapper site-header__wrapper"> href="#" class="brand"> src="logo.svg" alt="brand" /> class="nav"> href="/track-shipment" class="button">Track In that case, the spacing can’t be done with justify-content: space-between . Instead, I will use margin-left: auto for navigation. It will push it and the button to the far right.

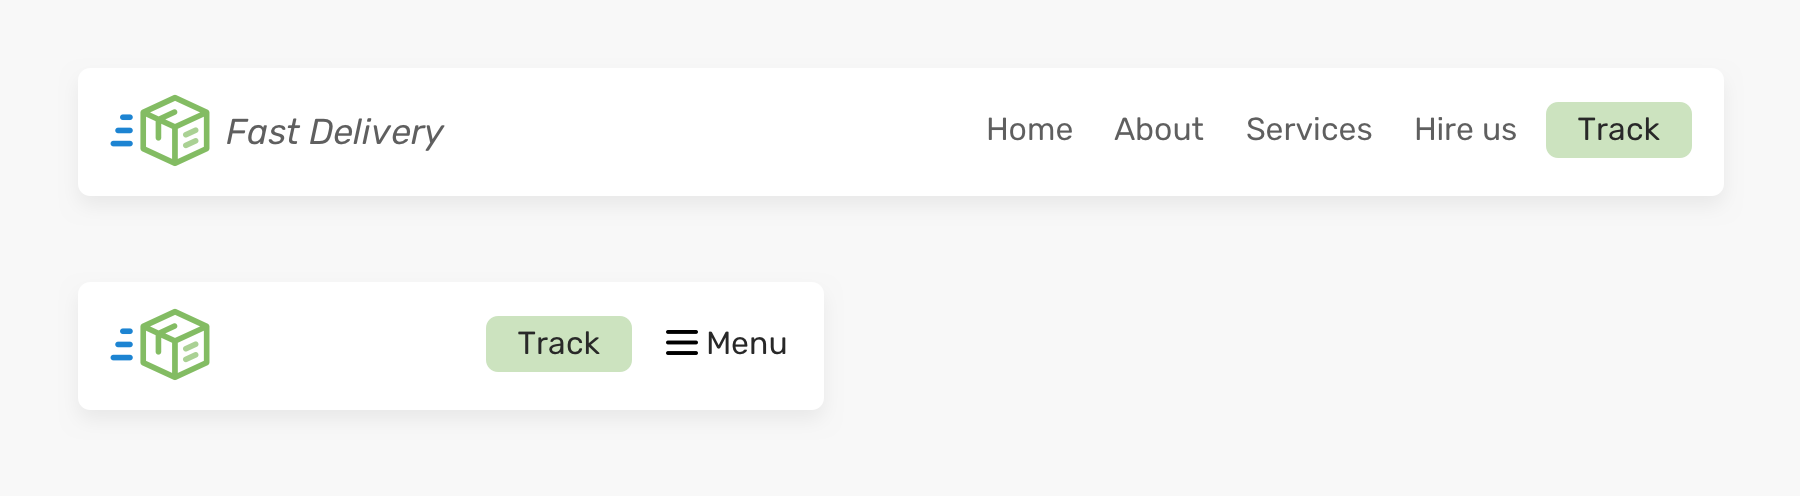
Separating the navigation and the track button is useful for mobile, as we will need to keep the button and show a mobile toggle button next to it.
Header Variation 2
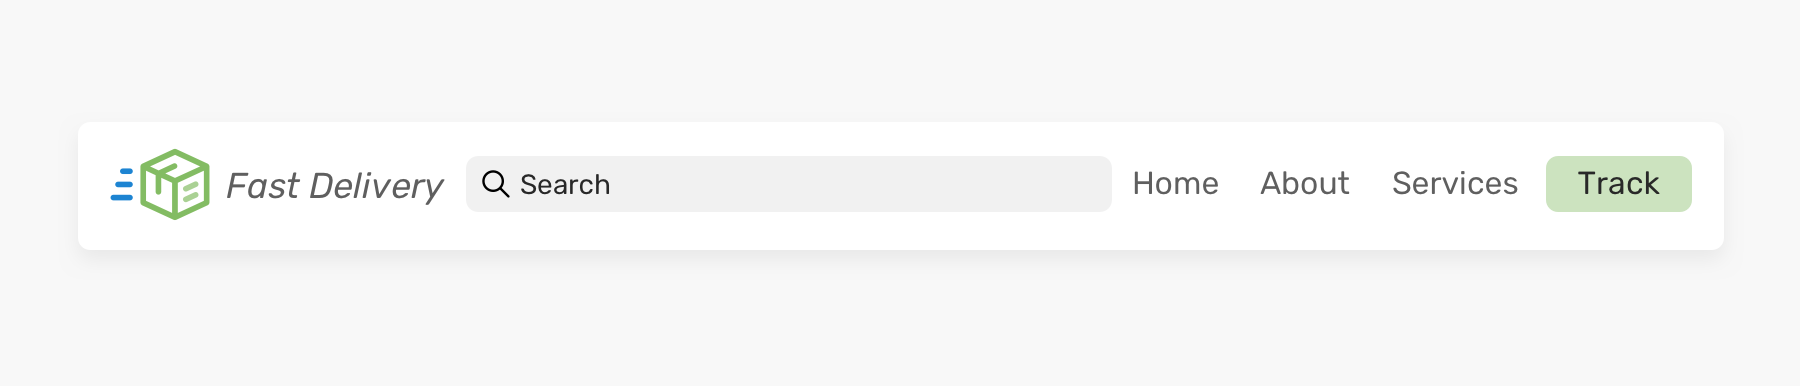
Similar to the first variation, this one has a search input that is taking the remaining available space. With flexbox, this can be achieved by using the flex property.
class="site-header"> class="wrapper site-header__wrapper"> href="#" class="brand"> src="logo.svg" alt="brand" /> class="search">