- Login Validation & Authentication Using Vanilla Javascript
- View This On YouTube
- Folder Structure
- Sass
- Login Page
- Login JavaScript
- Login Class
- Constructor
- Validate on Submit Function
- Validation Function
- Status Function
- Calling Our Login Class
- Dashboard Page
- Auth Class
- Call Auth Class on Every Page
- SASS
- Conclusion
- How to create login form with JavaScript validation in html?
- Step 1.
- Step 2.
- Welcome To My Account Login
- Step 3.
- Step 4.
- Example: adding JavaScript tag
- Watch Tutorial Video on YouTube
Login Validation & Authentication Using Vanilla Javascript
In this tutorial, we will create a form validator for a simple login page using HTML, SASS, and Vanilla JavaScript. Basically, we use JS to create classes that will validate the login variables based on our needs then we will store information in the browser for authentication. I do not use Bootstrap, jQuery, or any other frameworks. This method can be used on local browsers, web apps, and even on your server since it is all front-end code.
View This On YouTube
Folder Structure
Sass
I have my environment set up to publish a style.css and style.min.css into my css folder automatically. Any changes I make to my sass/style.scss file will automatically go into that folder and minify itself.
Login Page
For the login page, we will use the index.html since it is the first page our visitors will access when they go to the website. This does not need to be how you set it up, but it will prevent us from having to create a JS redirect if they are not logged in.
lang="en"> charset="UTF-8"> http-equiv="X-UA-Compatible" content="IE=edge"> name="viewport" content="width=device-width, initial-scale=1.0"> Login rel="stylesheet" href="/css/style.min.css"> defer src="/js/login.js"> class="login"> class="container"> class="text-center">Login action="/dashboard.html" class="loginForm"> class="input-group"> for="username" class="label">Username type="text" id="username" class="input"> class="error-message"> class="input-group"> for="password" class="label">Password type="password" id="password" class="input"> class="error-message"> class="button" type="submit">Login This is a basic page with an HTML form on it. Notice that the body has a class and the form directs to dashboard.html. You can have this either hard-coded in your form as I did, or you can add the redirect to your JS file.
Login JavaScript
In your js folder, add a file named login.js. This will control the login functionality for this page and is referenced in the script tags of the HTML.
Login Class
We will first create a new class that we can call for this script. All functions will go inside of this class so they are easier to use later. Notice the naming convention I am using for my JS class.
class Login // everything will go here > Constructor
Our constructor is needed to help «prefill» some variables we will need through the class. We will send a form and the required fields to our script when we make a call to the class so we need to make sure they are being passed and set before the functions are run. Add this between the brackets in your class above.
constructor(form, fields) this.form = form; this.fields = fields; this.validateonSubmit(); > Validate on Submit Function
In the constructor, we call a function called ValidateonSubmit(). This function will handle the default abilities of the script and make calls to the other functions when they are needed. This function can be added directly below the constructor.
validateonSubmit() let self = this; // setup calls to the "this" values of the class described in the constructor // add a "submit" event listener to the form this.form.addEventListener("submit", (e) => // remove default functionality e.preventDefault(); var error = 0; // loop through the fields and check them against a function for validation self.fields.forEach((field) => const input = document.querySelector(`#$field>`); if (self.validateFields(input) == false) // if a field does not validate, auto-increment our error integer error++; > >); // if everything validates, error will be 0 and can continue if (error == 0) //do login api here or in this case, just submit the form and set a localStorage item localStorage.setItem("auth", 1); this.form.submit(); > >); > Validation Function
In the previous function, we call a class named validateFields(), this function also takes the field variable to pass to itself. The field is based on where in the defined array and the form the script currently is.
validateFields(field) // remove any whitespace and check to see if the field is blank, if so return false if (field.value.trim() === "") // set the status based on the field, the field label, and if it is an error message this.setStatus( field, `$field.previousElementSibling.innerText> cannot be blank`, "error" ); return false; > else // if the field is not blank, check to see if it is password if (field.type == "password") // if it is a password, check to see if it meets our minimum character requirement if (field.value.length 8) // set the status based on the field, the field label, and if it is an error message this.setStatus( field, `$field.previousElementSibling.innerText> must be at least 8 characters`, "error" ); return false; > else // set the status based on the field without text and return a success message this.setStatus(field, null, "success"); return true; > > else // set the status based on the field without text and return a success message this.setStatus(field, null, "success"); return true; > > > Status Function
Our status function called in the previous function is used to modify the css of the input fields and display the error messages. The code is relatively simple and works for all fields we have on the form.
setStatus(field, message, status) // create variable to hold message const errorMessage = field.parentElement.querySelector(".error-message"); // if success, remove messages and error classes if (status == "success") if (errorMessage) errorMessage.innerText = ""; > field.classList.remove("input-error"); > // if error, add messages and add error classes if (status == "error") errorMessage.innerText = message; field.classList.add("input-error"); > > Calling Our Login Class
For ease of use, I added the Login class call to the bottom of the file where we created the class. Typically, you would add this to an app.js or ini.js file, but it serves its purpose here as well.
// create a variable for the login form const form = document.querySelector(".loginForm"); // if the form exists, run the class if (form) // setup the fields we want to validate, we only have two but you can add others const fields = ["username", "password"]; // run the class const validator = new Login(form, fields); > Dashboard Page
This page is just for demo purposes. It only shows how a successful redirect happens and how we log out of the application. Notice the body does not have a class and there are two scripts called in the head.
lang="en"> charset="UTF-8"> http-equiv="X-UA-Compatible" content="IE=edge"> name="viewport" content="width=device-width, initial-scale=1.0"> Dashboard rel="stylesheet" href="/css/style.min.css"> defer src="/js/auth.js"> defer src="/init.js"> class="container"> class="text-center">Welcome to the Dashboard class="text-center"> href="#" class="logout">Log Out Auth Class
This simple class essentially just makes sure the localStorage item exists and creates a function to log out.
class Auth // setup the class and hide the body by default constructor() document.querySelector("body").style.display = "none"; const auth = localStorage.getItem("auth"); this.validateAuth(auth); > // check to see if the localStorage item passed to the function is valid and set validateAuth(auth) if (auth != 1) window.location.replace("/"); > else document.querySelector("body").style.display = "block"; > > // will remove the localStorage item and redirect to login screen logOut() localStorage.removeItem("auth"); window.location.replace("/"); > > Call Auth Class on Every Page
In order for our auth class to work for every page that needs to have auth, we just add it in our init.js file. This will call our Auth class with every page load so we are sure that the pages we want to protect are protected without having to rewrite the function every time. Add the following to your init.js file.
const auth = new Auth(); document.querySelector(".logout").addEventListener("click", (e) => auth.logOut(); >); SASS
I will not go over every detail about the SASS file as it is not very important for this tutorial, but you can read through it if you want to make any changes.
$primary: rgb(0, 132, 255); $error: red; @import url("https://fonts.googleapis.com/css2?family=Open+Sans&display=swap"); * box-sizing: border-box; > body font-family: "Open Sans", sans-serif; background-color: $primary; font-size: 16px; > h1, h2, h3, h4, h5, h6 padding: 0; margin: 0; > .container max-width: 98vw; margin: 0 auto; padding: 1rem; background-color: #fff; > .text-center text-align: center; > .login .container max-width: 460px; margin: 3rem auto; padding: 2rem; border: 1px solid #ddd; border-radius: 0.25rem; background-color: #fff; > > .input appearance: none; display: block; width: 100%; color: #333; border: 1px solid rbg(180, 180, 180); background-color: white; padding: 1rem; border-radius: 0.25rem; &.input-error border: 1px solid $error; &:focus border: 1px solid $error; > > &:focus outline: none; border: 1px solid $primary; background-clip: padding-box; > > .error-message font-size: 0.85rem; color: $error; > .button background-color: $primary; padding: 1rem; border: none; color: #fff; font-weight: bold; display: block; width: 100%; text-align: center; cursor: pointer; font-size: 1rem; &:hover filter: brightness(110%); > > Conclusion
This is phase one of a few more tutorials I have coming up. Stay tuned to learn more about building a vanilla JavaScript application with login, authentication, and internal, secured pages. In my next tutorial + video, I will be building a simple JSON API using PHP and MySQL to tie this into. If you want to watch the video when it premiers, don’t forget to subscribe to Dev Drawer on YouTube.
How to create login form with JavaScript validation in html?
In this tutorial you will learn how to create login form in HTML with JavaScript validation? in easy way. Here you will learn everything in step by learning method. Just follow the below step to create the login form with JavaScript validation.
If you found any difficulty or mistake in this tutorial, then you can ask any question by posting comment in comment box.
Step 1.
Open Notepad or Adobe Dreamweaver or any other Html editor. I am using Dreamweaver. I am suggest to you, use Notepad for better practise.
Step 2.
Copy the below complete HTML code and paste it in your editor.
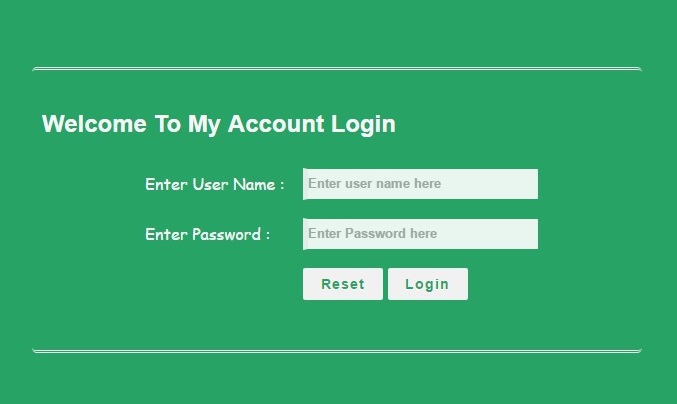
Welcome To My Account Login
Enter User Name : Enter Password : Step 3.
Now apply the CSS to all Elements for better presentation. First create CSS
tag in between .. tag like below.
Now copy the below CSS code and paste it in between
tag.
body < margin:0px; background-color:#27a465; color:#f7f7f7; font-family:Arial, Helvetica, sans-serif; >#main < width:600px; height:260px; margin-left:auto; margin-right:auto; border-radius:5px; padding-left:10px; margin-top:100px; border-top:3px double #f1f1f1; border-bottom:3px double #f1f1f1; padding-top:20px; >#main table < font-family:"Comic Sans MS", cursive; >/* css code for textbox */ #main .tb < height:28px; width:230px; border:1px solid #27a465; color:#27a465; font-weight:bold; border-left:5px solid #f7f7f7; opacity:0.9; >/* css code for button*/ #main .btn < width:80px; height:32px; outline:none; font-weight:bold; border:0px solid #27a465; text-shadow: 0px 0.5px 0.5px #fff; border-radius: 2px; font-weight: 600; color: #27a465; letter-spacing: 1px; font-size:14px; -webkit-transition: 1s; -moz-transition: 1s; transition: 1s; >#main .btn:hover
Step 4.
Here we add JavaScript code for validation check. If textbox will blank then it will give error message.
Now create JavaScript tag in between .. tag like below example.
Example: adding JavaScript tag
After that copy the below JavaScript code and paste it in between tag.
function login() < var uname = document.getElementById("email").value; var pwd = document.getElementById("pwd1").value; var filter = /^([a-zA-Z0-9_\.\-])+\@(([a-zA-Z0-9\-])+\.)+([a-zA-Z0-9])+$/; if(uname =='') < alert("please enter user name."); >else if(pwd==») < alert("enter the password"); >else if(!filter.test(uname)) < alert("Enter valid email id."); >else if(pwd.length < 6 || pwd.length >6) < alert("Password min and max length is 6."); >else < alert('Thank You for Login & You are Redirecting to Campuslife Website'); //Redirecting to other page or webste code or you can set your own html page. window.location = "https://www.campuslife.co.in"; >> //Reset Inputfield code. function clearFunc()
Watch Tutorial Video on YouTube