- How to Display Data in a Table using Tkinter
- How to Display Data in a Tkinter Entry Widget Table
- How to Display Data in a Tkinter Tksheet Widget Table
- How to Display SQLite Data in a Tkinter Table
- How to Display Pandas and Numpy Data in a Tkinter Table
- Next steps
- Get a version of Python that’s pre-compiled for Data Science
- Some Popular Python Packages for Data Science/Big Data/Machine LearningYou Get Pre-compiled – with ActivePython
- Вывод таблицы python tkinter
- Настройка столбца
- Добавление к Treeview прокрутки
How to Display Data in a Table using Tkinter
Before we start: This Python tutorial is a part of our series of Python Package tutorials. You can find other Tkinter related topics too!
If your Python application works with data, you may want to display it in your UI. The standard method for displaying data in GUI applications is in a table (tabular) format, consisting of rows and columns just like a spreadsheet. Unfortunately, Tkinter does not provide a widget for the creation of a table.
Luckily, there are alternate methods for creating a table to display data in Tkinter. For example, the Entry widget can be coded to display data in a table, and there are also table packages that can be downloaded from the Python Package Index (PyPI) and installed.
Once you decide on a method, a Tkinter table can be used as an interface for one or more related tables contained in a database for persistent or permanent storage.
How to Display Data in a Tkinter Entry Widget Table
Watch the demo in this video or continue scrolling to get the instructions and code snippets.
An Entry widget is typically used to enter or display a single string of text, but it can also be used together with the range() function and for loop to display values in a table of multiple rows and columns.
In this example, the range() function generates a list of numbers which are populated into an Entry widget table of 5 rows and 4 columns arranged in a grid() layout:
from tkinter import * rows = [] for i in range(5): cols = [] for j in range(4): e = Entry(relief=GROOVE) e.grid(row=i, column=j, sticky=NSEW) e.insert(END, '%d.%d' % (i, j)) cols.append(e) rows.append(cols) mainloop()
How to Display Data in a Tkinter Tksheet Widget Table
Tksheet is a third party package available in PyPI. It provides a Tkinter table widget with many options including a popup (right-click) menu that lets you add and delete rows, edit data in cells, and undo changes. Row and column coordinates ( x:y ) are displayed in each cell by default, and can be replaced with other data.
The Tksheet package can be installed in a terminal or command line, by entering:
In this example, the range() function generates a list of numbers based on a grid formula of row and column coordinates, and then populates the values in a table consisting of 1 row and 4 columns:
import tkinter as tk import tksheet top = tk.Tk() sheet = tksheet.Sheet(top) sheet.grid() sheet.set_sheet_data([[f"" for cj in range(4)] for ri in range(1)]) # table enable choices listed below: sheet.enable_bindings(("single_select", "row_select", "column_width_resize", "arrowkeys", "right_click_popup_menu", "rc_select", "rc_insert_row", "rc_delete_row", "copy", "cut", "paste", "delete", "undo", "edit_cell")) top.mainloop()
How to Display SQLite Data in a Tkinter Table
A Tkinter table can serve as an interface for data located in permanent storage, such as an SQLite database. In this case, an SQL statement is typically used to select all or some of the data in one or more database tables for display in the table. For example:
# An SQL statement that selects all data from a table:
Note that the data displayed in the Tkinter table is not persistent, but the query statement is saved automatically in the database for future use.
In this example, a Tkinter table is used as an interface to display data in an SQLite database table:
from tkinter import ttk import tkinter as tk import sqlite3 def connect(): con1 = sqlite3.connect("") cur1 = con1.cursor() cur1.execute("CREATE TABLE IF NOT EXISTS table1(id INTEGER PRIMARY KEY, First TEXT, Surname TEXT)") con1.commit() con1.close() def View(): con1 = sqlite3.connect("") cur1 = con1.cursor() cur1.execute("SELECT * FROM ") rows = cur1.fetchall() for row in rows: print(row) tree.insert("", tk.END, values=row) con1.close() # connect to the database connect() root = tk.Tk() tree = ttk.Treeview(root, column=("c1", "c2", "c3"), show='headings') tree.column("#1", anchor=tk.CENTER) tree.heading("#1", text="ID") tree.column("#2", anchor=tk.CENTER) tree.heading("#2", text="FNAME") tree.column("#3", anchor=tk.CENTER) tree.heading("#3", text="LNAME") tree.pack() button1 = tk.Button(text="Display data", command=View) button1.pack(pady=10) root.mainloop()
How to Display Pandas and Numpy Data in a Tkinter Table
In this example, a Pandas and Numpy data structure is displayed in a Tkinter table:
import pandas as pd import numpy as np import sys from tkinter import * root = Tk() root.geometry('580x250') dates = pd.date_range('20210101', periods=8) dframe = pd.DataFrame(np.random.randn(8,4),index=dates,columns=list('ABCD')) txt = Text(root) txt.pack() class PrintToTXT(object): def write(self, s): txt.insert(END, s) sys.stdout = PrintToTXT() print ('Pandas date range of 8 values in 1 timestamp column adjacent to a numpy random float array of 8 rows and 4 columns, displayed in a Tkinter table') print (dframe) mainloop()
Next steps
Now that you know how to use Tkinter’s Pack() layout manager, let’s move on to other things you can do with Tkinter:
Get a version of Python that’s pre-compiled for Data Science
While the open source distribution of Python may be satisfactory for an individual, it doesn’t always meet the support, security, or platform requirements of large organizations.
This is why organizations choose ActivePython for their data science, big data processing and statistical analysis needs.
Pre-bundled with the most important packages Data Scientists need, ActivePython is pre-compiled so you and your team don’t have to waste time configuring the open source distribution. You can focus on what’s important–spending more time building algorithms and predictive models against your big data sources, and less time on system configuration.
Some Popular Python Packages for Data Science/Big Data/Machine LearningYou Get Pre-compiled – with ActivePython
- pandas (data analysis)
- NumPy (multi-dimensional arrays)
- SciPy (algorithms to use with numpy)
- HDF5 (store & manipulate data)
- Matplotlib (data visualization)
- Jupyter (research collaboration)
- PyTables (managing HDF5 datasets)
- HDFS (C/C++ wrapper for Hadoop)
- pymongo (MongoDB driver)
- SQLAlchemy (Python SQL Toolkit)
Вывод таблицы python tkinter
Для отображения данных в виде таблицы параметру show предпочтительно передать значение «headings» (если надо отображать заголовки), либо » » (для таблицы без заголовков). Определим небольшую таблицу с тремя столбцами:
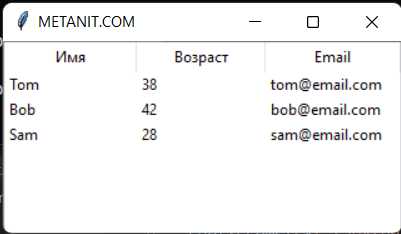
from tkinter import * from tkinter import ttk root = Tk() root.title("METANIT.COM") root.geometry("250x200") # определяем данные для отображения people = [("Tom", 38, "tom@email.com"), ("Bob", 42, "bob@email.com"), ("Sam", 28, "sam@email.com")] # определяем столбцы columns = ("name", "age", "email") tree = ttk.Treeview(columns=columns, show="headings") tree.pack(fill=BOTH, expand=1) # определяем заголовки tree.heading("name", text="Имя") tree.heading("age", text="Возраст") tree.heading("email", text="Email") # добавляем данные for person in people: tree.insert("", END, values=person) root.mainloop() Здесь данные, которые будут отображаться в таблице, определены в виде списка people, который хранит набор кортежей. Каждый кортеж состоит из трех элементов. Условно будем считать, что первый элемент кортежа представляет имя пользователя, второй — возраст, а третий — электронный адрес. И эти данные нам надо отобразить в таблице:
people = [("Tom", 38, "tom@email.com"), ("Bob", 42, "bob@email.com"), ("Sam", 28, "sam@email.com")] Для отображения этих данных определяем три столбца: name, age и email в виде кортежа и передаем их параметру columns :
columns = ("name", "age", "email") tree = ttk.Treeview(columns=columns, show="headings") Далее нам надо настроить заголовки столбца с помощью метода heading() класса Treeview (по умолчанию столбцы не имеют никаких заголовков). Данный метод принимает ряд параметров:
Первый параметр указывает на имя столбца. В примере выше определяем также параметр text , который определяет текст заголовка
И последний момент — добавляем сами данные в таблицу с помощью метода insert() класса Treeview
tree.insert("", END, values=person) Первый параметр — пустая строка «» указывает, что элемент добавляется как элемент верхнего уровня (то есть у него нет родительского элемента). Значение END указывает, что элемент добавляется в конец набора. И параметр values в качестве добавляемых данных устанавливает кортеж person.
В итоге мы получим следующую таблицу:
Настройка столбца
Вполне возможно, что изначальные настройки столбцов нас не устроят. Например, текст заголовка располагается по умолчанию по центру, а данные столбца выравниваются по левому краю. Кроме того, каждый столбец имеет некоторую начальную ширину, в следствие чего ширина виджета может оказаться больше ширины окна. Либо мы захотим как-то иначе настроить вид столбца.
Прежде всего мы можем настроить заголовки столбца с помощью метода heading() :
heading(column, text, image, anchor, command)
- column : имя настраиваемого столбца
- text : текст заголовка
- image : картинка для заголовка
- anchor : устанавливает выравнивание заголовка по определенному краю. Может принимать значения n, e, s, w, ne, nw, se, sw, c
- command : функция, выполняемая при нажатии на заголовок
Для настройки столбца в целом применяется метод column() :
column(column, width, minwidth, stretch, anchor)
- column : индекс настраиваемого столбца в формате «# номер_столбца»
- width : ширина столбца
- minwidth : минимальная ширина
- anchor : устанавливает выравнивание заголовка по определенному краю. Может принимать значения n, e, s, w, ne, nw, se, sw, c
- stretch : указывает, будет ли столбец растягиваться при растяжении контейнера. Если будет, то значение True , иначе значение False
Применим некоторые из этих параметров:
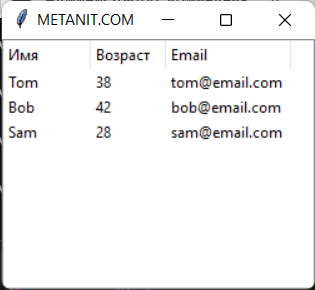
from tkinter import * from tkinter import ttk root = Tk() root.title("METANIT.COM") root.geometry("250x200") # определяем данные для отображения people = [("Tom", 38, "tom@email.com"), ("Bob", 42, "bob@email.com"), ("Sam", 28, "sam@email.com")] # определяем столбцы columns = ("name", "age", "email") tree = ttk.Treeview(columns=columns, show="headings") tree.pack(fill=BOTH, expand=1) # определяем заголовки с выпавниваем по левому краю tree.heading("name", text="Имя", anchor=W) tree.heading("age", text="Возраст", anchor=W) tree.heading("email", text="Email", anchor=W) # настраиваем столбцы tree.column("#1", stretch=NO, width=70) tree.column("#2", stretch=NO, width=60) tree.column("#3", stretch=NO, width=100) # добавляем данные for person in people: tree.insert("", END, values=person) root.mainloop() В данном случае для заголовков устанавливаем выравнивание по левому краю. Для столбцов запрещаем растяжение и устанавливаем ширину.
При добавлении изображения оно помещается в правой части. Например, установка изображения для третьего столбца:
# предполагается, что в папке приложения располагается файл email_icon_micro.png email_icon = PhotoImage(file="./email_icon_micro.png") tree.heading("email", text="Email", anchor=W, image=email_icon) 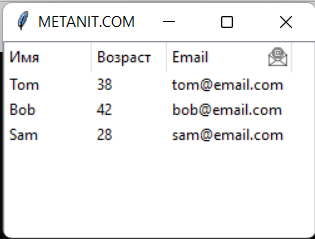
Добавление к Treeview прокрутки
from tkinter import * from tkinter import ttk root = Tk() root.title("METANIT.COM") root.geometry("250x200") root.rowconfigure(index=0, weight=1) root.columnconfigure(index=0, weight=1) # определяем данные для отображения people = [ ("Tom", 38, "tom@email.com"), ("Bob", 42, "bob@email.com"), ("Sam", 28, "sam@email.com"), ("Alice", 33, "alice@email.com"), ("Kate", 21, "kate@email.com"), ("Ann", 24, "ann@email.com"), ("Mike", 34, "mike@email.com"), ("Alex", 52, "alex@email.com"), ("Jess", 28, "jess@email.com"), ] # определяем столбцы columns = ("name", "age", "email") tree = ttk.Treeview(columns=columns, show="headings") tree.grid(row=0, column=0, sticky="nsew") # определяем заголовки tree.heading("name", text="Имя", anchor=W) tree.heading("age", text="Возраст", anchor=W) tree.heading("email", text="Email", anchor=W) tree.column("#1", stretch=NO, width=70) tree.column("#2", stretch=NO, width=60) tree.column("#3", stretch=NO, width=100) # добавляем данные for person in people: tree.insert("", END, values=person) # добавляем вертикальную прокрутку scrollbar = ttk.Scrollbar(orient=VERTICAL, command=tree.yview) tree.configure(yscroll=scrollbar.set) scrollbar.grid(row=0, column=1, sticky="ns") root.mainloop()