Publishing to Azure App Service on Linux
Applies to: ![]() Visual Studio
Visual Studio ![]() Visual Studio for Mac
Visual Studio for Mac ![]() Visual Studio Code
Visual Studio Code
Linux is the only operating system option for running Python apps in App Service. Python on Windows is no longer supported, see App Service Linux Docs — Python Support. You can, however, build your own custom Windows container image and run that in App Service. For more information, see use a custom Docker image.
Visual Studio provides the capability to publish a Python web app directly to Azure App Service on Linux. Publishing to Azure App Service on Linux means copying the necessary files to the server and setting up an appropriate web.config file that instructs the web server how to launch your app.
The publishing process differs between Visual Studio 2017 and later and Visual Studio 2015. Specifically, Visual Studio 2015 automates some of the steps, including the creation of web.config , but this automation limits long-term flexibility and control. Visual Studio 2017 and later requires more manual steps but provides more exact control over your Python environment. Both options are described here.
For background on the changes between Visual Studio 2015 and Visual Studio 2017 and later, see the blog post, Publish to Azure in Visual Studio 2017.
Prerequisites
For this walkthrough, you need a web app project based on the Bottle, Flask, or Django frameworks. If you don’t yet have a project and would like to try the publishing process, create a simple test project as follows:
- In Visual Studio, select File > New > Project, search for «Bottle», select the Bottle Web Project, specify and name and a path for the project, select OK. (The Bottle template is included with the Python development workload; see Installation.)
- Follow the prompts to install external packages, selecting Install into a virtual environment and your preferred base interpreter for the virtual environment. You typically match this choice with the version of Python installed on App Service.
- Test the project locally by pressing F5 or selecting Debug > Start Debugging.
Create an Azure App Service
Publishing to Azure requires a target App Service. For this purpose you can create an App Service using an Azure subscription, or you can use a temporary site.
If you don’t already have a subscription, start with a free full Azure account, which includes generous credits for Azure services. Also consider signing up for Visual Studio Dev Essentials, which gives you $25 credit every month for a full year.
Although Azure asks for a credit card to verify your account, the card is not charged. You can also set a spending limit equal to your free credits to guarantee that no extra charges occur. In addition, Azure provides a free App Service plan tier that’s ideal for simple test apps as described in the next section.
Using a subscription
With an active Azure subscription, create an App Service with an empty Web App as follows:
- Sign in at portal.azure.com.
- Search for App Service
- Select +Create, then select Web App.
- Specify a name for the web app, leave Resource Group to «Create New», and choose a Python runtime.
- Select any Azure Region near you. Then select Pricing tier, scroll down to and select the F1 Free plan, press Select, followed by OK and then Review + Create.
- (Optional) Once the App Service has been created, navigate to it, select Get publish profile, and save the file locally.
Using a temporary App Service
Create a temporary App Service without needing an Azure subscription as follows:
- Open your browser to https://azure.microsoft.com/try/app-service/web/.
- Select Web App for the app type, then select Next.
- Select Empty Site, followed by Create.
- Sign in with a social login of your choice, and after a short time your site is ready at the displayed URL.
- Select Download publishing profile and save the .publishsettings file, which you use later.
Configure Python on Azure App Service
Once you have an App Service with an empty Web App running (either in your subscription or on a free site). For publishing from Visual Studio 2017 and later, record the exact path to the Python interpreter installed with the site extension as described in that article.
If desired, you can also install the bottle package using the process in those instructions, as that package is installed as part of other steps in this walkthrough.
Publish to App Service — Visual Studio 2017 and later
Publishing to Azure App Service from Visual Studio 2017 and later copies only the files in your project to the server. It’s necessary, therefore, to create the necessary files to configure the server environment.
- In Visual Studio Solution Explorer, right-click the project and select Add > New Item. . In the dialog that appears, selecting the «Azure web.config (Fast CGI)» template and select OK. This creates a web.config file in your project root.
- Modify the PythonHandler entry in web.config so that the path matches the Python installation on the server (see IIS Configuration Reference (iis.net) for exact details). For example, for Python 3.6.1 x64 the entry should appear as follows:
- Bottle: add parentheses after app.wsgi_app as shown below. This is necessary because that object is a function (see app.py ) rather than a variable:
Second, add the following entry below the one for WSGI_HANDLER , replacing DjangoAzurePublishExample with the name of your project:
# Change the URL to your specific site ALLOWED_HOSTS = ['vspython-test-02.azurewebsites.net'] Failure to add your URL to the array results in the error «DisallowedHost at / Invalid HTTP_HOST header: ‘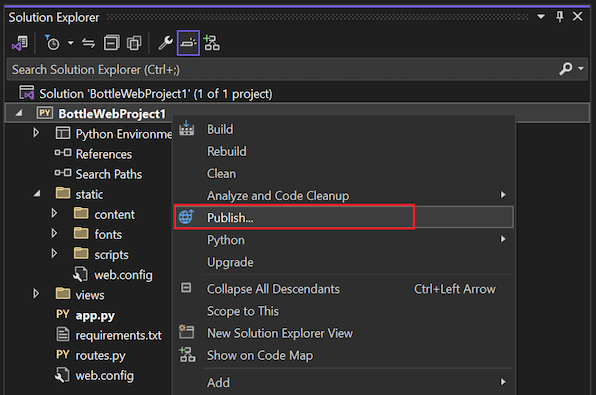
 b. If you’re using a temporary App Service on try.azurewebsites.net, or otherwise need to use a publishing profile, select the > control to find Import profile, select that option, then select Publish. This prompts for the location of the .publishsettings file downloaded earlier.
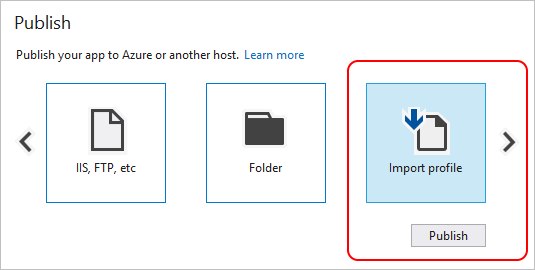
python -m pip install --upgrade -r /home/site/wwwroot/requirements.txt If you see permission errors when running this command, double-check that you’re running the command in your site extension folder and not in the folder of one of App Service’s default Python installations. Because you can’t modify those default environments, attempting to install packages certainly fails. d. For detailed error output, add the following line to web.config within the node, which provides more detailed error output:
e. Try restarting the App Service after installing new packages. A restart is not necessary when changing web.config , as App Service does an automatic restart whenever web.config changes.
Tip If you make any changes to your app’s requirements.txt file, be sure to again use the Kudu console to install any packages that are now listed in that file.
Publishing to App Service — Visual Studio 2015
A short video of this process can be found on Visual Studio Python Tutorial: Building a Website (youtube.com, 3m10s).
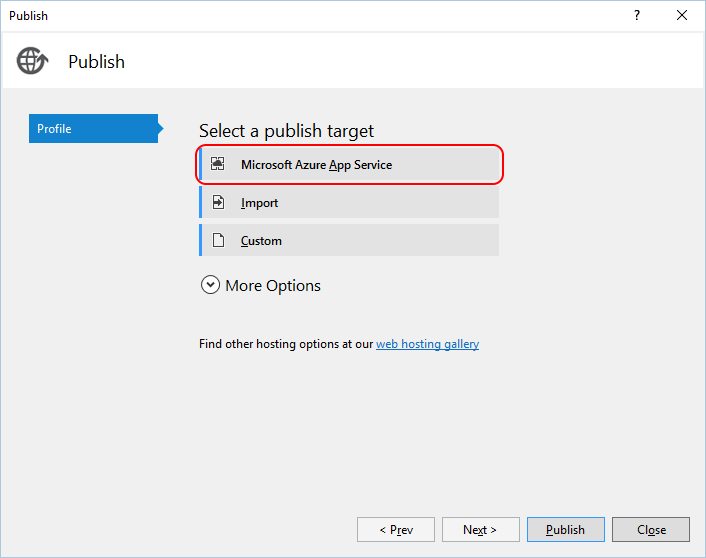
- In Solution Explorer, right-click the project and select Publish.
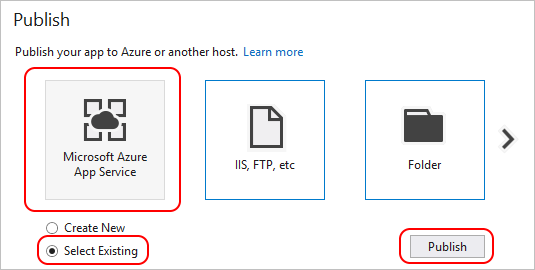
- In the Publish dialog, select Microsoft Azure App Service:

- Select a target:
- If you have an Azure subscription, select Microsoft Azure App Service as the publishing target, then in the following dialog select an existing App Service or select New to create a new one.
- If you’re using a temporary site from try.azurewebsites.net, select Import as the publishing target, then browse for the .publishsettings file downloaded from the site and select OK.
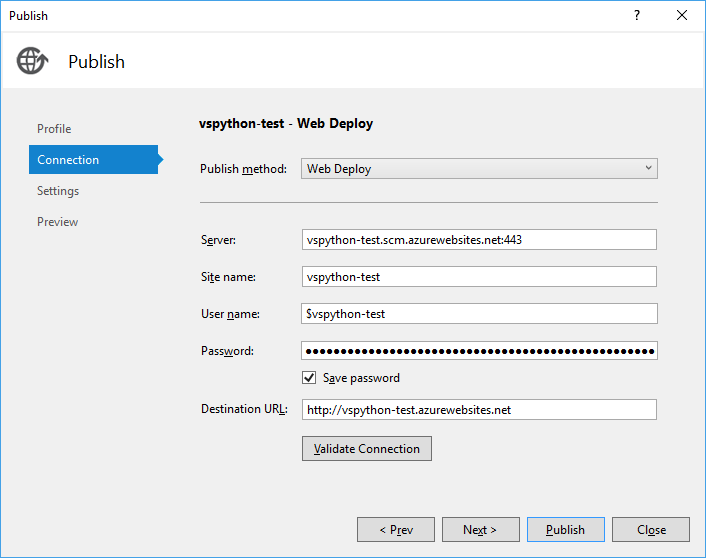
- The App Service details appear in the Publish dialog’s Connection tab below.
- Select Next > as needed to review additional settings.
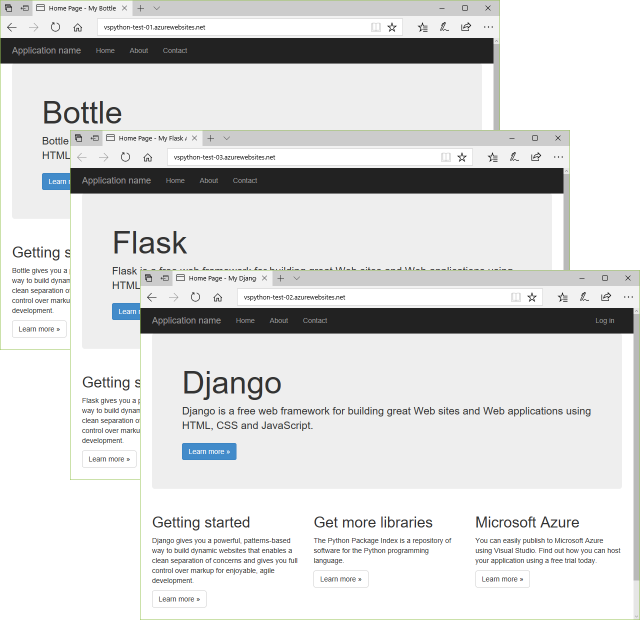
- Select Publish. Once your application is deployed to Azure, your default browser opens on that site.
As part of this process, Visual Studio also does the following steps:
- Create a web.config file on the server that contains appropriate pointers to the app’s wsgi_app function and to App Service’s default Python 3.4 interpreter.
- Turn off processing for files in the project’s static folder (rules for this are in web.config ).
- Publish the virtual environment to the server.
- Add a web.debug.config file and the debugging tools to enable remote debugging. For Visual Studio 2019 version 16.4 and earlier, the debugging tools are ptvsd. For Visual Studio 2019 version 16.5 and later, the debugging tools are debugpy.
As noted earlier, these automatic steps simplify the publishing process but make it more difficult to control the Python environment. For example, the web.config file is created only on the server but not added to your project. The publishing process also takes longer because it’s copying the whole virtual environment from your development computer rather than relying on the server configuration.
Eventually you may want to maintain your own web.config file and use requirements.txt to maintain packages on the server directly. Using requirements.txt , in particular, guarantees that your development and server environments always match.
Feedback
Submit and view feedback for