- Building HTML templates visually in visual studio code
- A bit about speedwapp vs code extension
- Adding the seedwapp extension to your vscode
- Exporting code & customizations
- Visual Studio Code как создать структуру html?
- Войдите, чтобы написать ответ
- Почему не запускается код?
- Почему не переключается версия node через nvm в VS Code?
- [VS Code] — How to Create a New HTML Template in VS Code
- 👩💻 Technical question
- More coding questions about VS Code
- 👩💻 Technical question
- 👩💻 Technical question
- 👩💻 Technical question
- 👩💻 Technical question
- 👩💻 Technical question
- 👩💻 Technical question
- 👩💻 Technical question
- 👩💻 Technical question
- 👩💻 Technical question
- 👩💻 Technical question
- 👩💻 Technical question
- 👩💻 c Code instructions
Building HTML templates visually in visual studio code
Hello, devs do you find it hard to build web pages within a short period? Are you still using the boring process of writing Html & CSS code to develop a fully responsive and UI-friendly web page? Do you spend hours just to make a single web page responsive and mobile-friendly? There is good news! In the article, I will demonstrate how you can easily build a fully customizable product landing page within 5 minutes that too using a vs code extension named speedwapp the best part you don’t need to type the full code and follow the boring process. There is no such prerequisite for this article a simple knowledge of HTML & CSS is appreciated just make sure that you have visual studio code installed on your computer and if not you can download it from here.
A bit about speedwapp vs code extension
Speedwapp is an amazing website builder that allows you to build beautiful landing pages directly from their website or you can your their free vs code extension which will demonstrate here.
Adding the seedwapp extension to your vscode
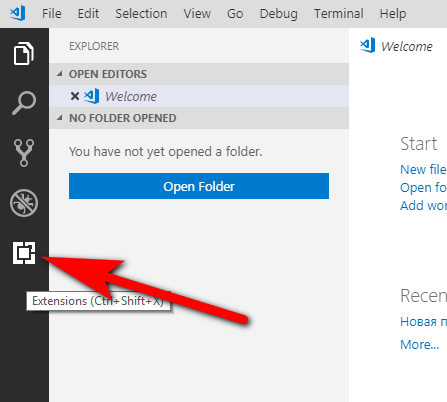
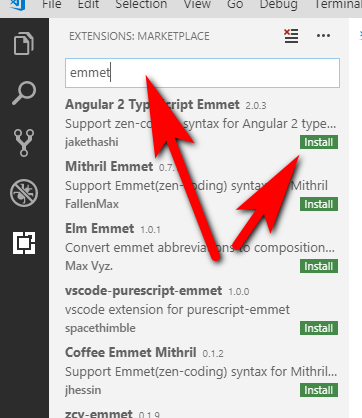
- Quickly open the visual studio code editor on your computer and navigate to the extensions section. If you are using a windows machine press ctrl+shift+x . Now in the search bar search for speedwapp and click on the install button

- Once you have installed the extension you will be prompted to a login page so put your credentials there or you can also sign up if you don’t have an account.
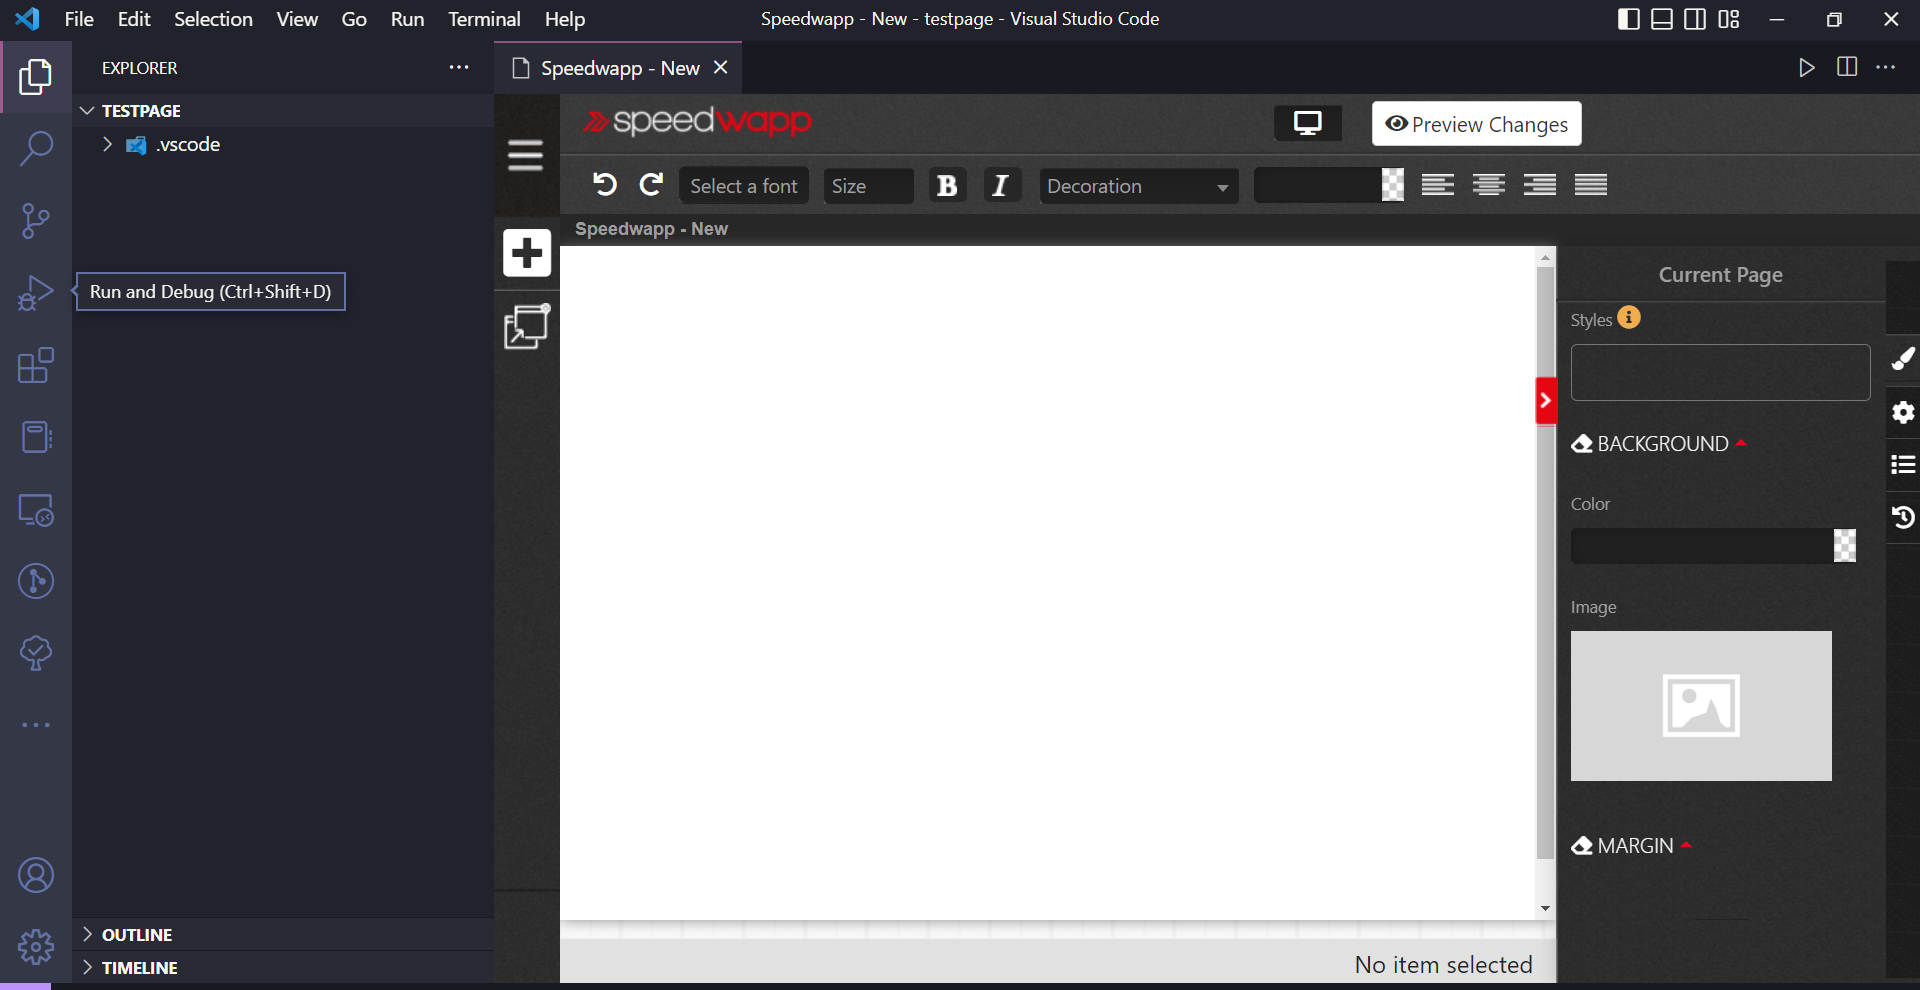
- Now press Ctrl+K N or Cmd+K N to create a new page using speedwapp

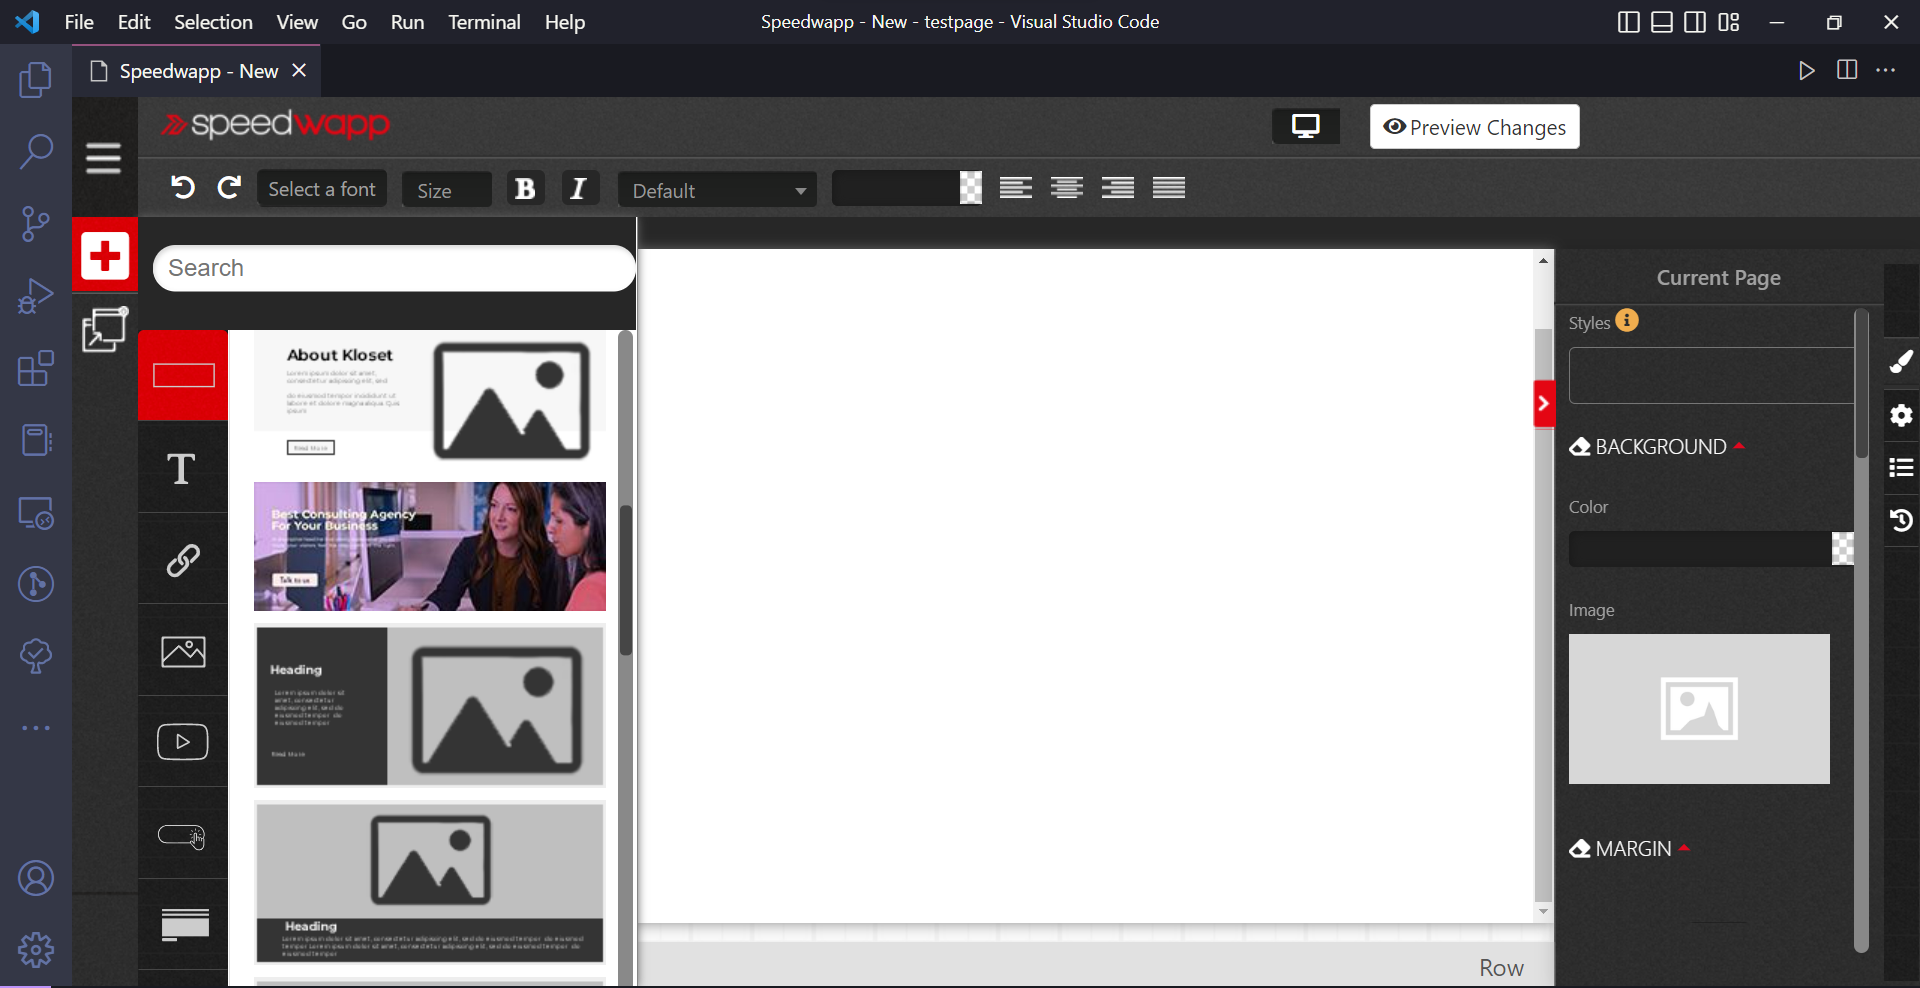
- click on the + symbol to add pre-defined templates or html code blocks to your page. I will be using a pre-defined template and then gonna edit it on my own
 .
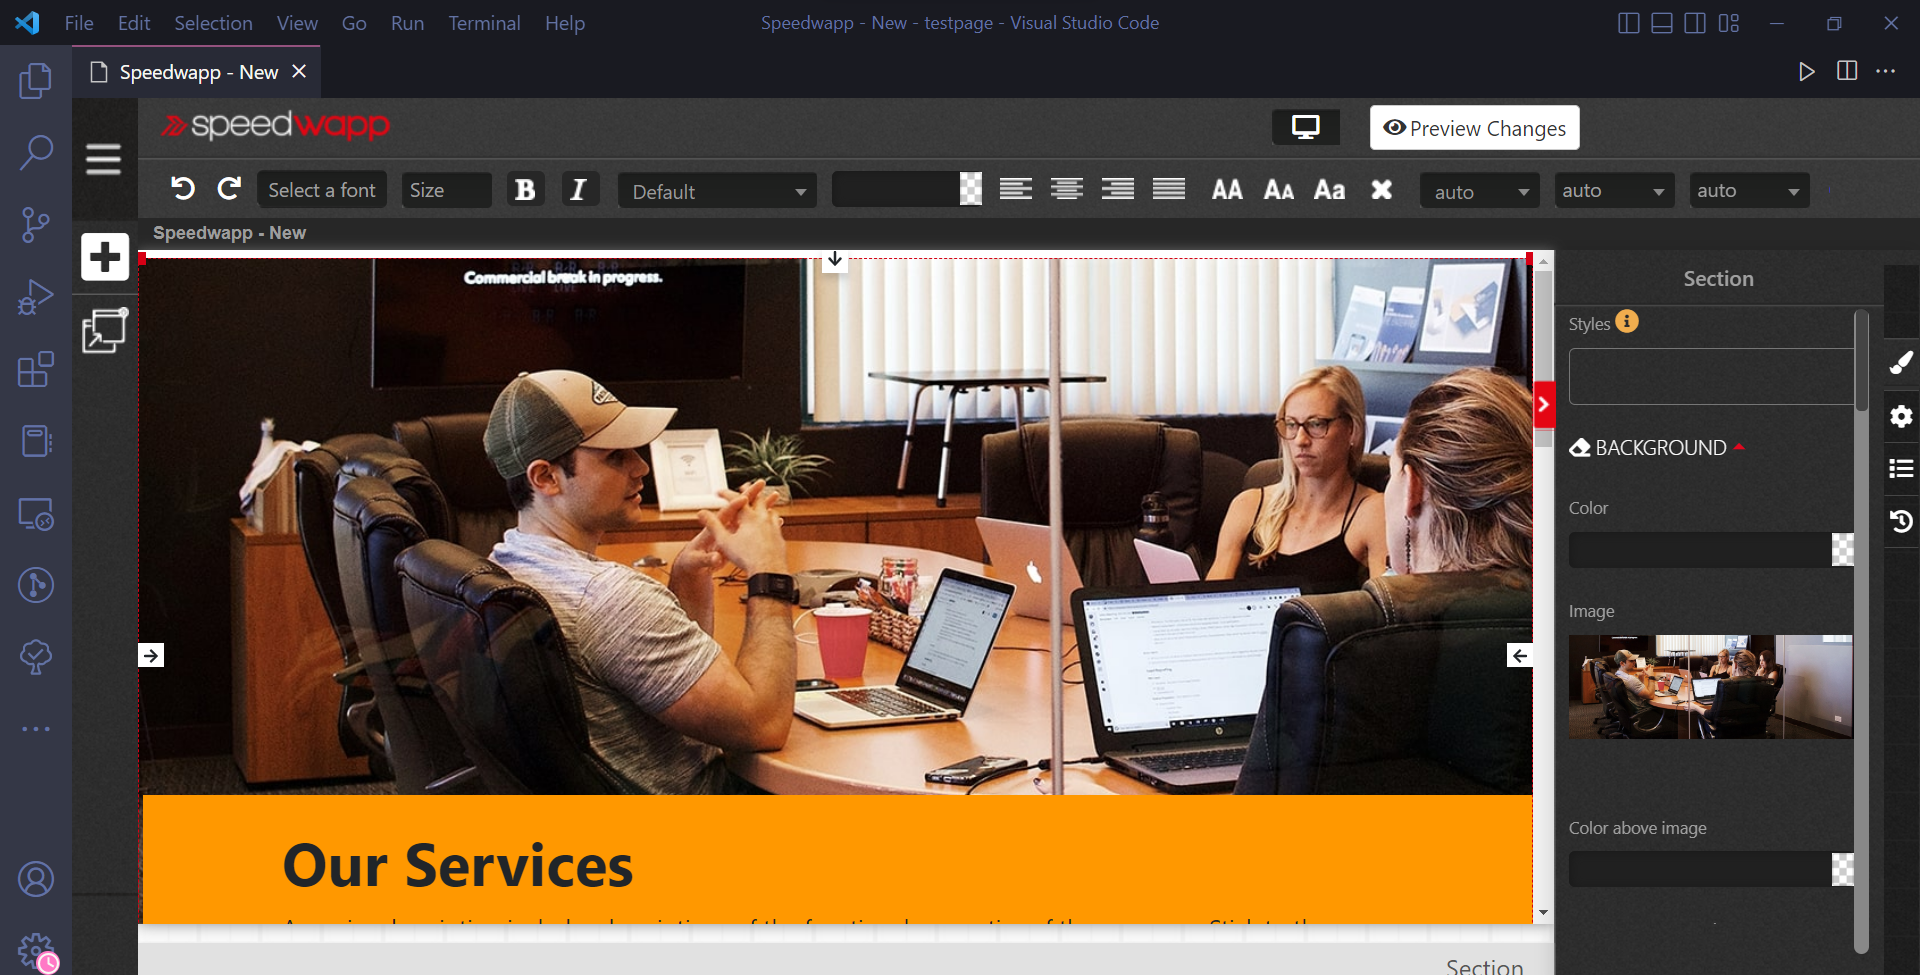
. - It looks a bit like this after I have imported one. Now let’s add a few more sections and then we will edit it.

- There in the bottom, you will see a small plus sign to add a new component so click on that and add a few more just like shown in the image below

- Now let’s edit it. So first, I want to change the background image of the first component and to do so click on the image you will see a panel on the left and there you can update it

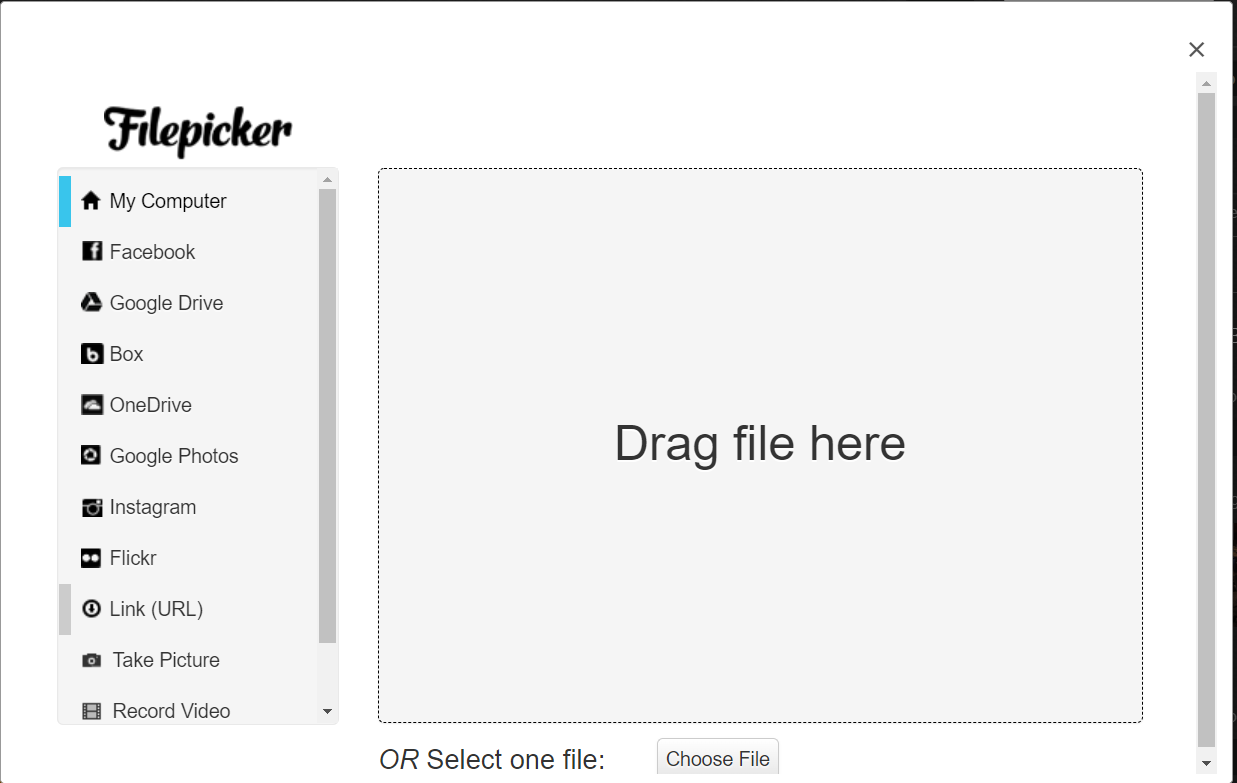
- Now we got a pop-up like this and I will be using the image links so head over to unsplash and pick an image of your choice then copy the image URL and paste it into the link section and click on upload.

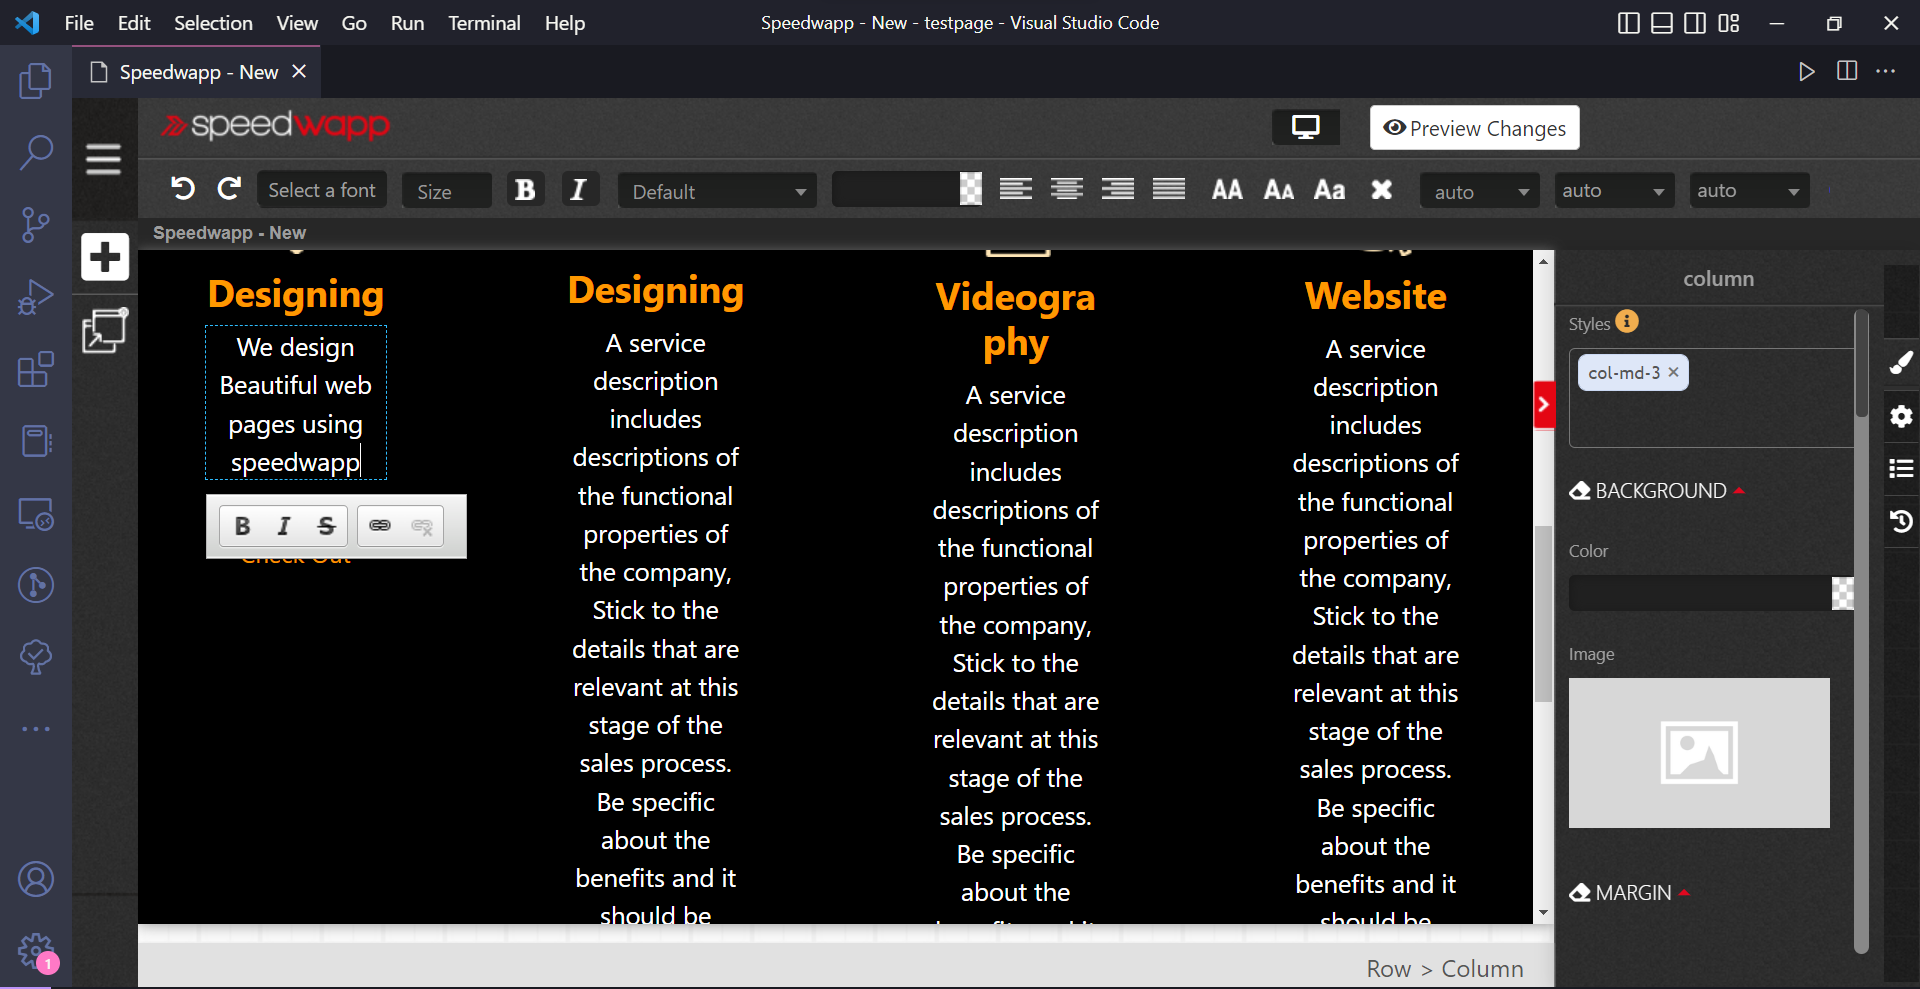
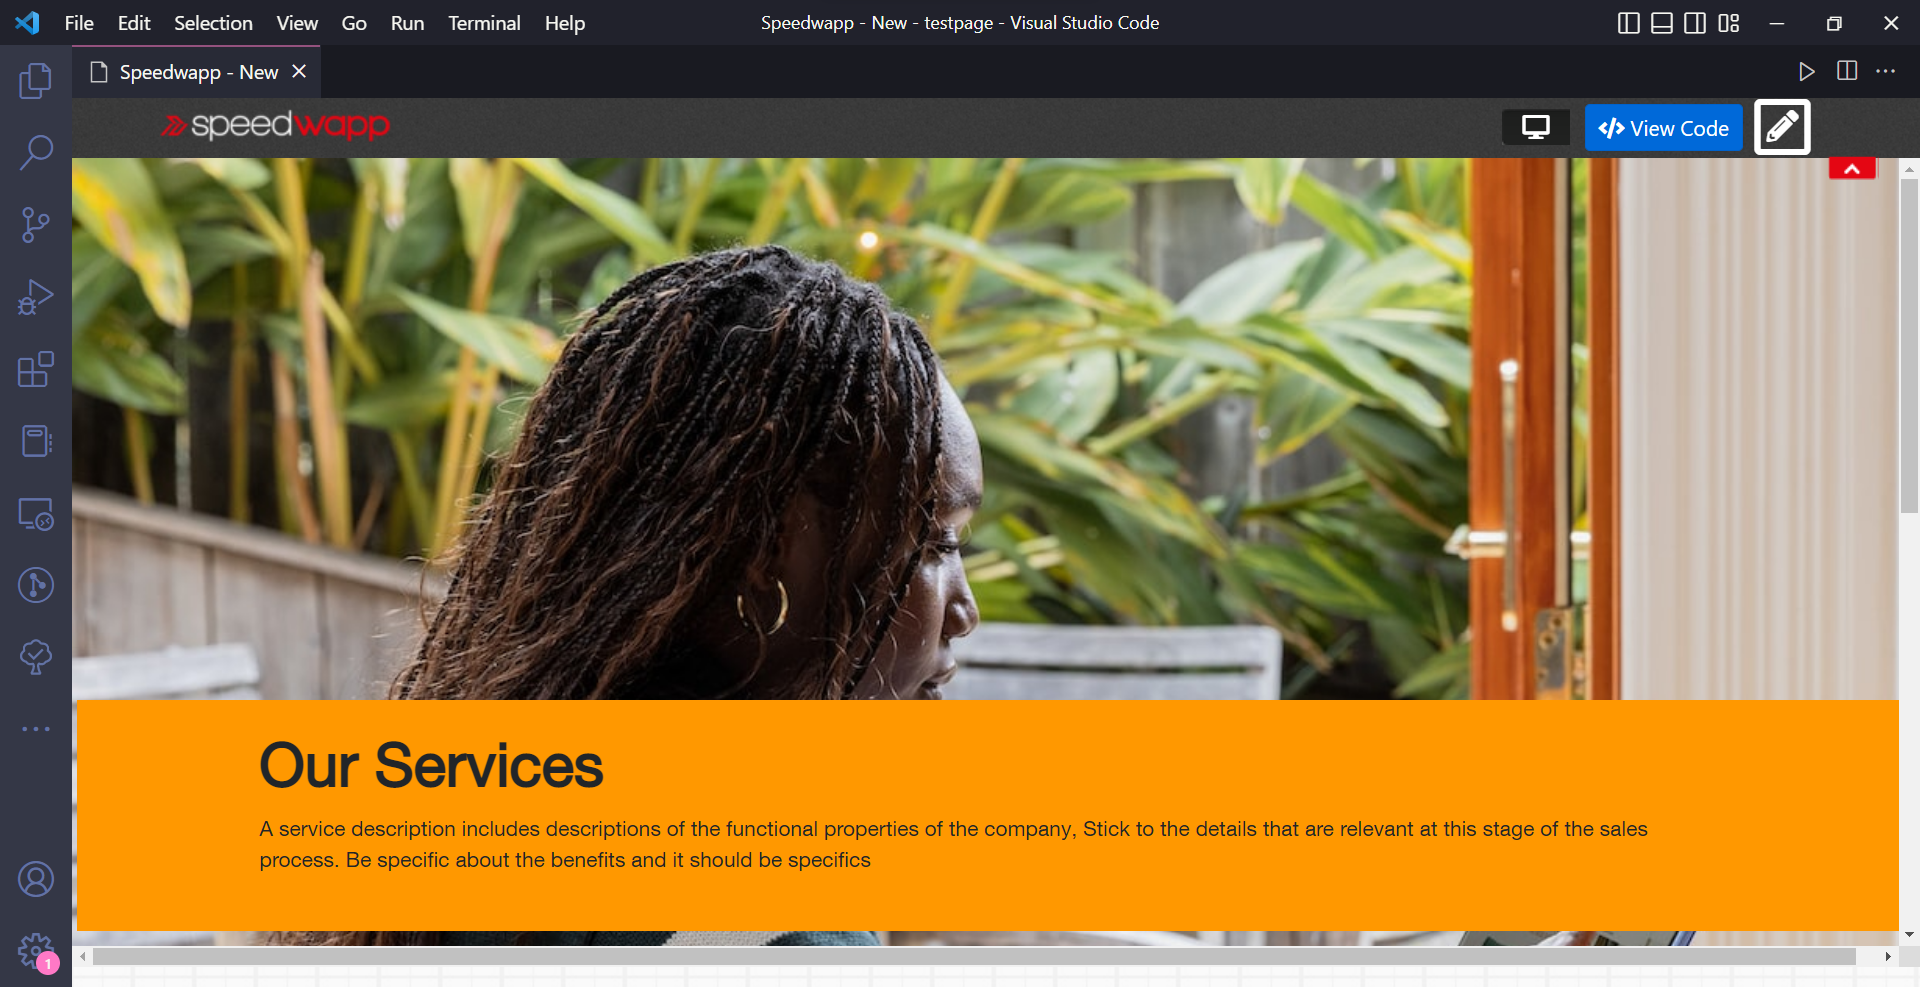
- Now I want to change the font style and size of the services paragraph so click on that component and in the above you will see an option to select a font and size once you enter the values where the changes will be live.

- Now let’s say I want to edit the content of the below section so click on the text and write whatever you want
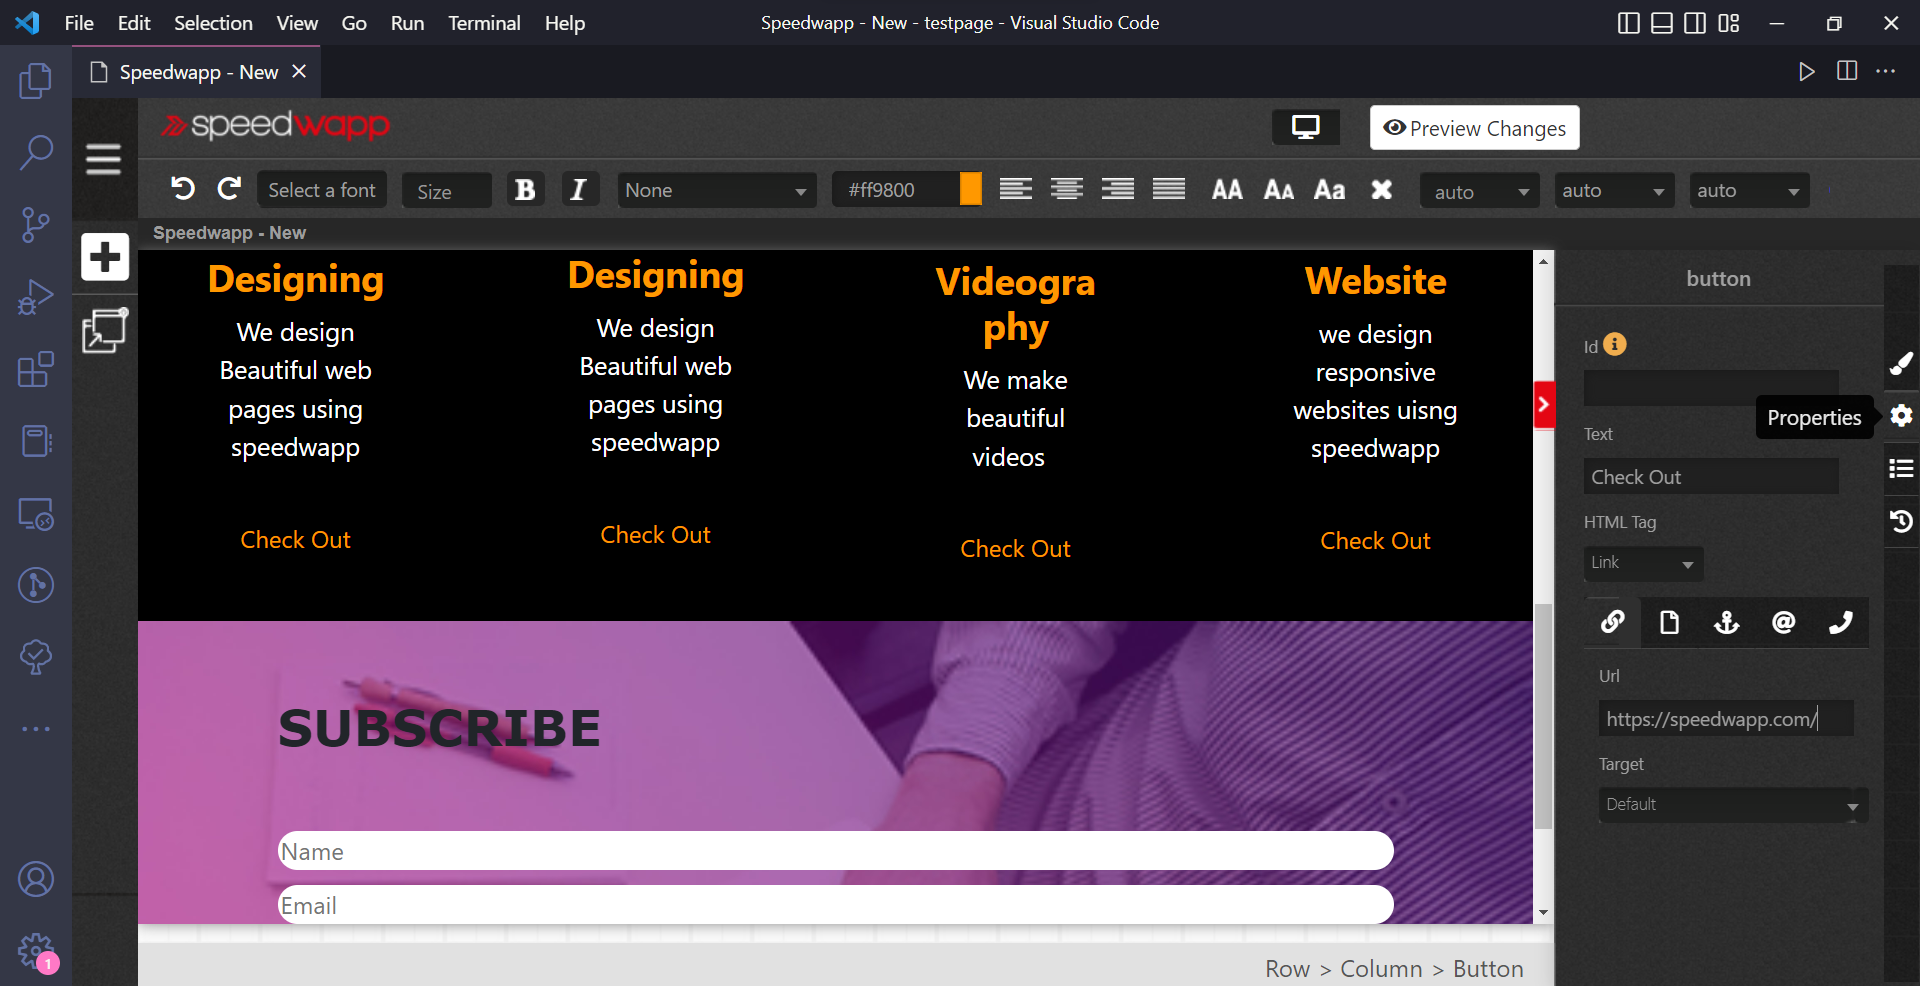
- Now let’s add links to these checkout buttons so click on them and in the right side panel click on the properties and there select Link under the HTML tag section and finally, paste your links there

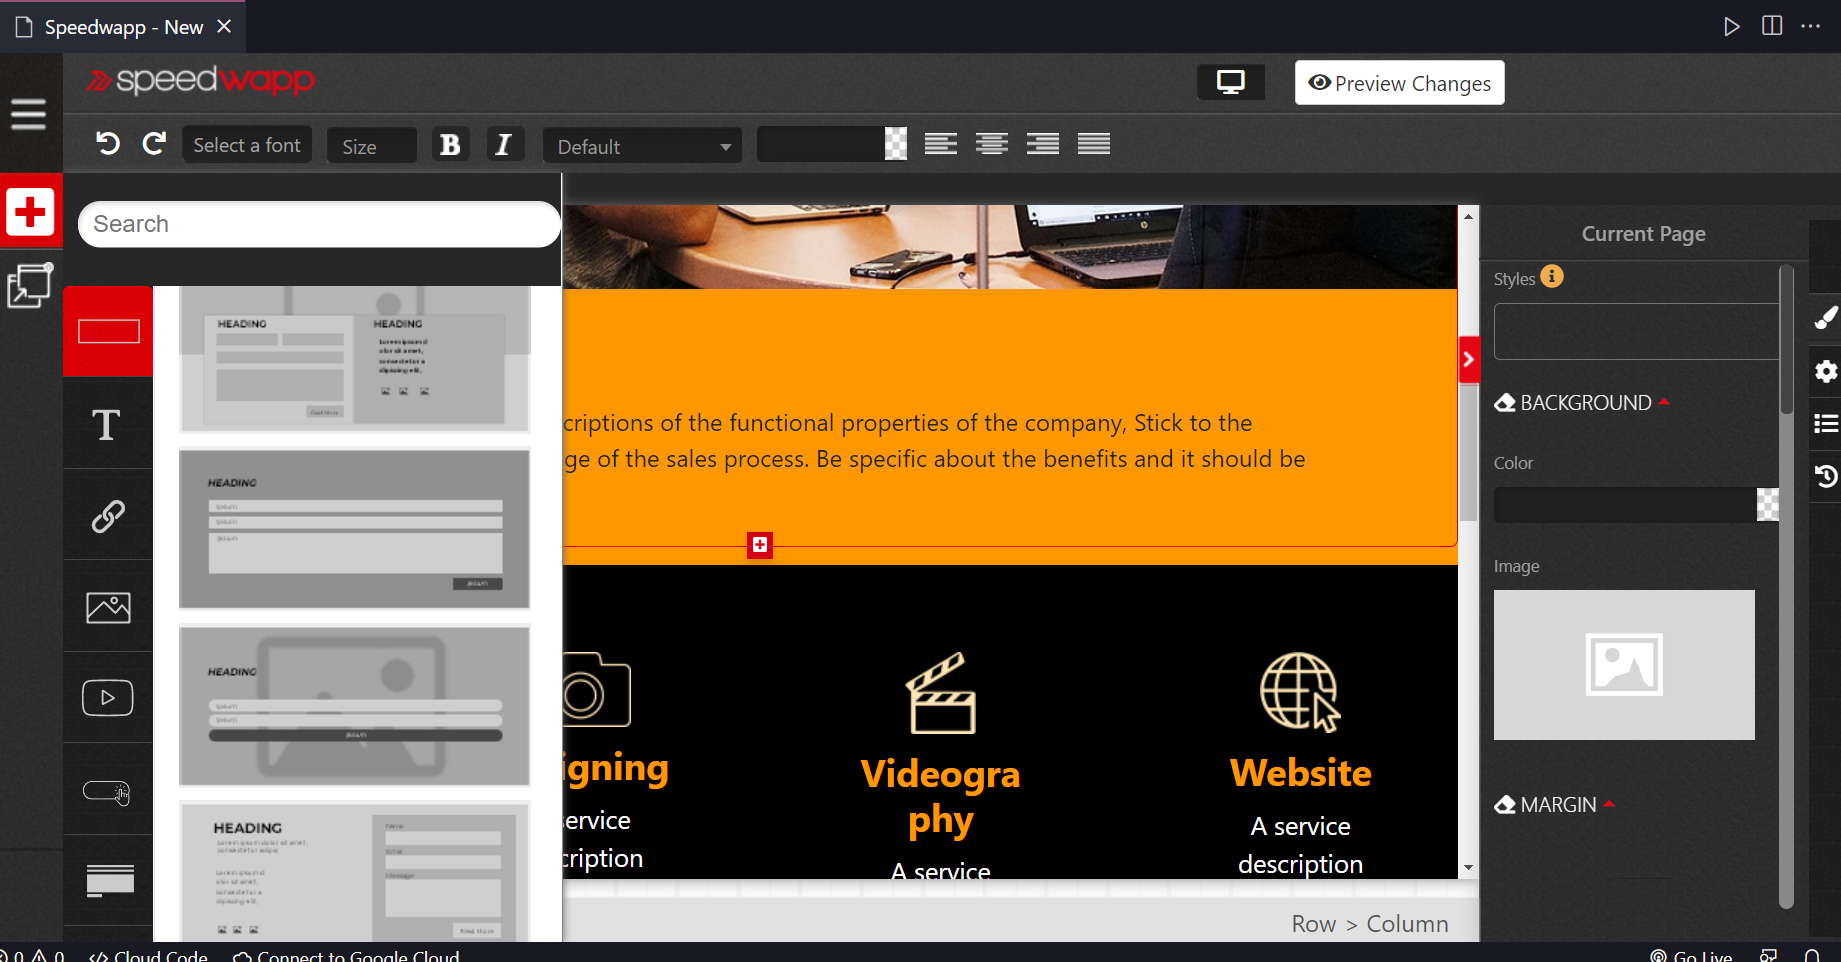

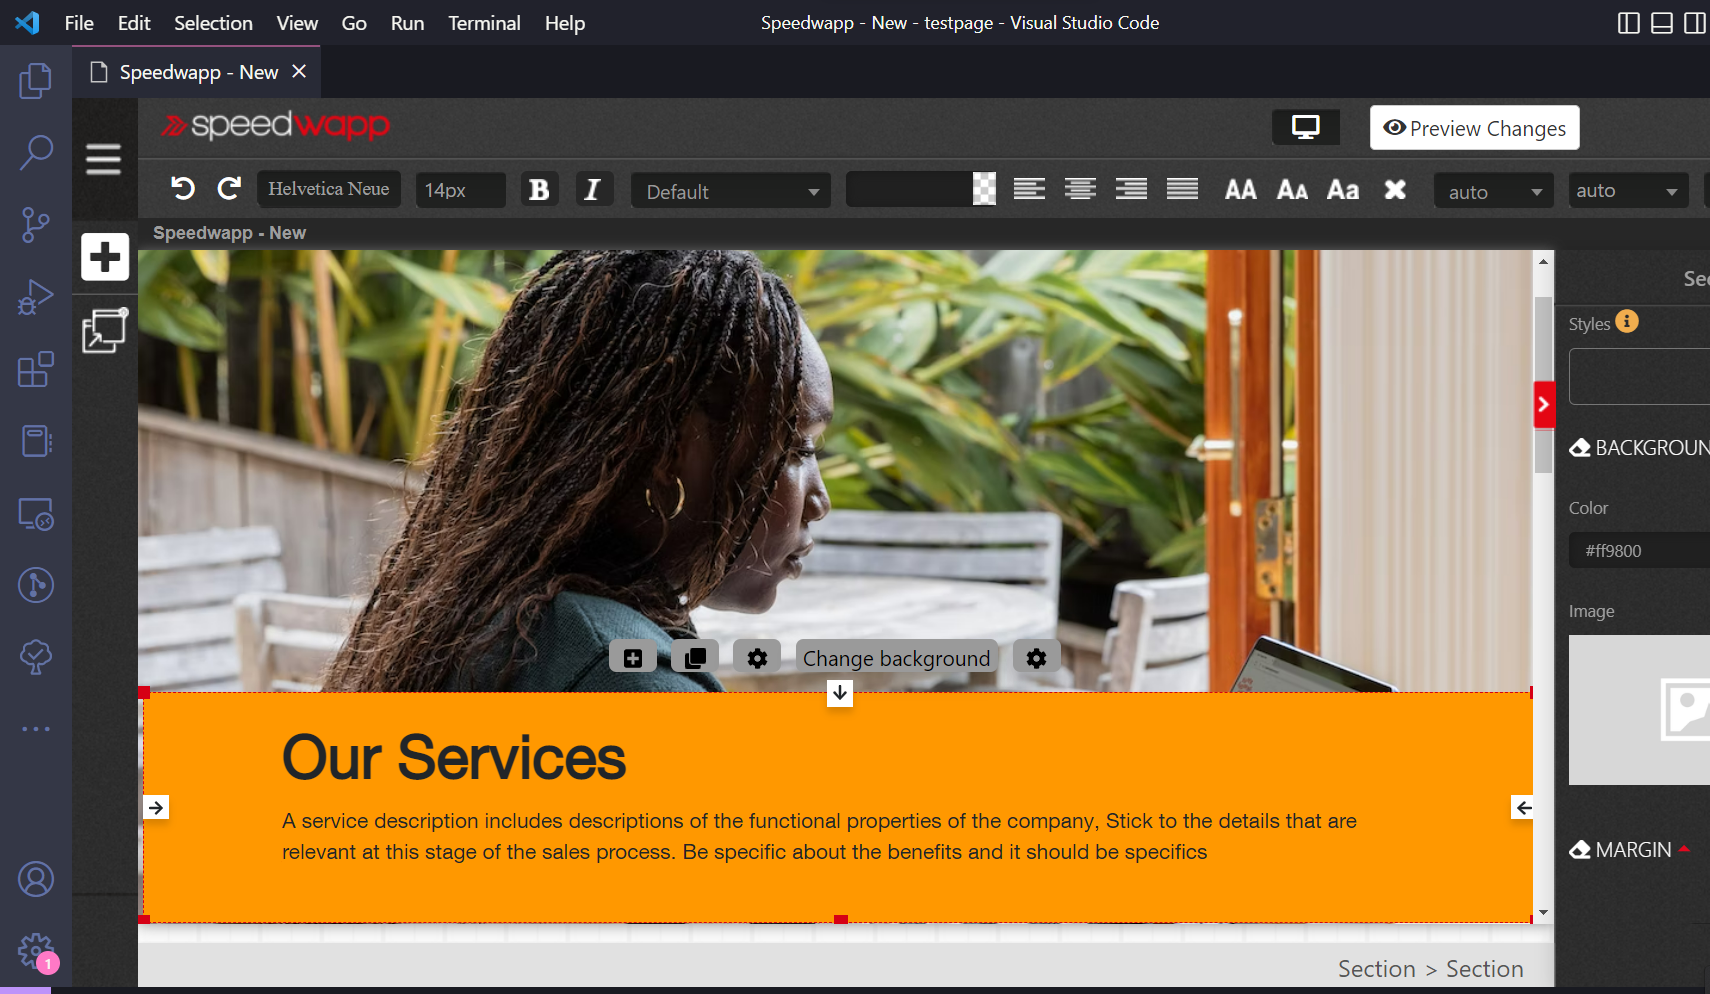
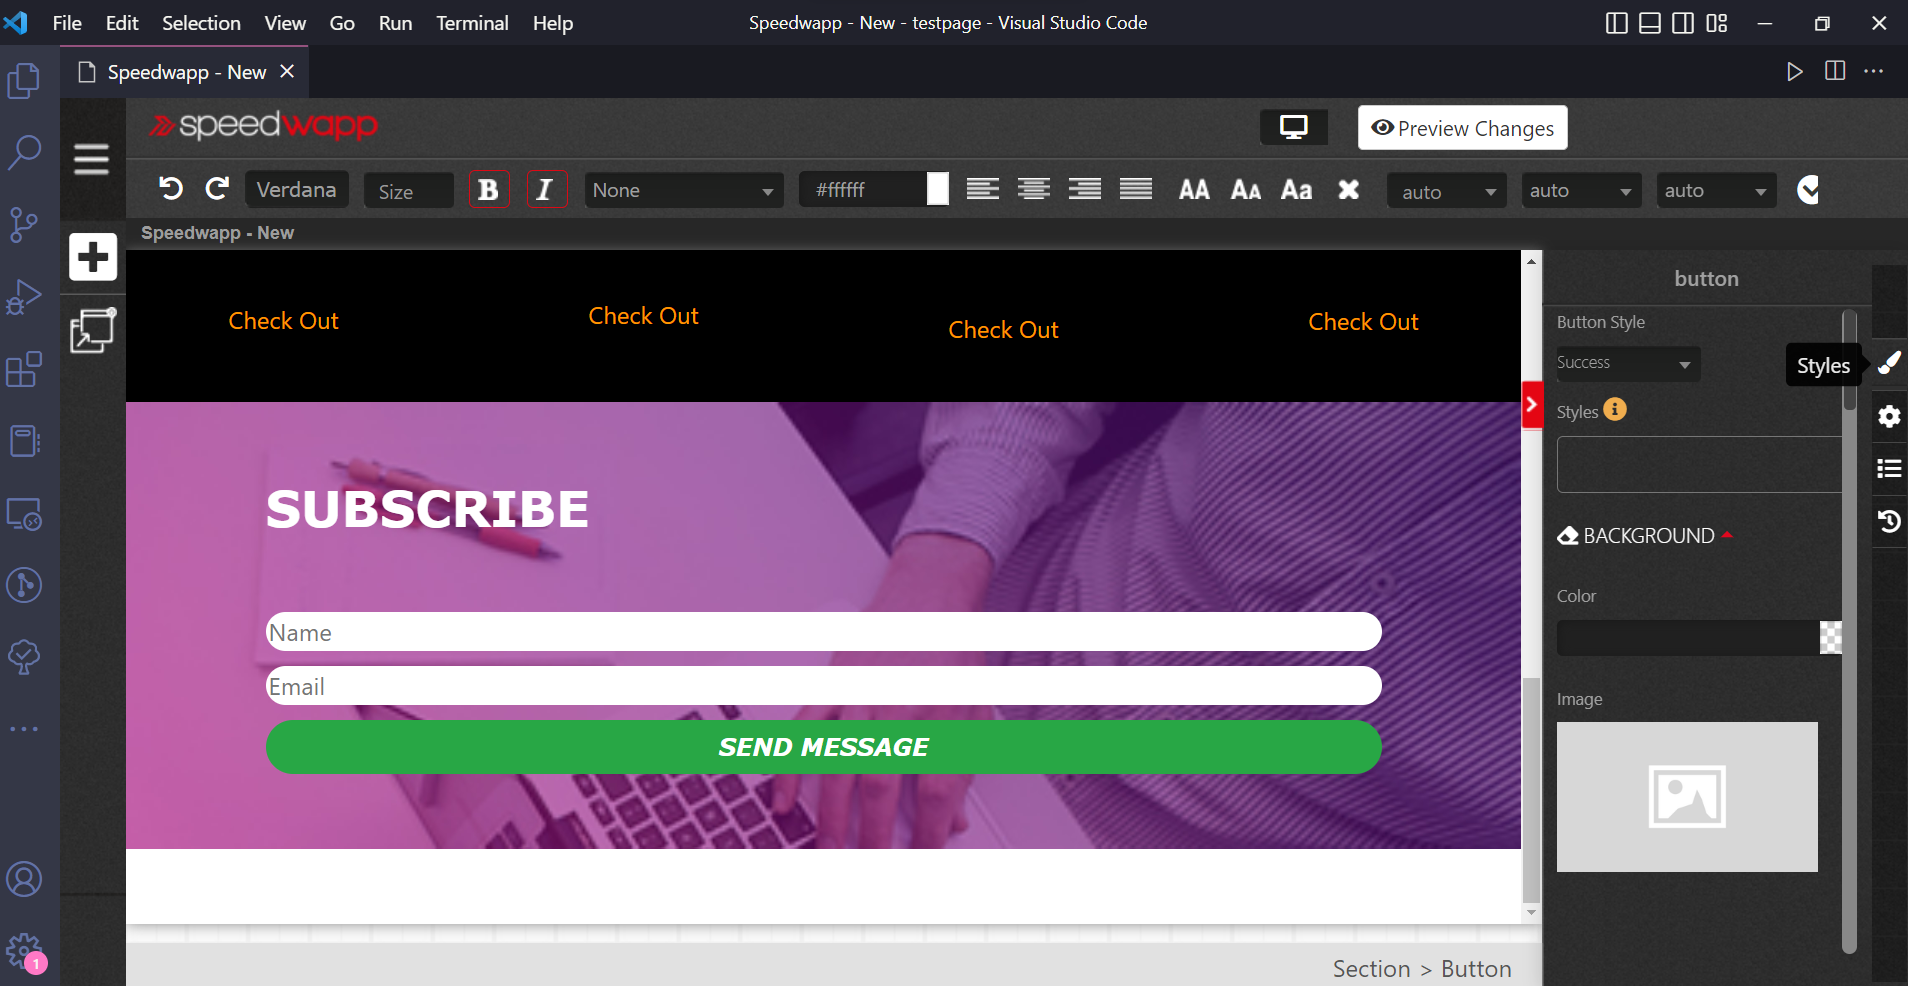
Now let’s edit the last section I want the button colour to be green so will click on that and side on styles on the left and there will change the button style to success.
So finally our landing page is ready now let’s deploy it to netlify.
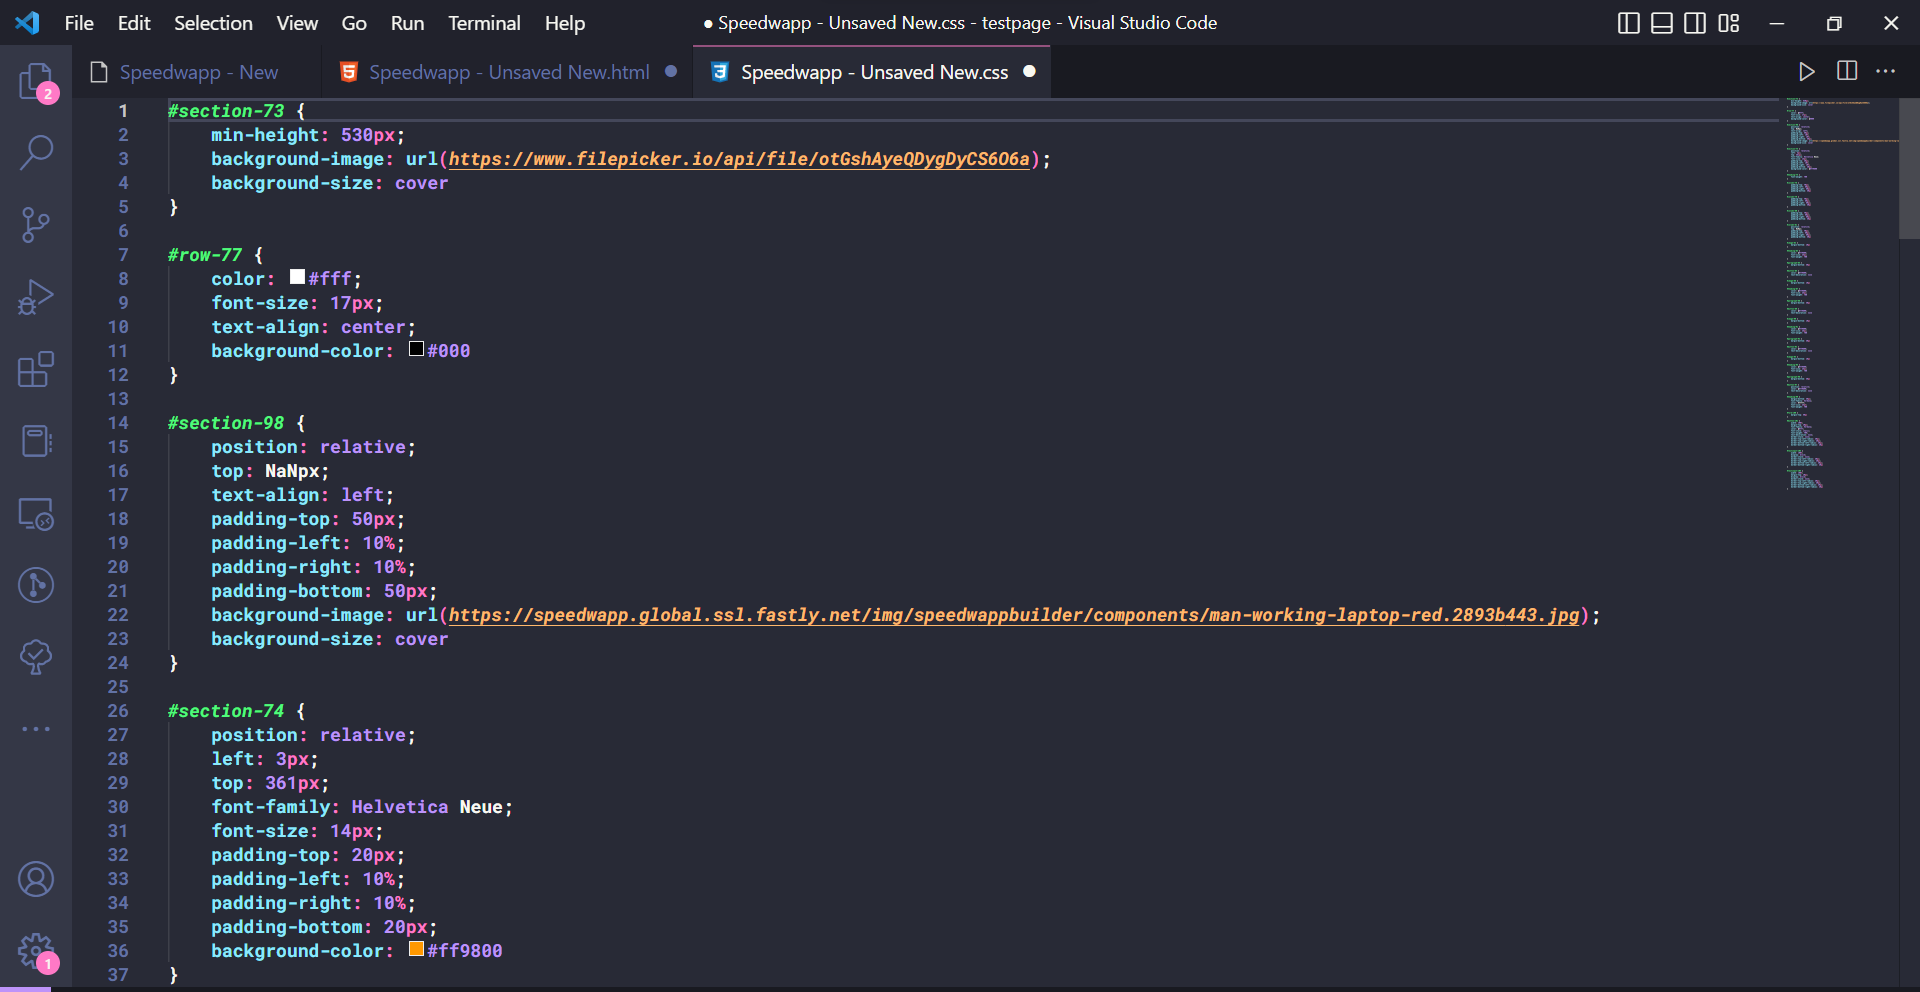
Exporting code & customizations
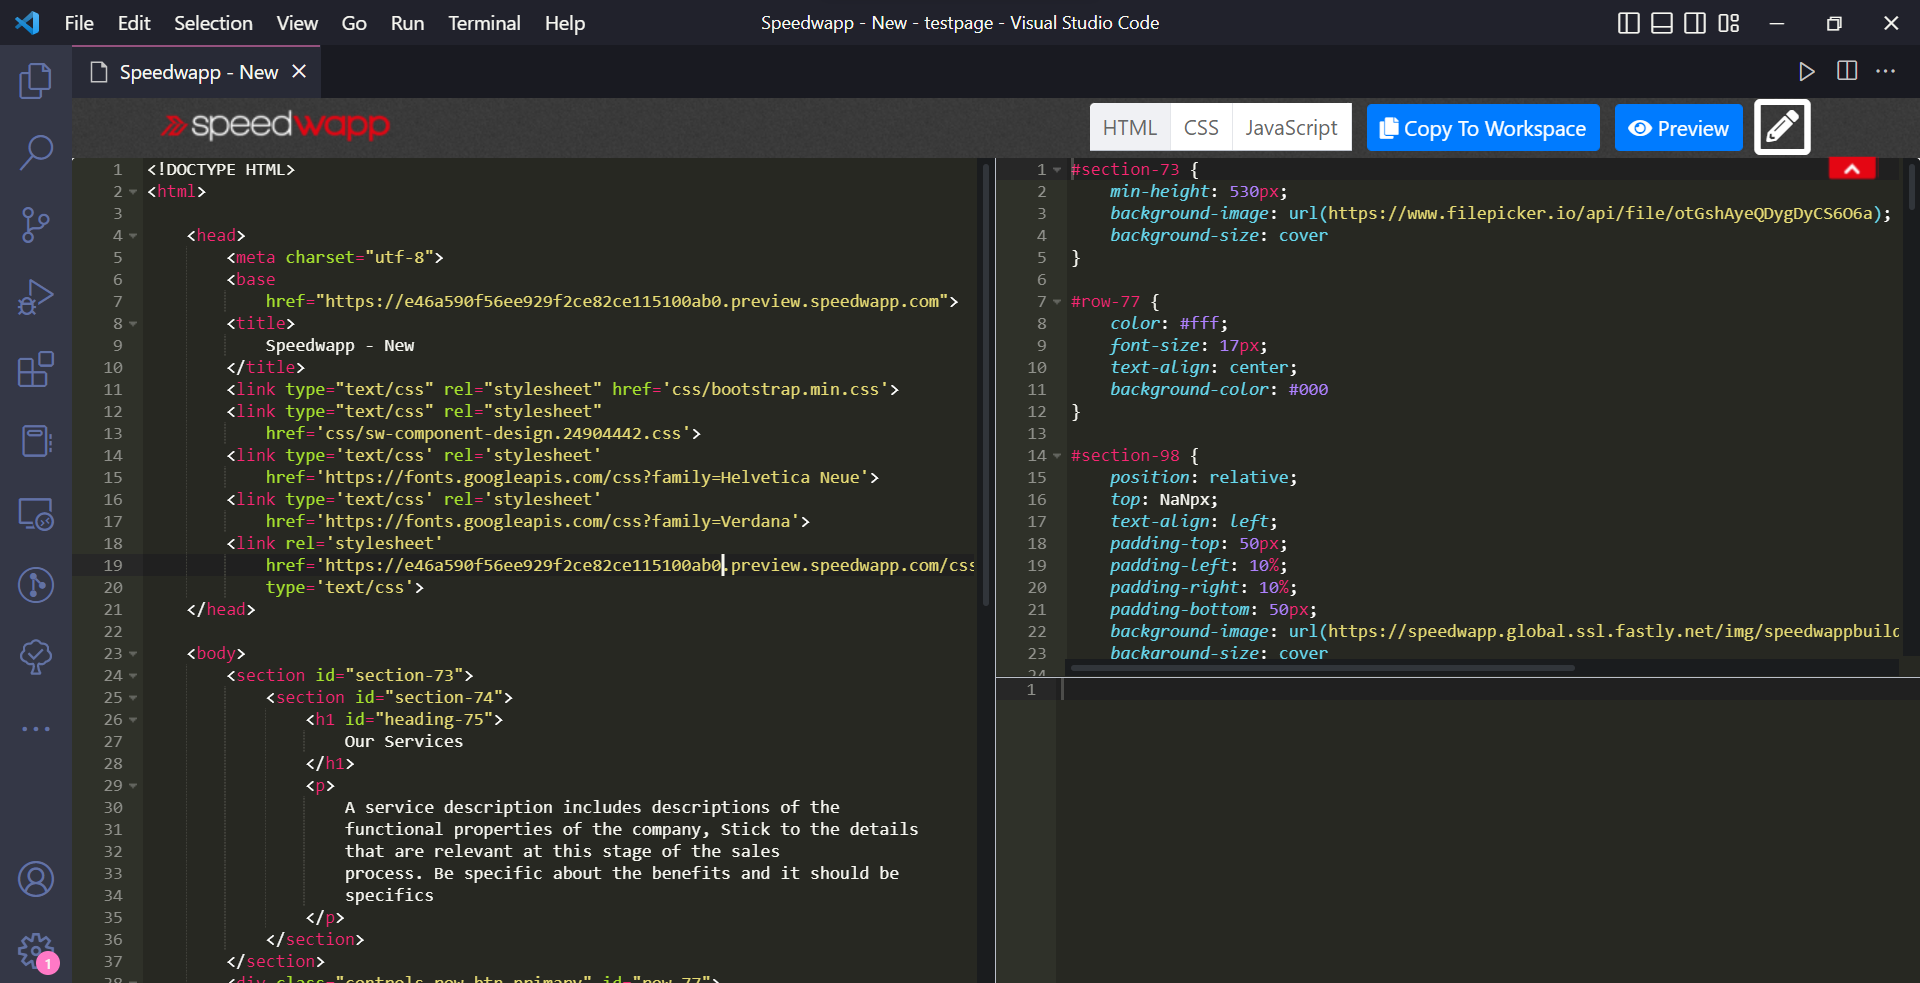
- Click on preview changes at the top and then click on view code Here you will see the full code of the beautiful webpage which we just made using speedwapp vs code extension. Now click on copy to workspace

- Now you will see the automatically generated code files Now move the code to a new folder and upload it to a GitHub repository
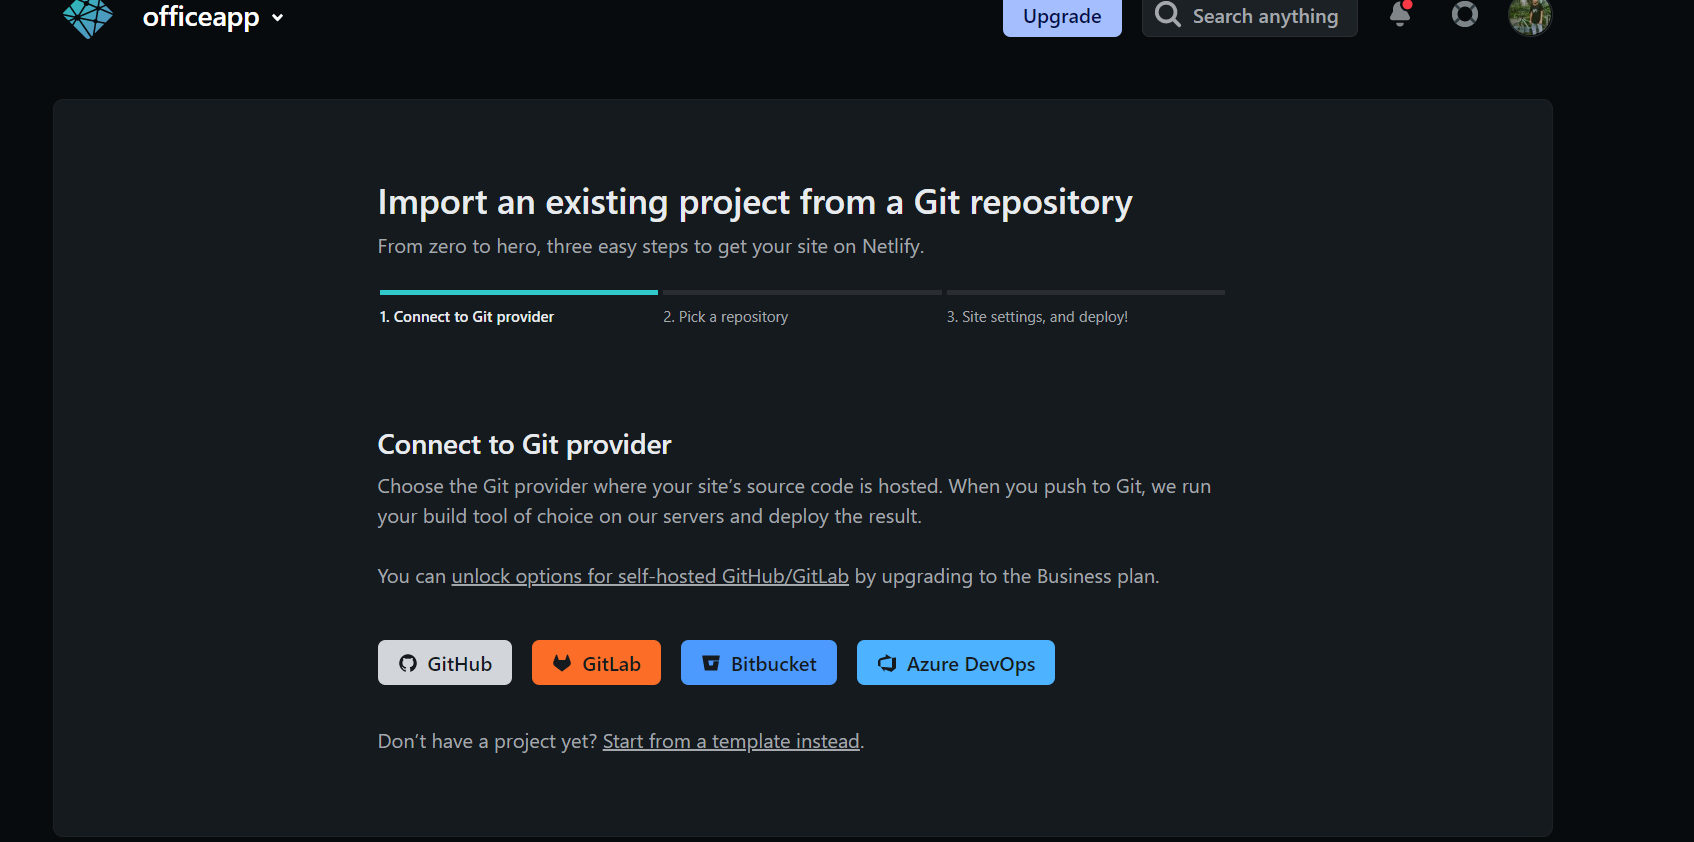
- Once you are done uploading the code head over to your netlify dashboard and click on add a site select the existing project and choose GitHub provider

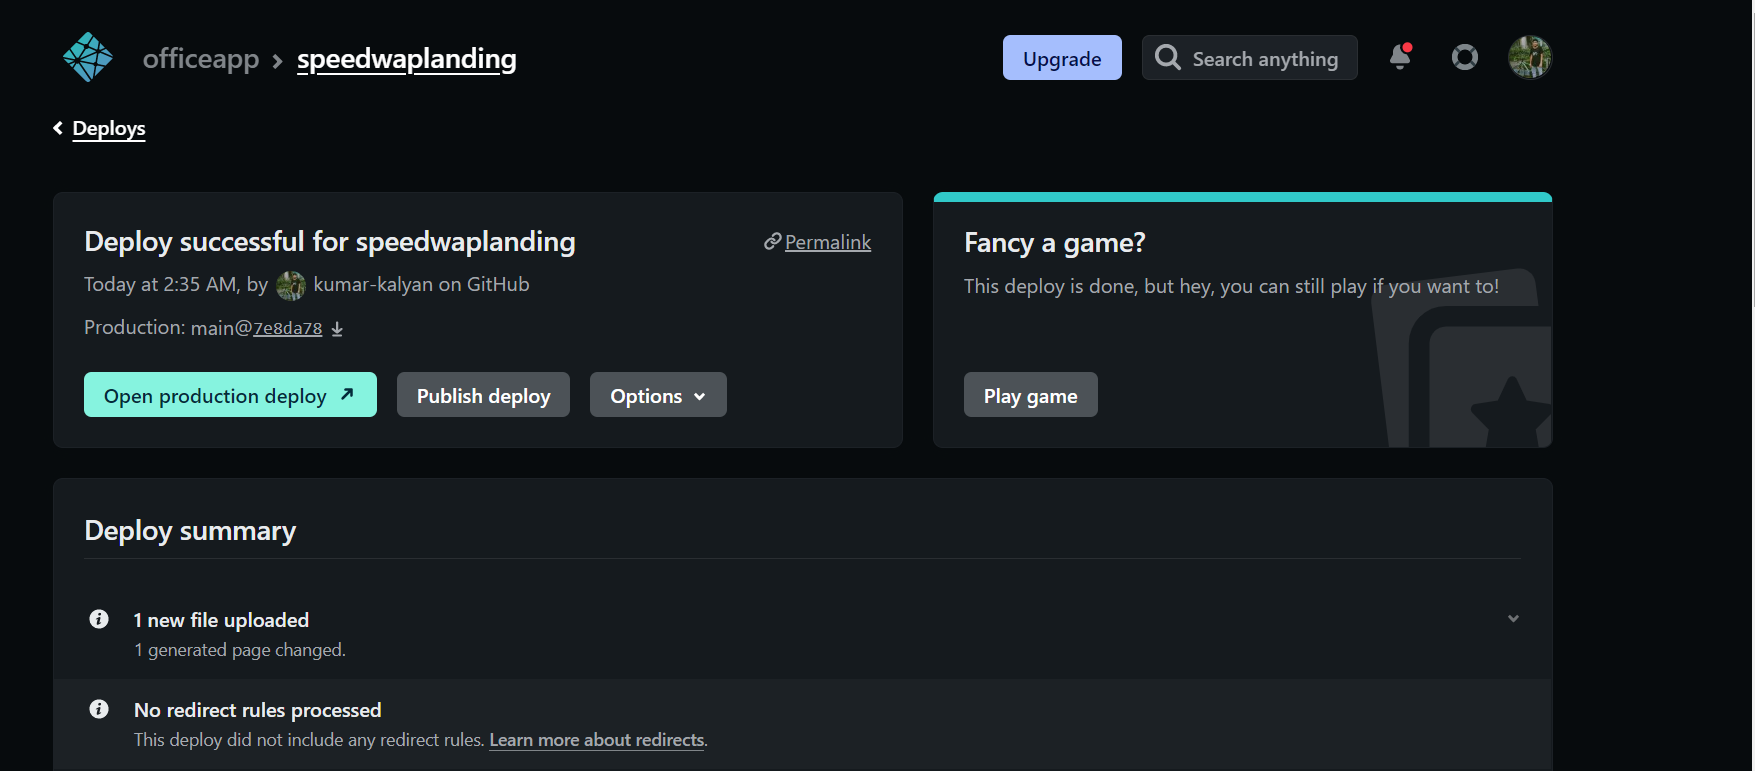
- Now select your repository and click on deploy site
 Check out my site here https://speedwaplanding.netlify.app/ GitHub Repository https://github.com/kumar-kalyan/speedwapp-landingpage
Visual Studio Code как создать структуру html?
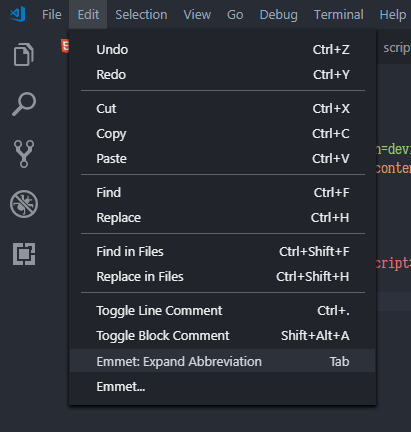
После саблайма очень непонятно как работать с вижуал. В сабе был эммет и для создания структуры нужно было нажать ! и таб. Для вижуал я установила много плагинов по рекомендациям, но вообще не понимаю как ими пользоваться. не срабатывает !таб, по видео вообще не понимаю как создается структура html в вижуал коде.
! + Tab в VSCode работает из коробки, переустановите его, и не ставьте плагины если вам они не нужны. Рекомендации не слушайте, это просто всего лишь рекомендации. Расширение файла в котором вы собрались писать код, должно быть html, но и в саблайм точно также, не будет работать emmet пока не задашь расширение

Никогда бы не подумал — но столкнулся с этой же проблемой.
Весь остальной emmet работает нормально.

Версия: 1.69.1 (user setup)
Фиксация: b06ae3b2d2dbfe28bca3134cc6be65935cdfea6a
Дата: 2022-07-12T08:21:24.514Z
Electron: 18.3.5
Chromium: 100.0.4896.160
Node.js: 16.13.2
V8: 10.0.139.17-electron.0
ОС: Windows_NT x64 10.0.22000
nkknnkknnkkn, да да это был баг одной из версий VSCode. Его быстренько пофиксили и выпустили обновление.


toradorra, вы точно vscode установили?
я перенесла свой проект из саблайма в код, в нем все плагины работают. но если я создаю новый файл, то ничего не работает
EYPPNM, а я не говорил что нету я сказал что в то время когда я его установил не было . на тот момент не было ..я устанавливал отдельно

EYPPNM, Сорян . ошибся . на тот момент не было . я им пользуюсь около 8 лет . с первой установки ..только обновляется и всё
Максим Ленский, я бы переставил начисто вин10, есть вероятность что начнет пошустрей работать. лицензия ваша подтянется.
Для быстрого создания html структуры нужно использовать сочетания клавиш сразу же (в течение 3-5 секунд) после написания ! или слова html. Эти сочетания клавиш могут быть таковы — «!» «html» + Tab; Enter . В кавычках показано то, что у вас должно быть введено в редакторе для быстрого создания
После создания файла в редакторе, сохраните его в вашей среде разработки локлаьном сервере, можно в формате php, короче говоря в вэб формате. Дальше нажимаете все тоже что написали ! и таб и будет вам счастье.
Войдите, чтобы написать ответ
Почему не запускается код?
Почему не переключается версия node через nvm в VS Code?
[VS Code] — How to Create a New HTML Template in VS Code
Learn how to create a new HTML template in VS Code with just a few simple steps. Follow along with our step-by-step guide.
👩💻 Technical question
How to create a new html template in VS Code?
More coding questions about VS Code
👩💻 Technical question
What does Prettier utility for VS Code?
👩💻 Technical question
How do i move my code from codepen to vscode
👩💻 Technical question
👩💻 Technical question
why does a listing directory is showing when I go live with my code on vs code ?
👩💻 Technical question
How do I install prettier on my Windows computer? I followed the link provided but got lost along the way.
👩💻 Technical question
how do i set prettier as a default for editor
👩💻 Technical question
how to change all class to className, all at once
👩💻 Technical question
What happens when I close the web terminal window/tab
👩💻 Technical question
How can I interact with the sandbox?
👩💻 Technical question
hi, I want to open a file in vs but i'm unable to link it to chrome how do I do that
👩💻 Technical question
how do i take a screen shot on a mac
👩💻 c Code instructions
* We have declared some functions in "timer.c" and corresponding function * prototypes in "timer.h": * void timer_init(void); // Initialise TCB0 to produce interrupts every 1ms * * Your task for Ex 9.3 is to complete the ISR declared in "timer.c" to display * simultaneously the first digit of your student number on the LHS of the 7-segment * display and the second digit of your student number on the RHS of this display (only * after timer_init() is called). * * TIP: Every time a new interrupt occurs you should swap which digit you are displaying. * * TIP: You will want to declare a global or static variable so you know which digit to * display on each iteration. * * TIP: You might like to refer to the following truth table for 7-segment digit mapping. * (remember to check which output Q0..Q6 maps to which segment on the QUTy) * * ABCDEFG * 0: 0000001 * 1: 1001111