- Установка PHP в Ubuntu
- Установка PHP в Ubuntu
- 1. Версия по умолчанию — 7.4
- 2. Устаревшая версия — 5.6
- 3. Новая версия — 8.0
- Установка расширений PHP
- Выбор версии PHP по умолчанию
- Выводы
- How to install and configure PHP
- Prerequisites
- Install PHP
- Install optional packages
- Configure PHP
- Test your setup
- Further reading
- How To Install PHP On Ubuntu 20.04 or 22.04
- Installing PHP on Ubuntu
- 1. Install PHP with Apache on Ubuntu
- 2. Install PHP with Nginx on Ubuntu
- Installing PHP Modules on Ubuntu
- How to Uninstall PHP on Ubuntu
Установка PHP в Ubuntu
PHP — это очень популярный скриптовый язык программирования с открытым исходным кодом, который часто используется для разработки веб-сайтов и веб-приложений. PHP означает рекурсивный акроним от PHP Hypertext Processor. Скрипты выполняются на стороне сервера и могут находиться как в отдельных файлах, так и быть встроенными в HTML.
На данный момент официально поддерживается три версии PHP — это 5.6, 7.4 и 8. Предыдущие версии больше не получают обновлений безопасности. В этой статье мы рассмотрим как выполняется установка PHP Ubuntu. Будем устанавливать только поддерживаемые версии. Кроме того, рассмотрим как установить расширения для Apache, а также изменить версию по умолчанию.
Установка PHP в Ubuntu
1. Версия по умолчанию — 7.4
PHP версии 7.4 поставляется в официальных репозиториях Ubuntu, поэтому если вы хотите эту версию, то можете очень просто установить ее с помощью команды apt. Сначала смотрим информацию:
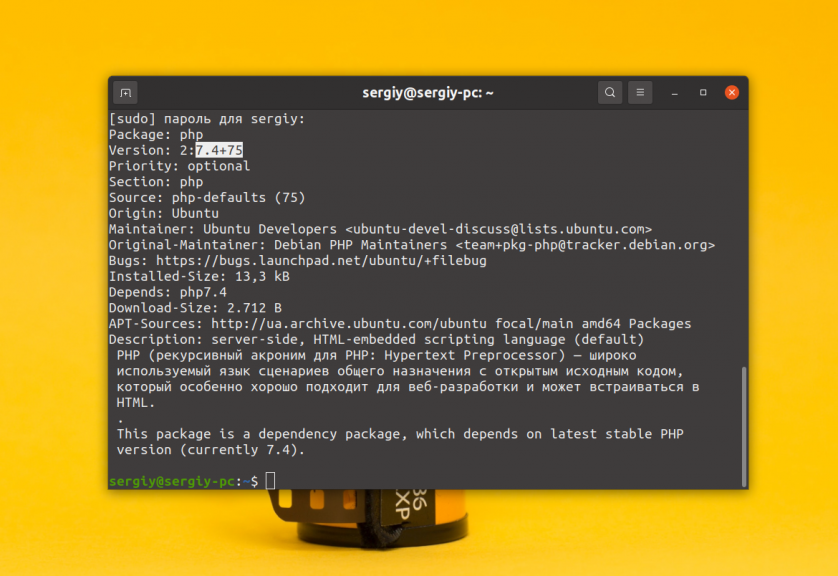
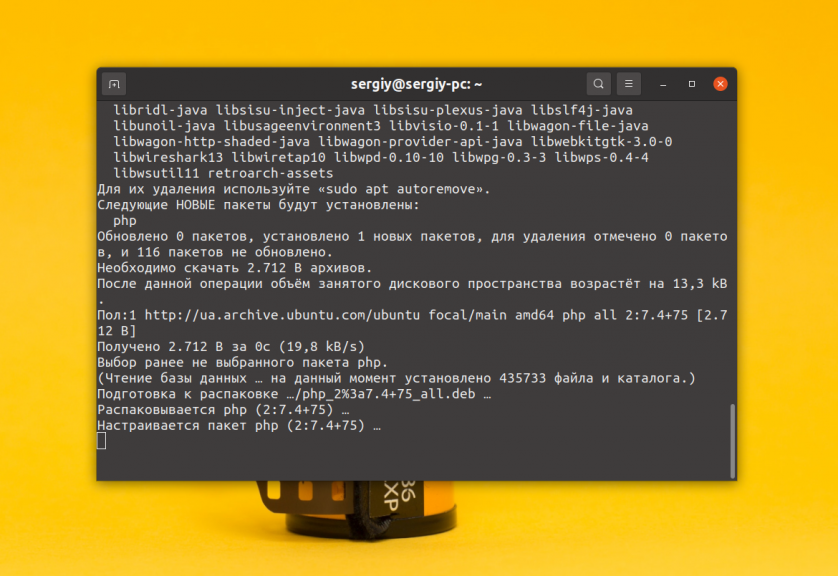
Теперь для установки версии из репозиториев наберите:
Для того чтобы интерпретатор php работал с Apache необходимо установить ещё этот пакет:
sudo apt install libapache2-mod-php
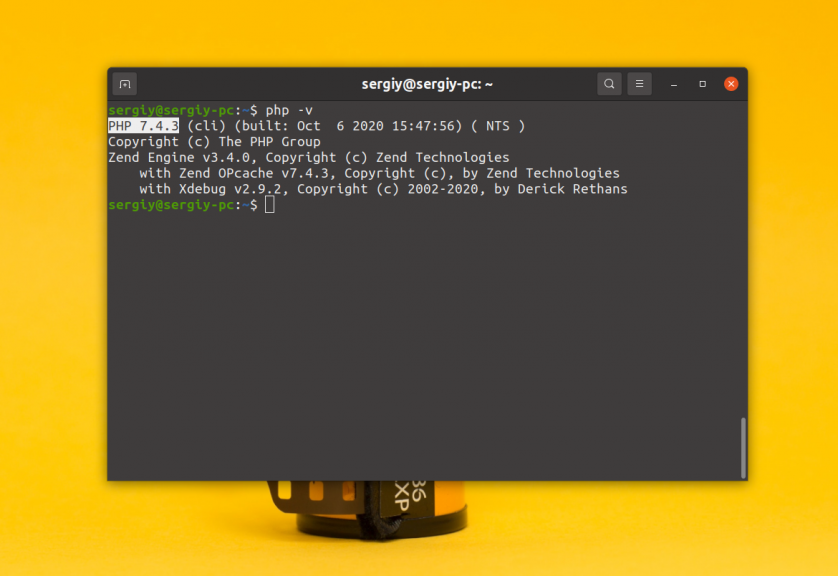
После этого можно посмотреть версию php в терминале:
2. Устаревшая версия — 5.6
Если вам нужна другая версия PHP, например, 5.6, то вам придется добавить в систему репозиторий PPA. Сначала необходимо установить зависимости:
sudo apt install python-software-properties
Затем для добавления PPA репозитория выполните:
sudo add-apt-repository ppa:ondrej/php
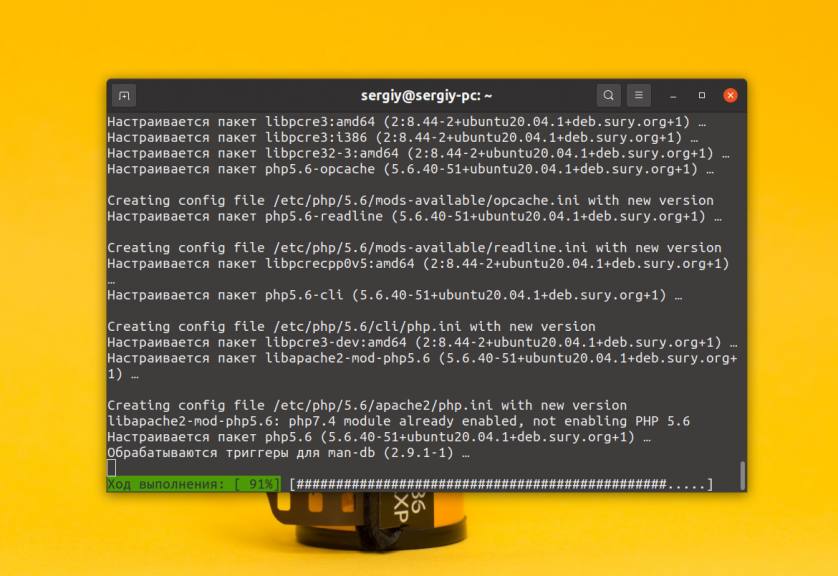
Теперь вы можете установить php ubuntu нужной вам версии. В данном случае 5.6. Для Apache выполните такие команды:
sudo apt install php5.6 libapache2-mod-php5.6
Затем можно смотреть версию:
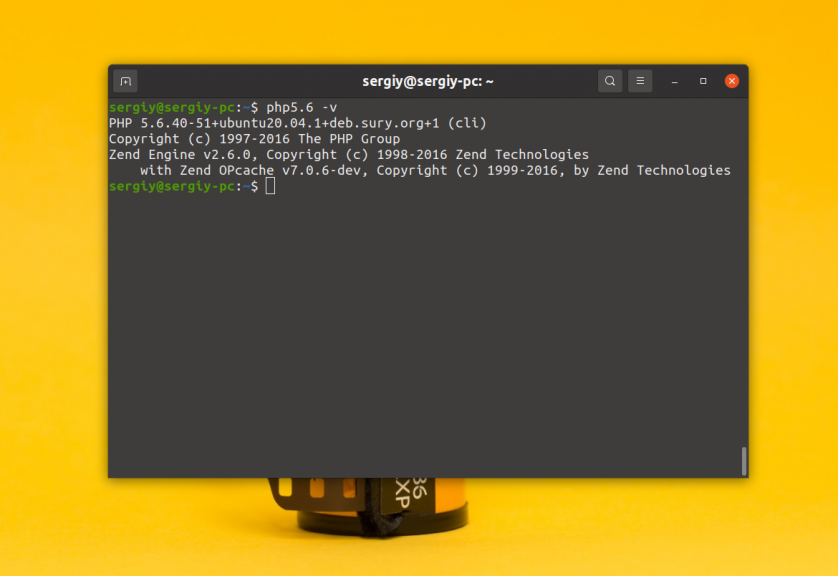
Обратите внимание, что установленная версия PHP не конфликтует с версией из официальных репозиториев. Обе версии могут существовать в системе и между ними можно переключаться.
3. Новая версия — 8.0
На момент написания статьи, версия PHP 8.0 вышла относительно недавно и в официальных репозиториях LTS релиза Ubuntu её нет. В этой версии было много улучшений и исправлений и если вы хотите её попробовать, то можете установить из того же самого PPA:
sudo add-apt-repository ppa:ondrej/php
Затем, как и в предыдущем пункте необходимо указать версию php, которая вам нужна в команде установки:
sudo apt install php8.0 libapache2-mod-php8.0
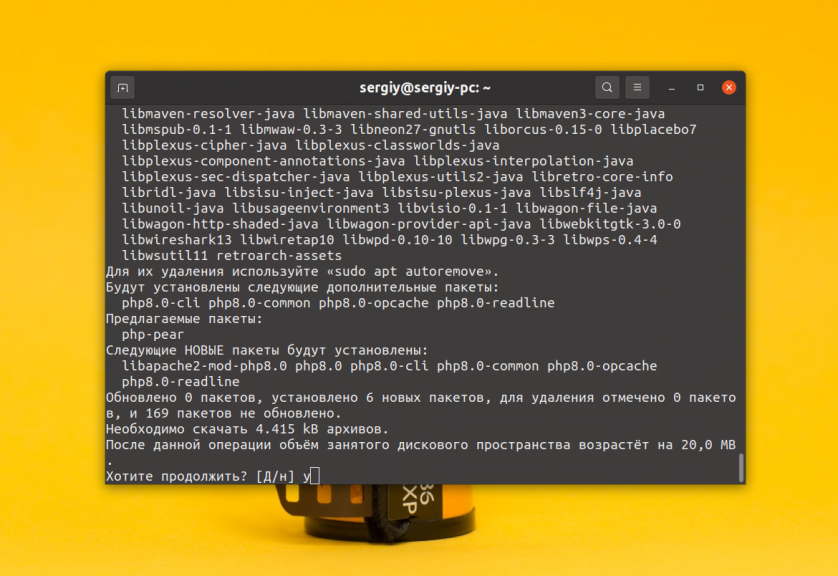
После завершения установки интерпретатор появится в системе:
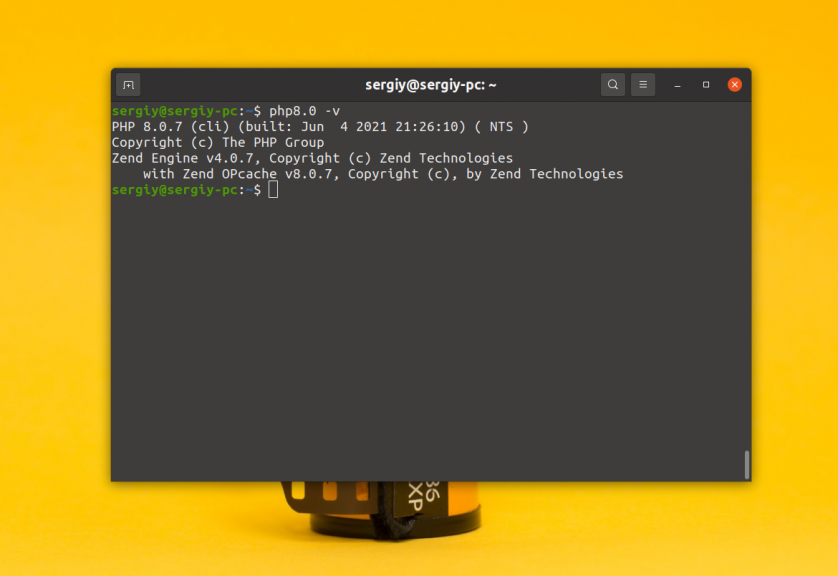
Установка расширений PHP
Не зависимо от того какую версию PHP вы установили, обычно для полноценной работы программ необходимо ещё установить расширения. Вот основные расширения, которые требуются чаще всего:
- php-curl — поддержка библиотеки CURL для отправки сетевых запросов;
- php-memcached — кэширование с помощью Memcache;
- php-mysql — поддержка баз данных MySQL и MariaDB;
- php-pgsql — поддержка PostgreSQL;
- php-gd — обработка графики с помощью библиотеки GD;
- php-imagick — обработка графики с помощью библиотеки ImageMagick;
- php-intl — локализация и интернационализация;
- php-mcrypt — шифрование;
- php-xml — работа с XML файлами и DOM;
- php-zip — работа с ZIP архивами;
- php-mbstring — работа со строками содержащими UTF-8 символы, в том числе и кириллицу.
Для того чтобы установить все эти расширения для версии PHP по умолчанию выполните такую команду:
sudo apt install php-curl php-memcached php-mysql php-pgsql php-gd php-imagick php-intl php-mcrypt php-xml php-zip php-mbstring
Если надо установить расширения PHP для определённой версии, то следует указать эту версию в названии пакета:
sudo apt install php7.4-curl php7.4-memcached php7.4-mysql php7.4-pgsql php7.4-gd php7.4-imagick php7.4-intl php7.4-mcrypt php7.4-xml php7.4-zip php7.4-mbstring
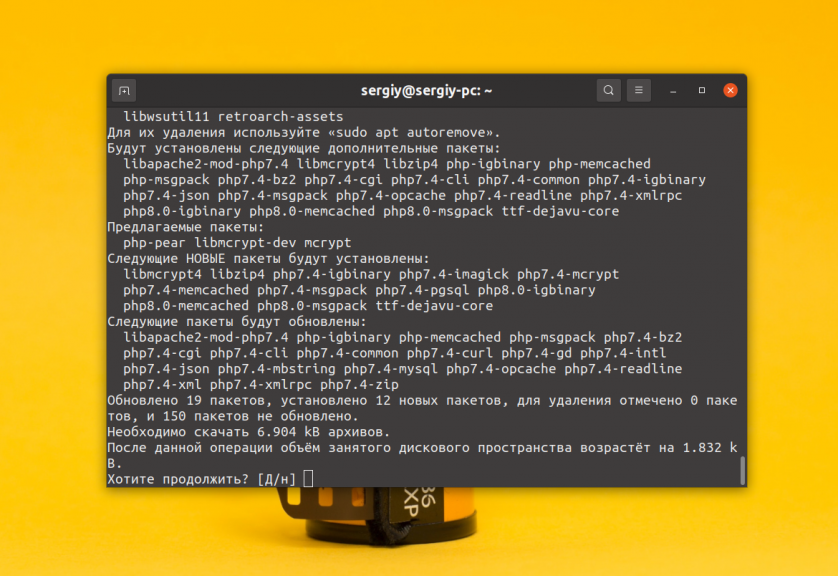
Аналогично можно установить расширения для PHP 5.6 или 8.0.
Выбор версии PHP по умолчанию
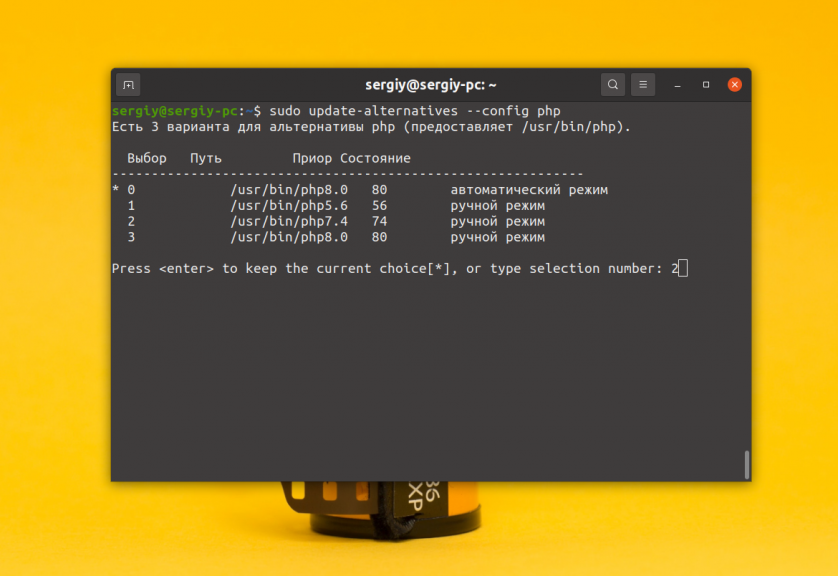
Вы можете выбрать какую версию php нужно использовать по умолчанию с помощью утилиты update-alternatives. Сначала смотрим доступные версии:
sudo update-alternatives —config php
После этого следует ввести номер версии, которую вы хотите использовать по умолчанию:
Или можно сразу установить php ubuntu по умолчанию:
sudo update-alternatives —set php /usr/bin/php5.6
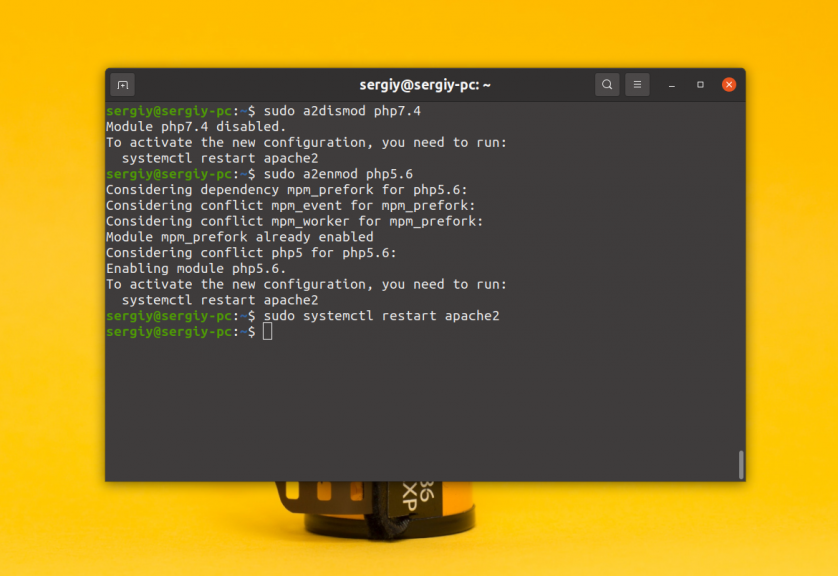
Чтобы используемая версия обновилась в Apache нужно подключить правильный модуль и перезагрузить веб-сервер. Например, для того чтобы отключить 7.4 и включить 5.6 выполните:
sudo a2dismod php7.4
sudo a2enmod php5.6
sudo systemctl restart apache2
Установка php 8 Ubuntu выполняется так же. Теперь вы знаете как переключить версию php Ubuntu. Установка и настройка PHP вместе с Nginx отдельная обширная тема и она описана в статье про настройку PHP-FPM.
Выводы
В этой статье мы рассмотрели как выполняется установка PHP 8 ubuntu 20.04 и других версиях системы. Теперь вы знаете как установить не только PHP 8, но и другие поддерживаемые версии. Как видите, это очень просто, вы можете получить нужную версию PHP буквально в несколько кликов. Надеюсь, эта информация была вам полезной.
Обнаружили ошибку в тексте? Сообщите мне об этом. Выделите текст с ошибкой и нажмите Ctrl+Enter.
How to install and configure PHP
PHP is a general-purpose scripting language well-suited for Web development since PHP scripts can be embedded into HTML. This guide explains how to install and configure PHP in an Ubuntu System with Apache2 and MySQL.
Prerequisites
Before installing PHP you should install Apache (or a preferred web server) and a database service such as MySQL.
- To install the Apache package, please refer to our Apache guide.
- To install and configure a MySQL database service, refer to our MySQL guide.
Install PHP
PHP is available on Ubuntu Linux, but unlike Python (which comes pre-installed), must be manually installed.
To install PHP – and the Apache PHP module – you can enter the following command into a terminal prompt:
sudo apt install php libapache2-mod-php Install optional packages
The following packages are optional, and can be installed if you need them for your setup.
- PHP-CLI
You can run PHP scripts via the Command Line Interface (CLI). To do this, you must first install the php-cli package. You can install it by running the following command:
sudo apt install php-mysql sudo apt install php-pgsql Configure PHP
If you have installed the libapache2-mod-php or php-cgi packages, you can run PHP scripts from your web browser. If you have installed the php-cli package, you can run PHP scripts at a terminal prompt.
By default, when libapache2-mod-php is installed, the Apache2 web server is configured to run PHP scripts using this module. First, verify if the files /etc/apache2/mods-enabled/php8.*.conf and /etc/apache2/mods-enabled/php8.*.load exist. If they do not exist, you can enable the module using the a2enmod command.
Once you have installed the PHP-related packages and enabled the Apache PHP module, you should restart the Apache2 web server to run PHP scripts, by running the following command:
sudo systemctl restart apache2.service Test your setup
To verify your installation, you can run the following PHP phpinfo script:
You can save the content in a file – phpinfo.php for example – and place it under the DocumentRoot directory of the Apache2 web server. Pointing your browser to http://hostname/phpinfo.php will display the values of various PHP configuration parameters.
Further reading
- For more in depth information see the php.net documentation.
- There are a plethora of books on PHP 7 and PHP 8. A good book from O’Reilly is Learning PHP, which includes an exploration of PHP 7’s enhancements to the language.
- Also, see the Apache MySQL PHP Ubuntu Wiki page for more information.
How To Install PHP On Ubuntu 20.04 or 22.04
PHP stands for Hypertext Preprocessor, and it’s a script-based server-side programming language.
PHP helps automate various server tasks. It handles tasks such as dynamic content, database requests, and data preprocessing/display.
Read our tutorial on how to install PHP on Ubuntu 20.04 or 22.04 including integration with Apache and Nginx.
- A Linux system running Ubuntu 20.04 or 22.04
- Access to an Ubuntu user account with sudo privileges.
- Access to a command line/terminal window (Ctrl+Alt+T).
- A running web server (Apache or Nginx).
Installing PHP on Ubuntu
Like many developer tools, PHP has several different release versions. At the time of writing, PHP 7.4. and 8.1 are the currently supported and most used versions of the software.
The following command installs PHP using the apt package manager:
On Ubuntu 20.04, the command installs PHP 7.4 while Ubuntu 22.04 installs PHP version 8.1.
If you’re looking to choose the specific version of PHP on either system, follow one of the installation steps below.
1. Install PHP with Apache on Ubuntu
If you are running an Apache web server, install PHP with the Apache module. Below you will find installations for both PHP 7.4 and PHP 8.1.
1. Ensure you are using the latest repository updates by entering the following command into a terminal window:
sudo apt update && sudo apt upgrade2. Install software-properties-common to help you manage distributions and independent software sources:
sudo apt install software-properties-commonIf the package is already available, continue to the next step.
3. Next, add the ondrej/php PPA which provides different PHP versions for Ubuntu:
sudo add-apt-repository ppa:ondrej/phpAfter the PPA loads, press Enter to confirm adding the repository. The available PHP versions in the PPA are from 5.6 up to 8.2.
4. Update apt to include the new packages:
5. Now you can install specific PHP versions. For example:
Note: The command for installing PHP automatically installs the PHP module for Apache 2. If it fails to do so, run the following command instead:
sudo apt -y install libapache2-mod-php
6. Verify the installation with:
The output displays the PHP version you installed.
If you installed version 7.4, the output appears as in the image below.

If you installed PHP 8.1, the output shows:

2. Install PHP with Nginx on Ubuntu
The Nginx server does not have native PHP processing. If you are using an Nginx server instead of Apache, follow the steps below to install PHP 7.4 or 8.1 to work with Nginx.
1. Enter the following command into a terminal window to ensure you are using the latest software:
sudo apt update && sudo apt upgrade2. Add the ondrej/php PPA to include various PHP versions:
sudo add-apt-repository ppa:ondrej/phpWhen the PPA information loads, press Enter to continue.
2. To install PHP for Nginx, use one of the following commands:
sudo apt install php7.4-fpm -ysudo apt install php8.1-fpm -yThe system will reach out to download and install the package and its dependencies.

2. Once the installation finishes, restart the Nginx service to apply the changes by entering:
sudo systemctl restart nginx3. Next, enable PHP support by editing the server block. Open the server block with the command:
sudo nano /etc/nginx/sites-available/default4. Add the following code to your server block file for Nginx to make use of PHP:
Exchange the for your PHP version.
5. Finally, restart Nginx on Ubuntu and reload PHP:
sudo systemctl restart nginxsudo systemctl reload php-fpmInstalling PHP Modules on Ubuntu
To install additional PHP modules, use the following syntax:
sudo apt install php8.1-posixAlternatively, install multiple modules at once. For example, to install modules mysql, zip and bcmath on PHP 7.4, you would run:
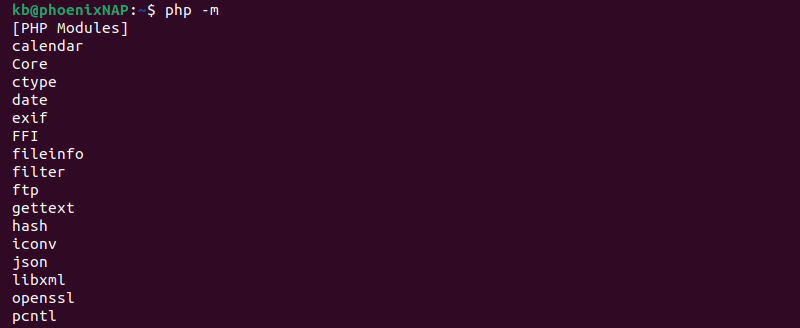
To list all loaded PHP modules run the command:
The output lists all compiled PHP modules, as in the example below.
How to Uninstall PHP on Ubuntu
To uninstall PHP from Ubuntu, follow the instructions below:
1. Run the following command in the terminal:
For example, if you installed the PHP 7.4 FPM version, run:
sudo apt-get purge php7.4-fpm2. Remove the orphaned packages with:
3. Lastly, check the PHP version to confirm the uninstall worked:
If the output does not show the version, the uninstall removed everything correctly.
After reading this article, you should have successfully installed PHP 7.4 or 8.1 with Apache or Nginx on your Ubuntu 20.04 and 22.04 system.
One important thing to remember is that PHP works in tandem with an existing server, so you need to install it specifically to your server software. Alternatively, you can always install a stable version from the default Ubuntu software repositories.
Sofija Simic is an experienced Technical Writer. Alongside her educational background in teaching and writing, she has had a lifelong passion for information technology. She is committed to unscrambling confusing IT concepts and streamlining intricate software installations.
If a script is not written correctly, or if something unusual happens, PHP can generate an error message. The .