- Web Style Sheets CSS tips & tricks
- Centering a block or image
- Centering vertically
- Centering vertically in CSS level 3
- Centering vertically and horizontally in CSS level 3
- Centering in the viewport in CSS level 3
- Nicely centered
- Site navigation
- CSS Layout — Horizontal & Vertical Align
- Example
- Center Align Text
- Example
- Center an Image
- Example
- Left and Right Align — Using position
- Example
- Left and Right Align — Using float
- Example
- The clearfix Hack
- Without Clearfix
- With Clearfix
- Example
- Center Vertically — Using padding
- Example
- Example
- Center Vertically — Using line-height
- Example
- Center Vertically — Using position & transform
- Example
- Center Vertically — Using Flexbox
- Example
- How to Center a Div with CSS
- How to Center a Div Using the CSS Flexbox Property
- How to Center a Div Horizontally Using Flexbox
- How to Center a Div Vertically Using Flexbox
- How to Position a Div at the Center Using Flexbox
- How to Center a Div Horizontally Using the CSS margin Property
- How to Center Text Horizontally Using the CSS text-align Property
- Conclusion
Web Style Sheets CSS tips & tricks
The most common and (therefore) easiest type of centering is that of lines of text in a paragraph or in a heading. CSS has the property ‘text-align’ for that:
renders each line in a P or in a H2 centered between its margins, like this:
The lines in this paragraph are all centered between the paragraph’s margins, thanks to the value ‘center’ of the CSS property ‘text-align’.
Centering a block or image
Sometimes it is not the text that needs to be centered, but the block as a whole. Or, phrased differently: we want the left and right margin to be equal. The way to do that is to set the margins to ‘auto’. This is normally used with a block of fixed width, because if the block itself is flexible, it will simply take up all the available width. Here is an example:
This rather narrow block of text is centered. Note that the lines inside the block are not centered (they are left-aligned), unlike in the earlier example.
This is also the way to center an image: make it into block of its own and apply the margin properties to it. For example:

The following image is centered:
Centering vertically
CSS level 2 doesn’t have a property for centering things vertically. There will probably be one in CSS level 3 (see below ). But even in CSS2 you can center blocks vertically, by combining a few properties. The trick is to specify that the outer block is to be formatted as a table cell, because the contents of a table cell can be centered vertically.
DIV.container < min-height: 10em; display: table-cell; vertical-align: middle >.This small paragraph.
This small paragraph is vertically centered.
Centering vertically in CSS level 3
CSS level 3 offers other possibilities. At this time (2014), a good way to center blocks vertically without using absolute positioning (which may cause overlapping text) is still under discussion. But if you know that overlapping text will not be a problem in your document, you can use the ‘transform’ property to center an absolutely positioned element. For example:
This paragraph is vertically centered.
For a document that looks like this:
the style sheet looks like this:
div.container3 < height: 10em; position: relative > /* 1 */ div.container3 p < margin: 0; position: absolute; /* 2 */ top: 50%; /* 3 */ transform: translate(0, -50%) > /* 4 */
- Make the container relatively positioned, which declares it to be a container for absolutely positioned elements.
- Make the element itself absolutely positioned.
- Place it halfway down the container with ‘top: 50%’. (Note that 50%’ here means 50% of the height of the container.)
- Use a translation to move the element up by half its own height. (The ‘50%’ in ‘translate(0, -50%)’ refers to the height of the element itself.)
Recently (since about 2015), another technique has also become available in several CSS implementations. It is based on the new ‘flex’ keyword for the ‘display’ property. This keyword is meant for use in graphical user interfaces (GUIs), but nothing stops you from using it in a document, if the document happens to have the right structure.
This paragraph is vertically centered.
the style sheet looks like this:
div.container5 < height: 10em; display: flex; align-items: center > div.container5 p
Centering vertically and horizontally in CSS level 3
We can extend both methods to center horizontally and vertically at the same time.
A side-effect of making the paragraph absolutely positioned is that it is then only as wide as it needs to be (unless we give it an explicit width, of course). In the example below, that’s precisely what we want: We center a paragraph with just one word (“Centered!”), so the width of the paragraph should be exactly the width of that word.
The yellow background is there to show that the paragraph is indeed only as wide as its contents. We assume the same mark-up as before:
The style sheet is similar to the previous example with respect to the vertical centering. But we now move the element halfway across the container as well, with ‘left: 50%’, and at the same time move it leftwards by half its own width in the ‘translate’ transformation:
div.container4 < height: 10em; position: relative >div.container4 p < margin: 0; background: yellow; position: absolute; top: 50%; left: 50%; margin-right: -50%; transform: translate(-50%, -50%) >
The next example below explains why the ‘margin-right: -50%’ is needed.
When the CSS formatter supports ‘flex’, it’s even easier:
div.container6 < height: 10em; display: flex; align-items: center; justify-content: center > div.container6 p
i.e., the only addition is the ‘justify-content: center’. Just like ‘align-items’ determines the vertical alignment of the container’s contents, ‘justify-content’ determines the horizontal alignment. (It’s actually a bit more complex, as their names suggest, but in a simple case that’s how it works.) A side-effect of ‘flex’ is that the child element, the P in this case, is automatically made as small as possible.
Centering in the viewport in CSS level 3
The default container for absolutely positioned elements is the viewport. (In case of a browser, that means the browser window). So centering an element in the viewport is very simple. Here is a complete example. (This example uses HTML5 syntax.)
Nicely centered
This text block is vertically centered.
Horizontally, too, if the window is wide enough.
You can see the result in a separate document.
The ‘margin-right: -50%’ is needed to compensate the ‘left: 50%’. The ‘left’ rule reduces the available width for the element by 50%. The renderer will thus try to make lines that are no longer than half the width of the container. By saying that the right margin of the element is further to the right by that same amount, the maximum line length is again the same as the container’s width.
Try resizing the window: You’ll see that each sentence is on one line when the window is wide enough. Only when the window is too narrow for the whole sentence will the sentence be broken over several lines. When you remove the ‘margin-right: -50%’ and resize the window again, you’ll see that the sentences will be broken already when the window is still twice as wide as the text lines.
Site navigation

Bert Bos, style activity lead
Copyright © 1994–2021 W3C ® Privacy policy
Created 5 May 2001;
Last updated Wed 06 Jan 2021 05:40:49 AM UTC
CSS Layout — Horizontal & Vertical Align
Setting the width of the element will prevent it from stretching out to the edges of its container.
The element will then take up the specified width, and the remaining space will be split equally between the two margins:
This div element is centered.
Example
Note: Center aligning has no effect if the width property is not set (or set to 100%).
Center Align Text
To just center the text inside an element, use text-align: center;
Example
Tip: For more examples on how to align text, see the CSS Text chapter.
Center an Image
To center an image, set left and right margin to auto and make it into a block element:

Example
Left and Right Align — Using position
One method for aligning elements is to use position: absolute; :
In my younger and more vulnerable years my father gave me some advice that I’ve been turning over in my mind ever since.
Example
Note: Absolute positioned elements are removed from the normal flow, and can overlap elements.
Left and Right Align — Using float
Another method for aligning elements is to use the float property:
Example
The clearfix Hack
Note: If an element is taller than the element containing it, and it is floated, it will overflow outside of its container. You can use the «clearfix hack» to fix this (see example below).
Without Clearfix
![]()
With Clearfix
![]()
Then we can add the clearfix hack to the containing element to fix this problem:
Example
Center Vertically — Using padding
There are many ways to center an element vertically in CSS. A simple solution is to use top and bottom padding :
Example
To center both vertically and horizontally, use padding and text-align: center :
I am vertically and horizontally centered.
Example
Center Vertically — Using line-height
Another trick is to use the line-height property with a value that is equal to the height property:
I am vertically and horizontally centered.
Example
.center <
line-height: 200px;
height: 200px;
border: 3px solid green;
text-align: center;
>
/* If the text has multiple lines, add the following: */
.center p line-height: 1.5;
display: inline-block;
vertical-align: middle;
>
Center Vertically — Using position & transform
If padding and line-height are not options, another solution is to use positioning and the transform property:
I am vertically and horizontally centered.
Example
.center <
height: 200px;
position: relative;
border: 3px solid green;
>
.center p margin: 0;
position: absolute;
top: 50%;
left: 50%;
transform: translate(-50%, -50%);
>
Tip: You will learn more about the transform property in our 2D Transforms Chapter.
Center Vertically — Using Flexbox
You can also use flexbox to center things. Just note that flexbox is not supported in IE10 and earlier versions:
Example
.center <
display: flex;
justify-content: center;
align-items: center;
height: 200px;
border: 3px solid green;
>
Tip: You will learn more about Flexbox in our CSS Flexbox Chapter.
How to Center a Div with CSS

Ihechikara Vincent Abba

There are a few common coding problems you might encounter when you start practicing what you’ve learned by building projects.
One common problem you’ll face as a web developer is how to place an element at the center of a page or within an element acting as its container. It’s the ubiquitous «How do I center a div?» problem.
In this article, we’ll see how we can center elements using various CSS properties. We’ll see code examples in each section and a visual representation of the elements in all the examples.
How to Center a Div Using the CSS Flexbox Property
In this section, we’ll see how we can use the CSS Flexbox property to center an element horizontally, vertically, and at the center of a page/container.
You can use an image if you prefer that, but we’ll just use a simple circle drawn with CSS. Here’s the code:

Positioning with Flexbox requires that we write the code in the parent or container element’s class.
How to Center a Div Horizontally Using Flexbox
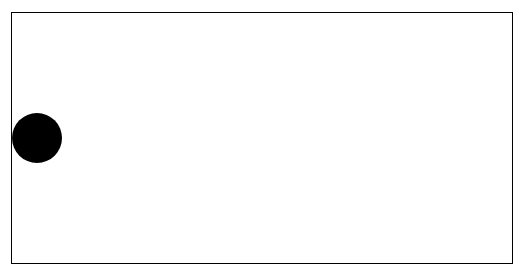
Now we’ll write the code to center the div element horizontally. We’re still making use of the circle we created above.
We’ve added two lines of code to center the circle horizontally. These are the lines we added:
display: flex; justify-content: center;display: flex; allows us to use Flexbox and its properties, while justify-content: center; aligns the circle to the center horizontally.
Here is the position of our circle:

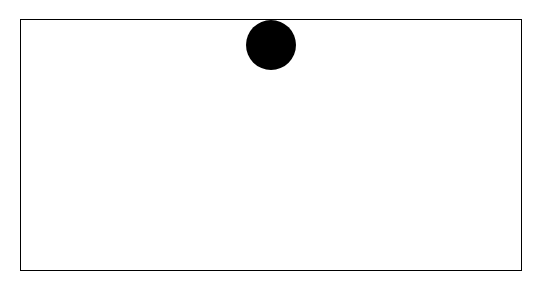
How to Center a Div Vertically Using Flexbox
What we’ll be doing in this section is similar to the last one, except for one line of code.
In this example, we used align-items: center; to center the circle vertically. Recall that we are required to write display: flex; first before specifying the direction.
Here’s the position of our circle:
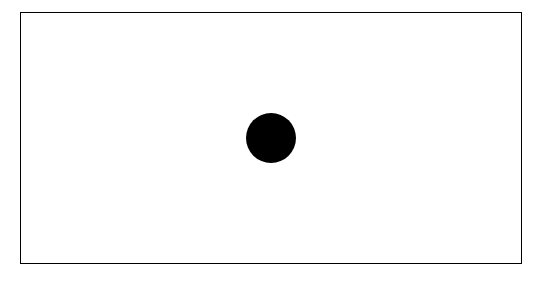
How to Position a Div at the Center Using Flexbox
In this section, we’ll position the circle at the center of the page using both the horizontal and vertical alignment properties of CSS Flexbox. Here’s how:
Here are the three lines of code we added to the container class above:
display: flex; justify-content: center; align-items: center;As expected, we begin with display: flex; which allows us to use Flexbox in CSS. We then used both the justify-content (horizontal alignment) and align-items (vertical alignment) properties to position the circle at the center of the page.
Here is the position of our circle:
How to Center a Div Horizontally Using the CSS margin Property
In this section, we’ll be using the margin property to center our circle horizontally.
Let’s create our circle again.
This time we’ll write the code in the circle class. Here’s how:
All we’ve added is the margin: 0 auto; line of code to the circle class.
Let’s have a look at the position of the circle:
How to Center Text Horizontally Using the CSS text-align Property
In this section, we’ll see how to center text horizontally.
This method only works when we are working with text written within an element.
In the example above, we have created a div with a class of container and a h1 element with some text. This is what it looks like at the moment:
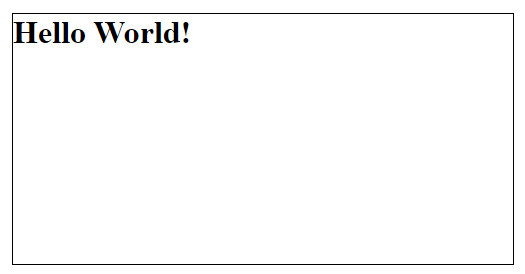
In other to align the text in the h1 element at the center of the page, we had to use the text-align property, giving it a value of center . Here’s what it looks like now in the browser:
Conclusion
In this article, we saw how we can center elements horizontally, vertically, and at the center of the page using Flexbox and the margin and text-align properties in CSS.
In each section, we saw both a code example and a visual representation of what the code does.