- How to Upgrade Java on Ubuntu?
- Method 1: Using Apt Package Manager to Upgrade Java on Ubuntu
- Install the Latest Version (Upgraded)
- Verify the Upgraded Java Version
- Method 2: Using the .deb File to Upgrade Java (Manually)
- Conclusion
- Как обновить Oracle Java на Ubuntu Linux
- Инструкция по обновлению для 32-битной системы:
- Инструкция по обновлению для 64-битной системы:
- Редактирование системного файла:
- How to Check and Update Java Version on Ubuntu 22.04?
- How to check Java version on Ubuntu 22.04
- How to Update Java version on Ubuntu 22.04
- Conclusion
- About the author
- Anees Asghar
How to Upgrade Java on Ubuntu?
Java is a high-level, object-oriented programming language that is widely used for developing desktop, mobile, and web applications. Java, like other applications, offers updated versions regularly. If your system or any programs are Java-dependent, then it is necessary to keep the Java version updated to get the latest features and support.
This post will address the possible methods to upgrade Java on Ubuntu:
Method 1: Using Apt Package Manager to Upgrade Java on Ubuntu
The most common method is to use the “APT” package manager, which allows users to easily upgrade to the latest version of Java by running a few commands in the terminal.
Step 1: Check the Existing Java Version
To check the installed java version in the operating system, run the “java” command with the “version” option:

The output shows that currently, the “1.8.0_352” version of Java is installed in the system.
Step 2: Update the Package Manager
To update the package manager’s list, use the “apt” command with the “update” utility in the following command:

The output shows that the package manager has been updated.
Install the Latest Version (Upgraded)
To install the latest version of OpenJDK, use the “APT” package manager by specifying the “openjdk-19-jdk” command:
$ sudo apt install openjdk-19-jdk
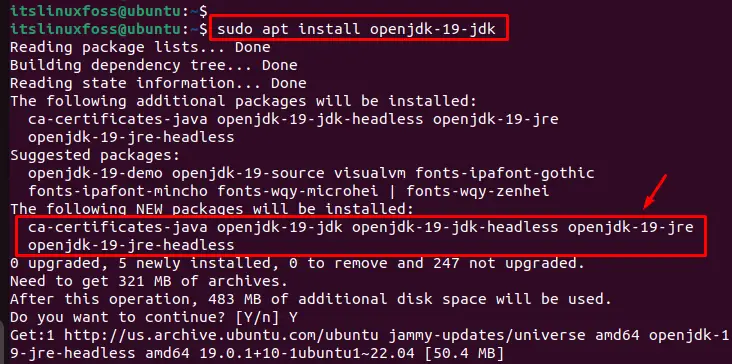
The output shows that the latest version of Java 19 along with dependent files have been installed in the system.
Note: Users can also utilize the “sudo apt upgrade” command to upgrade all installed packages, including Java, in the current system. In addition, Java 19 is the extended version of the Java 17 LTS version.
Verify the Upgraded Java Version
To verify the installed version of Java, specify the “java” command with the “version” option as below:

This command displays the “19.0.1” version of Java that is upgraded on the system.
Method 2: Using the .deb File to Upgrade Java (Manually)
To upgrade Java manually, download the latest version of Oracle JDK from the Official Website and install it on the Ubuntu system. Follow these steps to do this:
Step 1: Download the Latest JDK Version
Go to the Oracle JDK download page and download the upgraded version of the .deb file for Linux:
$ sudo wget https://download.oracle.com/java/19/latest/jdk-19_linux-x64_bin.deb
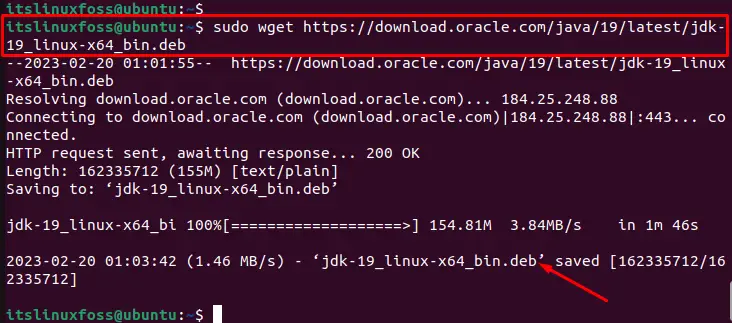
The output shows that the latest version of the .deb file has been downloaded in the system.
Note: Go to the Official Website to have the latest available “.deb” version of Java.
Step 2: Install the Latest Version of OpenJDK
To upgrade Java on Ubuntu, use the .deb package file to install the most recent version of OpenJDK:
$ sudo apt install ./jdk-19_linux-x64_bin.deb
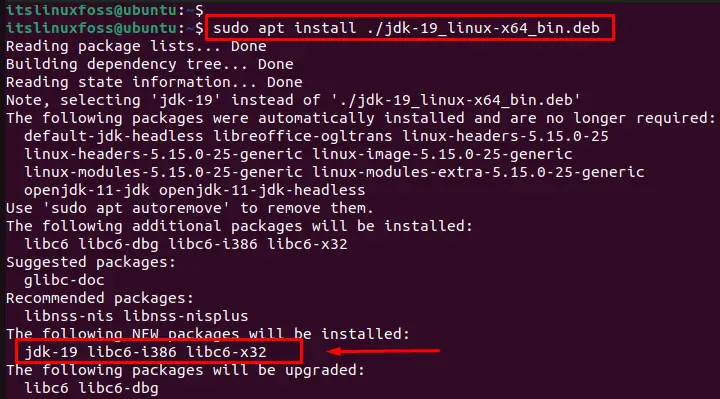
In this way, all dependencies with the latest version of java are installed in the system.
Step 3: Verify Upgraded Version of Java
To verify the upgraded version of Java, utilize the “version” option with the “java” command:

It displays the “19.0.1” version of Java that is currently installed on the system.
Conclusion
To upgrade Java on Ubuntu, use the “$ sudo apt install openjdk-19-jdk” command or download the latest version of Java from the Oracle Website and install it manually on the system. After the upgrade, execute the “java -version” to confirm the installed version of Java.
This article has explained all possible methods to upgrade Java on Ubuntu.
Как обновить Oracle Java на Ubuntu Linux
wikiHow работает по принципу вики, а это значит, что многие наши статьи написаны несколькими авторами. При создании этой статьи над ее редактированием и улучшением работали, в том числе анонимно, 10 человек(а).
Количество просмотров этой статьи: 24 494.
Эта статья научит вас, как обновить Oracle Java JDK/JRE на Ubuntu Linux. Oracle выпускает обновления Java JDK/JRE довольно часто с целью устранения ошибок и повышения безопасности.
- Внимание: Данная статья подразумевает, что у вас уже установлена 32- или 64-битная версия Oracle Java 7, расположенная в /usr/local/java и вы хотите обновить ее до последних версий Oracle Java. Если это не так, прочитайте следующую статью:
- Как установить Oracle Java на Ubuntu Linux

- jdk-7u40-linux-i586.tar.gz (32-bit)
- jre-7u40-linux-i586.tar.gz (32-bit)
- или
- jdk-7u40-linux-x64.tar.gz (64-bit)
- jre-7u40-linux-x64.tar.gz (64-bit)
Инструкция по обновлению для 32-битной системы:

- Напечатайте/скопируйте/вставьте: cd /home/«your_user_name»/Downloads
- Напечатайте/скопируйте/вставьте: sudo cp -r jdk-7u40-linux-i586.tar.gz /usr/local/java
- Напечатайте/скопируйте/вставьте: sudo cp -r jre-7u40-linux-i586.tar.gz /usr/local/java
- Напечатайте/скопируйте/вставьте: cd /usr/local/java

- Напечатайте/скопируйте/вставьте: sudo tar xvzf jdk-7u40-linux-i586.tar.gz
- Напечатайте/скопируйте/вставьте: sudo tar xvzf jre-7u40-linux-i586.tar.gz
Инструкция по обновлению для 64-битной системы:

- Напечатайте/скопируйте/вставьте: cd /home/«your_user_name»/Downloads
- Напечатайте/скопируйте/вставьте: sudo -s cp -r jdk-7u40-linux-x64.tar.gz /usr/local/java
- Напечатайте/скопируйте/вставьте: sudo -s cp -r jre-7u40-linux-x64.tar.gz /usr/local/java
- Напечатайте/скопируйте/вставьте: cd /usr/local/java

- Напечатайте/скопируйте/вставьте: sudo tar xvzf jdk-7u40-linux-x64.tar.gz
- Напечатайте/скопируйте/вставьте: sudo tar xvzf jre-7u40-linux-x64.tar.gz
jdk1.7.0_25
jre1.7.0_25

Редактирование системного файла:

- Напечатайте/скопируйте/вставьте: sudo gedit /etc/profile
- или
- Напечатайте/скопируйте/вставьте: sudo nano /etc/profile
Перейдите в конец файла /etc/profile и добавьте следующие строки в самом конце (сейчас вы поменяете номера версий Oracle Java со старого на новый; вы это делаете в системном файле /etc/profile):
Отредактируйте файл /etc/profile:
JAVA_HOME=/usr/local/java/jdk1.7.0_25
PATH=$PATH:$HOME/bin:$JAVA_HOME/bin
JRE_HOME=/usr/local/java/jre1.7.0_25
PATH=$PATH:$HOME/bin:$JRE_HOME/bin
export JAVA_HOME
export JRE_HOME
export PATH
JAVA_HOME=/usr/local/java/jdk1.7.0_40
PATH=$PATH:$HOME/bin:$JAVA_HOME/bin
JRE_HOME=/usr/local/java/jre1.7.0_40
PATH=$PATH:$HOME/bin:$JRE_HOME/bin
export JAVA_HOME
export JRE_HOME
export PATH
Сохраните файл и закройте его
How to Check and Update Java Version on Ubuntu 22.04?
![]()
Java is a general-purpose client-side programming language that serves several functionalities like android application development, game development, web applications development, and many other software products. To build any application, first, we have to install Java on our computer systems. However, some applications are not capable to run on java’s outdated version. So, it’s essential to know which Java version is installed on our operating system and if our machine is running an outdated version of java, then how to update it.
This post will explain how to check and upgrade the Java version on Ubuntu 22.04. So, let’s begin!
How to check Java version on Ubuntu 22.04
Open the terminal on your ubuntu 22.04 operating system and type the below-mentioned command to check which Java version is installed on your machine:
Once you typed the above-given command on the terminal, it will produce the following outcome:
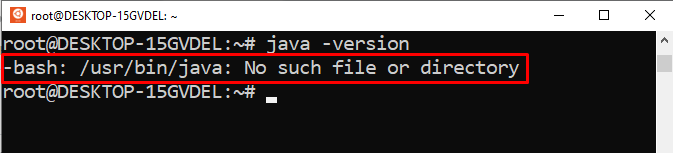
The above snippet shows that Java is not installed on our machine. Now, let’s move one step further to learn how to install/upgrade the Java version on Ubuntu 22.04.
How to Update Java version on Ubuntu 22.04
To update the java version or to install the latest java version, firstly you have to upgrade the apt repository. To do so, type the below-given command on the terminal:
Next, run the below-enlisted command to install the default Java Runtime Environment(JRE) on your operating system:
When you execute the above-given command, it will work like this:
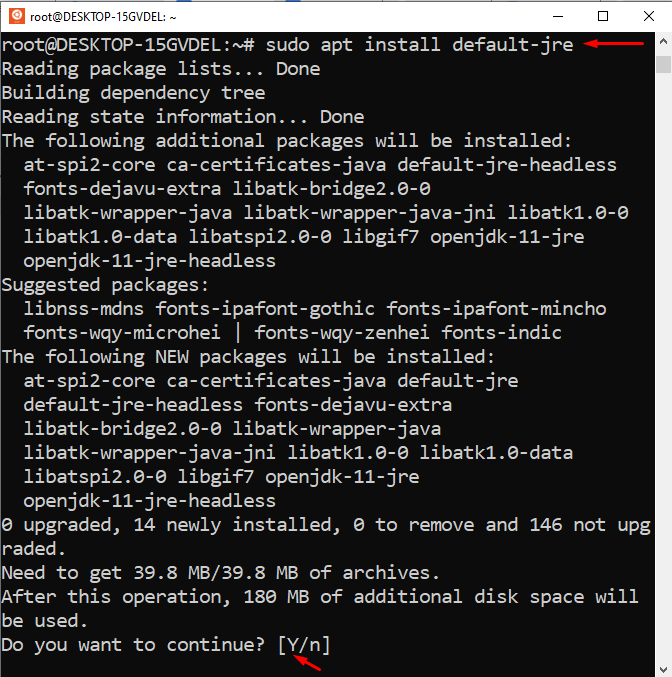
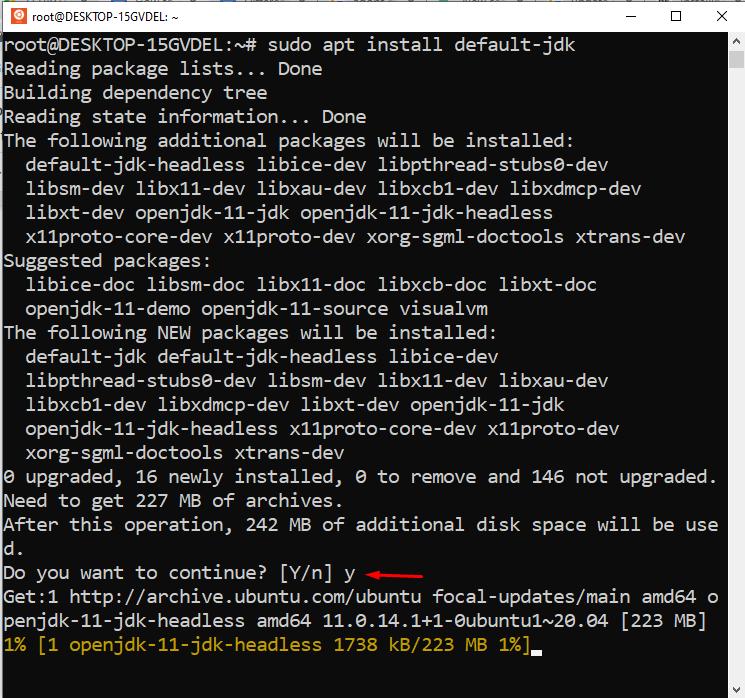
Type “Y” to continue the installation process:
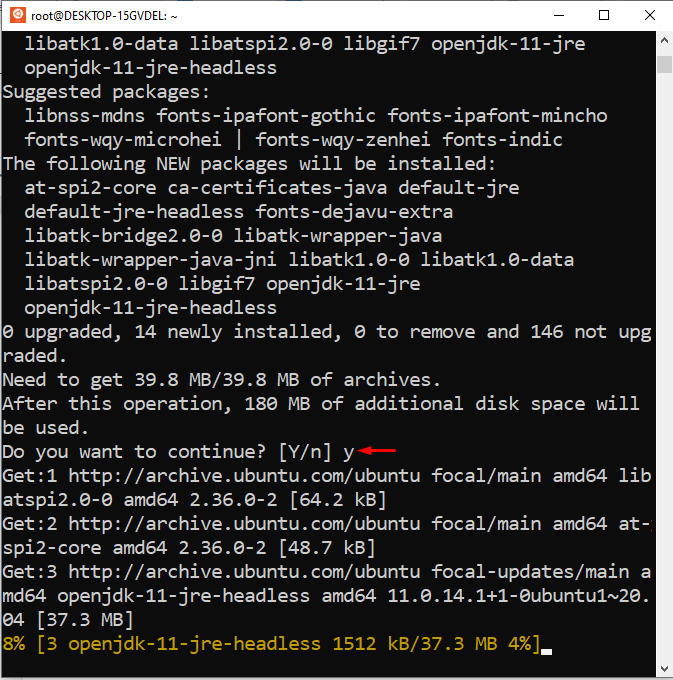
The whole installation process will take a few minutes to install JRE on your system. You can verify the JRE’s installation by typing the following command:
If JRE is successfully installed on your Ubuntu 22.04, then you will witness the result something like this:
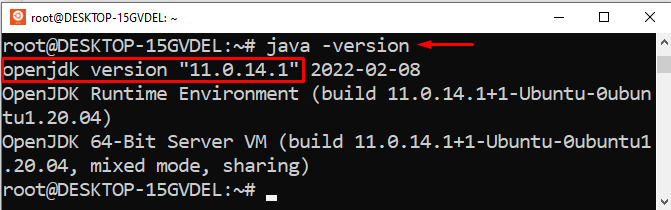
Congratulations! You have successfully installed the latest and updated version of Java on Ubuntu 22.04.
As the JRE’s installation is done, now you can run almost every java software on your machine. However, some java-oriented software may require the Java Development Kit(JDK) to compile/run some particular tasks. In such cases, you can install the JDK by typing the below-given command:
The above-given command will work something like this:
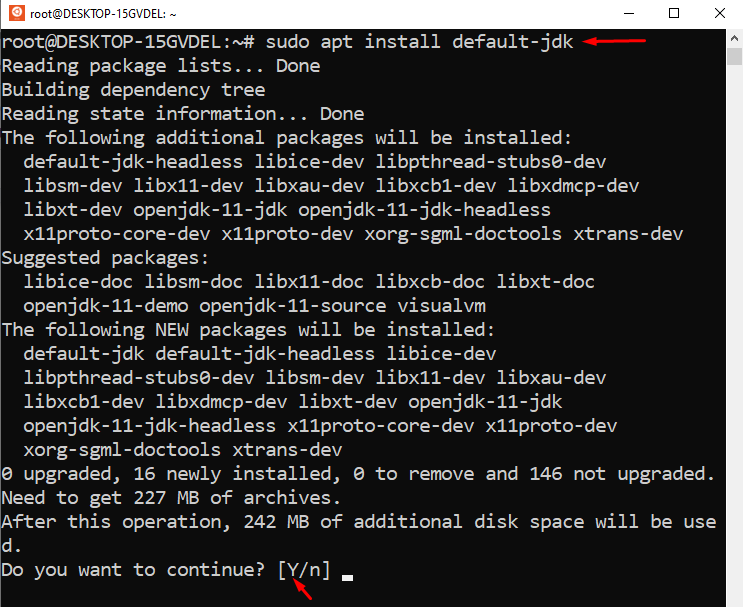
Type “Y” to continue the JDK’s installation process:
Type the below-given command on the terminal of ubuntu 22.04 to verify whether the updated JDK is installed on your machine or not:
You will witness the below-given output:

Congrats! You are running an updated Java version on your ubuntu 22.04.
Conclusion
Open the terminal and type “sudo apt install default-jre” to install JRE, and type “sudo apt install default-jdk” to install JDK on ubuntu 22.04. To check or verify the java version type “java -version” on the terminal of Ubuntu 22.04. This write-up provided a step-by-step guide on how to check, update, and verify the java version on ubuntu 22.04.
About the author
Anees Asghar
I am a self-motivated IT professional having more than one year of industry experience in technical writing. I am passionate about writing on the topics related to web development.