Создаём своё первое десктопное приложение при помощи HTML, JS и Node-WebKit
В наше время при помощи JavaScript и HTML можно сделать практически всё. А благодаря Node-WebKit (недавно переименован в NW.js) можно делать даже десктопные приложения, которые выглядят, как нативные и имеют доступ ко всем частям ОС. Сегодня мы покажем, как создать простое десктопное приложение при помощи Node-WebKit, используя jQuery и несколько модулей для Node.js.
Node-WebKit — комбинация Node.js и встроенного браузера WebKit. Код JavaScript выполняется в особом окружении, из которого есть доступ и к стандартному API браузеров, и к Node.js.
Устанавливаем Node-WebKit
Для разработки нужно скачать исполняемый файл node-webkit и вызывать его из командной строки. Позже всё вместе упакуется в одну программу, которая будет запускаться пользователем.
Скачайте файлы, подходящие для вашей системы, и распакуйте их в подходящее место. Запускать их нужно так:
# если у вас linux/osx /path/to/node-webkit/nw /your/project/folder # если у вас windows C:\path\to\node-webkit\nw.exe C:\your\project\folder # (пути указаны только для примера)
Откроется новое окно node-webkit, в которое будет выведено множество отладочных сообщений.
Первое приложение
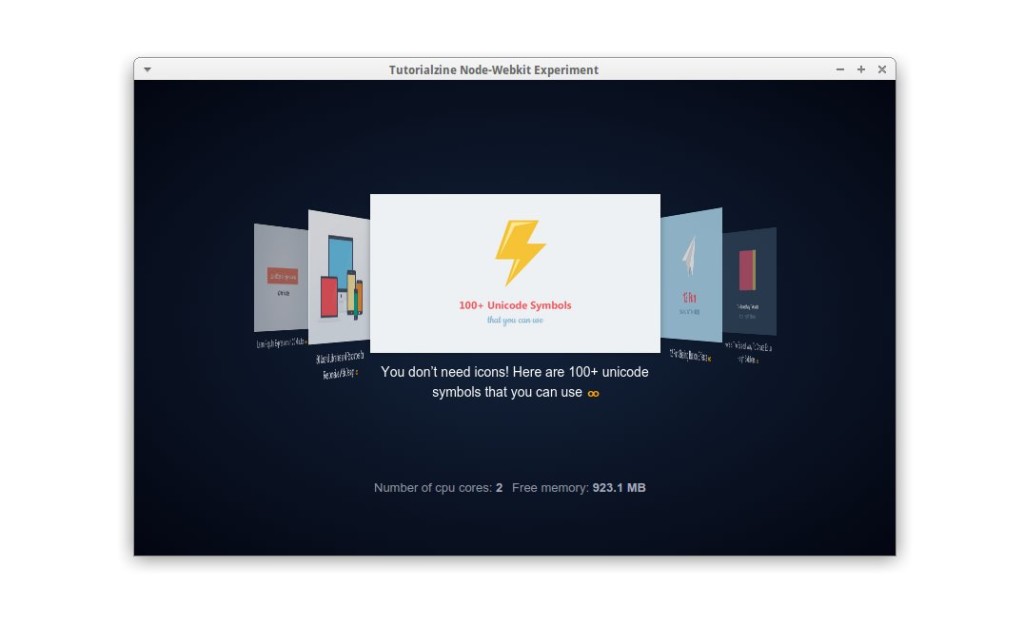
Мы подготовили для вас тестовое приложение для примера. Оно скачивает последние статьи с Tutorialzine и делает из них карусельку при помощи jQuery Flipster.
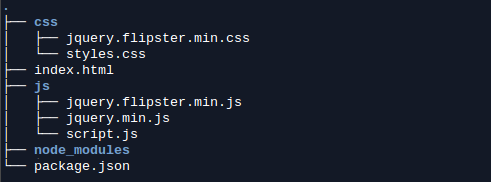
структура каталогов
В архиве содержатся вышеуказанные файлы. Выглядят они как статический сайт, но работать в браузере при запуске index.html не будут – им нужны модули Node.js. Для запуска воспользуйтесь командой
Она и запустит наше превосходное приложение.
Как это сделано
Всё начинается с файла package.json, который node-webkit ищет при запуске. Там описано, что нужно загружать и даны разные настройки окна.
В свойстве window описана необходимость открыть окно размера 800 х 500 пикселей и спрятать у него тулбар. В него загрузится файл из свойства main. У нас это
index.html
И наконец, наш файлик с JavaScript. Вот где самое интересное.
// Смешать в одном файле код jQuery и Node.js? Да не вопрос! $(function()< // Показать данные о компьютере, используя модуль os var os = require('os'); var prettyBytes = require('pretty-bytes'); $('.stats').append('Number of cpu cores: ' + os.cpus().length + ''); $('.stats').append('Free memory: ' + prettyBytes(os.freemem())+ ''); // Нативная библиотека Node webkit для UI. Понадобится попозже var gui = require('nw.gui'); // Загрузить последние посты с Tutorialzine var ul = $('.flipster ul'); // Ограничений на запрос данных с других доменов нет, поэтому // мы можем отправить ajax-запрос на другой сайт. $.get('http://feeds.feedburner.com/Tutorialzine', function(response)< var rss = $(response); // Найдём статьи в RSS фиде rss.find('item').each(function()< var item = $(this); var content = item.find('encoded').html().split('
')[0]+'
'; var urlRegex = /(http|ftp|https):\/\/[\w\-_]+(\.[\w\-_]+)+([\w\-\.,@?^=%&:/~\+#]*[\w\-\@?^=%&/~\+#])?/g; // Загрузим первую картинку из статьи var imageSource = content.match(urlRegex)[1]; // Создадим li для каждой статьи и добавим в ненумерованный список var li = $('
'); li.find('a') .attr('href', item.find('link').text()) .text(item.find("title").text()); li.find('img').attr('src', imageSource); li.appendTo(ul); >); // Инициализируем плагин flipster $('.flipster').flipster(< style: 'carousel' >); // По клику на карусельке откроем страницу в дефолтном браузере. // Иначе она открылась бы в нашем окне, а нам это не надо. $('.flipster').on('click', 'a', function (e) < e.preventDefault(); // откроем URL в дефолтном браузере gui.Shell.openExternal(e.target.href); >); >); >);
В браузере нельзя получить доступ к информации на другом домене через jQuery. Но node-webkit убирает эти ограничения.
OS – встроенный в Node.js модуль. Умеет возвращать объём свободной системной памяти
Pretty Bytes – преобразует байты в человеко-читаемые строки 1337 → 1.34 kB.
Также есть jQuery и плагин jQuery-flipster. И всё!
Пакуем и распространяем
Конечно, для удобства пользователя нужно запаковать всё это в отдельную программу, которую можно будет запускать простым двойным кликом.
Вручную это довольно муторно делать, особенно если вы хотите подготовить приложение для разных платформ. Но есть для этого и автоматические библиотеки.
Есть и минус – исполняемые файлы получаются уж очень большими (бывает, что и 40-50 Мб), поскольку в них упихивается и браузер webkit и node.js, и ваш код. Возможно, для создания простых небольших десктопных приложений это не идеальный вариант.
Заключение
Node-webkit – мощная штучка, открывающая новые возможности для веб-разработчиков. С её помощью можно создавать вспомогательные приложения для ваших веб-сервисов и делать десктопные клиенты, у которых будет полный доступ к компьютеру пользователя. Подробнее о node-webkit читайте в их wiki.
This article is a simple tutorial designed to teach you some fundamental skills for creating cross platform web applications. You will build a sample School Plan app, which will provide a dynamic “app-like” experience across many different platforms and work offline. It will use Apache Cordova and Mozilla’s Brick web components.
The story behind the app, written by Piotr
I’ve got two kids and I’m always forgetting their school plan, as are they. Certainly I could copy the HTML to JSFiddle and load the plan as a Firefox app. Unfortunately this would not load offline, and currently would not work on iOS. Instead I would like to create an app that could be used by everyone in our family, regardless of the device they choose to use.
You should understand the basics of HTML, CSS and JavaScript before getting started.
Please also read the instructions on how to load any stage in this tutorial.
The Cordova documentation would also be a good thing to read, although we’ll explain the bits you need to know below.
You could also read up on Mozilla Brick components to find out what they do.
Preparation
Before building up the sample app, you need to prepare your environment.
Installing Cordova
We’ve decided to use Apache Cordova for this project as it’s currently the best free tool for delivering HTML apps to many different platforms. You can build up your app using web technologies and then get Cordova to automatically port the app over to the different native platforms. Let’s get it installed first.
First install NodeJS: Cordova is a NodeJS package.
Next, install Cordova globally using the npm package manager:
Note: On Linux or OS X, you may need to have root access.
Installing the latest Firefox
If you haven’t updated Firefox for a while, you should install the latest version to make sure you have all the tools you need.
Installing Brick
Mozilla Brick is a tool built for app developers. It’s a set of ready-to-use web components that allow you to build up and use common UI components very quickly.
To install Brick we will need to use the Bower package manager. Install this, again using npm :
bower install mozbrick/brick
Getting some sample HTML
Now you should find some sample HTML to use in the project — copy your own children’s online school plans for this purpose, or use our sample if you don’t have any but still want to follow along. Save your markup in a safe place for now.
Stage 1: Setting up the basic HTML project
In this part of the tutorial we will set up the basic project, and display the school plans in plain HTML. See the stage 1 code on Github if you want to see what the code should look like at the end of this section.
Start by setting up a plain Cordova project. On your command line, go to the directory in which you want to create your app project, and enter the following command:
The last step is needed every time you want to check the changes.
Open the App Manager in the Firefox browser. Press the [Add Packaged App] button and navigate to the prepared firefoxos app directory, which should be available in school-plan/platforms/firefoxos/www . Note: If you are running Firefox Aurora or Nightly, you can do these tasks using our new WebIDE tool, which has a similar but slightly different workflow to the App Manager.
Press the [Start Simulator] button then [Update] and you will see the app running in a Firefox OS simulator. You can inspect, debug and profile it using the App Manager — read Using the App Manager for more details.
Now let’s export the app as a native Android APK so we can see it working on that platform. Add the platform and get Cordova to build the apk file with the following two commands:
In Stage 2 of our app implementation, we will look at using Brick to improve the user experience of our app. Instead of having to potentially scroll through a lot of lesson plans to find the one you want, we’ll implement a Brick custom element that allows us to display different plans in the same place.
You can see the finished Stage 2 code on Github.
We will be using the brick-deck component. This provides a “deck of cards” type interface that displays one brick-card while hiding the others
First, run the following command in www directory to install the needed entire Brick codebase into the app/bower_components .