- Css input value color
- Try it
- Value
- Using color inputs
- Providing a default color
- Tracking color changes
- Selecting the value
- Validation
- Example
- HTML
- JavaScript
- Initialization
- Reacting to color changes
- Result
- Как изменить цвет текста и фона в текстовом поле?
- Решение
- Styling Input Type Color | Pure CSS Tutorial
- Video Tutorial:
- Project Folder Structure:
- HTML:
- CSS:
- Other Tutorials You Might Like:
Css input value color
Only simple colors (without alpha channel) are allowed though CSS colors has more formats, e.g. color names, functional notations and a hexadecimal format with an alpha channel.
The element’s presentation may vary substantially from one browser and/or platform to another—it might be a simple textual input that automatically validates to ensure that the color information is entered in the proper format, or a platform-standard color picker, or some kind of custom color picker window.
Try it
Value
Note: Setting the value to anything that isn’t a valid, fully-opaque, RGB color in hexadecimal notation will result in the value being set to #000000 . In particular, you can’t use CSS’s standardized color names, or any CSS function syntax, to set the value. This makes sense when you keep in mind that HTML and CSS are separate languages and specifications. In addition, colors with an alpha channel are not supported; specifying a color in 9-character hexadecimal notation (e.g. #009900aa ) will also result in the color being set to #000000 .
Using color inputs
Inputs of type color are simple, due to the limited number of attributes they support.
Providing a default color
You can update the simple example above to set a default value, so that the color picker is pre-filled with the default color and the color picker (if any) will also default to that color:
input type="color" value="#ff0000" /> If you don’t specify a value, the default is #000000 , which is black. The value must be in seven-character hexadecimal notation, meaning the «#» character followed by two digits each representing red, green, and blue, like this: #rrggbb . If you have colors that are in any other format (such as CSS color names or CSS color functions such as rgb() or rgba() ), you’ll have to convert them to hexadecimal before setting the value .
Tracking color changes
As is the case with other types, there are two events that can be used to detect changes to the color value: input and change . input is fired on the element every time the color changes. The change event is fired when the user dismisses the color picker. In both cases, you can determine the new value of the element by looking at its value .
Here’s an example that watches changes over time to the color value:
.addEventListener("input", updateFirst, false); colorPicker.addEventListener("change", watchColorPicker, false); function watchColorPicker(event) document.querySelectorAll("p").forEach((p) => p.style.color = event.target.value; >); >
Selecting the value
When a browser doesn’t support a color picker interface, its implementation of color inputs will be a text box that validates the contents automatically to ensure that the value is in the correct format. In this case you can use the select() method to select the text currently in the edit field.
If the browser instead uses a color picker, select() does nothing. You should be aware of this behavior so your code can respond appropriately in either case.
Validation
A color input’s value is considered to be invalid if the user agent is unable to convert the user’s input into seven-character lower-case hexadecimal notation. If and when this is the case, the :invalid pseudo-class is applied to the element.
Example
Let’s create an example which does a little more with the color input by tracking the change and input events to take the new color and apply it to every element in the document.
HTML
The HTML is fairly straightforward — a couple of paragraphs of descriptive material with an of type color with the ID color-picker , which we’ll use to change the color of the paragraphs’ text.
p> An example demonstrating the use of the code><input type="color">code> control. p> label for="color-picker">Color:label> input type="color" value="#ff0000" id="color-picker" /> p> Watch the paragraph colors change when you adjust the color picker. As you make changes in the color picker, the first paragraph's color changes, as a preview (this uses the code>inputcode> event). When you close the color picker, the code>changecode> event fires, and we detect that to change every paragraph to the selected color. p>
JavaScript
First, there’s some setup. Here we establish some variables, setting up a variable that contains the color we’ll set the color picker to when we first load up, and then setting up a load handler to do the main startup work once the page is fully loaded.
let colorPicker; const defaultColor = "#0000ff"; window.addEventListener("load", startup, false);
Initialization
Once the page is loaded, our load event handler, startup() , is called:
function startup() colorPicker = document.querySelector("#color-picker"); colorPicker.value = defaultColor; colorPicker.addEventListener("input", updateFirst, false); colorPicker.addEventListener("change", updateAll, false); colorPicker.select(); >
This gets a reference to the color element in a variable called colorPicker , then sets the color input’s value to the value in defaultColor . Then the color input’s input event is set up to call our updateFirst() function, and the change event is set to call updateAll() . These are both seen below.
Finally, we call select() to select the text content of the color input if the control is implemented as a text field (this has no effect if a color picker interface is provided instead).
Reacting to color changes
We provide two functions that deal with color changes. The updateFirst() function is called in response to the input event. It changes the color of the first paragraph element in the document to match the new value of the color input. Since input events are fired every time an adjustment is made to the value (for example, if the brightness of the color is increased), these will happen repeatedly as the color picker is used.
function updateFirst(event) const p = document.querySelector("p"); if (p) p.style.color = event.target.value; > >
When the color picker is dismissed, indicating that the value will not change again (unless the user re-opens the color picker), a change event is sent to the element. We handle that event using the updateAll() function, using Event.target.value to obtain the final selected color:
function updateAll(event) document.querySelectorAll("p").forEach((p) => p.style.color = event.target.value; >); >
This sets the color of every block so that its color attribute matches the current value of the color input, which is referred to using event.target .
Result
The final result looks like this:
Как изменить цвет текста и фона в текстовом поле?
Установить цвет фона и текста для однострочного текстового поля формы.
Решение
Цвет фона элемента задается стилевым свойством background-color , а цвет текста с помощью color , эти свойства необходимо добавить к селектору INPUT . Поскольку тег является универсальным, то он создает не только текстовое поле, но и другие элементы форм и чтобы определить стиль для конкретного поля можно воспользоваться классами, как показано в примере 1.
Пример 1. Цвет текста и фона в текстовом поле
HTML5 CSS 2.1 IE Cr Op Sa Fx
Результат примера показан на рис. 1.
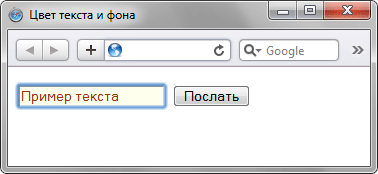
Рис. 1. Вид текстового поля после добавления к нему стилей
В данном примере добавляется новый класс с именем colortext , он добавляется к тегу с помощью конструкции class=»textfield» .
Аналогично можно определить стиль одновременно для всех текстовых полей, зная, что к тегу в этом случае всегда добавляется атрибут type . Используя запись INPUT[type=»text»] задаем стиль для всех элементов , но стиль применяется только в том случае, когда значение атрибута type равно text (пример 2).
Пример 2. Использование селекторов атрибутов
XHTML 1.0 CSS 2.1 IE Cr Op Sa Fx
INPUT[type="text"]
Styling Input Type Color | Pure CSS Tutorial

Welcome to today’s tutorial. In today’s tutorial, we will learn how to style input type color. Today, we will be looking into customizing the color input with two different styles. Styling color input isn’t as straightforward as applying background-color and adding borders. It’s much more complicated. But in this tutorial, we will customize the color input with small steps.
So let us begin the tutorial. For this tutorial, we will be using HTML and CSS.
Video Tutorial:
If you would like to code along with me, I have a video version of this tutorial. You can check it down below. Also, I post new tutorials on my youtube channel every alternate day. Be sure to subscribe so you don’t miss them.
Project Folder Structure:
Let us take a look at the project folder structure. The project folder is called – Styling Color Input. Inside this folder, we have two files – index.html and style.css . The first file is an HTML document while the second one is the stylesheet.
HTML:
We begin with coding the HTML first. Do copy the code below and paste it into your HTML file.
The HTML consists of two container divs. Inside each of these containers, we have an input type color and a label . The id of the first input tag is style1 while the id of the second is style2 .
We link these labels to their respective inputs by setting the for attribute of the label to the id of the input .
Also, we set a default color for each of the color input by setting a hex color code as the value attribute.
CSS:
Let us now style these inputs using CSS. Now, copy the code provided below and paste it into your stylesheet.
We begin by doing a CSS reset which removes unwanted paddings and margins from all the elements. It also sets the box-sizing of all the elements to the border-box.
Next, we set the display of body to flex and contents inside the body are placed with space around them horizontally using justify-content . We also centre them vertically using align-items .
Now coming to the container. Even for the container, the display is set to flex. The default value of flex-direction is row. Here we set it to the column . The reason we do it is that we want the input and label to be one below the other.
Other Tutorials You Might Like:
For style1, we set the appearance property to none. This will hide the default appearance of the input. Now we can style it as per our choice. We set the width and height both to 100px. Next, we set the background colour to transparent. Also, we set the border to none.
Up to this step, the styling of style2 is exactly the same.
We selected the chosen color using the ::-webkit-color-swatch pseudo-element. The border-radius of the color swatch is set to 15px and the borders are removed.
Similarly, we select the color swatch of the style2 and set the border-radius to 50% to shape it into a circle. Also to make it look even better we add a thick black border around it.
That’s it for this tutorial. These were the two ways you can style your color input to suit your need.
* < padding: 0; margin: 0; box-sizing: border-box; >body < height: 100vh; display: flex; justify-content: space-around; align-items: center; >.container < display: flex; flex-direction: column; align-items: center; gap: 30px; >label < font-family: "Poppins", sans-serif; font-size: 20px; cursor: pointer; >/*—— Style 1 ——*/ #style1 < -webkit-appearance: none; -moz-appearance: none; appearance: none; width: 100px; height: 100px; background-color: transparent; border: none; cursor: pointer; >#style1::-webkit-color-swatch < border-radius: 15px; border: none; >#style1::-moz-color-swatch < border-radius: 15px; border: none; >/*—— Style 2 ——*/ #style2 < -webkit-appearance: none; -moz-appearance: none; appearance: none; background-color: transparent; width: 100px; height: 100px; border: none; cursor: pointer; >#style2::-webkit-color-swatch < border-radius: 50%; border: 7px solid #000000; >#style2::-moz-color-swatch
If you have any issues while creating this, you can download the source code provided below by clicking on the download code button. Also, I would love to hear your suggestions and feedback so please comment on them below.