Tkinter Label
Summary: in this tutorial, you’ll learn about Tkinter Label widget and how to use it to display a text or image on the screen.
Introduction to Tkinter Label widget
Tkinter Label widget is used to display a text or image on the screen. To use a Label widget, you use the following general syntax:
label = ttk.Label(container, **options)Code language: Python (python)The Label widget has many options that allow you to customize its appearance:
| Options | Meaning |
|---|---|
| anchor | When the text and/or image are smaller than the width, the anchor option determines where to position them tk.W , tk.CENTER or tk.E for left, center, and right alignment respectively. |
| background | Set the background color for the label |
| borderwidth | Add a border around the label. |
| class_ | Specify a custom widget class name for changing the label’s appearance. |
| compound | Specify how to display both text and image on the Label. |
| cursor | Specify the mouse cursor’s appearance when the mouse is over the widget. |
| font | Specify the font style for displaying text |
| foreground | Specify the color of the text |
| image | Specify an image or images to show in addition to text or instead of text. |
| justify | If the text contains newline characters, the justify option specifies how each line is positioned horizontally. The valid values are tk.LEFT (left-justify), tk.CENTER (center), and tk.RIGHT (right-justify). |
| padding | Add more space around the label. |
| relief | Use this option to create an effect for the Label .e.g, flat, raised, sunken, groove, and ridge. |
| style | Specify the custom widget style. |
| takefocus | is a boolean value that specifies whether the label is visited during focus traversal. It defaults to False which doesn’t get focus. |
| text | Specify a string of text to show in the widget |
| textvariable | A StringVar instance that holds the text value of the widget. It overrides the text option if both textvariable and text are available. |
| underline | Specify the position of the letter that should be underlined e.g, underline = 0 would underline the letter E in the text=’Exit’ |
| width | Specify the number of characters to show |
| wraplength | Chop the text into the lines which less than the length specified by the wraplength option. |
The following shows a skeleton program that we’ll use to illustrate various options of the Label widget:
import tkinter as tk from tkinter import ttk root = tk.Tk() root.geometry('300x200') root.resizable(False, False) root.title('Label Widget Demo') # show the label here root.mainloop()Code language: Python (python)Displaying a regular label
The following program shows how to display a regular label on the root window:
import tkinter as tk from tkinter.ttk import Label root = tk.Tk() root.geometry('300x200') root.resizable(False, False) root.title('Label Widget Demo') # show a label label = Label(root, text='This is a label') label.pack(ipadx=10, ipady=10) root.mainloop()Code language: Python (python)
- First, import Label class from the tkinter.ttk module.
- Second, create the root window and set its properties including size, resizeable, and title.
- Third, create a new instance of the Label widget, set its container to the root window, and assign a literal string to its text property.
Setting a specific font for the Label
To set a particular font for a label, you pass the font keyword argument to the Label constructor like this:
font = ('font name', font_size)Code language: Python (python)The font keyword argument is a tuple that contains font name and size. For example:
font=("Helvetica", 14)Code language: Python (python)The following example shows a label with the Helvetica font:
import tkinter as tk from tkinter import ttk root = tk.Tk() root.geometry('300x200') root.resizable(False, False) root.title('Label Widget Demo') # label with a specific font label = ttk.Label( root, text='A Label with the Helvetica font', font=("Helvetica", 14)) label.pack(ipadx=10, ipady=10) root.mainloop() Code language: Python (python)
Displaying an image
To use a Label widget to display an image, you follow these steps:
First, create a PhotoImage widget by passing the path to the photo to the PhotoImage constructor:
photo = tk.PhotoImage(file='./assets/python.png')Code language: Python (python)Second, assign the PhotoImage object to the image option of the Label widget:
Label(. image=photo)Code language: Python (python)The following example shows how to use a Label widget to display an image:
import tkinter as tk from tkinter import ttk # create the root window root = tk.Tk() root.geometry('300x200') root.resizable(False, False) root.title('Label Widget Image') # display an image label photo = tk.PhotoImage(file='./assets/python.png') image_label = ttk.Label( root, image=photo, padding=5 ) image_label.pack() root.mainloop() Code language: Python (python)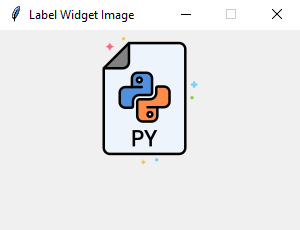
Note that the image file is located at the /assets/ folder.
To display both text and image, you’ll use the text attribute and compound option.
The compound option specifies the position of the image relative to the text. Its valid values are:
| Compound | Effect |
|---|---|
| ‘top’ | Display the image above the text. |
| ‘bottom’ | Display the image below the text. |
| ‘left’ | Display the image to the left of the text. |
| ‘right’ | Display the image to the right of the text. |
| ‘none’ | Display the image if there’s one, otherwise display the text. The compound option defaults to ‘none’ . |
| ‘text’ | Display the text, not the image |
| ‘image’ | Display the image, not the text. |
The following program shows how to display both text and image on a label:
import tkinter as tk from tkinter import ttk # create the root window root = tk.Tk() root.geometry('300x200') root.resizable(False, False) root.title('Label Widget Image') # display an image label photo = tk.PhotoImage(file='./assets/python.png') image_label = ttk.Label( root, image=photo, text='Python', compound='top' ) image_label.pack() root.mainloop() Code language: PHP (php)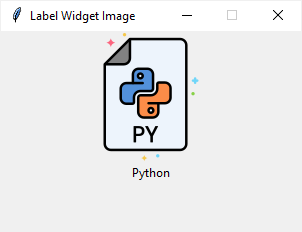
Summary
Tkinter python label font
Виджет Label представляет текстовую метку. Этот элемент позволяет выводить статический текст без возможности редактирования.
Для создания элемента Label применяется конструктор, который принимает два параметра:
Параметр master представляет ссылку на родительский контейнер, а параметр options представляет следующие именованные параметры
- anchor : устанавливает позиционирование текста
- background : фоновый цвет
- borderwidth : толщина границы метки
- cursor : курсор указателя мыши при наведении на метку
- font : шрифт текста
- foreground : цвет текста
- height : высота виджета
- image : ссылка на изображение, которое отображается на метке
- justify : устанавливает выравнивание текста. Значение LEFT выравнивает текст по левому краю, CENTER — по центру, RIGHT — по правому краю
- pading : отступы от границ вилжета до его текста
- relief : определяет тип границы, по умолчанию значение FLAT
- text : устанавливает текст метки
- textvariable : устанавливает привязку к элементу StringVar
- underline : указывает на номер символа в тексте метки, который подчеркивается. По умолчанию значение -1, то есть никакой символ не подчеркивается
- width : ширина виджета
- wraplength : при положительном значении строки текста будут переносится для вмещения в пространство виджета
Выведем в окне приложения простейший текст:
from tkinter import * from tkinter import ttk root = Tk() root.title("METANIT.COM") root.geometry("250x200") label = ttk.Label(text="Hello METANIT.COM") label.pack() root.mainloop() 
Установка шрифта
Параметр font принимает определение шрифта в виде:
font = ("имя шрифта", размер_шрифта) Первое значение передает имя шрифта в кавычках, а второе — числовой размер шрифта. Например, установим шрифт Arial высотой в 14 единиц:
from tkinter import * from tkinter import ttk root = Tk() root.title("METANIT.COM") root.geometry("250x200") label = ttk.Label(text="Hello METANIT.COM", font=("Arial", 14)) label.pack() root.mainloop() 
Установка изображения
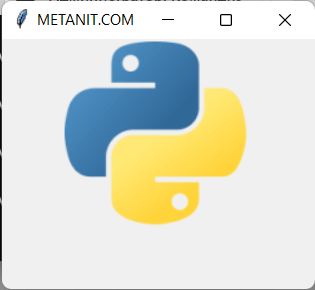
За установку изображения на метке отвечает параметр image . Самый простой способ определения изображения представляет создание объекта PhotoImage , в конструктор которого передается путь к изображению:
from tkinter import * from tkinter import ttk root = Tk() root.title("METANIT.COM") root.geometry("250x200") python_logo = PhotoImage(file="./python_logo.png") label = ttk.Label(image=python_logo) label.pack() root.mainloop() В моем случае изображение представляет файл python_logo.png, которое находится в одной папке с файлом приложения и которое изображает логотип python:
Если необходимо также отображать и текст, то для этого можно установить параметр compound , который определяет положение текста по отношению к изображению с помощью одного из следующих значений:
- top : изображение поверх текста
- bottom : изображение под текстом
- left : изображение слева от текста
- right : изображение справа от текста
- none : при наличии изображения отображается только изображение
- text : отображается только текст
- image : отображается только изображение
Например, отобразим картинку поверх текста:
from tkinter import * from tkinter import ttk root = Tk() root.title("METANIT.COM") root.geometry("250x200") python_logo = PhotoImage(file="./python_logo.png") label = ttk.Label(image=python_logo, text="Python", compound="top") label.pack() root.mainloop() 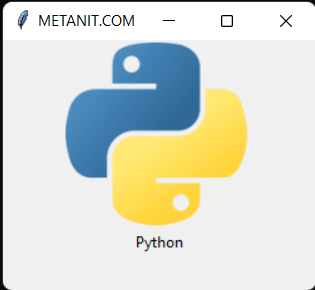
Стилизация
По умолчанию метка не имеет границы. Для установки толщины границы используется параметр borderwidth , при этом нам также надо установить тип границы с помощью параметра releaf , который может принимать значения: «flat», «raised», «sunken», «ridge», «solid» и «groove»:
from tkinter import * from tkinter import ttk root = Tk() root.title("METANIT.COM") root.geometry("250x200") label = ttk.Label(text="Hello Tkinter", borderwidth=2, relief="ridge", padding=8) label.pack(expand=True) root.mainloop() Установка цвета фона и текста:
from tkinter import * from tkinter import ttk root = Tk() root.title("METANIT.COM") root.geometry("250x200") label = ttk.Label(text="Hello Tkinter", background="#FFCDD2", foreground="#B71C1C", padding=8) label.pack(expand=True) root.mainloop() What is the default font of tkinter label?
What is the default font of tkinter Label ? If I want to change the label font size, tkinter forces me to define a font type as well (as a tuple, e.g. (‘Arial’, 20) ), but I do not want to change the font that is being used. Is it Arial? Is it Courier?
It’s not. (‘Courier’, 20) results in a completely different font with serifs. Try it on a Windows 10 machine.
3 Answers 3
It will be set as the TkDefaultFont value. You can check this value by starting a Tk() instance and then checking for the default font.
import tkinter from tkinter import font root = tkinter.Tk() # Start Tk instance your_font = font.nametofont("TkDefaultFont") # Get default font value into Font object your_font.actual() Here, try this program. The default I get is Segoe UI
from tkinter import * from tkinter import font root=Tk() l1=Label(root,text="Hello") l1.pack() Button(root,text='get label font',command=lambda: print(font.nametofont(l1['font']).configure()["family"])).pack() root.mainloop() @TheLizzard: A list is not being used inside a lambda here. Regardless, you’re also incorrect about it being a bad practice to use one to make multiple calls in one.
@martineau The list was edited out. Also there is no way to have multiple commands in 1 line with the lambda without going over the 80 character per line guideline (PEP8).