- HTML Tag
- Syntax
- Example of the HTML tag:
- Using CSS styles
- Example of the tag with CSS styles:
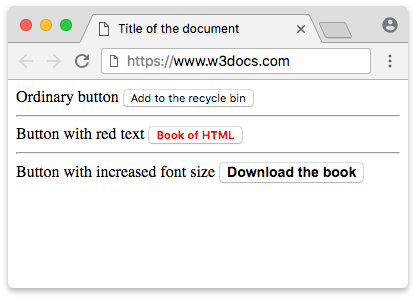
- Result
- Attributes
- Attributes
- How to style tag?
- Common properties to alter the visual weight/emphasis/size of text in tag:
- Coloring text in tag:
- Text layout styles for tag:
- Other properties worth looking at for tag:
- How to add alt text to a button with an image?
- How to add a link to a button?
- About button tag in html
- Синтаксис
- Атрибуты
- Закрывающий тег
- Браузеры
- HTML Button tag
- What Is HTML Tag?
- HTML Tag Attributes
- Styling HTML Button
- HTML Tag
- Browser Support
- Attributes
- Global Attributes
- Event Attributes
- More Examples
- Example
- Example
- Related Pages
HTML Tag
The tag is used to create clickable buttons on the web page. The difference between these elements and buttons created with the tag is that you can place the content (images or text) inside the .
Use the element to define a button within HTML form, as browsers display the content of the tag differently.
Syntax
The
Example of the HTML tag:
html> html> head> title>Title of the document title> head> body> h1>Here will be our button h1> button type="button">Click button> body> html>Using CSS styles
You can apply CSS styles to the tag to change the appearance of the button, its size, color, text font, and so on.
Example of the tag with CSS styles:
html> html> head> title>Title of the document title> head> body> Ordinary button button type="button">Add to the recycle bin button> hr /> Button with red text button type="button" style="color: red;">b>HTML Book b> button> hr /> Button with increased font size button type="button" style="font: bold 14px Arial;">Download the book button>br /> body> html>Result
Attributes
The
Attributes
| Attributes | Value | Description |
|---|---|---|
| autofocus | autofocus | Specifies that the button should receive focus after loading the page. |
| disabled | disabled | Deactivates the button. (Used when the button should become active after performing some action.) |
| form | form_id | Specifies one or more forms the button belongs to. If the button has multiple forms, then their identifiers (form_id) must be separated by spaces. |
| formaction | URL | Defines the address, where the form data will be sent after clicking on the button. (Used only for the buttons with the type=»submit» attribute). |
| formenctype | Defines how the form-data should be encoded when a form is submitted. (Used only for type=»submit»). | |
| application/x-www-form- | All symbols are encoded before a form is submitted (default value). | |
| urlencoded | Symbols are not encoded. | |
| multipart/form-data | Spaces are being replaced by the sign «+», but symbols aren’t encoded. | |
| text/plain | ||
| formmethod | Defines the method of the HTTP request, which will be used when a form is submitted (only for type=»submit»). | |
| get | Passes the form data in the address bar («name = value»), which are added to the URL of the page after the question mark and are separated by an ampersand (&). (http://example.ru/doc/?name=Ivan&password=vanya) | |
| post | The browser communicates with the server and sends the data for processing. | |
| formnovalidate | formnovalidate | Specifies that the form-data should not be validated on submission (only for type=»submit»). |
| formtarget | Specifies, where the response will be shown after the form is submitted (only for type=»submit»). | |
| blank | Opens the response in a new window. | |
| self | Opens the response in the current window. | |
| parent | Opens the response in the parent frame. | |
| top | Opens the response in the full width window. | |
| name | name | Defines the button name. |
| type | Defines the button type. | |
| button | ordinary button | |
| reset | button, that clears the form from the input data | |
| submit | button for sending form data. | |
| value | text | Defines the button value. |
How to style tag?
Common properties to alter the visual weight/emphasis/size of text in tag:
- CSS font-style property sets the style of the font. normal | italic | oblique | initial | inherit.
- CSS font-family property specifies a prioritized list of one or more font family names and/or generic family names for the selected element.
- CSS font-size property sets the size of the font.
- CSS font-weight property defines whether the font should be bold or thick.
- CSS text-transform property controls text case and capitalization.
- CSS text-decoration property specifies the decoration added to text, and is a shorthand property for text-decoration-line, text-decoration-color, text-decoration-style.
Coloring text in tag:
- CSS color property describes the color of the text content and text decorations.
- CSS background-color property sets the background color of an element.
Text layout styles for tag:
- CSS text-indent property specifies the indentation of the first line in a text block.
- CSS text-overflow property specifies how overflowed content that is not displayed should be signalled to the user.
- CSS white-space property specifies how white-space inside an element is handled.
- CSS word-break property specifies where the lines should be broken.
Other properties worth looking at for tag:
- CSS text-shadow property adds shadow to text.
- CSS text-align-last property sets the alignment of the last line of the text.
- CSS line-height property specifies the height of a line.
- CSS letter-spacing property defines the spaces between letters/characters in a text.
- CSS word-spacing property sets the spacing between words.
How to add alt text to a button with an image?
To add alt text to a button with an image, you can use the alt attribute. Here is an example:
button type="button"> img src="button-image.png" alt="Button Label"> button>In this example, the alt attribute has been added to the img element inside the button element. The value of the alt attribute should be a short description of the image, which will be read by screen readers in place of the image itself.
How to add a link to a button?
To add a link to a button, you can wrap the button element in an a element with the href attribute set to the URL you want to link to. Here is an example:
"https://example.com"> "button"> Button Label In this example, the a element has been added around the button element, and the href attribute has been set to the URL you want to link to. When the user clicks on the button, they will be taken to the linked URL.
About button tag in html
Тег создает на веб-странице кнопки и по своему действию напоминает результат, получаемый с помощью тега (с атрибутом type=»button | reset | submit» ). В отличие от этого тега, предлагает расширенные возможности по созданию кнопок. Например, на подобной кнопке можно размещать любые элементы HTML, в том числе изображения. Используя стили можно определить вид кнопки путем изменения шрифта, цвета фона, размеров и других параметров.
Теоретически, тег должен располагаться внутри формы, устанавливаемой элементом . Тем не менее, браузеры не выводят сообщение об ошибке и корректно работают с тегом , если он встречается самостоятельно. Однако, если необходимо результат нажатия на кнопку отправить на сервер, помещать в контейнер обязательно.
Синтаксис
Атрибуты
accesskey Доступ к элементам формы с помощью горячих клавиш. autofocus Устанавливает, что кнопка получает фокус после загрузки страницы. disabled Блокирует доступ и изменение элемента. form Связывает между собой форму и кнопку. formaction Задаёт адрес, на который пересылаются данные формы при нажатии на кнопку. formenctype Способ кодирования данных формы. formmethod Указывает метод пересылки данных формы. formnovalidate Отменяет проверку формы на корректность. formtarget Открывает результат отправки формы в новом окне или фрейме. name Определяет уникальное имя кнопки. type Тип кнопки — обычная, для отправки данных формы на сервер или для очистки формы. value Значение кнопки, которое будет отправлено на сервер или прочитано с помощью скриптов.
Также для этого тега доступны универсальные атрибуты и события.
Закрывающий тег
Результат данного примера показан на рис. 1.
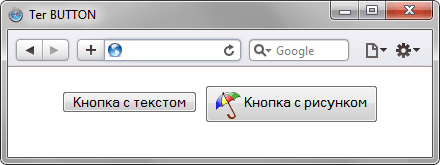
Рис. 1. Вид кнопок в браузере Safari
Браузеры
Internet Explorer до версии 7.0 включительно не поддерживает атрибут value .
HTML Button tag
The button options on the web pages are an example of the HTML tag. This tag enables the webpage to show the desired button for the content domain. In this tutorial, you will study the HTML tag.
What Is HTML Tag?
The HTML tag in the webpage represents a clickable button. It can be used to submit forms, trigger events, or perform other actions.
The HTML Tag displays the HTML page with a controller as required with the content domain. That controller is merely a clickable button, used to indulge documents or anywhere in an HTML document as accessible, standard button functionality. The content’s images and text can reside inside that tag, which is the main difference between this element and the buttons created with the element in HTML. Various browsers operate diverse default types for . Here is an example of how to use the tag:
- button : This is the default value and creates a standard button.
- submit : This creates a submit button that submits a form when clicked.
- reset : This creates a reset button that resets a form when clicked.
HTML Tag Attributes
- type : This attribute specifies the type of button. It can be set to «submit» to submit a form, «reset» to reset a form, or «button» to perform some other action.
- name : This attribute specifies a name for the button, which can be used to identify it in the form data when the form is submitted.
- value : This attribute specifies a value for the button, which will be sent to the server when the form is submitted.
- disabled : This attribute disables the button, making it unclickable.
- onclick : This attribute specifies a JavaScript function to be executed when clicking the button.
- form : This attribute specifies the form that the button belongs to.
- formaction : This attribute specifies the URL of the file that will process the form data when the button is clicked.
- formenctype : This attribute specifies the type of encoding to use when sending form data to the server.
- formmethod : This attribute specifies the HTTP method to use when sending form data to the server.
- formnovalidate : This attribute specifies that the form data should not be validated when clicking the button.
- formtarget : This attribute specifies where to display the response after submitting the form.
In addition to the above-mentioned attributes, you can also use standard HTML attributes, such as id , class , and style to customize the appearance and behavior of the button.
Here is an example of a button with some of these attributes:
You can also use JavaScript event handlers, such as onclick , to specify an action to be performed when the button is clicked.
The button element should not be used to create a link to another page. You must use the tag to create a link.
Styling HTML Button
You can also style a button using CSS by adding a class or id attribute to the button element and then styling it using a stylesheet.
HTML Tag
Inside a element you can put text (and tags like , , ,
, , etc.). That is not possible with a button created with the element!
Tip: Always specify the type attribute for a element, to tell browsers what type of button it is.
Tip: You can easily style buttons with CSS! Look at the examples below or visit our CSS Buttons tutorial.
Browser Support
Attributes
| Attribute | Value | Description |
|---|---|---|
| autofocus | autofocus | Specifies that a button should automatically get focus when the page loads |
| disabled | disabled | Specifies that a button should be disabled |
| form | form_id | Specifies which form the button belongs to |
| formaction | URL | Specifies where to send the form-data when a form is submitted. Only for type=»submit» |
| formenctype | application/x-www-form-urlencoded multipart/form-data text/plain | Specifies how form-data should be encoded before sending it to a server. Only for type=»submit» |
| formmethod | get post | Specifies how to send the form-data (which HTTP method to use). Only for type=»submit» |
| formnovalidate | formnovalidate | Specifies that the form-data should not be validated on submission. Only for type=»submit» |
| formtarget | _blank _self _parent _top framename | Specifies where to display the response after submitting the form. Only for type=»submit» |
| name | name | Specifies a name for the button |
| type | button reset submit | Specifies the type of button |
| value | text | Specifies an initial value for the button |
Global Attributes
Event Attributes
More Examples
Example
.button border: none;
color: white;
padding: 15px 32px;
text-align: center;
text-decoration: none;
display: inline-block;
font-size: 16px;
margin: 4px 2px;
cursor: pointer;
>
Example
Use CSS to style buttons (with hover effect):
.button border: none;
color: white;
padding: 16px 32px;
text-align: center;
text-decoration: none;
display: inline-block;
font-size: 16px;
margin: 4px 2px;
transition-duration: 0.4s;
cursor: pointer;
>
.button1 background-color: white;
color: black;
border: 2px solid #4CAF50;
>
.button1:hover background-color: #4CAF50;
color: white;
>
.button2 background-color: white;
color: black;
border: 2px solid #008CBA;
>
.button2:hover background-color: #008CBA;
color: white;
>