- Supermicro — установка SSL сертификата на IPMI (Redfish, BMC)
- Supermicro IPMI SSL TLS Certificate Replacement
- Share this:
- 15 thoughts on “Supermicro IPMI SSL TLS Certificate Replacement”
- Leave a Reply Cancel reply
- Fix Java Error – Failed To Validate Certificate For IPMI or KVM
- Fix Java Error – Failed To Validate Certificate For IPMI or KVM
- Conclusion
Supermicro — установка SSL сертификата на IPMI (Redfish, BMC)

Устанавливаем SSL сертификат на IPMI web-интерфейс управления сервером Supermicro.
Логинимся в IPMI сервера. Открываем раздел Configuration > SSL Certification.

Примечание: есть поддержка SHA2 и RSA 2048 bit SSL.
Нам понадобится два файла:
Видно, что генерация CSR отсутствует. Генерируем сам CSR и приватный ключ с помощью подсистемы Linux на своей машине Windows 10:
В результате получаем два файла:
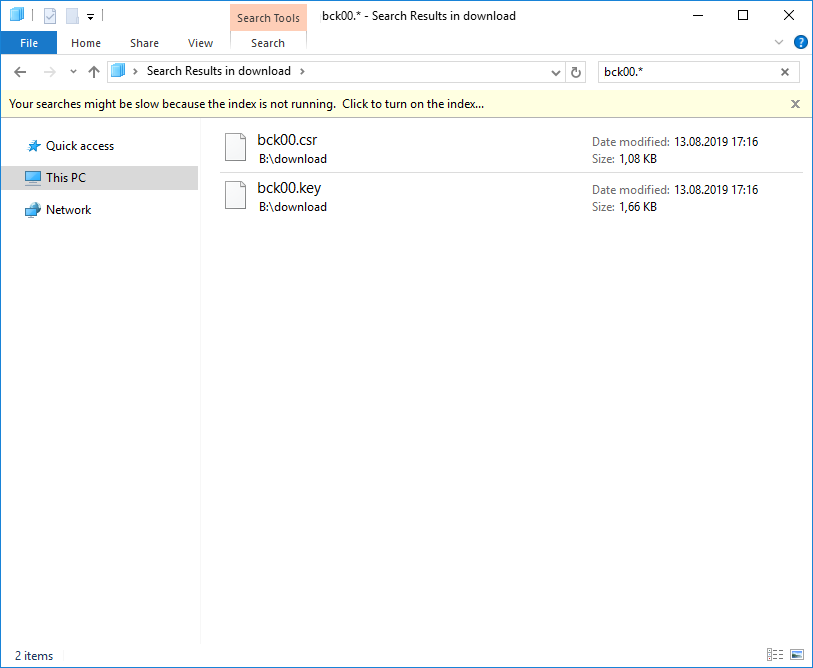
Открываем блокнотом файл CSR и копируем в буфер содержимое.
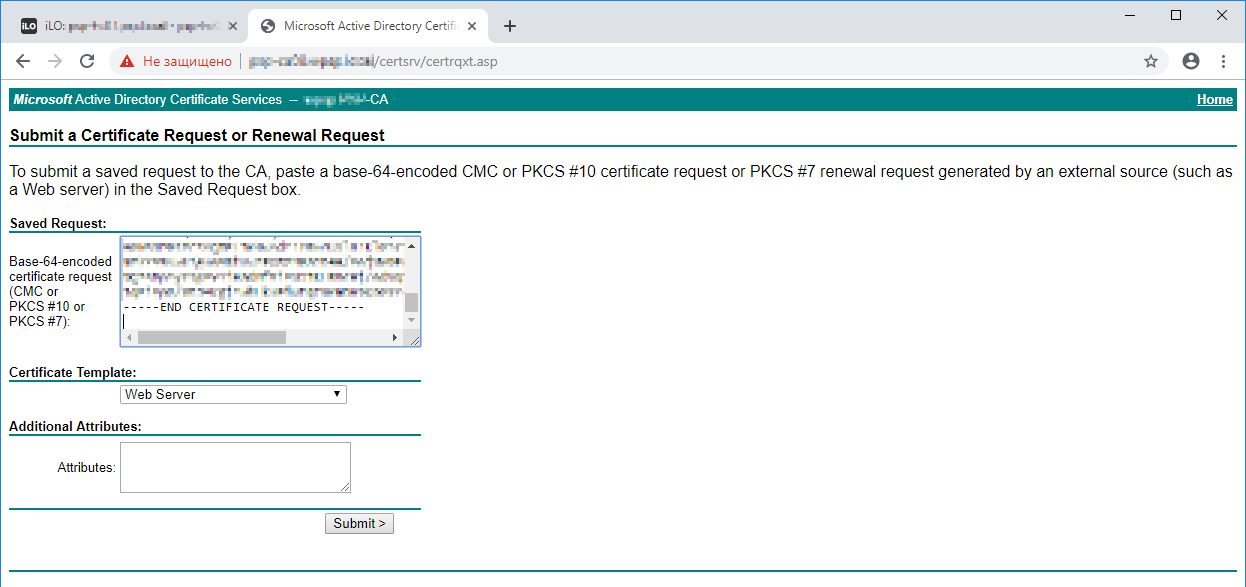
Открываем центр сертификации.
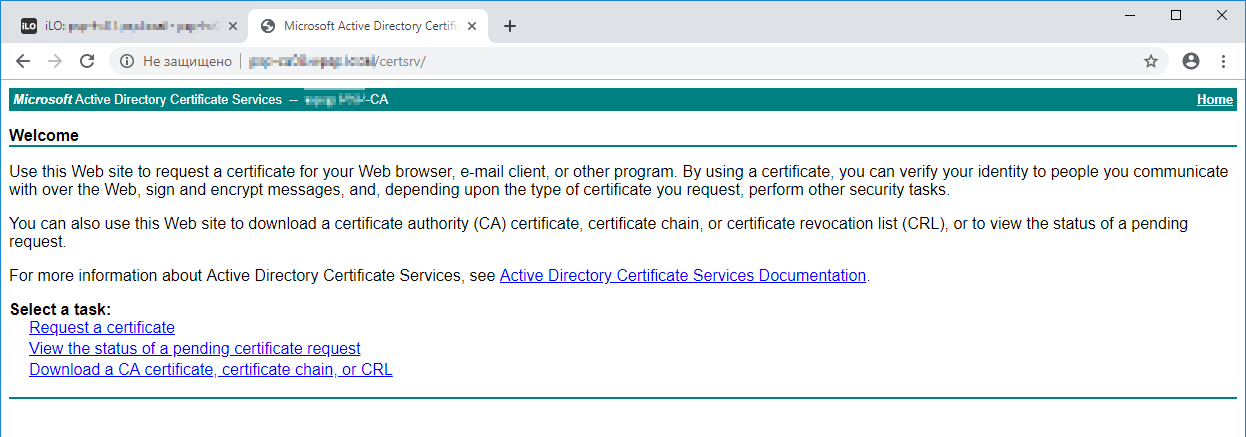
Request a certificate.
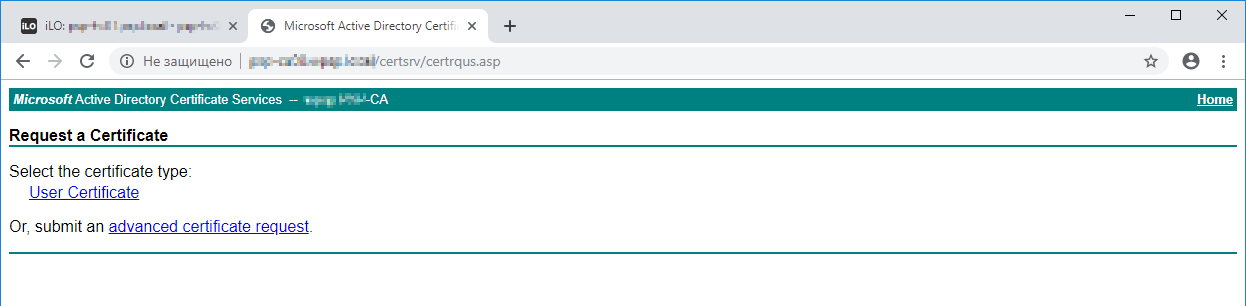
Advanced certificate request.
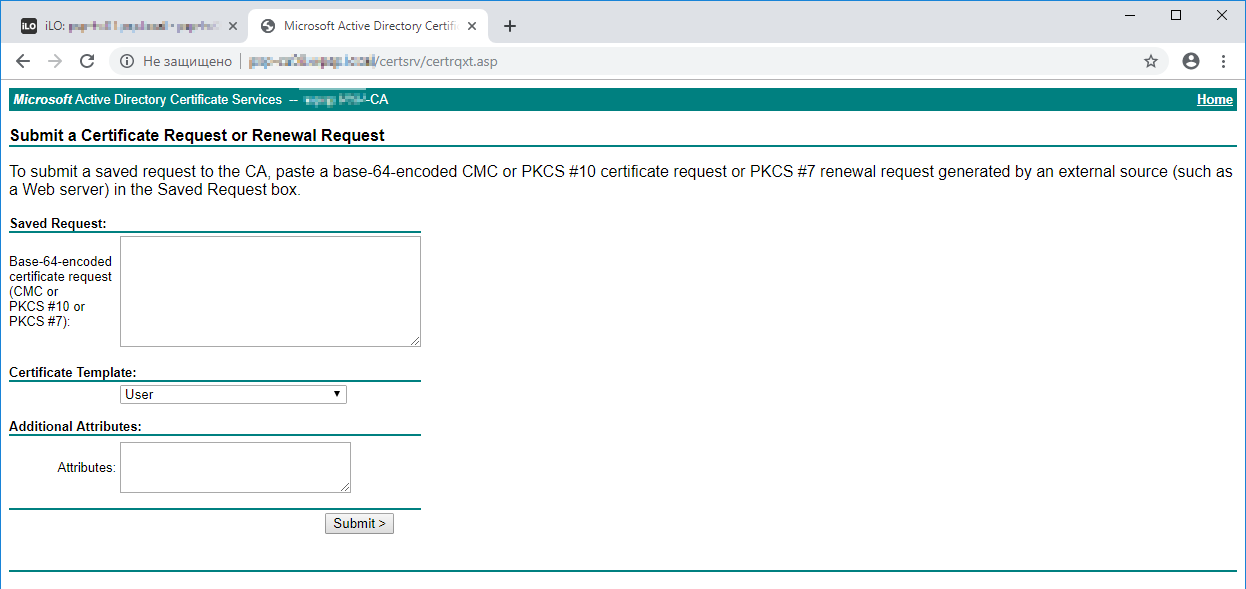
В Saved Request вставляем скопированный base64 код. Certificate Template меняем на Web Server.
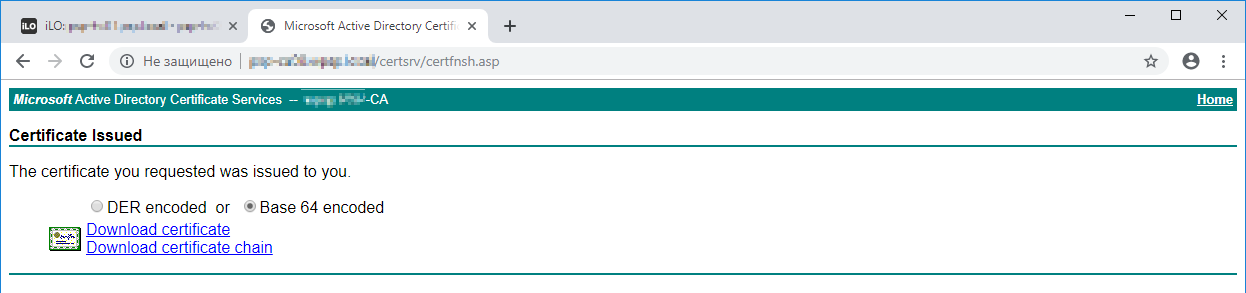
Устанавливаем галку Base 64 encoded и скачиваем сертификат Download certificate. Скачивается файл сертификата CER.
Переименовываем файл KEY в xxx-key.pem.
Переименовываем файл CER в xxx-cert.pem.
Логинимся в IPMI сервера. Открываем раздел Configuration > SSL Certification.
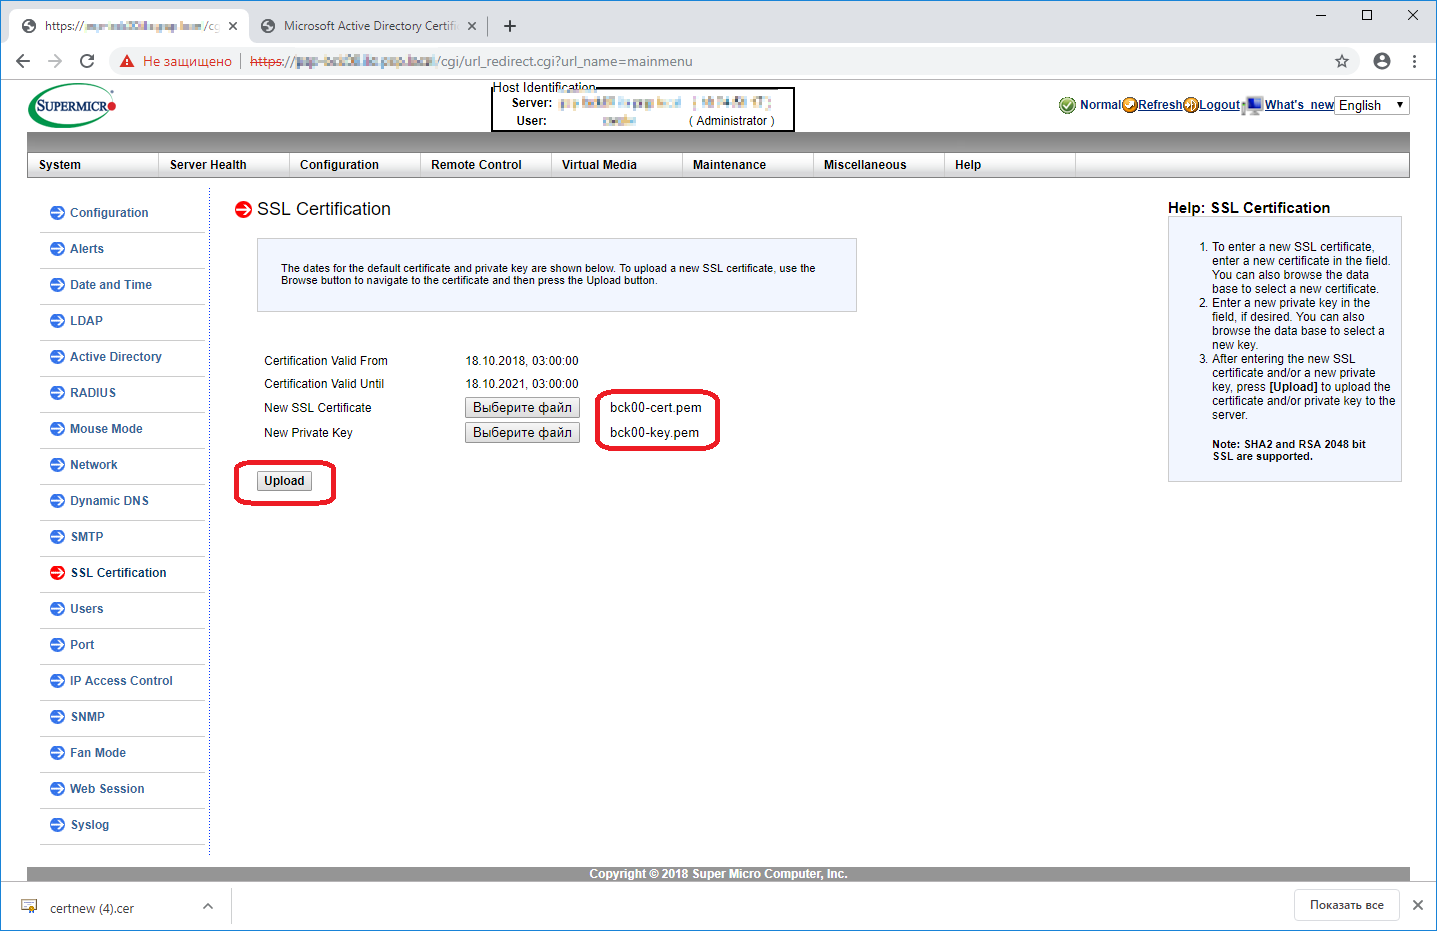
New SSL Certificate — сюда загружаем файл xxx-cert.pem.
New Private Key — сюда загружаем файл xxx-key.pem.
Нажимаем кнопку Upload.
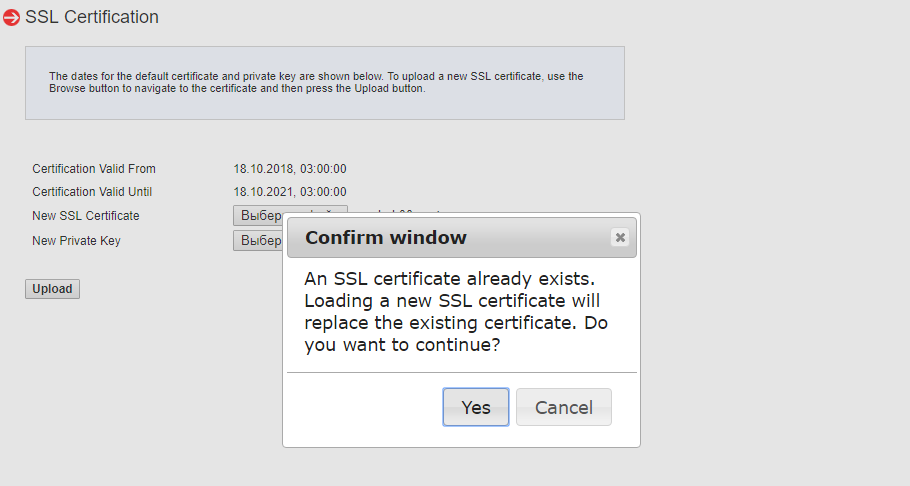
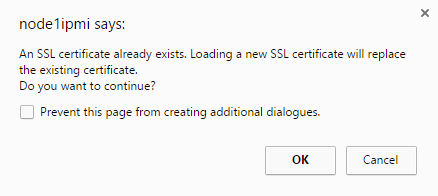
Подтверждаем замену самоподписанного сертификата — Yes.
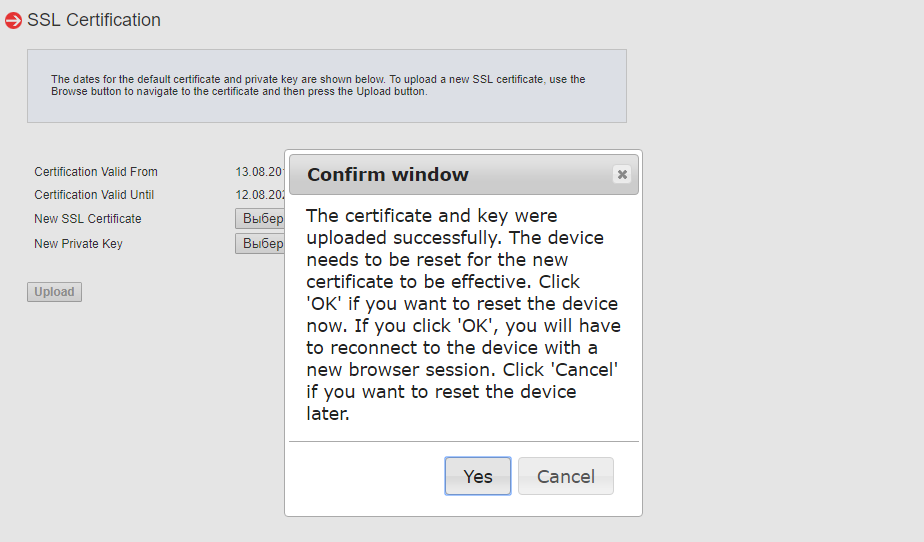
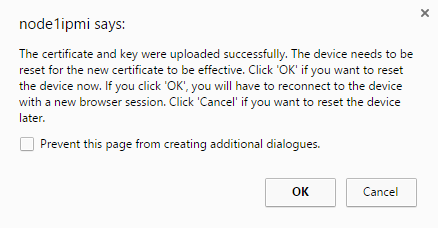
Сертификат и ключ успешно загружены, перезагружаем IPMI — Yes.
Через пару минут перезапускаем браузер и проверяем, что IPMI работает с новым сертификатом.
Supermicro IPMI SSL TLS Certificate Replacement
I’ve been meaning to replace the SSL/TLS certificates on my Supermicro servers IPMI (Intelligent Provisioning Management Interface) consoles. Now that I’ve upgraded the firmware on both units I think it’s about time I sorted the certificates as well. This is something I did at work some time ago and then handed over to our team junior to complete. Anyone I work with will tell you that I really do hate seeing certificate alerts!
Let’s get right to it – once logged on we can click the ‘Configuration’ button and then select the ‘SSL Certification’ option.
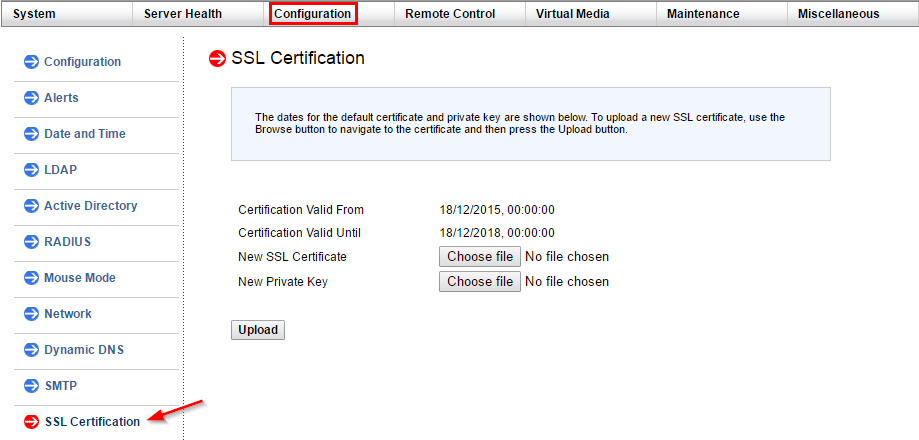
The system requires we provide the new certificate and the private key, it would be nice if Supermicro provided a built-in certificate creation and signing request interface. It’s not the end of the world that they don’t but it would simplify things.
I will generate a private 2048 bit RSA key and redirect the output from OpenSSL to a file named ‘node1impi.key’, I strongly recommend you do not create a key size less than 2048 bits.
C:\OpenSSL\bin>openssl.exe genrsa 2048 > node1ipmi.key Generating RSA private key, 2048 bit long modulus . +++ . +++ e is 65537 (0x010001) C:\OpenSSL\bin>
Now I have my private key it’s time to create my configuration file so I can then combine the two to generate my certificate signing request, also known as a CSR. For this example I’m just going to re-use an existing template I have, modifying the common name. I’ll save this text file as ‘node1ipmi.cfg’. Be sure to use SHA256 as a minimum for the hashing algorithm.
We now feed OpenSSL the configuration and private key files and instruct it to output a new CSR.
C:\OpenSSL\bin>openssl.exe req -out node1ipmi.csr -key node1ipmi.key -new -config node1ipmi.cfg
The next step is to submit the CSR to your certificate authority (CA) – of course the instructions here depend entirely on your own CA setup so I’ll move on to importing the files to the IPMI console.
Once you have the required files you will need to ensure the certificate ends with a .cert or .pem extension and the private key file has a .pem extension.

Once confirmed the system will prompt for a reset of the IPMI interface.
Allow the system time to complete the reset process. If all is well your broswer should no longer dispaly an insecure/warning message and we can celebrate the joyous green. I am happy to see that Chrome reports Supermicro support modern ciphers on their IPMI interfaces, or at least on my version with the latest firmware.
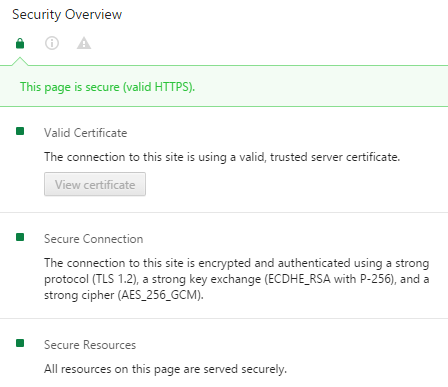
A quick nmap scan seems to suggest the following cipher suites are supported, I haven’t been able to find any definitive documentation though so take this with a pinch of salt.
- TLS_ECDHE_RSA_WITH_AES_256_GCM_SHA384 (secp256r1)
- TLS_ECDHE_RSA_WITH_AES_256_CBC_SHA384 (secp256r1)
- TLS_DHE_RSA_WITH_AES_256_GCM_SHA384 (dh 1024)
- TLS_DHE_RSA_WITH_AES_256_CBC_SHA256 (dh 1024)
- TLS_RSA_WITH_AES_256_GCM_SHA384 (rsa 2048)
- TLS_RSA_WITH_AES_256_CBC_SHA256 (rsa 2048)
- TLS_ECDHE_RSA_WITH_AES_128_GCM_SHA256 (secp256r1)
- TLS_ECDHE_RSA_WITH_AES_128_CBC_SHA256 (secp256r1)
- TLS_DHE_RSA_WITH_AES_128_GCM_SHA256 (dh 1024)
- TLS_DHE_RSA_WITH_AES_128_CBC_SHA256 (dh 1024)
- TLS_RSA_WITH_AES_128_GCM_SHA256 (rsa 2048)
- TLS_RSA_WITH_AES_128_CBC_SHA256 (rsa 2048)
There are other ways of generating the required certificates and deploying to Supermicro systems but this works perfectly fine for me and my small lab setup. Hopefully it will prove useful to anyone in a similar situation.
Share this:
15 thoughts on “Supermicro IPMI SSL TLS Certificate Replacement”
Sorry for kinda necro-posting; I’m facing the problem here that the device allows uploading, displays the correct SSL certificate expiration date…
Sadly, after the reboot it comes back with some self signed certificate… Reply
Have you tried flushing your browser cache/using an alternate browser just to rule that out? Also you could do a reset on the IPMI controller first then complete the change to see if that assists. I assume you’re running the latest firmware version as potentially it could be a bug too. Reply
Great post. I am having an issue getting the entire certificate chain installed. When I browse to the management IP I see Cert error chain not complete and does not display the Intermediate cert, even though the file used for the installation includes the server cert and intermediate cert. Any thoughts?. Reply
Hi Andres, First off thanks for the kind words, always nice to get positive feedback! When you open the certificate file on your computer does it show the complete chain correctly on the ‘Certification Path’ tab? If you could let me know what shows there and give me a bit more info on what you’ve done so far that would be great. I’m sure we can get to the bottom of the problem. Alex Reply
I installed my own ones. no issue reported during install. Alas, the web server stopped working.
tried:
– upgrade to latest firmware (3.72)
– reset via ipmicfg -fd
but the web server seems not to be working anymore.
but BMC is reachable and pretty manageable via IPMIVIEW. Any suggestion ? Ivan Reply
Hi Ivan, Sorry to hear you are having problems. I wonder, have you tried doing a BMC reset with IPMITool? An example is below, this is from memory and you might want to perform with the system in maintenance – ipmitool mc reset cold -H ipAddressHere -U username -P password I have had some luck in the past with a complete power off, removing all power leads and letting the capacitors drain out. I don’t recall having the same problem as you describe but that might help if the above reset doesn’t. Let me know how you get on, hopefully we can come to a resolution. Regards, Alex Reply
Hi Alex, I did not try ipmitool, gonna try out shortly; I guess IPMICFG should do the same but seems not to work. will try ipmitool. I tried to remove powercord and detach RTC battery for a couple of minutes but it seem to retain conf somewhere in flash. Gonna perform some more testing and get back to you. thank you for the suggestions. Ivan Reply
Apologies if I am being thick here but the 1st cmd generates the file node1ipmi.key. However, when you show the GUI import, for private key, you show Node1ipmi.pem Where does that file come from? Reply
Hi Mike, If you check the section after submitting the config and private key files to OpenSSL and then to your CA, I mention the need to ensure the files have the correct extensions. Just above the screenshot I think you’re referencing. Let me know if you have any trouble and I’ll try and assist further. Reply
So I have to sign the certificate (server.csr) that’s created by the openssl command against our Company signed certificates. This gives me a cert.pem file. I am struggling to then use this cert.pem as a valid certificate – IPMI tools barfs stating the private key and cert don’t match. Reply
Just to make sure I’ve got your workflow down correctly – -> You’re creating a private key using the OpenSSL command
-> You create a config file similar to the one I use as an example
-> You pipe the above private key and config file through OpenSSL to generate a CSR
-> You submit the CSR request to (presumably) internal certificate authority – this generates your signed cert which you then save
-> You select the private key and the new cert.pem for upload and the interface refuses to accept these files The last point might be incorrect – are you saying that the interface allows you to upload the files but remote tools do not like the certificate? If it accepted them and restarted fine I’d expect the webpage to display the correct certificate without errors. Let me know if I’ve misunderstood, I’m sure we can figure it out. Reply
When I try to import via the WebUI in to the IPMI, it generates an error messages stating these do not match. Reply
I’ve run through the steps again on a test system and I’m not able to reproduce your issue at this time. If I pick the wrong private key then I can generate the problem but otherwise it’s working for me with the kit I have. I’m presuming you’ve tested with a fresh private key/config and submitted that to your CA? Reply
Yes I have . I think the problem is the key that I get (cert.pem) is where the issue lies.Even though this cert.pem is created using the server.csr generated from the private key, it’s still not liking the combination when imported in to the WebUI. SSL certificate validation failed. Please try to upload the certificate and key again. NOTE: The cert.pem starts/finishes with: —–BEGIN CERTIFICATE—–
—–END CERTIFICATE—– The private key starts/finishes with: —–BEGIN RSA PRIVATE KEY—–
—–END RSA PRIVATE KEY—– If I try to “validate” the cert.pem, I get the following: openssl req -noout -text -in cert.pem
unable to load X509 request
139851323561808:error:0906D06C:PEM routines:PEM_read_bio:no start line:pem_lib.c:703:Expecting: CERTIFICATE REQUEST I also tried to follow another guide and run this command too but it errors: openssl x509 -x509toreq -days 365 -in cert.pem -signkey server_key_3.pem -out ca.req
unable to load certificate
140394197907280:error:0906D06C:PEM routines:PEM_read_bio:no start line:pem_lib.c:703:Expecting: TRUSTED CERTIFICATE Reply
Hmm I think when you’re validating that cert.pem you’re actually asking OpenSSL to validate a CSR file. I’d guess if you pointed that at the CSR it would load it fine. I have to say I’m not an expert with OpenSSL so I could be wrong in that assumption. I’ll see if I can find another text box to try this out on. What firmware version are your systems running? Reply
Leave a Reply Cancel reply
This site uses Akismet to reduce spam. Learn how your comment data is processed.
Fix Java Error – Failed To Validate Certificate For IPMI or KVM

In this tutorial, we intend to teach you to Fix Java Error – Failed To Validate Certificate For IPMI or KVM.
IPMI (Intelligent Platform Management Interface) is a set of standardized specifications for hardware-based platform management systems that makes it possible to control and monitor servers centrally.
KVM is a type of hypervisor that enables, emulates, and provides for the creation of virtual machines on operating systems. These machines are built on top of the Linux kernel.
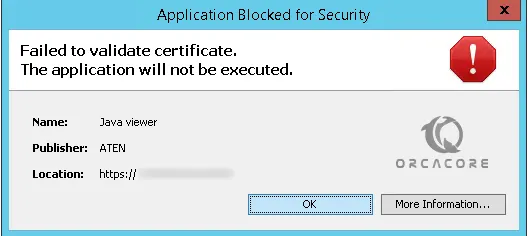
Sometimes when you want to access IPMI, KVM, or remote control from a dedicated server, you should launch the console and you will get the following error:
Error Failed To Validate Certificate. The application will not be executed.To Fix this error, follow the steps below.
Fix Java Error – Failed To Validate Certificate For IPMI or KVM
The first step is to update your Java version. In some cases, it will resolve your problem. But if you have still this error follow the steps below.
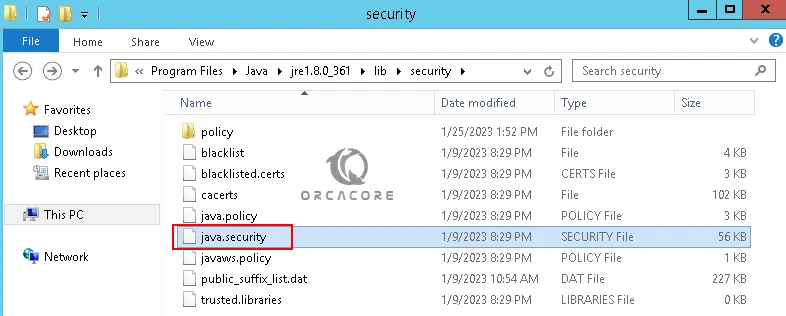
To fix this error, you should remove java.security file. To do this, you should navigate to the following location:
C:\Program Files > Java > jre1.8.0_361 > lib > securityC:\ Program Files (x86) > Java > jre1.8.0_361 > lib > securityOr Program Files depends on your OS.
And remove the java.security from there.
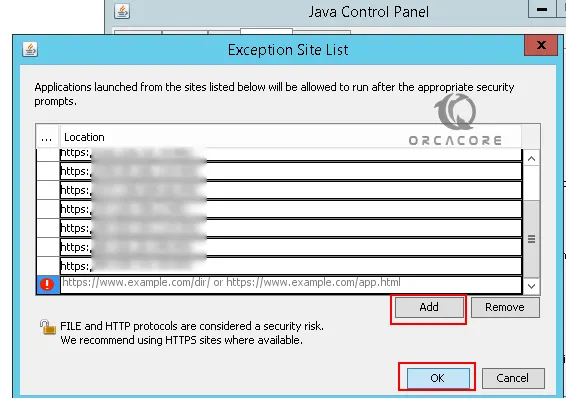
Next step is to fix the java error, from your start menu search for Configure Java. From the Java control panel, you need to navigate to the security section and click Edit Site List.
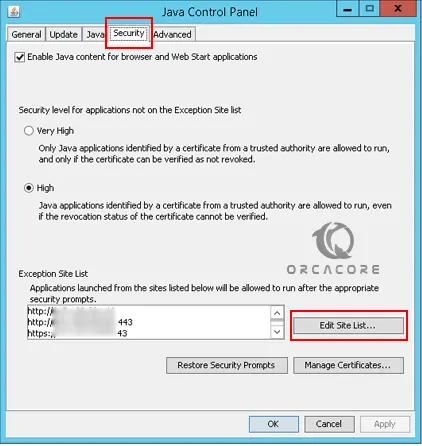
From there, you need to add the remote console IP addresses. The syntax should be like the following:
For HTTPS, use: https://x.x.x.x:443
Finally, restart your browser and try again. It will be fixed. You can access your console.
Conclusion
At this point, you have learned to Fix Java Error – Failed To Validate Certificate For IPMI or KVM.
Hope you enjoy it. You may be like these articles: