- How to connect a Raspberry Pi to a serial USB port with Python from the terminal
- What we need
- Step-by-step guide
- Raspberry Pi environment preparation
- Install Pyserial
- Test installation and read console
- Using Pyserial inside Python programs
- Introducing the guide to getting started with the Raspberry Pi
- How piwheels will save Raspberry Pi users time in 2020
- Set up a Tor proxy with Raspberry Pi to control internet traffic
- Serial Communication in Raspberry Pi Using Python
- Using UART on Raspberry Pi – Python
- Using Python
- Installing pySerial
- Example Program
- Related Posts:
- Share this post
- Author
How to connect a Raspberry Pi to a serial USB port with Python from the terminal
Use these open source tools and simple commands to easily interface with other devices from your Raspberry Pi.
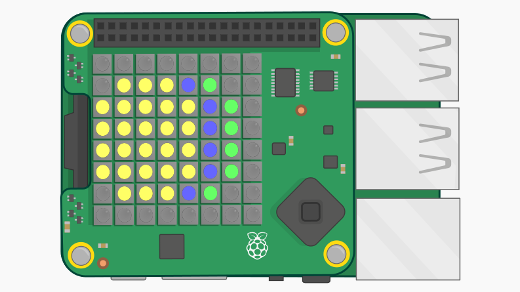
Raspberry Pi can be used to interface with the real world from its GPIO, for example, by controlling a stepper motor. You can also use Raspberry Pi to dialog with some devices—like Arduino—by using a serial USB port.
In this guide, I’ll show you how to connect your Raspberry Pi to a serial USB port and read its values with Python from the terminal (without a desktop environment). For this purpose, we’ll use Pyserial and its terminal tool.
What we need
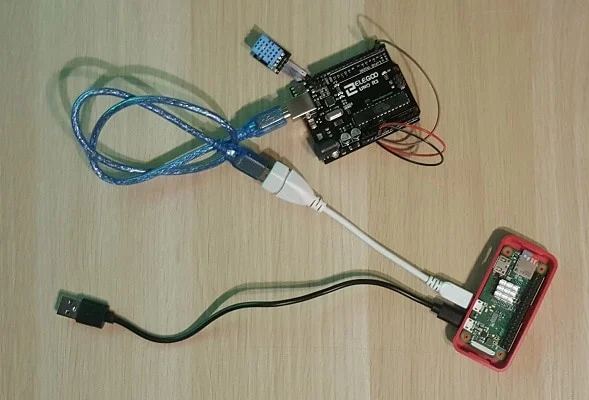
For this project, I’m going to use a Raspberry Pi Zero W and an Arduino Uno R3. Steps should also work with newer Raspberry Pi boards.
- Raspberry Pi Zero W (including proper power supply or a smartphone micro USB charger with at least a 3A) or newer board
- micro SD card (at least 16 GB, at least class 10)
- Arduino Uno R3 board or compatible board (you can also consider the Elegoo starter kit).
Step-by-step guide
We’ll start by installing Raspbian Buster Lite in our Raspberry Pi Zero W. Then, we’ll use Python to install proper libraries to read data from Arduino Uno R3.
Raspberry Pi environment preparation
Before you start, please refer to Install Raspbian Buster Lite in your Raspberry Pi article to install Raspberry PI OS.
Furthermore, Rasbpian Buster Lite comes with Python pre-installed.
Now we must configure Arduino Uno with its first sketch. To accomplish this, you have two options:
Install Pyserial
Before installing Pyserial, we need to get pip:
sudo apt install python-pipNow we can go on to install Pyserial:
python -m pip install pyserialTest installation and read console
To read our console, we need to connect the Raspberry Pi USB port to Arduino one. For testing purposes, I’ll show you results from my weather system:
Arduino must be configured to send data via COM port with a Serial.print command inside its running sketch. Remember to append carriage return (text «\n») to each data sample in your Arduino sketch, in order to have different rows for each reading.
In this configuration, you can simply use the Pyserial miniterm tool to list available ports and their output. Use command python -m serial.tools.miniterm, then enter device port and receive port data on screen. Use CTRL+] to close connection:
pi@raspberrypi:~ $ python -m serial.tools.miniterm --- Available ports: --- 1: /dev/ttyACM0 'ttyACM0' --- 2: /dev/ttyAMA0 'ttyAMA0' --- Enter port index or full name: /dev/ttyACM0 --- Miniterm on /dev/ttyACM0 9600,8,N,1 --- --- Quit: Ctrl+] | Menu: Ctrl+T | Help: Ctrl+T followed by Ctrl+H --- 20.0;61.0 20.0;61.0 20.0;61.0 --- exit ---You can also go directly on the port reading, if you already know its name, just by appending the port name. In my example, the correct port is /dev/ttyACM0 (please refer Connecting Raspberry Pi to Arduino only via terminal from Raspbian Buster Lite to know how to discover your port), so direct command will be:
pi@raspberrypi:~ $ python -m serial.tools.miniterm /dev/ttyACM0 --- Miniterm on /dev/ttyACM0 9600,8,N,1 --- --- Quit: Ctrl+] | Menu: Ctrl+T | Help: Ctrl+T followed by Ctrl+H --- 20.0;61.0 20.0;61.0 20.0;61.0 --- exit ---Using Pyserial inside Python programs
Also, this operation is really simple. You need to import a serial library and call port opening. Create a file named «test.py»:
and include the following code:
import serial ser=serial.Serial(’/dev/ttyACM0’,9600) readedText = ser.readline() print(readedText) ser.close()Article originally posted at peppe8o.com. Reposted with the permission.

Introducing the guide to getting started with the Raspberry Pi
Find out how to choose a Raspberry Pi and start using it in our new eBook.

How piwheels will save Raspberry Pi users time in 2020
By making pre-compiled Python packages for Raspberry Pi available, the piwheels project saves users significant time and effort.

Set up a Tor proxy with Raspberry Pi to control internet traffic
Create an anonymous server and browser with these simple steps and a few pieces of affordable hardware.
Serial Communication in Raspberry Pi Using Python
This is the fourth part of our Raspberry Pi tutorial series, in this post i will show you, how to use Serial Communication in Raspberry Pi using Python programming language. The following are the links to the previous tutorials on the Raspberry Pi.
Serial Communication is one of the most important type of communication for Embedded Engineers, as it is simple as compared to other types of communication and most of the embedded devices still use this communication and that’s why to connect these devices with Raspberry Pi, serial communication is must. Using serial communication in Raspberry Pi is little bit tricky, but after this tutorial you will be able to successfully use Serial Communication in Raspberry Pi using Python programming language.
I don’t know whether PySerial package is pre-installed or not with the Rasbian OS, but in my case it was not installed as i am using the Lite version of Raspbian OS, so our first step is to install the PySerial package, and then using the API’s present in this package, we will send and receive data from Raspberry Pi to our Windows 10 PC, the connection diagram is shown below.
If your Raspberry Pi is connected with internet then use the following command in LXTerminal to install the PySerial library for Python.
And in case you don’t have working internet connection on Raspberry Pi, then you can download the PySerial package by clicking here, on Windows/Linux/Mac platforms and then copy these files into your Raspberry Pi, and then by using LXTerminal go to the directory where you have copied the files and after that use the following command to install the PySerial package.
So after this stage we have PySerial package installed and now we can proceed with writing the simple program for serial read and write operations, but before that we have to enable the Serial communication in Raspberry Pi, which is disabled by default.
There are two ways to do this, one is with Advanced Serial Setting in raspi-config and another is by editing the config.txt file, present in the boot directory of Raspberry Pi file system. Use the following command in LXTerminal to open the config.txt file using nano editor.
After using the above command, config.txt file will get opened in nano editor, and now you have to search for the following line.
After completing this step, save the config.txt file and reboot your Raspberry Pi, and we will write the Python program for ser ial communication using Raspberry Pi.
Note: If this line is not present in your config.txt file, then manually add this line and set the value to one.
The Python program for serial communication is as follow:
Save the above program in a file with any name, just make sure that it is a python file with extension *.py and after this connect your Raspberry Pi with USB to TTL converter and open the communication port on PC using any serial terminal PC application, like I am using HW Hercules, after running this script you will see the following data on HW Hercules running on PC, and if you type anything of HW Hercules terminal, it will be displayed on Raspberry Pi, character by character.
 |
| Serial Communication Using RPi Program Output |
I hope you guys like this post, the program is simple and self-explanatory, but still, if anyone faces any problem just drop a comment below in the comment box or mail me directly, I will try to help you as soon as possible.
About Embedded Laboratory
Embedded Laboratory is a group of Electronics Hobbyist and Enthusiast, working on, to provide quality content to the guys starting in the Embedded Domain.
Using UART on Raspberry Pi – Python

- And launching it,
minicom -b 115200 -o -D /dev/ttyAMA0
- 115200 is the baud rate
- ttyAMA0 is the port
- Verify whether the pi is receiving the same data as it transmits.
Using Python
In this section we will see, How to access UART using Python.
Installing pySerial
Pyserial provides backend for serial communication using python. The module named ‘serial’ selects appropriate backend automatically. To install pySerial, by using following command.
sudo apt-get install python-serial
Now the module serial can be imported to python by using ‘import serial‘.
Example Program
The following python program reads 10 characters from the serial port and sends back it.
import serial ser = serial.Serial ("/dev/ttyAMA0") #Open named port ser.baudrate = 9600 #Set baud rate to 9600 data = ser.read(10) #Read ten characters from serial port to data ser.write(data) #Send back the received data ser.close() Any doubts or suggestions? Comment below.
Related Posts:
Share this post
Author

Ligo George says:
bo says:
Glenn A Hamblin says:
Thanks for posting this project Vivek, Very informative. Are there any serial ports other than the port that is configured as the terminal? I wonder If I can do a 9-bit serial stream on the Pi? So many questions!! Thanks again,
Glenn
Rendon Greeff says:
Rendon Greeff says:
aman surya says:
ttyAMA0 is not at all there
instead its serial0
it’s like console=serial0,15200 etc
i am not able to do this so please help me
Pierre Marconi says:
Ligo George says:
Misha says:
Hi I am planning on sending integer data over a 433Mhz RF kit using 2 RPi’s. Now I have searched for a very long time and cannot find valid information. Please can you help. I want to send numerical data(integers or floats perhaps) over the 433Mhz RF link kit using the UART pins. Now the data sent is constantly changing in an infinite loop. 1. I assume if I change the parameters defining what “data” is (referencing above code) then I could transmit anything?
2. What is the code for the receiver? what code can I use to read the numbers that I sent through? All my code is in python like above and would like to keep it such
Any help would be appreciated. Misha
Ligo George says:
Hi,
Above tutorial not explaining to control your Pi through UART. It just shows how to use UART. We need UART communication for a lot of applications.
Mayke Santos says:
Hi.
How do you log into the Pi through UART communication? I managed to connect my Raspberry Pi to my Laptop using the method you described above; but I still don’t know how to control my Pi. Minicom does not give you signing in capabilities; does it?