- Compiling and Running Swing Programs
- Install the Latest Release of the Java SE Platform
- Create a Program That Uses Swing Components
- Compile the Program
- Run the Program
- Working with GUI applications in VS Code
- Develop JavaFX applications
- Create a new JavaFX project
- Run the JavaFX application
- More JavaFX examples
- Develop AWT applications
- Develop Swing applications
- Как начать пользоваться Swing GUI-визардом IntelliJ IDEA. Подробная инструкция
- Создание Swing GUI форм средствами JetBrains IntelliJ IDEA 2016.1
Compiling and Running Swing Programs
This section explains how to compile and run a Swing application from the command line. For information on compiling and running a Swing application using NetBeans IDE, see Running Tutorial Examples in NetBeans IDE. The compilation instructions work for all Swing programs applets, as well as applications. Here are the steps you need to follow:
- Install the latest release of the Java SE platform, if you haven’t already done so.
- Create a program that uses Swing components.
- Compile the program.
- Run the program.
Install the Latest Release of the Java SE Platform
Create a Program That Uses Swing Components
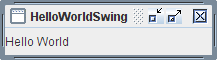
The HelloWorldSwing.java example, like all of our Swing tutorial examples, is created inside a package. If you look at the source code, you see the following line at the beginning of the file:
This means you must put the HelloWorldSwing.java file inside of a start directory. You compile and run the example from the directory above the start directory. The tutorial examples from the Using Swing Components lesson are inside of a components package and the examples from the Writing Event Listeners lesson are inside a events package, and so on. For more information, you might want to see the Packages lesson.
Compile the Program
Your next step is to compile the program. To compile the example, from the directory above the HelloWorldSwing.java file:
javac start/HelloWorldSwing.java
If you prefer, you may compile the example from within the start directory:
javac HelloWorldSwing.java
but you must remember to leave the start directory to execute the program.
If you are unable to compile, make sure you are using the compiler in a recent release of the Java platform. You can verify the version of your compiler or Java Runtime Environment (JRE) using these commands
javac -version java -version
Once you’ve updated your JDK, you should be able to use the programs in this trail without changes. Another common mistake is installing the JRE and not the full Java Development Kit (JDK) needed to compile these programs. Refer to the Getting Started trail to help you solve any compiling problems you encounter. Another resource is the Troubleshooting Guide for Java™ SE 6 Desktop Technologies.
Run the Program
After you compile the program successfully, you can run it. From the directory above the start directory:
java start.HelloWorldSwing
Working with GUI applications in VS Code
You can develop Java GUI applications in Visual Studio Code easily. To achieve that, you need to install the Extension Pack for Java, which includes all the required extensions to develop Java GUI applications.
If you run into any issues when using the features below, you can contact us by entering an issue.
Develop JavaFX applications
Create a new JavaFX project
You can create a new JavaFX application with just a few steps in VS Code:
- Step 1: Install the Extension Pack for Java.
- Step 2: In Visual Studio Code, open the Command Palette ( ⇧⌘P (Windows, Linux Ctrl+Shift+P ) ) and then select the command Java: Create Java Project.
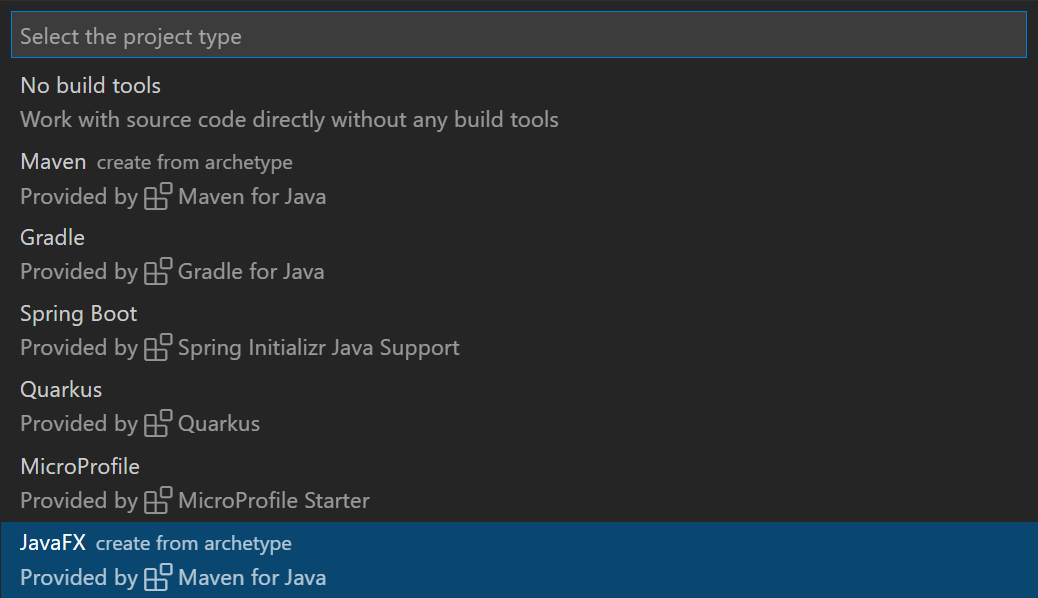
- Step 3: Select the option JavaFX in the list, follow the wizard, which will help you scaffold a new JavaFX project via Maven Archetype.
Run the JavaFX application
Note: The following guidance only works for projects managed by Maven. The generated project requires at least JDK 11 to launch it. Please make sure you have JDK 11 installed locally and set the installation path to the setting java.configuration.runtimes .
To run the JavaFX application, you can open the Maven Explorer, expand hellofx > Plugins > javafx and run the Maven goal: javafx:run .
Note: Make sure you have installed the Maven for Java extension. If you cannot find the Maven explorer, open the Command Palette ( ⇧⌘P (Windows, Linux Ctrl+Shift+P ) ) and then select the command Explorer: Focus on Maven View.
More JavaFX examples
More JavaFX project examples can be found in the openjfx samples repository, which covers different project structures (such as Gradle and unmanaged folder projects). There is documentation on each sample to describe how to run the program.
Develop AWT applications
By default, the types from the Abstract Window Toolkit (AWT) are hidden. You may notice that code completions are not working when you are developing an AWT application. To enable completions, you can open the Command Palette ( ⇧⌘P (Windows, Linux Ctrl+Shift+P ) ) and then select the command Java: Help Center. Go to the Student section and select Enable AWT Development.
Note: This action will update a setting, java.completion.filteredTypes at the workspace level in .vscode\settings.json , so please make sure a workspace is opened in VS Code.
You can use the sample code below to run a simple Java AWT application in VS Code.
import java.awt.*; import java.awt.event.*; public class AwtExample extends Frame public AwtExample() Button btn = new Button("Button"); btn.setBounds(50, 50, 50, 50); add(btn); setSize(150, 150); setTitle("This is my First AWT example"); setLayout(new FlowLayout()); setVisible(true); addWindowListener(new WindowAdapter() public void windowClosing(WindowEvent we) dispose(); > >); > public static void main(String args[]) new AwtExample(); > > Develop Swing applications
Swing application development is supported by default. You can directly write your Swing application code without any setup.
You can find more Swing samples in the Oracle Swing documentation.
Как начать пользоваться Swing GUI-визардом IntelliJ IDEA. Подробная инструкция
Давно не писал настольных приложений на Java вообще и с использовании Swing в частности. Однако, возникла необходимость немного по GUIть. В качестве инструмента выбрал IntelliJ IDEA Community edition, 2016.1 версии.
Взялся ваять и, естественно, первое, на что налетел — хотя со времён Borland Java Builder 2006 воды утекло немало, экранные интерфейсы создавать проще не стало, скорее наоборот. А одной из причин выбора IDEA было как раз наличие Swing дизайнера «из коробки», однако как им пользоваться с ходу решительно непонятно — форма генерится, класс создаётся, создаются переменные контролов из дизайнера… но и только: при создании нашего класса форма на экране не появляется
Пошарил интернет, информации приблизительно ноль. Народ говорит, мол, «создавай и — вперёд!». Хм…
По результатам небольших мытарств на эту тему решил опубликовать инструкцию, так как мне с учётом былого опыта было искать намного легче, чем новичку, который вообще в первый раз ваяет форму на Swing.
Создание Swing GUI форм средствами JetBrains IntelliJ IDEA 2016.1
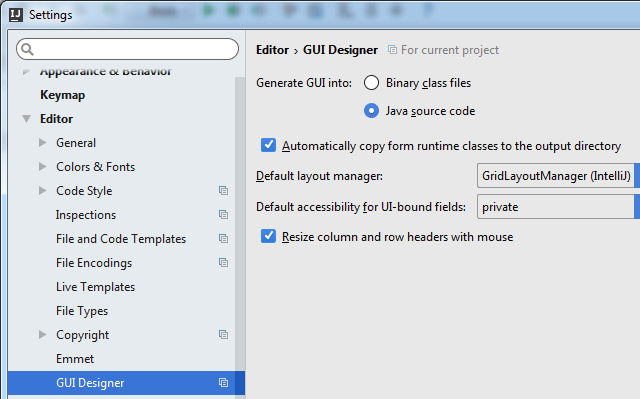
Во-первых, для понимания процесса лучше начать с того. что зайти в меню IDEA «File -> Settings» — там «Editor -> GUI Designer» и установить флажок Generate GUI Into: в Java source code. (это немного поможет пониманию процесса на первом этапе — потом можно будет убрать обратно).
Далее открываем дерево исходного кода своего проекта и кликаем правой кнопкой мыши на любую папку или файл исходного кода java и выбираем «New -> Dialog» — вводим имя класса для формы.

В итоге нам действительно сгенерили класс-наследник JDialog (который можно создать и использовать) и форма к нему.
Запускаем наш проект на выполнение и… о ужасчудо! при компиляции IDEA добавляет в конец нашего файла некоторый дополнительный код.
< // GUI initializer generated by IntelliJ IDEA GUI Designer // >>> IMPORTANT!! /** * Method generated by IntelliJ IDEA GUI Designer * >>> IMPORTANT!! /** * @noinspection ALL */ public JComponent $$$getRootComponent$$$()
Несложно догадаться, что вся наша Swing-овая форма конфигурируется в автогенерируемом методе $$$setupUI$$$.
Вспомните настройку, которую мы установили в самом начале — «GUI Into: -> Java source code». Если её не ставить, то этот метод просто будет появляться напрямую в _class_ файле, минуя java-файл (декомпилируйте его, если сомневаетесь — я это сделал). Соответственно, можете вернуть настройку «GUI Into:» к первоначальному виду, чтобы этот код (который всё равно редактировать настоятельно не рекомендуют) не мозолил глаза.
Теперь, когда мы поняли, как оно работает, перейдём к созданию прочих форм — необязательно диалогов.
Опять правой кнопкой мыши кликаем на папку или файл исходного кода, выбираем «New -> GUI Form» — вводим имя класса для формы.
Генерится класс и форма к нему. Накидываем на форму несколько контролов. В GUI дизайнере смотрим имя корневого элемента (обычно panel1, если IDEA не задала имя, а такое бывает, задайте принудительно — я для наглядности назвал rootPanel).

Переходим к исходному коду нашего класса.
Итак:
1. Добавляем для нашего класса наследование «extends JFrame»;
2. Добавляем конструктор класса со строками:
setContentPane(panel1); setVisible(true); public class GUIFrame extends JFrame < private JButton button1; private JPanel rootPanel; public GUIFrame() < setContentPane(rootPanel); setVisible(true); setDefaultCloseOperation(WindowConstants.EXIT_ON_CLOSE); >public static void main(String[] args) < new GUIFrame(); >> Всё. Форма готова к употреблению. Остальное смотрите в многочисленных инструкциях по Swing.
P.S. Как вариант, можно не наследовать наш класс от JFrame, а создать конструктор вида:
JFrame frame = new JFrame(); frame.setContentPane(panel1); frame.setVisible(true);