Create a gradient border in CSS
To show gradients for a border with CSS you can use the border-image property. It allows setting gradient values in the same way as the background-image property.
Besides the border-image property, you should specify additional properties to actually show border gradient.
We can combine these properties into a shorthand syntax border-width with border-style into border and border-image-source with border-image-slice into border-image .
.gradient-border border: 5px solid; border-image: linear-gradient(45deg, purple, orange) 1; > Now you have a nice looking gradient border. And you can use all types of gradients: linear-gradient , radial-gradient and conic-gradient .
However, there’s a drawback to this approach. You cannot use border-radius property, as it is not supported with the border-image property. But there are a few workarounds.
Pseudo element
Positioning trick
For this approach, we need to add a gradient as a background-image for the pseudo-element. Additionally, we need to set its position to absolute and set a negative margin, that will represent the border width. Give it a negative z-index to make it below the main element. And finally, make it inherit border-radius from the main element.
For the initial element, we need to set the required border-radius . Set background color, to match the body background. Optionally we give it a margin to make it within the boundaries of the container because pseudo-element has a negative margin.
.gradient-border-pseudo position: relative; padding: 10px 20px; background: #fff; margin: 5px; border-radius: 5px; > .gradient-border-pseudo::after content: ""; position: absolute; top: 0; right: 0; bottom: 0; left: 0; z-index: -1; margin: -5px; border-radius: inherit; background-image: linear-gradient(45deg, purple, orange); > Masking trick
For this solution, we’ll also use the pseudo-element, but instead of positioning it with z-index , we will use the mask property to clip the background.
The mask CSS shorthand property hides an element (partially or fully) by masking or clipping the image at specific points.
— MDN
While the mask property may lack full support, you can use this approach for the gradient border.
We’ll set the element’s background as a gradient. And then using mask property we’ll specify two more gradient backgrounds (same color as body ). The first one will mask (cover) the area within the padding boundaries, and the second one will mask (cover) the area all the way up to the border.
Additionally, we need to set the mask-composite property to exclude the top layer from the bottom in order to see the border.
.gradient-border-mask position: relative; padding: 15px 20px; > .gradient-border-mask::before content: ""; position: absolute; top: 0; left: 0; right: 0; bottom: 0; border-radius: 50px; border: 5px solid transparent; background: linear-gradient(45deg,purple,orange) border-box; -webkit-mask: linear-gradient(#fff 0 0) padding-box, linear-gradient(#fff 0 0); -webkit-mask-composite: destination-out; mask-composite: exclude; > Background clip
To avoid additional styles for pseudo-element you can use the background-image property in combination with background-clip property.
The background-clip CSS property sets whether an element’s background extends underneath its border box, padding box, or content box.
— MDN
Essentially we’re going to clip the background in the similar way we did with the mask property.
First, we’ll need to pass two gradients values for the background-image . One will represent the background of the element with the according color, and the second one will represent the border with gradient.
For each of the gradients, we’ll specify the background-clip property.
For the first one, the value will be padding-box , so the background will extend up until the border.
For the second one, the value will be border-box , which means that the background will extend to the outside edge of the border.
Finally we need to specify a transparent border color and border-radius , and it’s done.
.gradient-border-bg background: linear-gradient(#fff, #fff) padding-box, linear-gradient(45deg, slateblue, coral) border-box; border: 5px solid transparent; border-radius: 50px; > 💡 NOTE: To control the inner border-radius while maintaining the gradient you should use a slightly different approach. Check out my article on inner border-radius.
Demo
Complete examples with code available on CodePen:
See the Pen Untitled by Tippingpoint Dev (@tippingpointdev) on CodePen.
Border with gradient and radius

Unfortunately, border-radius isn’t supported with border-image and it’s painful to find tricks to obtain rounded borders having a gradient. Here is a trick that will produce such a result. No complex code, No SVG, or multiple elements are required! only two lines of CSS code using the mask property.
.box border-radius: 50px; /*1*/ border: 10px solid transparent; /*2*/ background: linear-gradient(45deg,red,blue) border-box; /*3*/ -webkit-mask: /*4*/ linear-gradient(#fff 0 0) padding-box, linear-gradient(#fff 0 0); -webkit-mask-composite: xor; /*5'*/ mask-composite: exclude; /*5*/ > 
Explanation
(1)(2): Those lines are trivial.
(3): We apply a gradient as background and we make its origin the border box (by default it’s the padding box).
(4): Using the mask property, we apply two opaque layers. The bottom one will cover the whole element and the top one will cover only the padding box (so it will not cover the border area)
(5): We exclude the top layer from the bottom one so that only the border area will be shown!
(5′): Some browsers still don’t support mask-composite so we use the prefixed version.
That’s it!
Now you can adjust the border, gradient, and radius as you want. The only drawback is that this will mask the content so we can move the code to a pseudo-element instead
.box position: relative; > .box::before content: ""; position: absolute; inset: 0; border-radius: 50px; padding: 10px; background:linear-gradient(45deg,red,blue); -webkit-mask: linear-gradient(#fff 0 0) content-box, linear-gradient(#fff 0 0); -webkit-mask-composite: xor; mask-composite: exclude; > 
I replaced the border with padding to make the code shorter but the logic remains the same: we exclude the content area from the padding area so only padding will remain visible
Как сделать круглый border с градиентом?
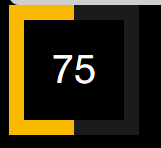
Сейчас пытаюсь так, но нагуглил что border-image и border-radius не работают вместе. Нужно то же самое что на скрине (это то, что в данный момент у меня), только чтобы border был круглый

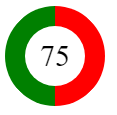
Я не очень верно пример привёл, процент заполнения круга цветом $orange должен быть равен числу, т.е. там может быть
border-image: linear-gradient(to right, $orange 66%, $darkGrey 34%) ;Я так понимаю в той реализации, которую предложили вы — это сделать не получится
Ne7Le4Der, ну а вообще простейший вариант — это два блока
на заднем градиент и паддинг, на внутреннем фон
Делал следующим образом: блоку, который надо обернуть, прописал стиль position: relative. И создал внутри этого блока div, с стилями:
position: absolute;
top: -2px;
left: -2px;
bottom: -2px;
right: -2px;//толщина бордера
border-radius: который нам нужен
background: градиент, который нам нужен.
Gradient Borders in CSS
If you hate the idea of a wrapping element, you could use a pseudo-element, as long as a negative z-index value is OK (it wouldn’t be if there was much nesting going on with parent elements with their own backgrounds).
Here’s a Stephen Shaw example of that, tackling border-radius in the process:
You could even place individual sides as skinny pseudo-element rectangles if you didn’t need all four sides.
But don’t totally forget about border-image , perhaps the most obtuse CSS property of all time. You can use it to get gradient borders even on individual sides:
Using both border-image and border-image-slice is probably the easiest possible syntax for a gradient border, it’s just incompatible with border-radius , unfortunately.
DigitialOcean documents the same approach in another tutorial.
Psst! Create a DigitalOcean account and get $200 in free credit for cloud-based hosting and services.
Comments
These are all great solutions, but I really hope in the near future linear-gradient on borders will be a reality. Would really help when making CSS graphics.
Hey Chris, Yes, it was intended that you could use linear-gradient and border-image together. If you need rounded borders too, you should be able to do that with SVG and border image. I’ve successfully done that before without distorting the corners or anything. Let me know if you want me to post an example.
When we were designing how border-image should work (many years ago), the thought was that the image would contain whatever rounded or fancy corners you wanted, and border-radius would only be used as a fallback, not as something that further clipped the corners.
Wasn’t working for me on Firefox 64 until I changed the border-image to border-image-source as border-image-slice: 1 was being overridden in the cascade.
Funnily enough, browser support seems to be inconsistent for the last example. When border-image-slice is declared in advance and there’s no value for slice set in the border-image shorthand, as in the example above, Firefox 64 and Safari on iOS 12 uses the default slice value (which is 100%, resulting in border-image:
Shorthands do normally reset the longhands to their initial values when left out, so I don’t know why Chrome and Opera wouldn’t. The last example seems to be fixed in iOS12 by changing border-image to border-image-source in those two classes.
Looks much like a Chromium bug in the cascade. Interestingly, Chrome DevTools in both “Styles” and “Computed” tabs displays the value 1 of border-image-slice struck-through, and Computed styles tab shows the value 100% coming from the shorthand declaration as overriding it — as it should be — but the value 1 appears to somehow mysteriously “survive” this overriding. As a side note, I disagree that border-image (as well as its longhand sub-properties) is “obtuse”. It’s arguably the most misunderstood CSS properties of all time, and maybe significantly underrated, especially in combination with SVG images. Some of its abilities like 9-slice scaling and — especially — painting things outside the element’s box (via border-image-outset ) are unique in CSS, and can provide much shorter and cleaner solutions to many cases that otherwise would require hacking around pseudo-elements or even extra markup.
Here is a variant with SVG: https://codepen.io/ccprog/pen/BvwbKX?editors=1100 It tries to expose as many specifics to CSS as possible. Note that SVG 2 would allow rx/ry to be defined as CSS properties, but implementation is as yet incomplete. Gradient positioning must also be done in the markup. Border positioning follows SVG rules, which means half the border overflows the box.
I have a pen showing how you can use background-clip to create rounded gradient borders https://codepen.io/GeorgePark/pen/EEGJEj
Thanks for writing this! I used the first option recently when a student wanted to have a gradient border animated.
Worked out pretty well: https://codepen.io/jupago/ Did not know about border-image-slice. Might also be fun to try clip-path. That 24ways article on Clip Paths got me wondering if that will eventually be the the next best thing. https://24ways.org/2018/clip-paths-know-no-bounds/
Been playing around with the Stephen Shaw’s ::before border. I tried applying it to one of my working projects and it seems that if you apply any sort of transform to the base element, then the pseudo element overrides the background color/image of the base element. I don’t know any way to make this work together with transform, just something to keep in mind, and a challenge to find a workaround.
I was able to come up with a pretty simple, single element, solution to this using multiple backgrounds and the background-origin property.
The nice things about this approach are:
1. It isn’t affected by z-index
2. It can scale easily by just changing the width of the transparent border Check it out: https://codepen.io/AlexOverbeck/pen/axGQyv?editors=1100
Hi, I found another solution to the problem, based on the good old 9-slice scaling technique. The CSS is rather extensive, but it does not need any extra SVG elements in your document or any additional elements nesting and might be interesting for some of you:
I needed a responsive button with border-gradient and radius and transparent background, and after the developers “it can’t be done” I coded it by myself.