If you want to add some interactivity to your existing project, you don’t have to rewrite it in React. Add React to your existing stack, and render interactive React components anywhere.
You need to install Node.js for local development. Although you can try React online or with a simple HTML page, realistically most JavaScript tooling you’ll want to use for development requires Node.js.
Using React for an entire subroute of your existing website
Let’s say you have an existing web app at example.com built with another server technology (like Rails), and you want to implement all routes starting with example.com/some-app/ fully with React.
Here’s how we recommend to set it up:
Build the React part of your app using one of the React-based frameworks.
Specify /some-app as the base path in your framework’s configuration (here’s how: Next.js, Gatsby).
Configure your server or a proxy so that all requests under /some-app/ are handled by your React app.
This ensures the React part of your app can benefit from the best practices baked into those frameworks.
Many React-based frameworks are full-stack and let your React app take advantage of the server. However, you can use the same approach even if you can’t or don’t want to run JavaScript on the server. In that case, serve the HTML/CSS/JS export ( next export output for Next.js, default for Gatsby) at /some-app/ instead.
Using React for a part of your existing page
Let’s say you have an existing page built with another technology (either a server one like Rails, or a client one like Backbone), and you want to render interactive React components somewhere on that page. That’s a common way to integrate React—in fact, it’s how most React usage looked at Meta for many years!
You can do this in two steps:
Set up a JavaScript environment that lets you use the JSX syntax, split your code into modules with the import / export syntax, and use packages (for example, React) from the npm package registry.
Render your React components where you want to see them on the page.
The exact approach depends on your existing page setup, so let’s walk through some details.
Step 1: Set up a modular JavaScript environment
A modular JavaScript environment lets you write your React components in individual files, as opposed to writing all of your code in a single file. It also lets you use all the wonderful packages published by other developers on the npm registry—including React itself! How you do this depends on your existing setup:
If your app is already split into files that use import statements, try to use the setup you already have. Check whether writing in your JS code causes a syntax error. If it causes a syntax error, you might need to transform your JavaScript code with Babel, and enable the Babel React preset to use JSX.
If your app doesn’t have an existing setup for compiling JavaScript modules, set it up with Vite. The Vite community maintains many integrations with backend frameworks, including Rails, Django, and Laravel. If your backend framework is not listed, follow this guide to manually integrate Vite builds with your backend.
These docs are old and won’t be updated. Go to react.dev for the new React docs.
See Add React to an Existing Project for the recommended ways to add React.
Use as little or as much React as you need.
React has been designed from the start for gradual adoption, and you can use as little or as much React as you need. Perhaps you only want to add some “sprinkles of interactivity” to an existing page. React components are a great way to do that.
The majority of websites aren’t, and don’t need to be, single-page apps. With a few lines of code and no build tooling, try React in a small part of your website. You can then either gradually expand its presence, or keep it contained to a few dynamic widgets.
In this section, we will show how to add a React component to an existing HTML page. You can follow along with your own website, or create an empty HTML file to practice.
There will be no complicated tools or install requirements — to complete this section, you only need an internet connection, and a minute of your time.
Step 1: Add a DOM Container to the HTML
First, open the HTML page you want to edit. Add an empty tag to mark the spot where you want to display something with React. For example:
divid="like_button_container">div>
We gave this a unique id HTML attribute. This will allow us to find it from the JavaScript code later and display a React component inside of it.
Tip
You can place a “container” like this anywhere inside the tag. You may have as many independent DOM containers on one page as you need. They are usually empty — React will replace any existing content inside DOM containers.
Step 2: Add the Script Tags
Next, add three tags to the HTML page right before the closing
The first two tags load React. The third one will load your component code.
Step 3: Create a React Component
Create a file called like_button.js next to your HTML page.
Open this starter code and paste it into the file you created.
Tip
This code defines a React component called LikeButton . Don’t worry if you don’t understand it yet — we’ll cover the building blocks of React later in our hands-on tutorial and main concepts guide. For now, let’s just get it showing on the screen!
After the starter code, add three lines to the bottom of like_button.js :
// . the starter code you pasted .const domContainer = document.querySelector('#like_button_container');const root = ReactDOM.createRoot(domContainer);root.render(e(LikeButton));
These three lines of code find the we added to our HTML in the first step, create a React app with it, and then display our “Like” button React component inside of it.
There is no step four. You have just added the first React component to your website.
Check out the next sections for more tips on integrating React.
Commonly, you might want to display React components in multiple places on the HTML page. Here is an example that displays the “Like” button three times and passes some data to it:
Note
This strategy is mostly useful while React-powered parts of the page are isolated from each other. Inside React code, it’s easier to use component composition instead.
Tip: Minify JavaScript for Production
Before deploying your website to production, be mindful that unminified JavaScript can significantly slow down the page for your users.
If you already minify the application scripts, your site will be production-ready if you ensure that the deployed HTML loads the versions of React ending in production.min.js :
If you don’t have a minification step for your scripts, here’s one way to set it up.
Optional: Try React with JSX
In the examples above, we only relied on features that are natively supported by browsers. This is why we used a JavaScript function call to tell React what to display:
const e = React.createElement;// Display a "Like" returne('button',onClick:()=>this.setState(liked:true>)>,'Like');
However, React also offers an option to use JSX instead:
// Display a "Like" return(buttononClick=()=>this.setState(liked:true>)>>Likebutton>);
These two code snippets are equivalent. While JSX is completely optional, many people find it helpful for writing UI code — both with React and with other libraries.
You can play with JSX using this online converter.
The quickest way to try JSX in your project is to add this tag to your page:
Now you can use JSX in any tag by adding type=»text/babel» attribute to it. Here is an example HTML file with JSX that you can download and play with.
This approach is fine for learning and creating simple demos. However, it makes your website slow and isn’t suitable for production. When you’re ready to move forward, remove this new tag and the type=»text/babel» attributes you’ve added. Instead, in the next section you will set up a JSX preprocessor to convert all your tags automatically.
Adding JSX to a project doesn’t require complicated tools like a bundler or a development server. Essentially, adding JSX is a lot like adding a CSS preprocessor. The only requirement is to have Node.js installed on your computer.
Go to your project folder in the terminal, and paste these two commands:
Step 1: Run npm init -y (if it fails, here’s a fix)
Step 2: Run npm install babel-cli@6 babel-preset-react-app@3
Tip
We’re using npm here only to install the JSX preprocessor; you won’t need it for anything else. Both React and the application code can stay as tags with no changes.
Congratulations! You just added a production-ready JSX setup to your project.
Create a folder called src and run this terminal command:
npx is not a typo — it’s a package runner tool that comes with npm 5.2+.
If you see an error message saying “You have mistakenly installed the babel package”, you might have missed the previous step. Perform it in the same folder, and then try again.
Don’t wait for it to finish — this command starts an automated watcher for JSX.
If you now create a file called src/like_button.js with this JSX starter code, the watcher will create a preprocessed like_button.js with the plain JavaScript code suitable for the browser. When you edit the source file with JSX, the transform will re-run automatically.
As a bonus, this also lets you use modern JavaScript syntax features like classes without worrying about breaking older browsers. The tool we just used is called Babel, and you can learn more about it from its documentation.
If you notice that you’re getting comfortable with build tools and want them to do more for you, the next section describes some of the most popular and approachable toolchains. If not — those script tags will do just fine!
JSX is a syntax extension for JavaScript that lets you write HTML-like markup inside a JavaScript file. Although there are other ways to write components, most React developers prefer the conciseness of JSX, and most codebases use it.
You will learn
Why React mixes markup with rendering logic
How JSX is different from HTML
How to display information with JSX
JSX: Putting markup into JavaScript
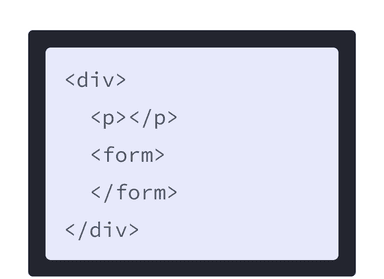
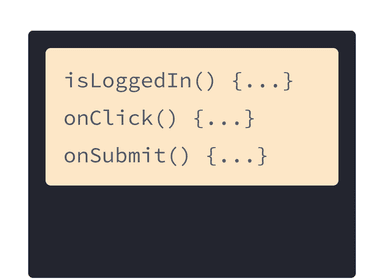
The Web has been built on HTML, CSS, and JavaScript. For many years, web developers kept content in HTML, design in CSS, and logic in JavaScript—often in separate files! Content was marked up inside HTML while the page’s logic lived separately in JavaScript:
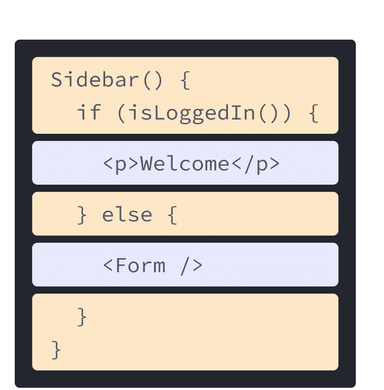
But as the Web became more interactive, logic increasingly determined content. JavaScript was in charge of the HTML! This is why in React, rendering logic and markup live together in the same place—components.
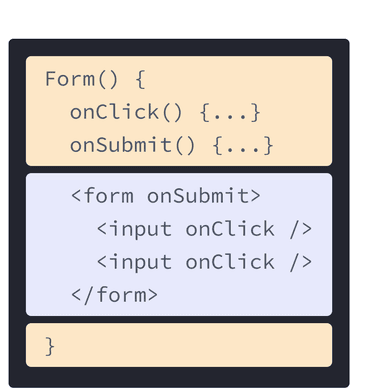
Keeping a button’s rendering logic and markup together ensures that they stay in sync with each other on every edit. Conversely, details that are unrelated, such as the button’s markup and a sidebar’s markup, are isolated from each other, making it safer to change either of them on their own.
Each React component is a JavaScript function that may contain some markup that React renders into the browser. React components use a syntax extension called JSX to represent that markup. JSX looks a lot like HTML, but it is a bit stricter and can display dynamic information. The best way to understand this is to convert some HTML markup to JSX markup.
JSX and React are two separate things. They’re often used together, but you can use them independently of each other. JSX is a syntax extension, while React is a JavaScript library.
Converting HTML to JSX
Suppose that you have some (perfectly valid) HTML: