- How to set css style to asp.net button?
- Method 1: Using the CssClass Property
- Method 2: Using Inline Styles
- Method 3: Using an External Style Sheet
- Style css asp net
- Распродажа книг
- Форма оформления покупки
- ASP.NET Web Server Controls and CSS Styles
- Rendering Appearance Properties to the Browser
- Control Style Objects
- Precedence and Inheritance of Style Objects
- Controlling CSS Styles and Classes Directly
How to set css style to asp.net button?
The Asp.Net Button control is a commonly used web control for creating web pages. Often times, you might want to apply some styling to the button to make it look more attractive or to match the overall design of your web page. This can be done by setting the CssClass property of the button control. In this article, we will discuss different methods to apply styles to the Asp.Net Button control.
Method 1: Using the CssClass Property
To set CSS style to an ASP.NET button using the CssClass property, follow these steps:
asp:Button ID="btnSubmit" runat="server" Text="Submit" />- In the code-behind file, add the following code to set the CssClass property of the button control:
btnSubmit.CssClass = "myButtonStyle";.myButtonStyle background-color: #4CAF50; /* Green */ border: none; color: white; padding: 15px 32px; text-align: center; text-decoration: none; display: inline-block; font-size: 16px; margin: 4px 2px; cursor: pointer; >That’s it! Now your button control will have the style defined in the «myButtonStyle» class.
Note: You can also set the CssClass property directly in the ASP.NET button control, like this:
asp:Button ID="btnSubmit" runat="server" Text="Submit" CssClass="myButtonStyle" />This will achieve the same result as setting the CssClass property in the code-behind file.
Method 2: Using Inline Styles
To set CSS style to an ASP.NET button using inline styles, follow these steps:
asp:Button ID="btnExample" runat="server" Text="Example Button" />asp:Button ID="btnExample" runat="server" Text="Example Button" Style="background-color: #4CAF50; color: white; padding: 10px 20px; border: none; border-radius: 4px; font-size: 16px;" />In the above example, the background color of the button is set to #4CAF50, the text color is set to white, the padding is set to 10px 20px, the border is set to none, the border radius is set to 4px, and the font size is set to 16px.
btnExample.Style.Add("background-color", "#4CAF50"); btnExample.Style.Add("color", "white"); btnExample.Style.Add("padding", "10px 20px"); btnExample.Style.Add("border", "none"); btnExample.Style.Add("border-radius", "4px"); btnExample.Style.Add("font-size", "16px");In the above example, the Style.Add method is used to add the CSS properties to the button control dynamically.
That’s it! You have successfully set CSS style to an ASP.NET button using inline styles.
Method 3: Using an External Style Sheet
To set a CSS style to an ASP.NET button using an external style sheet, you need to follow these steps:
- Create a new CSS file with a .css extension. For example, styles.css .
- Define a CSS class for the button. For example, .my-button .
- Specify the CSS properties for the class. For example, background-color: red; color: white; .
- Link the CSS file to the ASP.NET page. For example, .
- Apply the CSS class to the button by setting the CssClass property. For example, CssClass=»my-button» .
/* styles.css */ .my-button background-color: red; color: white; > DOCTYPE html> html> head> title>My ASP.NET Pagetitle> link rel="stylesheet" href="styles.css"> head> body> form runat="server"> asp:Button ID="myButton" runat="server" Text="Click me" CssClass="my-button" /> form> body> html>In this example, the my-button class is defined in the styles.css file and applied to the myButton ASP.NET button using the CssClass property. When the page is rendered, the button will have a red background color and white text color.
Style css asp net
Данное руководство устарело. Актуальное руководство: Руководство по ASP.NET Core
Итак, добавим в наше приложение небольшую примитивную стилизацию. Для этого определим файл стилей. По умолчанию Visual Studio уже добавляет файл стилей Site.css в папку Content:
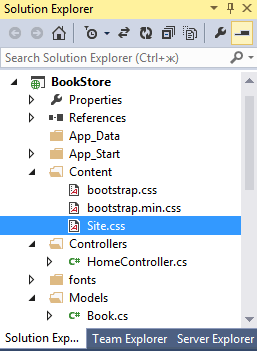
Кроме файла Site.css, в папке Content находится файл css-фреймворка Bootstrap, но нам он пока не понадобится. Откроем файл Site.css и изменим его содержание на следующее:
body < font-size: 13px; font-family: Verdana, Arial, Helvetica, Sans-Serif; background-color: #f7f7fa; padding-left:40px; >nav < display: block; >.menu < padding-left:10px; >.menu ul < list-style:none; >.menu li < display:inline; >.menu a:hover < color:red; >table < vertical-align:middle; text-align:left; >.header < font-weight:bold; >td < padding-right:10px; >input
Класс .menu в данном случае будет служить в качестве класса для навигационного меню на сайте. Хотя наше приложении не очень большое, поэтому там будет только ссылка на главную страницу. Но при необходимости вы можете добавить в него дополнительные пункты.
Чтобы использовать стили, мы можем их просто подключить в секции head, как в любой обычной html-страницу:
В нашем случае достаточно вставить данный код на оба наших представления. Однако это не самый лучший подход, так как стили для обоих представлений общие, кроме того, подобных представлений в проекте может быть не два, а гораздо больше. И если мы вдруг изменим ссылку на файл стилей, то придется менять эту ссылку на всех представлениях.
И чтобы выйти из этой проблемы фреймворк ASP.NET MVC предоставляет нам такую функциональность, как мастер-страницы. Мастер-страница задает единый шаблон для других использующих его представлений.
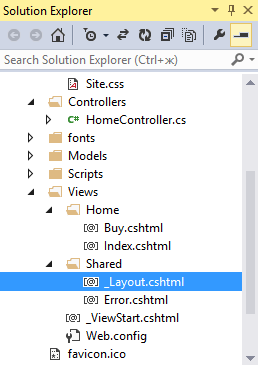
По умолчанию в проекте уже имеется мастер-страница, которая называется _Layout.cshtml . Ее можно найти в папке Views -> Shared:
Файл _Layout.cshtml уже имеет некоторое содержимое по умолчанию. Изменим его на следующее:
Для подключения стилей здесь использовался другой способ — метод Url.Content, в который передается путь к файлу. Впоследствии мы познакомимся с еще одним способом — подключение бандлов, который является более предпочтительным.
После секции head на мастер-странице идет создание меню. Так как у нас всего два представления, то в качестве одного единственного пункта меню указывается ссылка на главную страницу. Для создания ссылки используется метод Html.ActionLink. Он генерирует элемент-ссылку и принимает название ссылки, метод контроллера и имя контроллера.
И далее идет вызов метода RenderBody() — с помощью этого метода в это место будет подставляться разметка уже конкретных представлений.
Теперь изменим представления так, чтобы они использовали мастер-страницу. Обновленное представление Index.cshtml:
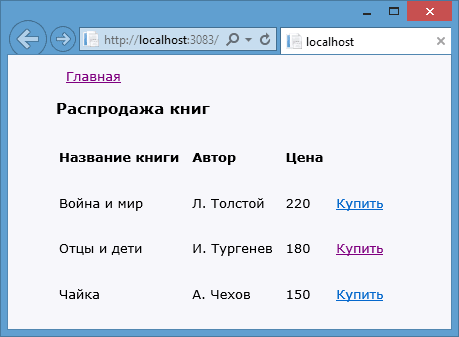
@ < Layout = "~/Views/Shared/_Layout.cshtml"; >Распродажа книг
@foreach (var b in ViewBag.Books) < Название книги
Автор
Цена
> @b.Name
@b.Author
@b.Price
Купить
Также изменим представление Buy.cshtml:
@ < Layout = "~/Views/Shared/_Layout.cshtml"; >Форма оформления покупки
Чтобы указать используемую мастер-страницу, в начале представления прописывается путь к мастер-странице: Layout = «~/Views/Shared/_Layout.cshtml»; . И теперь нам больше не нужны секции head и body. Мы их можем удалить.
Запустим на выполнение обновленный проект и убедимся, что к нашему приложению применена стилизация и мастер-страницы:
На этом работа над приложением закончена, и теперь мы можем перейти к более детальному обсуждению основных компонентов приложения MVC.
ASP.NET Web Server Controls and CSS Styles
You can control the look of ASP.NET server controls by setting various appearance properties such as ForeColor, BackColor, Height, and Width. In addition, some controls support style objects that expose additional style-related settings.
ASP.NET Web pages function as HTML pages at run time. You can therefore use cascading style sheets (CSS) to set the appearance of any elements on the page other than Web server controls. In addition, you can define ASP.NET themes that include cascading style sheet settings, and then apply themes to pages or to your site. For details, see ASP.NET Themes and Skins.
The sections below provide information about setting styles directly, including how to work with styles both at design time and programmatically.
Rendering Appearance Properties to the Browser
When the page runs, appearance properties are rendered according to the capabilities of the user’s browser. If the user’s browser supports cascading style sheets (CSS), the appearance properties are rendered as style attributes of the HTML elements that make up the control. For example, if you define a HyperLink Web server control and set its ForeColor property to Red, its Bold property to true, and its Size property to xx-small, the control is rendered as the following if the user’s browser supports style sheets:
On the other hand, if the user’s browser does not support styles, the control is rendered using other means, such as a element. The following shows the rendering for the example from above, but for a browser that does not support styles:
Other examples of properties that are rendered differently depending on the browser are BorderWidth and BorderColor.
Some appearance properties, such as BorderStyle, cannot be rendered without using styles. These properties are therefore ignored in browsers that do not support styles. For more information, see ASP.NET Web Server Controls and Browser Capabilities.
Control Style Objects
In addition to appearance properties such as ForeColor and BackColor, controls expose one or more style objects that encapsulate additional appearance properties. One example is the Font style property, which exposes an object of type FontInfo containing individual properties pertaining to the font, such as Size, Name, and Bold.
Some controls expose style objects you can use to set the appearance of specific portions of the control. For example, the Calendar Web server control contains style objects such as DayStyle (individual days), SelectedDayStyle (a day, week, or month selected by the user), and WeekendDayStyle. Using the SelectedDayStyle style object, for example, you can set the BackColor and ForeColor properties of the day selected by the user.
Most style objects are of type Style or TableItemStyle, because they are setting the attributes of table cells. The Font property is of type FontInfo.
Precedence and Inheritance of Style Objects
In complex controls, style objects often inherit characteristics from other style objects. For example, in the Calendar control, the SelectedDayStyle object is based on the DayStyle object. If you do not explicitly set any properties for SelectedDayStyle, it inherits its characteristics from the DayStyle object.
This inheritance means that style-object properties you set have an order of precedence. For example, the following list shows the order of style-object properties for the Calendar control, with the highest precedence given to the settings on the object last on the list.
- Appearance properties of the base Calendar control.
- DayStyle style object.
- WeekendDayStyle style object.
- OtherMonthDayStyle style object.
- TodayDayStyle style object.
- SelectedDayStyle style object.
There can be difficulties with styles when they are split between a container element and a text element. For example, suppose you have a style sheet for a control and you want the text style properties to be applied to a link and the rest of the style to be applied to a container. This is feasible if you set the styles using the style properties of the control, such as MenuItemStyle for a menu control or TodayDayStyle for a calendar control. But it is more difficult using styles defined by a CssClass property, because ASP.NET has no way to know the contents of the class on the server. ASP.NET applies the styles defined in the CssClass property to both the text and the container elements and adds an inline style to suppress the effects of this double application (double borders, proportional font multiplication, and so on).
The best way to style a control is to use the style properties defined by the control and to use a style sheet or inline styles to make minor adjustments to individual elements if necessary. To override a style defined by a control’s style properties, use the !important CSS rule in a style sheet or inline styles.
The following code example uses the CssClass property on the hovernodestyle element. This class is defined twice as myclass and as a.myclass:visited so that it overrides the a:visited definition.
a:visited < color: #000066 >myclass, a.myclass:visited If you use cascading style sheets (CSS) to customize the appearance of a control, use either inline styles or a separate CSS file, but not both. Using both inline styles and a separate CSS file can cause unexpected results.
Controlling CSS Styles and Classes Directly
In addition to the appearance properties and style objects, controls expose two properties that allow you to manipulate CSS styles more directly: CssClass and Style. The CssClass property enables you to assign a style sheet class to the control. The Style property enables you to set a string of style attributes to be written as-is to the control. Using the Style property allows you to set style attributes that are not exposed via other properties. The Style property exposes a collection whose methods, such as Add and Remove, you can call to set styles directly.
Settings you make in the Style property are not reflected in the corresponding individual appearance property. For example, if you set a string background-color:red in the Style property, the BackColor property is not also set to red, even though the control will render with a red background. If you set both appearance properties and the Style property, the individual appearance properties take precedence over the Style property.