- Tkinter Label
- Introduction to Tkinter Label widget
- Displaying a regular label
- Setting a specific font for the Label
- Displaying an image
- Summary
- Tkinter Label – Wrap Text
- Example
- Output in Windows
- Output in MacOS
- Summary
- Python Tkinter Label
- Options Used in Python Tkinter Label
- Examples of Python Tkinter Label
- Example #1
- Example #2
- Example #3
- Example #4
- Conclusion
- Recommended Articles
Tkinter Label
Summary: in this tutorial, you’ll learn about Tkinter Label widget and how to use it to display a text or image on the screen.
Introduction to Tkinter Label widget
Tkinter Label widget is used to display a text or image on the screen. To use a Label widget, you use the following general syntax:
label = ttk.Label(container, **options)Code language: Python (python)The Label widget has many options that allow you to customize its appearance:
| Options | Meaning |
|---|---|
| anchor | When the text and/or image are smaller than the width, the anchor option determines where to position them tk.W , tk.CENTER or tk.E for left, center, and right alignment respectively. |
| background | Set the background color for the label |
| borderwidth | Add a border around the label. |
| class_ | Specify a custom widget class name for changing the label’s appearance. |
| compound | Specify how to display both text and image on the Label. |
| cursor | Specify the mouse cursor’s appearance when the mouse is over the widget. |
| font | Specify the font style for displaying text |
| foreground | Specify the color of the text |
| image | Specify an image or images to show in addition to text or instead of text. |
| justify | If the text contains newline characters, the justify option specifies how each line is positioned horizontally. The valid values are tk.LEFT (left-justify), tk.CENTER (center), and tk.RIGHT (right-justify). |
| padding | Add more space around the label. |
| relief | Use this option to create an effect for the Label .e.g, flat, raised, sunken, groove, and ridge. |
| style | Specify the custom widget style. |
| takefocus | is a boolean value that specifies whether the label is visited during focus traversal. It defaults to False which doesn’t get focus. |
| text | Specify a string of text to show in the widget |
| textvariable | A StringVar instance that holds the text value of the widget. It overrides the text option if both textvariable and text are available. |
| underline | Specify the position of the letter that should be underlined e.g, underline = 0 would underline the letter E in the text=’Exit’ |
| width | Specify the number of characters to show |
| wraplength | Chop the text into the lines which less than the length specified by the wraplength option. |
The following shows a skeleton program that we’ll use to illustrate various options of the Label widget:
import tkinter as tk from tkinter import ttk root = tk.Tk() root.geometry('300x200') root.resizable(False, False) root.title('Label Widget Demo') # show the label here root.mainloop()Code language: Python (python)Displaying a regular label
The following program shows how to display a regular label on the root window:
import tkinter as tk from tkinter.ttk import Label root = tk.Tk() root.geometry('300x200') root.resizable(False, False) root.title('Label Widget Demo') # show a label label = Label(root, text='This is a label') label.pack(ipadx=10, ipady=10) root.mainloop()Code language: Python (python)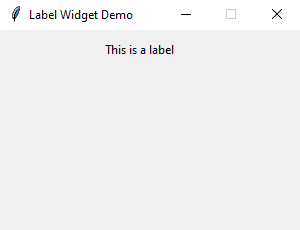
- First, import Label class from the tkinter.ttk module.
- Second, create the root window and set its properties including size, resizeable, and title.
- Third, create a new instance of the Label widget, set its container to the root window, and assign a literal string to its text property.
Setting a specific font for the Label
To set a particular font for a label, you pass the font keyword argument to the Label constructor like this:
font = ('font name', font_size)Code language: Python (python)The font keyword argument is a tuple that contains font name and size. For example:
font=("Helvetica", 14)Code language: Python (python)The following example shows a label with the Helvetica font:
import tkinter as tk from tkinter import ttk root = tk.Tk() root.geometry('300x200') root.resizable(False, False) root.title('Label Widget Demo') # label with a specific font label = ttk.Label( root, text='A Label with the Helvetica font', font=("Helvetica", 14)) label.pack(ipadx=10, ipady=10) root.mainloop() Code language: Python (python)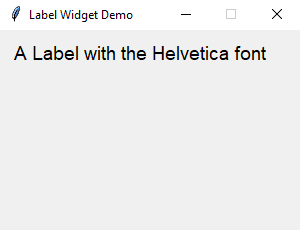
Displaying an image
To use a Label widget to display an image, you follow these steps:
First, create a PhotoImage widget by passing the path to the photo to the PhotoImage constructor:
photo = tk.PhotoImage(file='./assets/python.png')Code language: Python (python)Second, assign the PhotoImage object to the image option of the Label widget:
Label(. image=photo)Code language: Python (python)The following example shows how to use a Label widget to display an image:
import tkinter as tk from tkinter import ttk # create the root window root = tk.Tk() root.geometry('300x200') root.resizable(False, False) root.title('Label Widget Image') # display an image label photo = tk.PhotoImage(file='./assets/python.png') image_label = ttk.Label( root, image=photo, padding=5 ) image_label.pack() root.mainloop() Code language: Python (python)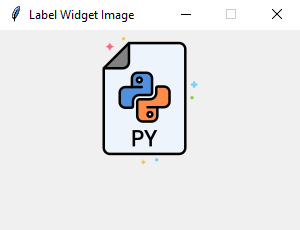
Note that the image file is located at the /assets/ folder.
To display both text and image, you’ll use the text attribute and compound option.
The compound option specifies the position of the image relative to the text. Its valid values are:
| Compound | Effect |
|---|---|
| ‘top’ | Display the image above the text. |
| ‘bottom’ | Display the image below the text. |
| ‘left’ | Display the image to the left of the text. |
| ‘right’ | Display the image to the right of the text. |
| ‘none’ | Display the image if there’s one, otherwise display the text. The compound option defaults to ‘none’ . |
| ‘text’ | Display the text, not the image |
| ‘image’ | Display the image, not the text. |
The following program shows how to display both text and image on a label:
import tkinter as tk from tkinter import ttk # create the root window root = tk.Tk() root.geometry('300x200') root.resizable(False, False) root.title('Label Widget Image') # display an image label photo = tk.PhotoImage(file='./assets/python.png') image_label = ttk.Label( root, image=photo, text='Python', compound='top' ) image_label.pack() root.mainloop() Code language: PHP (php)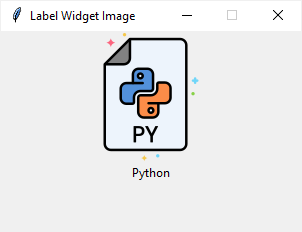
Summary
Tkinter Label – Wrap Text
In Tkinter, you can wrap the text in a label widget to specific screen units.
To wrap the text in a label widget to specific screen units in Tkinter, call specify required number of screen units for the the wraplength parameter while creating the Label widget using tk.Label().
tk.Label(window, wraplength=200, text="")In this tutorial, you will learn how to wrap the text in a label widget in Tkinter, with an example program.
Example
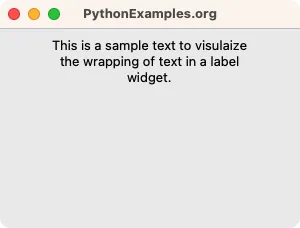
Consider a simple use case where you would like to display some large text in a Label widget, and wrap the text in a length of 200 screen units.
Python Program
import tkinter as tk # Create the main window window = tk.Tk() window.geometry("300x200") window.title("PythonExamples.org") window.configure(padx=5, pady=5) label = tk.Label(window, wraplength=200, text="This is a sample text to visulaize the wrapping of text in a label widget.") label.pack() # Run the application window.mainloop()Output in Windows
Output in MacOS
Summary
In this Python Tkinter tutorial, we learned how to wrap the text in a Label widget in Tkinter, with examples.
Python Tkinter Label
A Python Tkinter Label is a Tkinter widget class that is used to display text or image in the parent widget. It is a non-interactive widget whose sole purpose is to display any message to the user. Now let us first look at the Python Tkinter Label’s syntax, and then we will discuss why we use it in the first place.
Web development, programming languages, Software testing & others
The following are the parameters of Python Tkinter Label:
- Master: This is the parent widget.
- Options: This represents a list of options that can be used on the parent widget. These are key-value pairs that are separated by a comma.
Options Used in Python Tkinter Label
Python Tkinter Label is used to specify the container box where we place text or images. It is used to provide the user with information about the widgets used in the Python application.
The following are the options that can be used in the Python Tkinter Label:
- anchor: This option helps us control the position of the text when the parent widget has more space than the text needs. The value of the anchor corresponds to the different options available in a compass. The default option being CENTER.
- bg: This signifies the background color that is to be displayed behind the label and the indicator.
- bitmap: This is used to display an image in the label
- bd: This indicates the size of the border around the indicator. The default value is 2 pixels.
- cursor: This is used to denote the type of cursor, i.e. arrow or dot.
- font: This signifies the font in which the label is to be displayed.
- fg: This option helps to set the color of the text when we are displaying text in the label. When we are displaying bitmap, this option helps us to determine the color of the 1-bits in the bitmap.
- height: It determines the vertical dimension of the label.
- image: It helps us to set an image in the label widget.
- justify: It determines how multiple lines of text would be aligned with respect to each other. The possible options are LEFT for left-justified, CENTER for center alignment and RIGHT for right-justified. The default value is CENTER
- padx: This signifies the extra spaces added to the label’s start and end. The default value is 1.
- pady: This signifies the extra spaces added to the top and bottom of the text in the label. The default value is 1.
- relief: It determines the appearance of the border around the label. The default value is FLAT.
- text: This option is used to display one or more lines of text in a label widget.
- textvariable: This option also helps us display text in the label widget; the only difference is the method by which we are showing the text. In the textvariable method, a StringVar class object is created and then using the set option on that object, we can assign the text.
- underline: With this option’s help, we can display underline beneath the text in a label. The underline would start from the 0 th element and commence on an nth element. The default value for underline is -1, which means there is no underline.
- width: This signifies the width of the label in characters. The label will be sized to fit its content if this option is not set.
- wraplength: This helps us to limit the number of characters in each line by mentioning the value to the desired value. The default value is 0.
Examples of Python Tkinter Label
The Label widget is a standard Tkinter widget used to display text or images. Below given are the examples of python tkinter label:
Example #1
from tkinter import * root = Tk() var = StringVar() label = Label( root, anchor = CENTER , bg = "blue", textvariable = var, bd = 10, cursor = "dot") var.set("This example is about the anchor option of Python Tkinter Label") label.pack() root.mainloop()
Example #2
from tkinter import * root = Tk() label = Label( root, height = 10, width = 100, padx = 2, pady = 2, text="This example is about the anchor option of Python Tkinter Label") label.pack() root.mainloop()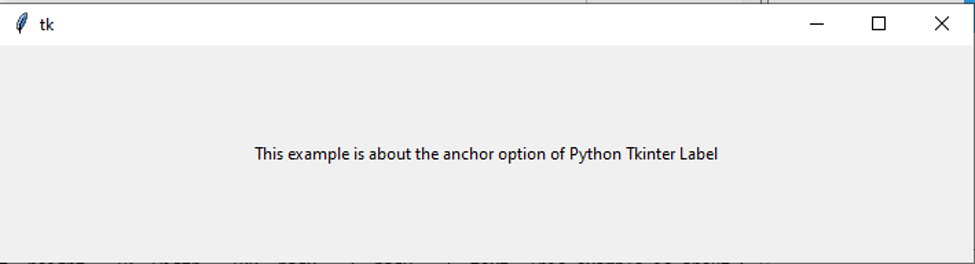
Example #3
from tkinter import * root = Tk() var = StringVar() label = Label( root, underline = 2, wraplength = 70, textvariable = var, relief = "groove") var.set("This example is about the anchor option of Python Tkinter Label") label.pack() root.mainloop()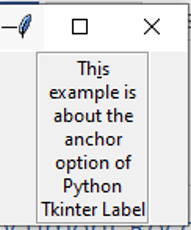
Example #4
from tkinter import * root = Tk() var = StringVar() label = Label( root, font = "bold", fg = "green", bg = "yellow", textvariable = var, relief = "groove") var.set("This example is about the anchor option of Python Tkinter Label") label.pack() root.mainloop()
Conclusion
In the following article, we have discussed the basics of the Python Tkinter Label. Primarily we saw the syntax along with the reason why we use the Python Tkinter label. After that, we discussed the options that can be used to tweak the labels. Lastly, we concluded the article by seeing multiple examples of the same. So next time you ponder upon Tkinter, do remember to use the features of Python Tkinter Label.
Recommended Articles
This is a guide to Python Tkinter Label. Here we discuss the definition and various options used in the python Tkinter label along with different examples and its code implementation. You may also have a look at the following articles to learn more –