- Python Tkinter Config (Configure Widgets)
- How to use Tkinter Config()
- Python Tkinter Config – Continued
- Finding all possible options with Config()
- Python tkinter label configure
- Определение и применение стилей
- Имена стилей
- Расширение встроенных стилей
- Применение стиля ко всем виджетам
- Changing Tkinter Label Text Dynamically using Label.configure()
- Example
- Output
Python Tkinter Config (Configure Widgets)
In this tutorial we will discuss the Python Tkinter Config function, which is used to configure certain options in widgets.
When you create a widget in Tkinter, you have to pass in several values as parameters, used to configure certain features for that Widget. The question that may arise at some point, is whether you can change these settings after the widget has been created.
For this we have the Tkinter Config() function, which can be used on any widget to change settings that you may have applied earlier, or haven’t applied yet.
How to use Tkinter Config()
In our first example here, we’ll take a look at a simple use of the Python Tkinter Config() function, used to simply change the text on a label.
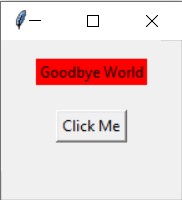
The below example features two widgets, a label and a button. The button is linked to a function that calls the config() on the label when the button is pressed. All you have to do is assign a new value to the option you want changed in the config() function.
import tkinter as tk root = tk.Tk() frame = tk.Frame(root) def dosomething(): mylabel.config(text = "Goodbye World") mylabel = tk.Label(frame, text = "Hello World", bg = "red") mylabel.pack(padx = 5, pady = 10) mybutton = tk.Button(frame, text = "Click Me", command = dosomething) mybutton.pack(padx = 5, pady = 10) frame.pack(padx = 5, pady = 5) root.mainloop()
Before Clicking the Button:
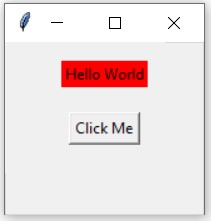
After Clicking the Button:
Python Tkinter Config – Continued
Let’s take a further look at using config() to change widgets values.
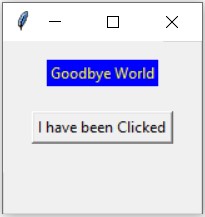
In the below example we are going to change several things about the widgets, not just the text. We’ll change the color, the background color, as well as the text on both widgets.
import tkinter as tk root = tk.Tk() frame = tk.Frame(root) def dosomething(): mylabel.config(text = "Goodbye World", bg = "blue", fg = "yellow") mybutton.config(text = "I have been Clicked") mylabel = tk.Label(frame, text = "Hello World", bg = "red") mylabel.pack(padx = 5, pady = 10) mybutton = tk.Button(frame, text = "Click Me", command = dosomething) mybutton.pack(padx = 5, pady = 10) frame.pack(padx = 5, pady = 5) root.mainloop()
Before Clicking the Button:
After Clicking the Button:
Finding all possible options with Config()
You can also use the config() funciton in an interesting way, to find all possible options for that specific widget. Remember, widgets have some unique options as well, which may not be present in others.
So if you want to see a list of options for a widget, simply call the config() function on that widget, without any parameters as shown below.
import tkinter as tk root = tk.Tk() frame = tk.Frame(root) def dosomething(): print(mylabel.config()) mylabel = tk.Label(frame, text = "Hello World", bg = "red") mylabel.pack(padx = 5, pady = 10) mybutton = tk.Button(frame, text = "Click Me", command = dosomething) mybutton.pack(padx = 5, pady = 10) frame.pack(padx = 5, pady = 5) root.mainloop()
Running the above code, and clicking the button will produce the following output in the form of a dictionary.
, 'SystemButtonFace'), 'activeforeground': ('activeforeground', 'activeForeground', 'Background', , 'SystemButtonText'), 'anchor': ('anchor', 'anchor', 'Anchor', , 'center'), 'background': ('background', 'background', 'Background', , 'red'), 'bd': ('bd', '-borderwidth'), 'bg': ('bg', '-background'), 'bitmap': ('bitmap', 'bitmap', 'Bitmap', '', ''), 'borderwidth': ('borderwidth', 'borderWidth', 'BorderWidth', , ), 'compound': ('compound', 'compound', 'Compound', , 'none'), 'cursor': ('cursor', 'cursor', 'Cursor', '', ''), 'disabledforeground': ('disabledforeground', 'disabledForeground', 'DisabledForeground', , 'SystemDisabledText'), 'fg': ('fg', '-foreground'), 'font': ('font', 'font', 'Font', , 'TkDefaultFont'), 'foreground': ('foreground', 'foreground', 'Foreground', , 'SystemButtonText'), 'height': ('height', 'height', 'Height', 0, 0), 'highlightbackground': ('highlightbackground', 'highlightBackground', 'HighlightBackground', , 'SystemButtonFace'), 'highlightcolor': ('highlightcolor', 'highlightColor', 'HighlightColor', , 'SystemWindowFrame'), 'highlightthickness': ('highlightthickness', 'highlightThickness', 'HighlightThickness', , ), 'image': ('image', 'image', 'Image', '', ''), 'justify': ('justify', 'justify', 'Justify', , 'center'), 'padx': ('padx', 'padX', 'Pad', , ), 'pady': ('pady', 'padY', 'Pad', , ), 'relief': ('relief', 'relief', 'Relief', , 'flat'), 'state': ('state', 'state', 'State', , 'normal'), 'takefocus': ('takefocus', 'takeFocus', 'TakeFocus', '0', '0'), 'text': ('text', 'text', 'Text', '', 'Hello World'), 'textvariable': ('textvariable', 'textVariable', 'Variable', '', ''), 'underline': ('underline', 'underline', 'Underline', -1, -1), 'width': ('width', 'width', 'Width', 0, 0), 'wraplength': ('wraplength', 'wrapLength', 'WrapLength', , )>This line here is responsible for displaying all the possible options for the label widget.
def dosomething(): print(mylabel.config()) #If you pay close attention to the output, you’ll also notice the current value of those options are also saved in in the key:value pairs of the dictionary.
There are other interesting things we can do as well, such as printing out a specific key-value pair as shown below.
def dosomething(): print(mylabel.config()["text"])This gives out the following value. Can you see the current text value stored in it?
('text', 'text', 'Text', '', 'Hello World')Now we’ll try to access that current value, which we can do using the following format.
def dosomething(): print(mylabel.config()["text"][4])This will print it out for us.
From my observation, the last value in the tuple is typically the current value.
This marks the end of the Python Tkinter Config. Any suggestions or contributions for CodersLegacy are more than welcome. Questions regarding the tutorial content can be asked in the comments section below.
Python tkinter label configure
Стиль описывает внешний вид виджета. За установку стиля в виджетах отвечает параметр style . Встроенные виджеты по умолчанию применяют некоторые встроенные стили. В частности, все кнопки применяют стиль TButton, который описывает, как выглядят кнопки. Каждый стиль имеет имя. При создании, изменении или применении стиля к виджетам, необходимо знать его имя.
Чтобы узнать стиль определенного виджета, можно обратиться к его параметру style :
label = ttk.Label(text="Hello World") label.pack(anchor=CENTER, expand=1) print(label["style"])Если возвращается пустая строка, то значит, что к виджету применяется стиль по умолчанию. В этом случае название стиля можно получить с помощью метода winfo_class() :
label = ttk.Label(text="Hello World") print(label.winfo_class()) # TLabelКак правило, встроенные стили называются по имени класса виджета и предваряются буквой T. Например, для виджета Label - стиль TLabel, для Button - TButton.
Определение и применение стилей
Стиль в Tkinter представляет объект Style . У данного объект есть метод configure() , который позволяет настроить стиль
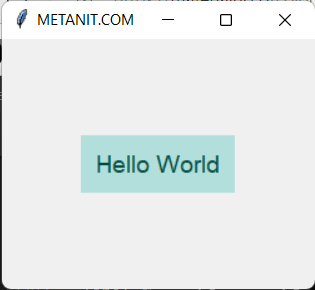
from tkinter import * from tkinter import ttk root = Tk() root.title("METANIT.COM") root.geometry("250x200") label_style = ttk.Style() label_style.configure("My.TLabel", # имя стиля font="helvetica 14", # шрифт foreground="#004D40", # цвет текста padding=10, # отступы background="#B2DFDB") # фоновый цвет label = ttk.Label(text="Hello World", style="My.TLabel") label.pack(anchor=CENTER, expand=1) root.mainloop()
Здесь создается стиль в виде объекта label_style. В методе configure() первым параметром передается имя стиля - в даннои случае "My.TLabel". Все остальные параметры настраивают различные аспекты стиля, так здесь устанавливаются шрифт, цвет фона и текста и отступы.
label_style.configure("My.TLabel", # имя стиля font="helvetica 14", # шрифт foreground="#004D40", # цвет текста padding=10, # отступы background="#B2DFDB") # фоновый цветЗатем применяем этот стиль, передавая его параметру style :
label = ttk.Label(text="Hello World", style="My.TLabel")Имена стилей
Имя создаваемых стилей имеют следующий формат:
новый_стиль.встроенный_стильНапример, в примере выше название стиля "My.TLabel" указывает, что фактически он называется "My" и наследуется от "TLabel". И те параметры, которые не будут явным образом определены, будут унаследованы от родительского стиля "TLabel"
Расширение встроенных стилей
Вместо создания новых стилей можно просто изменить отдельные характеристики уже существующих:
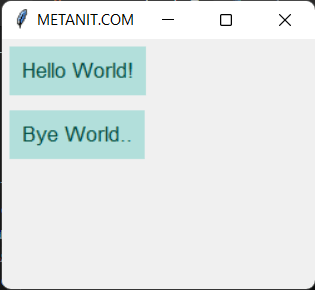
from tkinter import * from tkinter import ttk root = Tk() root.title("METANIT.COM") root.geometry("250x200") ttk.Style().configure("TLabel", font="helvetica 13", foreground="#004D40", padding=8, background="#B2DFDB") ttk.Label(text="Hello World!").pack(anchor=NW, padx=6, pady=6) ttk.Label(text="Bye World..").pack(anchor=NW, padx=6, pady=6) root.mainloop()
В данном случае изменяется встроенный стиль TLabel. Он применяется к меткам по умолчанию, поэтому данный стиль не надо явным образом устанавливать для меток.
Применение стиля ко всем виджетам
Выше стиль применялся к меткам Label, к другим же типам виджетов он не применялся. Если же мы хотим, чтобы у нас был бы общий стиль для всех типов виджетов, то в метод configure() в качестве имени стиля передается "."
from tkinter import * from tkinter import ttk root = Tk() root.title("METANIT.COM") root.geometry("250x200") ttk.Style().configure(".", font="helvetica 13", foreground="#004D40", padding=8, background="#B2DFDB") ttk.Label(text="Hello World!").pack(anchor=NW, padx=6, pady=6) ttk.Button(text="Click").pack(anchor=NW, padx=6, pady=6) root.mainloop()Подобный стиль также не надо явно применять, он применяется автоматически ко всем виджетам
Changing Tkinter Label Text Dynamically using Label.configure()
The Label widget in tkinter is generally used to display text as well as image. Text can be added in a Label widget by using the constructor Label(root, text= "this is my text"). Once the Label widget is defined, you can pack the Label widget using any geometry manager.
If you want to configure the Label widget, you can use the configure() property. The configure() method allows you to edit the text as well other properties of the Label widget dynamically.
Example
Let us take an example to understand how we can dynamically change the tkinter label text using the configure() method. In this example, we will create a Label text widget and a button to update the text of the label widget.
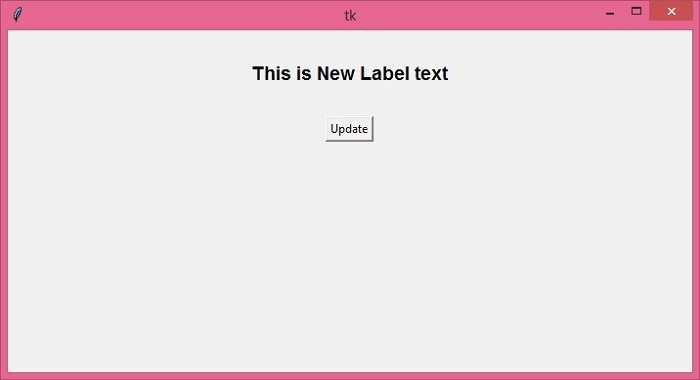
# Import the required library from tkinter import * # Create an instance of tkinter frame or widget win = Tk() win.geometry("700x350") def update_text(): # Configuring the text in Label widget label.configure(text="This is updated Label text") # Create a label widget label=Label(win, text="This is New Label text", font=('Helvetica 14 bold')) label.pack(pady= 30) # Create a button to update the text of label widget button=Button(win, text= "Update", command=update_text) button.pack() win.mainloop()Output
Running the above code will display a window with a label widget containing some text and a button.
When you click the button, it will update the text.