- Tkinter Button
- Introduction to Tkinter button widget
- Command callback
- Button states
- Tkinter button examples
- 1) Simple Tkinter button example
- 2) Tkinter image button example
- 3) Displaying an image button
- Summary
- Python Tkinter – Changing the state of buttons
- Implementing Button State
- Changing the state of buttons using Python tkinter
- Conclusion
- Change Tkinter Button State
- How to Disable / Enable a Button in TKinter?
- Example
- Output
Tkinter Button
Summary: in this tutorial, you’ll learn about the Tkinter Button widget and how to use it to create various kinds of buttons.
Introduction to Tkinter button widget
Button widgets represent a clickable item in the applications. Typically, you use a text or an image to display the action that will be performed when clicked.
Buttons can display text in a single font. However, the text can span multiple lines. On top of that, you can make one of the characters underline to mark a keyboard shortcut.
To invoke a function or a method of a class automatically when the button is clicked, you assign its command option to the function or method. This is called the command binding in Tkinter.
To create a button, you use the ttk.Button constructor as follows:
button = ttk.Button(container, **option)Code language: Python (python)A button has many options. However, the typical ones are like this:
button = ttk.Button(container, text, command)Code language: Python (python)- The container is the parent component on which you place the button.
- The text is the label of the button.
- The command specifies a callback function that will be called automatically when the button clicked.
Command callback
The command option associates the button’s action with a function or a method of a class. When you click or press the button, it’ll automatically invoke a callback function.
To assign a callback to the command option, you can use a lambda expression:
def callback(): # do something ttk.Button( root, text="Demo Button", command=callback )Code language: Python (python)If the function contains one expression, you use a lamba expression:
ttk.Button( root, text="Demo Button", command=lambda_expression )Code language: Python (python)Button states
The default state of a button is normal . In the normal state, the button will respond to the mouse events and keyboard presses by invoking the callback function assigned to its command option.
The button can also have the disabled state. In the disabled state, a button is greyed out and doesn’t respond to the mouse events and keyboard presses.
To control the state of a button, you use the state() method:
# set the disabled flag button.state(['disabled']) # remove the disabled flag button.state(['!disabled'])Code language: Python (python)Tkinter button examples
Let’s take some examples of using button widgets.
1) Simple Tkinter button example
The following program shows how to display an Exit button. When you click it, the program is terminated.
import tkinter as tk from tkinter import ttk # root window root = tk.Tk() root.geometry('300x200') root.resizable(False, False) root.title('Button Demo') # exit button exit_button = ttk.Button( root, text='Exit', command=lambda: root.quit() ) exit_button.pack( ipadx=5, ipady=5, expand=True ) root.mainloop()Code language: Python (python)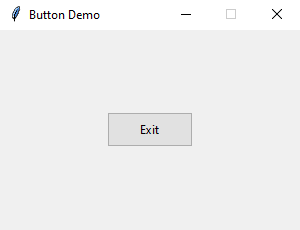
The following creates the Exit button:
exit_button = ttk.Button( root, text='Exit', command=lambda: root.quit() )Code language: Python (python)The command of the button is assigned to a lambda expression that closes the root window.
2) Tkinter image button example
The following program shows how to display an image button. To practice this example, you need to download the following image first:

Just right-click and save it into a folder that is accessible from the following program e.g., assets folder:
import tkinter as tk from tkinter import ttk from tkinter.messagebox import showinfo # root window root = tk.Tk() root.geometry('300x200') root.resizable(False, False) root.title('Image Button Demo') # download button def download_clicked(): showinfo( title='Information', message='Download button clicked!' ) download_icon = tk.PhotoImage(file='./assets/download.png') download_button = ttk.Button( root, image=download_icon, command=download_clicked ) download_button.pack( ipadx=5, ipady=5, expand=True ) root.mainloop()Code language: Python (python)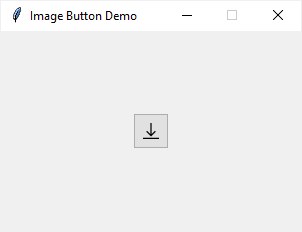
- First, create a new instance of the tk.PhotoImage class that references the image file ‘./assets/download.png’ .
- Second, create the ttk.Button whose image option is assigned to the image.
- Third, assign a function to the command option. When you click the button, it’ll call the download_clicked function that displays a message box.
3) Displaying an image button
To display both text and image on a button, you need to use the compound option. If you don’t, the button will display the text only, not the image.
The following shows how to display both text and image on a button:
import tkinter as tk from tkinter import ttk from tkinter.messagebox import showinfo # root window root = tk.Tk() root.geometry('300x200') root.resizable(False, False) root.title('Image Button Demo') # download button handler def download_clicked(): showinfo( title='Information', message='Download button clicked!' ) download_icon = tk.PhotoImage(file='./assets/download.png') download_button = ttk.Button( root, image=download_icon, text='Download', compound=tk.LEFT, command=download_clicked ) download_button.pack( ipadx=5, ipady=5, expand=True ) root.mainloop() Code language: Python (python)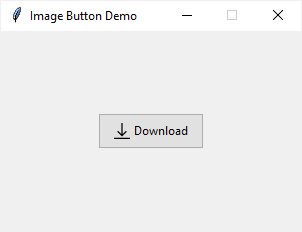
Summary
- Use the ttk.Button() class to create a button.
- Assign a lambda expression or a function to the command option to respond to the button click event.
- Assign the tk.PhotoImage() to the image property to display an image on the button.
- Use the compound option if you want to display both text and image on a button.
Python Tkinter – Changing the state of buttons
In this Python tutorial, we will learn how to use Tkinter to examine and alter the states of buttons.
To begin, we must first install Tkinter in our Python environment. We’ll see a graphical user interface window where we may modify the status of the Tkinter button by pressing it.
First, we must grasp what the state is in Python Tkinter.
Tkinter is a Python package that allows us to design our own graphical user interface (GUI). The Tkinter button has two states: normal and disabled. In the regular condition, we can push the button; but, in the disabled state, we cannot click the button.
So, in this tutorial, we’ll learn about Tkinter button states.
Implementing Button State
Let’s get started with the coding component of the provided challenge. First, import the Tkinter package. Now we’ll create an app object and set the window size to 200 x 200.
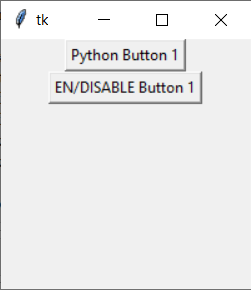
import tkinter as tk app = tk.Tk() app.geometry("200x200") We’ll add two more buttons, button 1 and button 2. We’ll offer an argument as an app that will be displayed in the app window, and we’ll give it a name by setting text attributes to “Python Button 1.”
By providing the value tk to the state of button 1, we will indicate that it is disabled. DISABLED.
Similarly, in Button 2, we will supply the instruction as to some function name, so that when we hit that button, the following function will be executed.
As a function, we provide them switchButtonState. That function will be defined later. We’ll also use the pack to place those two buttons.
button1 = tk.Button(app, text="Python Button 1",state=tk.DISABLED) button2 = tk.Button(app, text="EN/DISABLE Button 1",command = switchButtonState) button1.pack() button2.pack()
The function below will alter the status of the button. By clicking the button, if the status of button1 is normal, it will be changed to disabled; else, it will remain normal.
def switchButtonState(): if (button1['state'] == tk.NORMAL): button1['state'] = tk.DISABLED else: button1['state'] = tk.NORMAL
Finally, we must use app.mainloop() to make the app execute.
By clicking on Button2, you may now modify the status of that Button1.
Changing the state of buttons using Python tkinter
import tkinter as tk def switchButtonState(): if (button1['state'] == tk.NORMAL): button1['state'] = tk.DISABLED else: button1['state'] = tk.NORMAL app = tk.Tk() app.geometry("200x200") button1 = tk.Button(app, text="Python Button 1",state=tk.DISABLED) button2 = tk.Button(app, text="EN/DISABLE Button 1",command = switchButtonState) button1.pack() button2.pack() app.mainloop() Output Screens

Conclusion
Congratulations! You just learned how to Changing the state of buttons. Hope you enjoyed it! 😇
Liked the tutorial? In any case, I would recommend you to have a look at the tutorials mentioned below:
Thank you for taking your time out! Hope you learned something new!! 😄
Change Tkinter Button State

The left button is disabled (gray out) and the right button is normal.
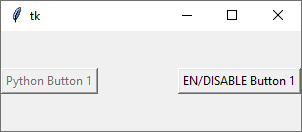
The states could be modified in the dictionary-like method or configuration-like method.
try: import Tkinter as tk except: import tkinter as tk def switchButtonState(): if (button1['state'] == tk.NORMAL): button1['state'] = tk.DISABLED else: button1['state'] = tk.NORMAL app = tk.Tk() app.geometry("300x100") button1 = tk.Button(app, text="Python Button 1", state=tk.DISABLED) button2 = tk.Button(app, text="EN/DISABLE Button 1", command = switchButtonState) button1.pack(side=tk.LEFT) button2.pack(side=tk.RIGHT) app.mainloop() By clicking button2 , it calls the function switchButtonState to switch button1 state from DISABLED to NORMAL , or vice versa.
state is the option of Tkinter Button widget. All the options in the Button widget are the keys of Button as a dictionary.
def switchButtonState(): if (button1['state'] == tk.NORMAL): button1['state'] = tk.DISABLED else: button1['state'] = tk.NORMAL The state is updated by changing the value of state in the Button dictionary.
The state could also be modified by using config method of Button object. Therefore, the switchButtonState() function could also be implemented as below,
def switchButtonState(): if (button1['state'] == tk.NORMAL): button1.config(state=tk.DISABLED) else: button1.config(state=tk.NORMAL) How to Disable / Enable a Button in TKinter?
There are various attributes and properties in each tkinter widget to help us extend the functionality of the application. Tkinter Button widgets can be enabled and disabled by defining its state in the Button Object. The state attribute generally accepts two values Normal and Disabled which are used for enabling and disabling the button, respectively.
Example
#Import necessary Library from tkinter import * from tkinter import ttk from tkinter.filedialog import asksaveasfile #Create an instance of tkinter window win= Tk() #Set the geometry of tkinter window win.geometry("750x250") #Define the function to change the value in label widget def change_text(label): label.configure(text= "Hey, I am Label-2", background="gray91") #Create a Label label = Label(win, text= "Hey, I am Label-1", font= ('Helvetica 15 underline'), background="gray76") label.pack(pady=20) #Create a button btn= ttk.Button(win,text= "Change", command= lambda:change_text(label), state= DISABLED) btn.pack(pady=10) win.mainloop() Output
Running the above code will display a window that has a disabled button. We can change the state of the button to Normal.
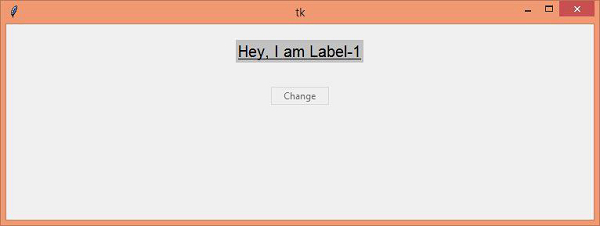
Now, change the value of the state attribute to NORMAL to make the button active on the window.