- Tkinter standard widget attributes
- Tkinter widget state
- Tkinter widget padding
- Tkinter Background colours
- Width and height
- Tkinter reliefs
- Tkinter fonts
- Tkinter cursors
- Introduction
- 15 – Program on Labels and Buttons with Relief Styles in tkinter in easy way
- Labels and Buttons with Relief Styles in tkinter in Python programming
- tkinter Labels and Buttons with Relief Styles in Python programming
Tkinter standard widget attributes
In this part of the Tkinter tutorial, we talk about standard widget attributes, including cursors, reliefs, colours, and fonts.
The standard widget attributes are keywords used in widget constructors.
Tkinter widget state
The state attribute defines the state of the widget. It can have the following values: NORMAL , ACTIVE , and DISABLED .
#!/usr/bin/python """ ZetCode Tkinter tutorial In this script, we use the state attribute. Author: Jan Bodnar Website: www.zetcode.com """ from tkinter import Tk, BOTH, NORMAL, ACTIVE, DISABLED from tkinter.ttk import Frame, Label class Example(Frame): def __init__(self): super().__init__() self.initUI() def initUI(self): self.master.title("Fonts") self.pack(fill=BOTH, expand=True) self.columnconfigure(0, pad=5) self.columnconfigure(1, pad=5) self.columnconfigure(2, pad=5) txt = "Today is a beautiful day" label1 = Label(self, text=txt, state=NORMAL) label1.grid(row=0, column=0) label2 = Label(self, text=txt, state=ACTIVE) label2.grid(row=0, column=1) label3 = Label(self, text=txt, state=DISABLED) label3.grid(row=0, column=2) def main(): root = Tk() ex = Example() root.geometry("+300+300") root.mainloop() if __name__ == '__main__': main() We demonstrate the state attribute on the Label widget.
label1 = Label(self, text=txt, state=NORMAL)

The first label has NORMAL state. Figure: Widget state
Tkinter widget padding
The padx and pady attributes add extra horizontal and vertical space to the widgets.
#!/usr/bin/python """ ZetCode Tkinter tutorial This program uses the padx and pady widget attributes. Author: Jan Bodnar Website: www.zetcode.com """ from tkinter import Tk, Frame, Button from tkinter import BOTH, LEFT, TOP class Example(Frame): def __init__(self): super().__init__() self.initUI() def initUI(self): self.master.title("Padding") self.pack(fill=BOTH) frame = Frame(self, bd=5) frame.pack() btn1 = Button(frame, text='Button') btn1.pack(side=LEFT, padx=5) btn2 = Button(frame, text='Button') btn2.pack(side=LEFT, padx=5) frame2 = Frame(self) frame2.pack() btn1 = Button(frame2, text='Button') btn1.pack(side=TOP, pady=15) btn2 = Button(frame2, text='Button') btn2.pack(side=TOP, pady=15) self.pack() def main(): root = Tk() root.geometry("300x250+300+300") app = Example() root.mainloop() if __name__ == '__main__': main() In the example, we create two frames; each of them has two widgets. The first frame forms a row from the buttons, the second one a column. The padx and pady attributes add space between the buttons.
btn1 = Button(frame, text='Button') btn1.pack(side=LEFT, padx=5)
With the pack manager, we create a row of buttons. The padx adds 5px space between the buttons horizontally.
btn1 = Button(frame2, text='Button') btn1.pack(side=TOP, pady=15)

Here we form a column. Therefore, we use the pady attribute to add space vertically. Figure: Padding
Tkinter Background colours
The background colours of widgets can be set with background attribute. It can be abbreviated to bg .
Likewise, the foreground colours of widgets can be set with foreground attribute. It can be abbreviated to fg .
#!/usr/bin/python """ ZetCode Tkinter tutorial This program uses sets various background colours with bg attribute. Author: Jan Bodnar Website: www.zetcode.com """ from tkinter import Tk, Frame, Label from tkinter import BOTH, LEFT class Example(Frame): def __init__(self): super().__init__() self.initUI() def initUI(self): self.master.title("Background colours") self.pack(fill=BOTH) frame = Frame(self, borderwidth=10) frame.pack() lbl1 = Label(frame, bg='SlateGray3', width=15, height=10) lbl1.pack(side=LEFT, padx=3) lbl2 = Label(frame, bg='SlateGray4', width=15, height=10) lbl2.pack(side=LEFT) lbl3 = Label(frame, bg='DarkSeaGreen3', width=15, height=10) lbl3.pack(side=LEFT, padx=3) lbl4 = Label(frame, bg='DarkSeaGreen4', width=15, height=10) lbl4.pack(side=LEFT) self.pack() def main(): root = Tk() root.geometry("+300+300") app = Example() root.mainloop() if __name__ == '__main__': main() In the code example, we create four labels with four different background colours.
lbl1 = Label(frame, bg='SlateGray3', width=15, height=10) lbl1.pack(side=LEFT, padx=3)

The first label has SlateGray3 background colour. Figure: Background colours
Width and height
The width and height attributes set the width and height of the widget.
#!/usr/bin/python """ ZetCode Tkinter tutorial This program uses width and height attributes to set the size of widgets. Author: Jan Bodnar Website: www.zetcode.com """ from tkinter import Tk, Frame, Button from tkinter import BOTH, LEFT class Example(Frame): def __init__(self): super().__init__() self.initUI() def initUI(self): self.master.title("Width and height") self.pack(fill=BOTH) frame = Frame(self, borderwidth=10) frame.pack() btn1 = Button(frame, text='Button') btn1.pack(side=LEFT, padx=5) btn2 = Button(frame, text='Button', width=8) btn2.pack(side=LEFT, padx=5) btn3 = Button(frame, text='Button', width=5, height=4) btn3.pack(side=LEFT) self.pack() def main(): root = Tk() root.geometry("+300+300") app = Example() root.mainloop() if __name__ == '__main__': main() In the example, we control the size of buttons with width and height.
btn2 = Button(frame, text='Button', width=8)

The width of this button is set to eight characters. Figure: With and height attributes
Tkinter reliefs
A relief is a border decoration. The possible values are: SUNKEN , RAISED , GROOVE , RIDGE , and FLAT .
#!/usr/bin/python """ ZetCode Tkinter tutorial This program uses relief styles. Author: Jan Bodnar Website: www.zetcode.com """ from tkinter import Tk, Frame, Label from tkinter import BOTH, LEFT, FLAT, SUNKEN, RAISED, GROOVE, RIDGE class Example(Frame): def __init__(self): super().__init__() self.initUI() def initUI(self): self.master.title("Reliefs") self.pack(fill=BOTH) frame = Frame(self, borderwidth=10) frame.pack() lbl1 = Label(frame, bg='LightSteelBlue3', width=15, height=10, relief=FLAT) lbl1.pack(side=LEFT, padx=3) lbl2 = Label(frame, bg='LightSteelBlue3', bd=2, width=15, height=10, relief=SUNKEN) lbl2.pack(side=LEFT) lbl3 = Label(frame, bg='LightSteelBlue3', bd=2, width=15, height=10, relief=RAISED) lbl3.pack(side=LEFT, padx=3) lbl4 = Label(frame, bg='LightSteelBlue3', bd=3, width=15, height=10, relief=GROOVE) lbl4.pack(side=LEFT) lbl5 = Label(frame, bg='LightSteelBlue3', bd=3, width=15, height=10, relief=RIDGE) lbl5.pack(side=LEFT, padx=3) self.pack() def main(): root = Tk() root.geometry("+300+300") app = Example() root.mainloop() if __name__ == '__main__': main() The example shows five different reliefs applied on labels.
lbl3 = Label(frame, bg='LightSteelBlue3', bd=2, width=15, height=10, relief=RAISED)

The third label has a RAISED relief. With bd we increased the border width so that the reliefs are more visible. Figure: Reliefs
Tkinter fonts
Tkinter has a tkinter.font module for working with fonts. It has some built-in fonts such as TkTooltipFont , TkDefaultFont , or TkTextFont . The font is set with the font attribute.
#!/usr/bin/python """ ZetCode Tkinter tutorial In this script, we display text in three different fonts. Author: Jan Bodnar Website: www.zetcode.com """ from tkinter import Tk, BOTH from tkinter.ttk import Frame, Label, Notebook, Style from tkinter.font import Font class Example(Frame): def __init__(self): super().__init__() self.initUI() def initUI(self): self.master.title("Fonts") self.pack(fill=BOTH, expand=True) txt = "Today is a beautiful day" myfont = Font(family="Ubuntu Mono", size=16) label1 = Label(self, text=txt, font=myfont) label1.grid(row=0, column=0) label2 = Label(self, text=txt, font="TkTextFont") label2.grid(row=1, column=0) label3 = Label(self, text=txt, font=('Times', '18', 'italic')) label3.grid(row=2, column=0) def main(): root = Tk() ex = Example() root.geometry("+300+300") root.mainloop() if __name__ == '__main__': main() The example shows three labels having text in three different fonts.
myfont = Font(family="Ubuntu Mono", size=16) label1 = Label(self, text=txt, font=myfont)
A specific font is created with the Font class. If the font is not available on the platform, Tkinter reverts to some default font.
label2 = Label(self, text=txt, font="TkTextFont")
Here we use a built-in font name.
label3 = Label(self, text=txt, font=('Times', '18', 'italic')) 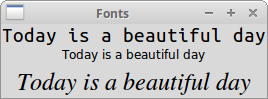
A font can also be specified as a tuple of strings. Figure: Tkinter fonts
Tkinter cursors
The cursor is a small icon that shows where the mouse pointer is located. The cursor in Tkinter is set with the cursor attribute.
#!/usr/bin/python """ ZetCode Tkinter tutorial This program uses different cursors. Author: Jan Bodnar Website: www.zetcode.com """ from tkinter import Tk, Frame, Label from tkinter import BOTH, LEFT class Example(Frame): def __init__(self): super().__init__() self.initUI() def initUI(self): self.master.title("Cursors") self.pack(fill=BOTH) frame = Frame(self, borderwidth=10) frame.pack() lbl1 = Label(frame, bg='SlateGray3', width=15, height=10, cursor='tcross') lbl1.pack(side=LEFT, padx=3) lbl2 = Label(frame, bg='SlateGray4', width=15, height=10, cursor='hand2') lbl2.pack(side=LEFT) lbl3 = Label(frame, bg='DarkSeaGreen3', width=15, height=10, cursor='heart') lbl3.pack(side=LEFT, padx=3) lbl4 = Label(frame, bg='DarkSeaGreen4', width=15, height=10, cursor='pencil') lbl4.pack(side=LEFT) self.pack() def main(): root = Tk() root.geometry("+300+300") app = Example() root.mainloop() if __name__ == '__main__': main() In the example, we have four labels. Different cursors are used for each of the labels.
lbl4 = Label(frame, bg='DarkSeaGreen4', width=15, height=10, cursor='pencil')
The fourth label has a pencil icon for the cursor.
In this part of the Tkinter tutorial, we have worked with standard widget attributes.
Introduction

GUI(Graphical user interface):-Its basically a system of interactive visual components for a software. A GUI displays objects that convey information, and represent actions that can be taken by the user. In simple words it is just representation of the code for user with proper arrangements of widgets.
We need to understand that it does not affect the working of the program.It’s only function is to manage how things are going to display.
Tkinter gives us the way in through which we can build a GUI in Python.It can be said as Python interface to the Tk GUI toolkit,which comes with Python. Tkinter is the standard library in Python. When Python and Tkinter are combined then they provide a fast and easy way to create GUI applications. Tkinter provides a powerful object-oriented interface to the Tk GUI toolkit .
- Import Tkinter module.
- Create main window of GUI generally known as Root window.
- Add widgets you want.
- Enter the main event loop using root.mainloop() to take action against each operation defined by you.
Tkinter provides user to create different objects in their window which are known as Widgets.Example of such Widgets are; buttons, labels and text boxes used in a GUI application.
So when we are creating a GUI «Relief» style becomes an important aspect for proper framing and implementation of the program.
15 – Program on Labels and Buttons with Relief Styles in tkinter in easy way

Labels and Buttons with Relief Styles in tkinter in Python programming
Labels and Buttons with Relief Styles in tkinter in Python programming.
tkinter Labels and Buttons with Relief Styles in Python programming
1 2 3 4 5 6 7 8 9 10 11 12 13 14 15 16 17 18 19 20 21 22 23 24 25 26 27 28 29 30 31 32 33
from tkinter import * root =Tk() p=Label(root, text="Labels and Buttons with Relief Styles") p.grid(row=0,column=0) p1=Label(root, text="RAISED", fg="white", bg="red", height=2, width=20) b1=Button(root,relief=RAISED, height=2, width=20) p1.grid(row=1,column=0) b1.grid(row=1,column=1) p1=Label(root, text="SUNKEN", fg="white", bg="orange", height=2, width=20) b1=Button(root,relief=SUNKEN, height=2, width=20) p1.grid(row=2,column=0) b1.grid(row=2,column=1) p1=Label(root, text="FLAT", fg="white", bg="blue", height=2, width=20) b1=Button(root,relief=FLAT, height=2, width=20) p1.grid(row=3,column=0) b1.grid(row=3,column=1) p1=Label(root, text="RIDGE", fg="white", bg="green", height=2, width=20) b1=Button(root,relief=RIDGE, height=2, width=20) p1.grid(row=4,column=0) b1.grid(row=4,column=1) p1=Label(root, text="SOLID", fg="white", bg="magenta", height=2, width=20) b1=Button(root,relief=SOLID, height=2, width=20) p1.grid(row=5,column=0) b1.grid(row=5,column=1) p1=Label(root, text="GROOVE", fg="white", bg="purple", height=2, width=20) b1=Button(root,relief=GROOVE, height=2, width=20) p1.grid(row=6,column=0) b1.grid(row=6,column=1)