Откройте расширение Chrome через Selenium WebDriver с помощью Python
Я создал расширение chrome, которое вызывает вызовы API в базу данных и извлекает некоторые данные, относящиеся к открытому веб-сайту. Например, если я открываю target.com и нажимаю на расширение, это даст вам данные, относящиеся к target.com. Я пытаюсь написать автоматические тесты для него через веб-драйвер селена, который я могу запускать на регулярной основе для регрессионного тестирования. Чтобы проверить расширение, мне нужно сначала открыть расширение (обычно мы делаем это, нажимая на значок расширения). Я пробовал разные способы попытаться щелкнуть значок расширения, но не был успешным. (Например, с помощью сочетания клавиш ALT — LEFT_ARROW — SPACE, но это не работает через webdriver). Я также пробовал это (упомянутый здесь):
options = webdriver.ChromeOptions() options.add_argument("--app-id = mbopgmdnpcbohhpnfglgohlbhfongabi") Но выше код не помогает при открытии расширения. Я был бы признателен за любые мысли о том, как я могу это сделать, используя python в Selenium Webdriver.
7 ответов
У нас есть аналогичное требование, работая над дополнением Chrome с помощью Selenium WebDriver. Как сказал «@Aleksandar Popovic», мы не можем щелкнуть значок расширения Chrome с помощью WebDriver, так как значок находится вне веб-страницы. Мы используем sikuli (инструмент автоматизации, использующий распознавание образов), чтобы щелкнуть над ним. После этого добавочное всплывающее окно будет другим окном браузера, поэтому используйте окно переключателя для выполнения действий над всплывающим окном. Вот пример кода в Java, используя как Selenium Webdriver, так и Sikuli. Sikuli будет работать на основе распознавания образов. Прежде чем запускать код, снимок экрана браузера Chrome и обрезайте его так, чтобы на изображении был доступен только Addon. Сохраните это изображение как «AddonIcon.png». Sikuli будет соответствовать этому изображению (в нашем случае AddonIcon.png) на экране и имитировать действие клика на нем.
import java.io.File; import java.util.List; import java.util.Set; import org.openqa.selenium.By; import org.openqa.selenium.WebDriver; import org.openqa.selenium.chrome.ChromeDriver; import org.openqa.selenium.chrome.ChromeOptions; import org.openqa.selenium.support.ui.ExpectedConditions; import org.openqa.selenium.support.ui.WebDriverWait; import org.sikuli.script.App; import org.sikuli.script.FindFailed; import org.sikuli.script.Pattern; import org.sikuli.script.Screen; public class PageTest < public static void main(String[] args) < // Opening chrome with that addon ChromeOptions options = new ChromeOptions(); options.addExtensions(new File("Path to ur chrome addon (.cxt file)")); System.setProperty("webdriver.chrome.driver", "path to chromedriver.exe"); WebDriver driver = new ChromeDriver(options); driver.manage().window().maximize(); // Creating object to the Sukali screen class Screen s=new Screen(); //Finding and clicking on the Addon image try < s.find("Path to the 'AddonIcon.png'"); s.click("Path to the 'AddonIcon.png'"); >catch (FindFailed e) < e.printStackTrace(); >//Wait until new Addon popup is opened. WebDriverWait wait = new WebDriverWait(driver, 5); wait.until(ExpectedConditions.numberOfWindowsToBe(2)); // Switch to the Addon Pop up String parentWindow= driver.getWindowHandle(); Set allWindows = driver.getWindowHandles(); for(String curWindow : allWindows) < if(!parentWindow.equals(curWindow))< driver.switchTo().window(curWindow); >> /***********Ur code to work on Add-on popup************************/ > > Была та же проблема. Работала над ним, используя ссылку: chrome-extension://
Using Google Chrome Extensions with Selenium
Running Google Chrome with an extension installed is quite simple because Chrome supports a —load-extension command-line argument for exactly this purpose. This can be specified before launching Chrome with Selenium by creating a ChromeOptions instance and calling add_argument() .
from selenium import webdriver from selenium.common.exceptions import NoSuchElementException # Configure the necessary command-line option. options = webdriver.ChromeOptions() options.add_argument('--load-extension=path/to/the/extension') # Initalize the driver with the appropriate options. driver = webdriver.Chrome(chrome_options=options) The above code will setup a Selenium driver for Chrome with the extension located at path/to/extension preinstalled.
Let’s make a very minimal Chrome extension and use it to verify that this code works. We’ll first need to make a directory to hold the extension
and then we’ll need to create a manifest.json file inside of that directory to define the basic meta-information for the extension. Here’s a very basic example of a manifest.json file
which includes only the minimum required fields and one content script. The content script is expected to be located in chrome-extension/content.js and it will be automatically injected into every page when the extension is installed. You can put whatever you want in here for web scraping or browser automation purposes, but here’s a useful piece of code for testing that Chrome is successfully loading the extension before launching.
// Wait for the DOM to completely load. document.addEventListener("DOMContentLoaded", () => < // Overwrite the contents of the body. document.body.innerHTML = 'Successfully Installed!'; >);
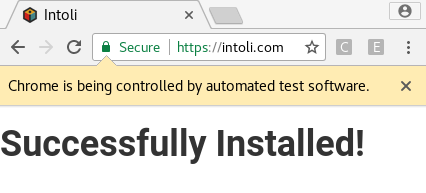
This code will first wait for the DOM to load completely and will then replace the entire body of the document with a big banner saying “Successfully Installed!” We can write a simple test script for this that checks for the injected h1 tag and prints out a success or failure message.
from selenium import webdriver from selenium.common.exceptions import NoSuchElementException # Configure the necessary command-line option. options = webdriver.ChromeOptions() # Note that `chrome-extension` is the path to the unpackaged extension. options.add_argument('--load-extension=chrome-extension') # Navigate to any page. well, not just *any* page. driver = webdriver.Chrome(chrome_options=options) driver.get('https://intoli.com') # Check if the extension worked and log the result. try: header = driver.find_element_by_id('successfully-installed') print('Success! :-)') except NoSuchElementException: print('Failure! :-(') finally: # Clean up. driver.quit() Running the script should output
provided that everything is working correctly. The browser will quit automatically during the test, but you’ll like also see our success message flash briefly on the screen before that happens.
Note that if you attempt to run this test in headless mode by adding an options.add_argument(‘—headless’) line, you will unfortunately see the failure message.
This is because Google Chrome currently does not support Extensions in headless mode. If you have a use case for Chrome in headless mode then be sure to let the Chrome team know! It’s something that many of us would really love to see, and it will only happen if they get significant feedback about the issue.
Suggested Articles
If you enjoyed this article, then you might also enjoy these related ones.
Adventures with Dockerised Headed Chrome, Extensions and Selenium-python

The Customer Interaction Platform team here at OVO wanted to automated some manual post-release checks as part of their CI release stage. This post details some of the challenges of automating that process.
These checks were generally executed manually by the engineer following the post-release run-book, its essentially a high level integration test, to ensure that the telephony, data protection act verification and CRM systems are working together as expected. These three systems are tied together using a Chrome extension to provide a seamless user experience for our call centre agents.
As all three of the systems are browser based, thoughts immediately went to using browser automation tools such as Cypress, as we needed multiple tabs and extensions we needed an entire browser to automate, including multiple tabs and extensions to complete the checks fully.
The corporate browser here at OVO is Google’s Chrome as we are heavy users of G-Suite and Meet internally.
The obvious choice from here is Selenium, which as it operates outside the browser rather than within it, has the ability to control things that cannot securely be accessed from within the browser such as controlling multiple tabs.
Headed Chrome in Docker
Running a headless Chrome in Docker is pretty much a solved problem: Chrome has first class support for running headless and Selenium ship pre-made chrome based Docker images. Indeed we initially used these images until we discovered that headless Chrome does not support extensions.
The flow we were trying to automate relied on an in-house Chrome extension to function, so we were out of luck.
To run a full blown headed chrome we would need a display server. Running a full X server inside docker seemed overly complex though, so it was Xvfb, a virtual framebuffer, to the rescue.
We also pass no-sandbox and —disable-gpu to stop various warnings due to resources (cgroups and grapics hardware) being unavailable in our Docker environment.
![]()
Surprisingly there is also no way to access the pop-up authentication box you receive as a user from selenium, or to inject a custom header (so we can send the Authorization header ourselves).
This means in the end we ended up using another chrome extension to fill in the authentication details, again, loaded via a an argument to chrome at start time. This 2nd small extension is dynamically generated and adds an authentication listener: e.g chrome.webRequest.onAuthRequired.addListener() . This listener then returns the appropriate login information, as supplied by environment variables injected from the Docker environment.
Dealing with multiple tabs
As the tests were written as a pytest pack, we made each tab available to the tests via fixture. We store a list of the windowId s and then switch to the relevant tab before the test is run, an example snippet is below:
@pytest.fixture def crm_tab_driver(driver): driver.switch_to.window(TAB_HANDLES[crm]) return driverThis places inherent limits on the number of tests you can run at once, as you can only have a single active tab.
Debugging
When developing using Selenium locally you get the relative luxury of being able to actually see what state of the browser and its contents, a luxury which is very much not available when your docker image is running in Kubernetes somewhere!
Selenium has good support for taking screenshots so we had the script upload to Google cloud storage at various stages.
To assist with debugging we also upload to the same bucket a copy of the DOM state at exit in case of an error, a copy of the formatted dev-console logs and finally the chromedriver log itself
for entry in driver.get_log('browser'): browser_logs += ' '.format(**entry)A final quick note on chromedriver logs, if the parent directory of the path you set for service_log_path does not exist when chromedriver starts, it will exit with no error message! Hopefully that titbit will save you some minutes of confusion.
if not os.path.exists(LOG_DIR): os.makedirs(LOG_DIR) driver = webdriver.Chrome( options=options, service_log_path=os.path.join(LOG_DIR, "chromedriver.log"), service_args=["--verbose", "--whitelisted-ips"], ) As you can see what seems a conceptually simple task has many layers and problems to solve as you work through them. Hopefully these notes will help give an idea of the kinds of items that need navigating when coming up with working solutions with real world software.