- Compile and Install Python from Source On Linux
- Clone Python Repository
- Checkout to required python release
- Install build-essentials
- Compile and Install Python
- Compile Python
- Access Python’s Configuration Options
- Installation quick summary
- Troubleshooting Python compilation & installation
- Установка Python на Linux
- Подготовка
- Сборка Python в Linux из исходников
- Установка Python в Linux
- Категории
- Свежие записи
- How to Compile & Install Python 3.11/3.10 from Source in Ubuntu
- 1. Preparation:
- 2. Download Python Tarball:
- 3. Configure the source:
- 4. Build and install Python:
- 5. Verify
- 5. Make Python 3.11 default
- Uninstall Python 3.11:
- Ji m
Compile and Install Python from Source On Linux
All Linux distributions come with latest stable python release. Yet, if you want to try out new python for its elegant new features. You can compile and install it side by existing python.
Steps to Install Python from source
It is recommended not to replace python that comes with OS. You may mess up with internals since many OS internals (commands) rely on default python instead install side by existing python using “make altinstall”
Clone Python Repository
You can choose to download python source at “Python Source Release” or you can proceed with git with luxury to switch between any version you want.
git clone https://github.com/python/cpython.git
switch to cloned directory using “cd cpython”
Checkout to required python release
You can list all python releases (tags) using command “git tag“
Following command will help to list last 20 release in descending order
git tag | sort -r | head -n 20For the sake of this article I’m switching to release v3.8.0 using “git checkout” command
You can verify your current branch(version) switched to by using command “git branch“
Install build-essentials
Before proceeding further, consider updating package information and upgrading system
sudo apt -y update sudo apt -y upgrade
Above commands may take a while. Wait for them to complete to proceed further.
Install tools required to build and install python
apt -y install build-essential
Compile and Install Python
Compile Python
Compile Python using following commands
To install python with shared libraries run ” ./configure –enable-shared “.
./configure script takes another optional command line options–prefix. It can be used to set where final built files will be placed(installed).
Example: ./configure –prefix=/opt/python3.8
If –prefix option is used with ./configure script. It is not necessary to use “make altinstall” instead you can run “make install“
./configure make make install
- ./configure script checks all dependencies and prepares for build. If it is complaining about anything, make sure it is fixed before proceeding further(compilation).
- make tool will build files
- make install will install (or) it will put files into the destination specified by –prefix option of ./configure
After command make you may see optional modules which are not built with following message
INFO: Could not locate ffi libs and/or headers Python build finished successfully! The necessary bits to build these optional modules were not found: _bz2 _curses _curses_panel _dbm _gdbm _hashlib _lzma _sqlite3 _ssl _tkinter _uuid readline zlib To find the necessary bits, look in setup.py in detect_modules() for the module's name. The following modules found by detect_modules() in setup.py, have been built by the Makefile instead, as configured by the Setup files: _abc atexit pwd time Failed to build these modules: _ctypes Could not build the ssl module! Python requires an OpenSSL 1.0.2 or 1.1 compatible libssl with X509_VERIFY_PARAM_set1_host(). LibreSSL 2.6.4 and earlier do not provide the necessary APIs, https://github.com/libressl-portable/portable/issues/381 If you think, you need any of the modules mentioned above are required. Don’t hesitate to install those dependencies and then repeat “./configure; make” followed by “make install” if everything goes well with make.
Install dependencies(development files) to build python optional modules mentioned in the above output message of make command
sudo apt -y install uuid-dev libssl-dev libreadline-dev zlib1g-dev libsqlite3-dev liblzma-dev libncurses5-dev libbz2-dev libgdbm-dev
Once above development packages are installed. Run “make” to build(compile) python with dependencies installed followed by “make install” .
Use make altinstall if you would like to install python with out replacing default python if –prefix option is not used with ./configure script
If –prefix option is specified to ./configure script, built files will placed in that specified directory else files will be placed inside /usr/local by default. That is, inside “/usr/local/bin”, “usr/local/lib” etc.
You can find python command location using command “which python3.8”. Note: replace python3.8 with the version you have installed
Access Python’s Configuration Options
Once python is compiled and installed. We can access the configuration options that python was compiled with using module called “sysconfig“
Following python code will print configuration options that python was compiled with
for k, v in sysconfig.get_config_vars().items(): print("20>: <>".format(k, v))On the other hand you can also use the command “pyton3.8-config” (python*-config) to get information about python configuration
If you build and install python with ./configure’s –prefix option, all files will be placed in single directory specified with folders inside as follows,
- bin directory contains all executable files
- include directory contains all python header files like Python.h that are required for writing c extensions or python wrappers. Usually this directory will be passed with -I flag to gcc when compiling to embedded python
- lib directory contains all python modules and libraries
- share directory contains man pages that can be read with man command
Installation quick summary
- Clone python repository
- Switch to latest stable branch/tag using “git checkout” command
- Compile & install
- ./configure –prefix=$HOME/python3
- make
- make install
- Optionally create symbolic link to python executable in /usr/sbin dir if python is installed in custom location using –prefix
Troubleshooting Python compilation & installation
- Make sure you are on right branch/tag by using “git branch” command
- Check compiler version and make sure you are using latest and right gcc & g++ compilers
- Check there is not trouble with build-essentials
- If you get compiler error while compiling code with make command. Make sure right compiler, python version and installed dependencies are required versions
- Compilation errors may occur during make if choice compiler is not right one or misuse of flags
neotam
Programming language agnostic, Software architect, Python expert, Networking & DevOps engineer & consultant with decade of experience in creating serious web applications, real time event-driven non blocking applications and database driven applications ranging from small scale to enterprise grade.
Установка Python на Linux
В этой заметке я покажу как собрать из исходников и установить Python на Linux. Я буду все действия производить на Ubuntu 20.04, но инструкция будет одинаково работать и на LinuxMint и Debian.
В моей Ubuntu по умолчанию установлен Python 3.8.10, я хочу установить более свежую версию, как же это сделать?
Подготовка
Устанавливаем все необходимое для сборки Питона из исходников
sudo apt install build-essential zlib1g-dev libncurses5-dev libgdbm-dev libnss3-dev libssl-dev libreadline-dev libffi-dev libsqlite3-dev wget libbz2-dev
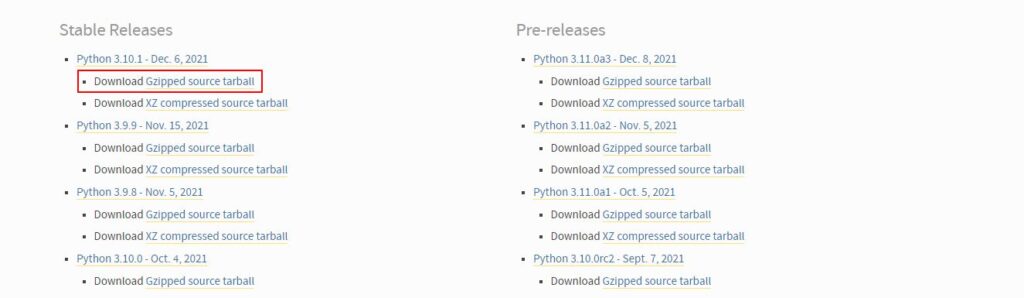
Дальше на странице https://www.python.org/downloads/source/ нужно сохранить ссылку на исходники нужной вам версии Python, например я возьму последнюю на данный момент версию Python 3.10.1

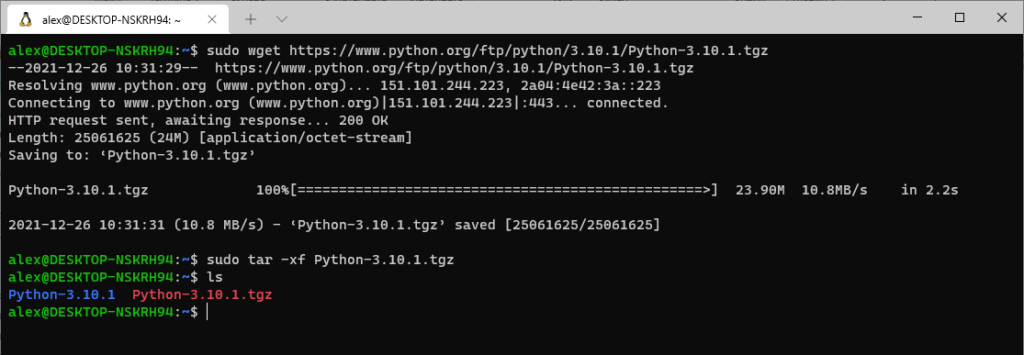
С помощью wget скачиваем исходники в домашнюю директорию
sudo wget https://www.python.org/ftp/python/3.10.1/Python-3.10.1.tgz
Далее разархивируем скаченный архив:
sudo tar -xf Python-3.10.1.tgz

Сборка Python в Linux из исходников
Перейдем в директорию с исходным кодом Python
Далее нужно запустить скрипт конфигурации, он выполнит проверки на необходимые для сборки Python
Мы запускаем скрипт с параметром —enable-optimizations, он оптимизирует собираемый двоичный файл Python (правда это замедлит процесс сборки, https://docs.python.org/3/using/configure.html).
После выполнения скрипта нам остается запустить сам процесс сборки:
Параметром -j 4 я указал количество ядер процессора, узнать эту цифру можно командой nproc .
Установка Python в Linux
Процесс сборки довольно длительная операция, после того, как она завершиться можно установить Python одной из двух команд:
Эта команда устанавливает наш Python рядом с предыдущими версиями, в будущем вы сможете выбирать какой версией пользоваться.
Эта команда установит новую версию Python поверх старых.
В данный момент я воспользовался первой командой altinstall .
Дожидаемся окончания процесса установки и проверяем:
В ответ получаем версию Python 3.10.1
Предыдущая версия python, установленная в Убунту 20.04 по умолчанию так же доступна, можно убедится в этом вызвав команду:
В ответ получаем версию Python 3.8.10
Теперь можно удалить архив с исходниками и папку куда мы их разархивировали:
sudo rm -Rf Python-3.10.1 Python-3.10.1.tgz
Еще раз повторюсь, что инструкция выше по сборке Python из исходников в Ubuntu подойдет и для установки Python в LinuxMint и Debian. В репозиториях этих дистрибутивов уже есть собранные Python, но не всегда самой свежей версии.
Категории
Свежие записи
How to Compile & Install Python 3.11/3.10 from Source in Ubuntu
This simple tutorial shows how to compile and install Python 3.11, Python 3.10, or other certain Python version in Ubuntu.
For Ubuntu 18.04, Ubuntu 20.04 and Ubuntu 22.04 LTS, there’s well trusted “deadsnakes” team PPA that maintains all the Python packages. For non-LTS releases, you may build the programming language package manually from the source tarball.
NOTE: This tutorial is tested and works in Ubuntu 20.04, Ubuntu 22.04, and Ubuntu 23.04 in my case.
1. Preparation:
Before getting started, you need to install some essential packages for building the computer language package.
Open terminal either by pressing Ctrl+Alt+T on keyboard or by searching from start menu. When it opens, run the command below to install the dependencies:
sudo apt install wget build-essential libreadline-dev libncursesw5-dev libssl-dev libsqlite3-dev tk-dev libgdbm-dev libc6-dev libbz2-dev libffi-dev zlib1g-dev
2. Download Python Tarball:
You can simply download the latest tarball from the Python website via the link below:
In case you’re running Ubuntu without desktop environment, download the source package by running the wget command in terminal:
wget -c https://www.python.org/ftp/python/3.11.0/Python-3.11.0.tar.xz
For other Python version, go and download via web browser in this page. And, change the version number in command accordingly.
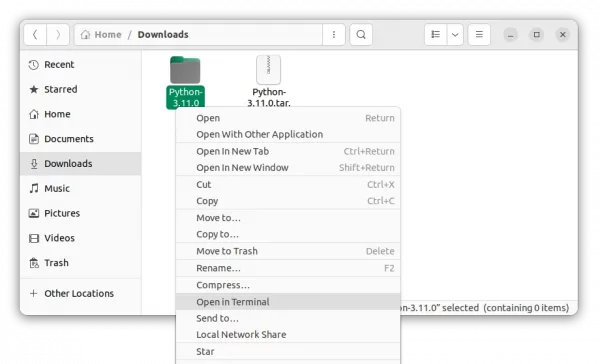
And uncompress the tarball either by right-click and selecting ‘Extract Here‘ in file manager, or by running command in terminal:
3. Configure the source:
Depends on how you grab the source tarball, either right-click on it in file manager, extract, and open the source folder in terminal via context menu option:
Open Python 3.11 source folder in terminal
If you just did the tar command above, then you may navigate to source folder via:
The command varies depends on which Python version you downloaded.
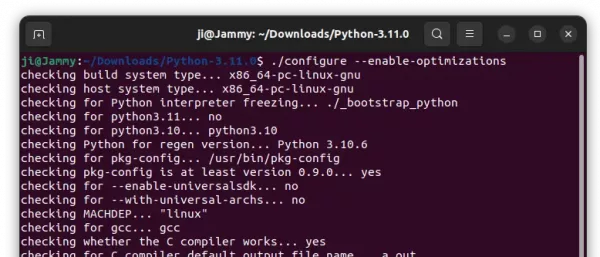
When you’re in source directory, run command to configure the source with expensive, stable optimizations (PGO, etc.):
./configure --enable-optimizations
4. Build and install Python:
Finally compile and install it into “/usr/local/bin” by running command:
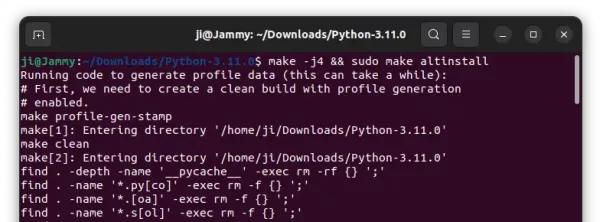
sudo make -j4 && sudo make altinstall
Here -j4 will start 4 threads to speed up the job. Depends on your CPU, you may increase the number or just skip it. And, when make command done, it will ask you to type password for running make install with sudo privilege.
5. Verify
If everything’s done successfully without error, you may verify by running command:
It should output the language version as well as the pip package manager version for you
5. Make Python 3.11 default
After installation, you may set it as default by creating symbolic links to /usr/bin/python3:
sudo update-alternatives --install /usr/bin/python3 python3 /usr/local/bin/python3.10 110
sudo update-alternatives --install /usr/bin/python3 python3 /usr/local/bin/python3.11 100
In the first command change system default python3.10 to python3.8 if you’re on Ubuntu 20.04. Finally, run command below at any time to select which Python to use as default:
sudo update-alternatives --config python3
Uninstall Python 3.11:
Until you removed the source directory, you may first either navigate to that folder in terminal or right-click and select open folder in terminal, finally run make uninstall command to remove Python 3.11:
If you’ve already removed the source, or the previous command does not work for you, try removing all the installed libraries manually via:
cd /usr/local/bin && rm -f sudo rm -f 2to3 2to3-3.11 idle3 idle3.11 pip pip3 pip3.10 pip3.11 pydoc3 pydoc3.11 python3 python3.11 python3.11-config python3-config
Ji m
I’m a freelance blogger who started using Ubuntu in 2007 and wishes to share my experiences and some useful tips with Ubuntu beginners and lovers. Please comment to remind me outdated tutorial! And, notify me if you find any typo/grammar/language mistakes. English is not my native language. Contact me via [email protected] Buy me a coffee: https://ko-fi.com/ubuntuhandbook1