Say Goodbye to Chrome: Build Your Own Browser with PyQt5 and Python
Now that we have the necessary tools, let’s get into the code. The full code for this project can be found on this GitHub repository: https://github.com/Pandeyashish17/browser-using-python. Not only the code but also all the button images that we will be using in this project are available there. We’re using PyQt5 to create a QTabWidget and a QMainWindow, which will serve as the foundation for our browser. We’re also using PyQtWebEngine to create a QWebEngineView, which will be used to display web pages. We’re creating a bunch of buttons with images like ‘back.svg’, ‘forward.svg’, ‘reload.svg’, ‘home.svg’, ‘add.svg’ which are available at the repository mentioned above. These buttons will have different functionality like back, forward, reload and navigate home. We’re also creating a search bar, which uses Google to search for whatever you type in. So, whether you’re looking for funny cat videos or researching the latest and greatest Python libraries, our browser’s got you covered! Full Code
import sys from PyQt5.QtCore import * from PyQt5.QtGui import * from PyQt5.QtWidgets import * from PyQt5.QtWebEngineWidgets import * class MainWindow(QMainWindow): def __init__(self): super(MainWindow, self).__init__() # create a QTabWidget self.tabs = QTabWidget() self.setCentralWidget(self.tabs) self.showMaximized() self.home_url = "https://github.com/Pandeyashish17/browser-using-python" # Create a new tab and set it as the current tab self.add_new_tab(self.home_url, "Home") # create a navigation toolbar navbar = QToolBar() self.addToolBar(navbar) back_btn = QAction(QIcon('back.svg'),'', self) back_btn.triggered.connect(self.tabs.currentWidget().back) navbar.addAction(back_btn) forward_btn = QAction(QIcon('forward.svg'),'', self) forward_btn.triggered.connect(self.tabs.currentWidget().forward) navbar.addAction(forward_btn) reload_btn = QAction(QIcon('reload.svg'),'', self) reload_btn.triggered.connect(self.tabs.currentWidget().reload) navbar.addAction(reload_btn) home_btn = QAction(QIcon('home.svg'),'', self) home_btn.triggered.connect(self.navigate_home) navbar.addAction(home_btn) new_tab_btn = QAction(QIcon('add.svg'),'', self) new_tab_btn.triggered.connect(self.add_new_tab) navbar.addAction(new_tab_btn) # create a search bar self.search_bar = QLineEdit() self.search_bar.returnPressed.connect(self.search) navbar.addWidget(self.search_bar) def add_new_tab(self, url=None, title="blank"): browser = QWebEngineView() # set url if given if url: browser.setUrl(QUrl(url)) # create a new tab and set browser as its widget tab_index = self.tabs.addTab(browser, title) # make the new tab the current tab self.tabs.setCurrentIndex(tab_index) # update the url bar browser.urlChanged.connect(self.update_url) def search(self): url = self.search_bar.text() current_tab = self.tabs.currentWidget() current_tab.setUrl(QUrl(f"https://google.com/search?q=")) def navigate_home(self): self.tabs.currentWidget().setUrl(QUrl(self.home_url)) def update_url(self, q): self.search_bar.setText(q.toString()) app = QApplication(sys.argv) QApplication.setApplicationName('The Silly Surfer ') window = MainWindow() app.exec_() 
Now, let’s run the code and see our wild and unique browser in action! You can easily customize the browser as per your need and create something even more unique and wild. And there you have it, folks! Your very own, one-of-a-kind browser built with PyQt5 and Python. Now you can surf the web in style, with all the fun buttons and icons to make your browsing experience extra delightful. Happy coding!
python browser
Python browser with PyQt4
In this tutorial we will build a webbrowser with Python. We will use the PyQT library which has a web component. In this tutorial you will learn how to link all the components together. We will use the default rendering engine and not roll one in this tutorial.
If you have not done our pyqt4 beginner tutorial, you could try it. If python-kde4 cannot be found update your repository to find it. The Ubuntu or Debian install guide .
Related course:
PyQt installation
sudo pip install python-qt4
sudo apt-get install qt4-designer
sudo apt-get install pyqt4-dev-tools
sudo apt-get install python-kde4
Creating the GUI with PyQT
Select Main Window and press Create. We now have our designer window open. Drag a KWebView component on the window. If you have a QtWebView (qtwebkit) in the component list. use that instead. We also add an Line Edit on top. Press File > Save As > browser.ui. Run the command:
pyuic4 browser.ui > browser.py
This will generate a Python file. Remove the line “from kwebview import KWebView” from the bottom of the browser.py file. Change KWebView to QtWebView. We want to use QtWebView instead. If you are lazy to change that, take the browser.py file from below.
QWebView exploration
import sys
from browser import BrowserDialog
from PyQt4 import QtCore, QtGui
from PyQt4.QtCore import QUrl
from PyQt4.QtWebKit import QWebView
class MyBrowser(QtGui.QDialog):
def __init__(self, parent=None):
QtGui.QWidget.__init__(self, parent)
QWebView.__init__(self)
self.ui = BrowserDialog()
self.ui.setupUi(self)
self.ui.lineEdit.returnPressed.connect(self.loadURL)
def loadURL(self):
url = self.ui.lineEdit.text()
self.ui.qwebview.load(QUrl(url))
self.show()
#self.ui.lineEdit.setText(«»)
if __name__ == «__main__»:
app = QtGui.QApplication(sys.argv)
myapp = MyBrowser()
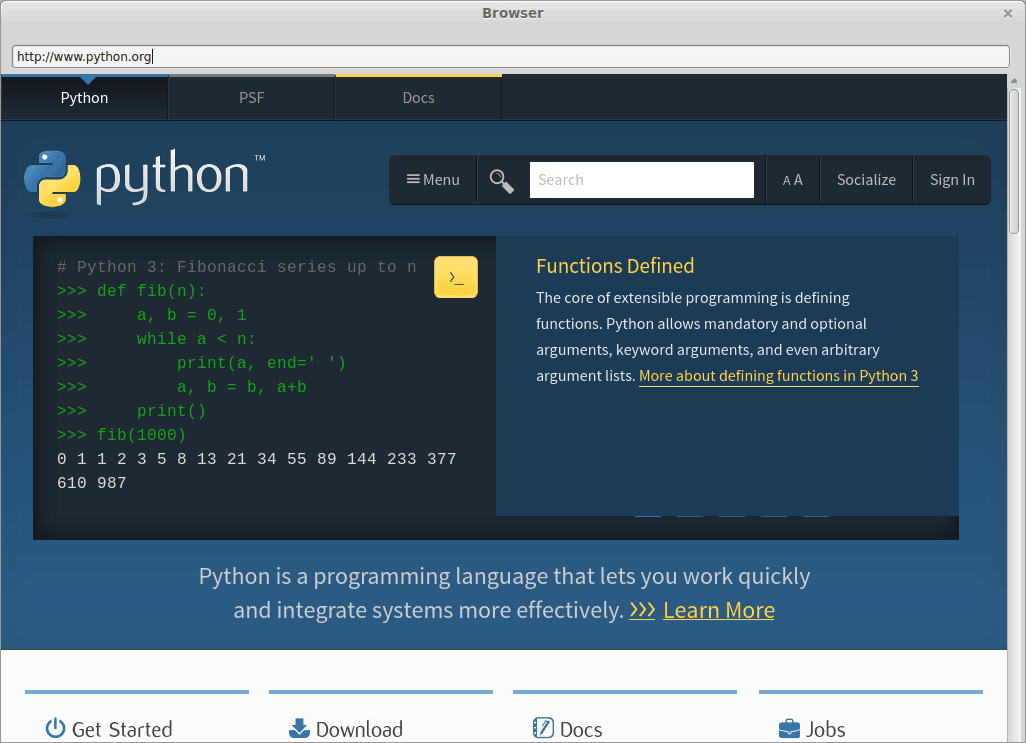
myapp.ui.qwebview.load(QUrl(‘http://www.pythonspot.com’))
myapp.show()
sys.exit(app.exec_())
This code will use the UI as defined in browser.py and add logic to it. The lines
self.ui.lineEdit.returnPressed.connect(self.loadURL)
def loadURL(self):
url = self.ui.lineEdit.text()
self.ui.qwebview.load(QUrl(url))
self.show()
#self.ui.lineEdit.setText(«»)
The first line defines the callback or event. If a person presses enter (returnPressed), it will call the function loadURL. It makes sure that once you press enter, the page is loaded with that function. If you did everything correctly, you should be able to run the browser with the command:
Please make sure you type the full url, e.g. : https://pythonspot.com including the http:// part. Your browser should now start:
If your code does not run, please use the codes below (or look at the differences and change whats wrong):
# -*- coding: utf-8 -*-
# Form implementation generated from reading ui file ‘browser.ui’
#
# Created: Fri Jan 30 20:49:32 2015
# by: PyQt4 UI code generator 4.10.4
#
# WARNING! All changes made in this file will be lost!
import sys
from PyQt4 import QtCore, QtGui
from PyQt4.QtGui import QApplication
from PyQt4.QtCore import QUrl
from PyQt4.QtWebKit import QWebView
try:
_fromUtf8 = QtCore.QString.fromUtf8
except AttributeError:
def _fromUtf8(s):
return s
try:
_encoding = QtGui.QApplication.UnicodeUTF8
def _translate(context, text, disambig):
return QtGui.QApplication.translate(context, text, disambig, _encoding)
except AttributeError:
def _translate(context, text, disambig):
return QtGui.QApplication.translate(context, text, disambig)
class BrowserDialog(object):
def setupUi(self, Dialog):
Dialog.setObjectName(_fromUtf8(«Dialog»))
Dialog.resize(1024, 768)
self.qwebview = QWebView(Dialog)
self.qwebview.setGeometry(QtCore.QRect(0, 50, 1020, 711))
self.qwebview.setObjectName(_fromUtf8(«kwebview»))
self.lineEdit = QtGui.QLineEdit(Dialog)
self.lineEdit.setGeometry(QtCore.QRect(10, 20, 1000, 25))
self.lineEdit.setObjectName(_fromUtf8(«lineEdit»))
self.retranslateUi(Dialog)
QtCore.QMetaObject.connectSlotsByName(Dialog)
def retranslateUi(self, Dialog):
Dialog.setWindowTitle(_translate(«Browser», «Browser», None))
import sys
from browser import BrowserDialog
from PyQt4 import QtCore, QtGui
from PyQt4.QtCore import QUrl
from PyQt4.QtWebKit import QWebView
class MyBrowser(QtGui.QDialog):
def __init__(self, parent=None):
QtGui.QWidget.__init__(self, parent)
QWebView.__init__(self)
self.ui = BrowserDialog()
self.ui.setupUi(self)
self.ui.lineEdit.returnPressed.connect(self.loadURL)
def loadURL(self):
url = self.ui.lineEdit.text()
self.ui.qwebview.load(QUrl(url))
self.show()
#self.ui.lineEdit.setText(«»)
if __name__ == «__main__»:
app = QtGui.QApplication(sys.argv)
myapp = MyBrowser()
myapp.ui.qwebview.load(QUrl(‘http://www.pythonspot.com’))
myapp.show()
sys.exit(app.exec_())
Creating your own browser using Python
Hey there! In this tutorial, we will be learning to create a simple browser in Python using PyQt5 in PyCharm.
Qt is a set of cross-platform C++ libraries that implement high-level APIs for accessing various aspects of modern desktop and mobile systems such as location and positioning services, Bluetooth connectivity, etc.
PyQt5 is a comprehensive set of Python bindings for Qt v5, that enables Python to be used as an alternative application development language to C++ on all supported platforms including iOS and Android.
Implementation
- Firstly, open PyCharm and create a project titled Browser. Then open the terminal and type the below-listed commands to install the respective libraries.
pip install PyQt5 pip install PyQtWebEngine
# Import necessary libraries from PyQt5.QtWidgets import * from PyQt5.QtCore import * from PyQt5.QtWebEngineWidgets import * import sys # Create a main window class class MainWindow(QMainWindow): # Constructor of this class def __init__(self): super(MainWindow, self).__init__() # To provide a widget for viewing and editing web documents: self.browser = QWebEngineView() # To set default browser homepage as google homepage: self.browser.setUrl(QUrl("http://www.google.com")) # To set browser as central widget of main window: self.setCentralWidget(self.browser) # To open browser in a maximized window: self.showMaximized() # To create a navigation bar: navbar = QToolBar() navbar.adjustSize() # To add the navigation bar to the browser: self.addToolBar(navbar) # To add back button within navigation bar: back_btn = QAction('⮜', self) back_btn.triggered.connect(self.browser.back) navbar.addAction(back_btn) # To add forward button within navigation bar: forward_btn = QAction('⮞', self) forward_btn.triggered.connect(self.browser.forward) navbar.addAction(forward_btn) # To add reload button within navigation bar: reload_btn = QAction('⟳', self) reload_btn.triggered.connect(self.browser.reload) navbar.addAction(reload_btn) # To add URL bar within navigation bar: self.url_bar = QLineEdit() self.url_bar.returnPressed.connect(self.open_url) navbar.addWidget(self.url_bar) self.browser.urlChanged.connect(self.update_url) # To navigate to desired URL specified within URL bar: def open_url(self): url = self.url_bar.text() self.browser.setUrl(QUrl(url)) # To update the URL bar contents when navigated from one page to another: def update_url(self, q): self.url_bar.setText(q.toString()) # To call constructor of the C++ class QApplication: # Here, sys.argv is used to initialize the QT application app = QApplication(sys.argv) # To specify name of the browser: QApplication.setApplicationName("My_Explorer") # To create an object of MainWindow class defined above: window = MainWindow() # To run the main event loop and wait until exit() is called: app.exec() To access the arrowhead and reload symbols used in the above code, click here.
Output
In the video below, you can see the output of our project that we have just built:
You can see our browser is ready.