- Installing packages using pip and virtual environments
- Installing pip
- Installing virtualenv
- Creating a virtual environment
- Activating a virtual environment
- Change Pip Install Location
- Method 1: Through the terminal/ command line
- Method 2: Editing pip Configuration file
- Example (Linux)
- Example (Windows)
- Removing Packages Installed Using the Above Methods
- (Important) Remark on Usage of Modules Installed as Above
Installing packages using pip and virtual environments
This guide discusses how to install packages using pip and a virtual environment manager: either venv for Python 3 or virtualenv for Python 2. These are the lowest-level tools for managing Python packages and are recommended if higher-level tools do not suit your needs.
This doc uses the term package to refer to a Distribution Package which is different from an Import Package that which is used to import modules in your Python source code.
Installing pip
pip is the reference Python package manager. It’s used to install and update packages. You’ll need to make sure you have the latest version of pip installed.
Debian and most other distributions include a python-pip package; if you want to use the Linux distribution-provided versions of pip, see Installing pip/setuptools/wheel with Linux Package Managers .
You can also install pip yourself to ensure you have the latest version. It’s recommended to use the system pip to bootstrap a user installation of pip:
python3 -m pip install --user --upgrade pip python3 -m pip --version
Afterwards, you should have the latest version of pip installed in your user site:
pip 21.1.3 from $HOME/.local/lib/python3.9/site-packages (python 3.9)
The Python installers for Windows include pip. You can make sure that pip is up-to-date by running:
py -m pip install --upgrade pip py -m pip --version
Afterwards, you should have the latest version of pip:
pip 21.1.3 from c:\python39\lib\site-packages (Python 3.9.4)
Installing virtualenv
If you are using Python 3.3 or newer, the venv module is the preferred way to create and manage virtual environments. venv is included in the Python standard library and requires no additional installation. If you are using venv, you may skip this section.
virtualenv is used to manage Python packages for different projects. Using virtualenv allows you to avoid installing Python packages globally which could break system tools or other projects. You can install virtualenv using pip.
python3 -m pip install --user virtualenv
py -m pip install --user virtualenv
Creating a virtual environment
venv (for Python 3) and virtualenv (for Python 2) allow you to manage separate package installations for different projects. They essentially allow you to create a “virtual” isolated Python installation and install packages into that virtual installation. When you switch projects, you can simply create a new virtual environment and not have to worry about breaking the packages installed in the other environments. It is always recommended to use a virtual environment while developing Python applications.
To create a virtual environment, go to your project’s directory and run venv. If you are using Python 2, replace venv with virtualenv in the below commands.
The second argument is the location to create the virtual environment. Generally, you can just create this in your project and call it env .
venv will create a virtual Python installation in the env folder.
You should exclude your virtual environment directory from your version control system using .gitignore or similar.
Activating a virtual environment
Before you can start installing or using packages in your virtual environment you’ll need to activate it. Activating a virtual environment will put the virtual environment-specific python and pip executables into your shell’s PATH .
You can confirm you’re in the virtual environment by checking the location of your Python interpreter:
Change Pip Install Location
Python-pip, by default, installs packages on a global scope – for all users. In Unix-based systems, the packages are installed on /usr/local/bin/ whereas, on Windows, they are located in the Program Files directory.
This article focuses on the cases we are interested in installing Python packages in a specific folder. We will also explain how to use and remove packages installed in this manner.
There are two ways to install packages to a particular directory – through the terminal (command line) and by editing the pip configuration file.
Method 1: Through the terminal/ command line
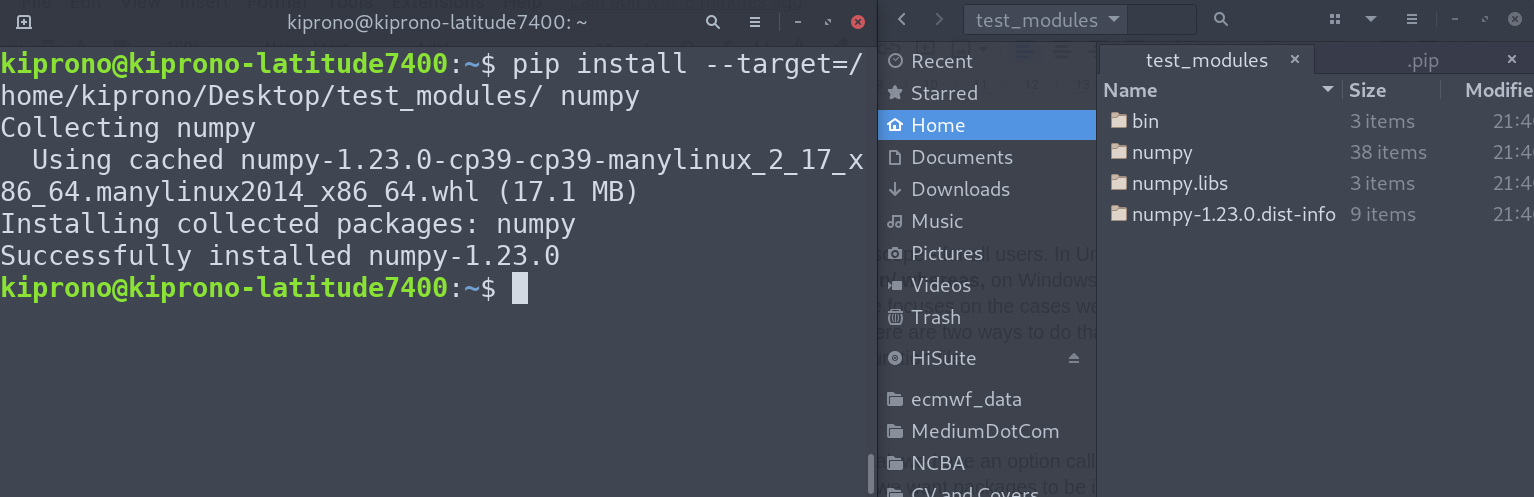
When installing the modules using pip on the terminal or Windows PowerShell, we have a “target” option or short-hand “t” that allows us to specify the directory to which we want packages to be installed. The general syntax is as shown below
Here is an example of how I installed NumPy to the “test_modules” folder on my Desktop,
Method 2: Editing pip Configuration file
You can also specify the default pip installation location in the configuration file, which is located in the following path based on the OS (you may have to create these paths and files):
Unix and Mac OS
$HOME is the home directory of the current user on Linux/Mac, usually located at /home/. It can also be written as a tilde (~). On Windows, the home directory %HOME% is located in C:\Users\ for the logged-in user. Like in Linux, the ~ also means home folder when using WindowsPowerShell.
Example (Linux)
At the start, the directory does not exist, so I have to create the pip directory and add the configuration file pip.config inside it. Executed the following command on the terminal:
mkdir -p ~/.config/pip && touch ~/.config/pip/pip.conf
(“p” option allows us to create a folder within a folder if there’s a need, whereas && enables us to join two commands into one line.).
That creates an empty configuration file. On the file, we define the default installation location with the following general syntax:
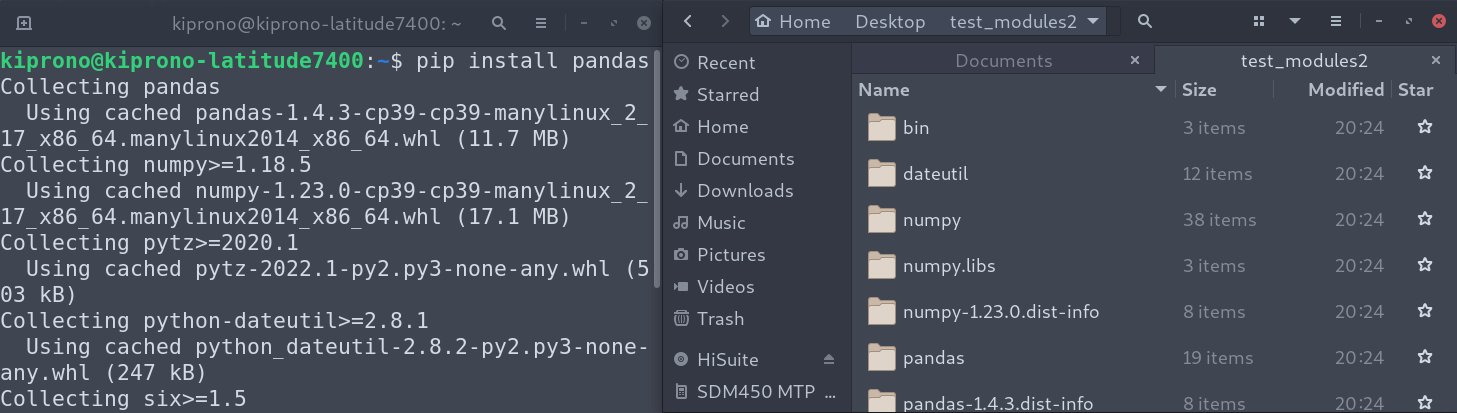
In our example, we want to install packages on the “test_modules2″ directory on the Desktop. The file ~/.config/pip/pip.config will have the following contents:
[global] target=~/Desktop/test_modules2
On installing Python packages now, they are installed on the above directory. See below.
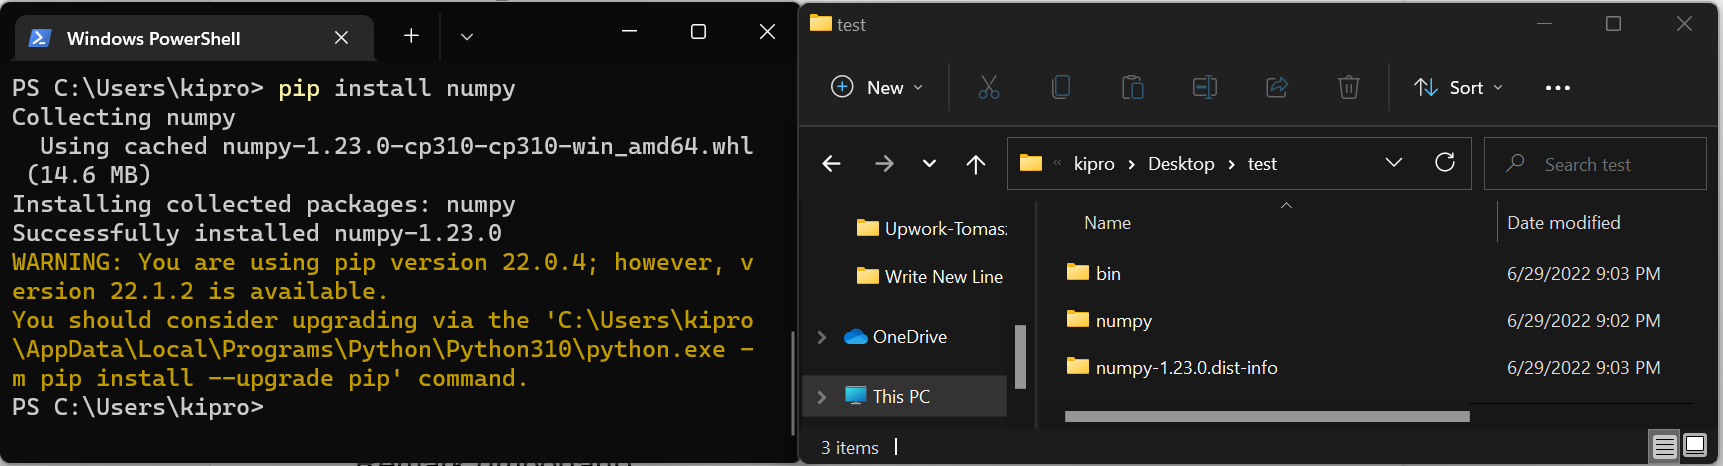
Example (Windows)
First of all, we need the pip.ini file. To get that, we run the following command on Windows PowerShell (of course, you can also create files and folders on the GUI):
The semi-colon (;) is used to combine two commands in one line, and cd > creates an empty file, that is to say, the command cd > ~\pip\pip.ini in our case creates a pip.ini file within the pip folder in the home directory (C:\Users\ ).
Next, we need to specify the target directory in the configuration file pip.ini. For that, we add the following content to the configuration file:
Where is the default directory for pip installation going forward unless you change the settings on the configuration file.
Note: If the target directory indicated on the config file does not exist, it is created. You can read more about the pip configuration file in the pip documentation.
Removing Packages Installed Using the Above Methods
To remove the packages installed in the above methods, delete the folders with the installed package(s). Remember to remove the settings on the configuration file if you no longer need them and want to go to default.
(Important) Remark on Usage of Modules Installed as Above
After setting the default pip installation location, Python may continue looking for installed modules on the default paths. If you want to learn how to import packages from the location we just created with the above methods, see this article.