- An Intro to the Python Imaging Library / Pillow
- Install Pillow
- Opening Images
- Getting Image Information
- Cropping Images
- Using Filters
- Wrapping Up
- Related Reading
- Image Processing: PIL (pillow) Tutorial
- Image Editing
- Image Processing vs Image Manipulation
- What is PIL (pillow)?
- PIL v.s. pillow
- Python PIL (pillow) Tutorials
- Python Imaging Library (PIL) Tutorial
- Python Imaging Library (PIL)
- Python Imaging Library (PIL): Tutorial
- Summary
An Intro to the Python Imaging Library / Pillow
The Python Imaging Library or PIL allowed you to do image processing in Python. The original author, Fredrik Lundh, wrote one of my favorite Python blogs when I first started learning Python. However PIL’s last release was way back in 2009 and the blog also stopped getting updated. Fortunately, there were some other Python folks that came along and forked PIL and called their project Pillow. The Pillow project is a drop-in replacement for PIL that also supports Python 3, something PIL never got around to doing.
Please note that you cannot have both PIL and Pillow installed at the same time. There are some warnings in their documentation that list some differences between PIL and Pillow that get updated from time to time, so I’m just going to direct you there instead of repeating them here since they will likely become out of date.
Install Pillow
You can install Pillow using pip or easy_install. Here’s an example using pip:
Note that if you are on Linux or Mac, you may need to run the command with sudo.
Opening Images
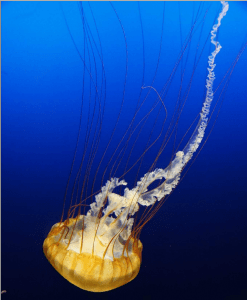
Pillow makes it easy to open an image file and display it. Let’s take a look:
from PIL import Image image = Image.open('/path/to/photos/jelly.jpg') image.show() Here we just import the Image module and ask it to open our file. If you go and read the source, you will see that on Unix, the open method saves the images to a temporary PPM file and opens it with the xv utility. On my Linux machine, it opened it with ImageMagick, for example. On Windows, it will save the image as a temporary BMP and open it in something like Paint.
Getting Image Information
You can get a lot of information about an image using Pillow as well. Let’s look at just a few small examples of what we can extract:
>>> from PIL import Image >>> image = Image.open(‘/path/to/photos/jelly.jpg’) >>> r, g, b = image.split() >>> histogram = image.histogram() [384761, 489777, 557209, 405004, 220701, 154786, 55807, 35806, 21901, 16242] >>> exif = image._getexif() exif
In this example, we show how to extract the RGB (red, green, blue) values from the image. We also learn how to get a histrogram from the image. Note that I truncated the output a bit as the histogram’s output was much larger. You could graph the histrogram using another Python package, such as matplotlib. Finally, the example above demonstrates how to extract the EXIF information from the image. Again, I have shortened the output from this method a bit as it contained way too much information for this article.
Cropping Images
You can also crop images with Pillow. It’s actually quite easy, although it may take you a little trial and error to figure it out. Let’s try cropping our jellyfish photo:
>>> from PIL import Image >>> image = Image.open('/path/to/photos/jelly.jpg') >>> cropped = image.crop((0, 80, 200, 400)) >>> cropped.save('/path/to/photos/cropped_jelly.png') You will note that all we need to do is open the image and then call its crop method. You will need to pass in the x/y coordinates that you want to crop too, i.e. (x1, y1, x2, y2). In Pillow, the 0 pixel is the top left pixel. As you increase your x value, it goes to the right. As you increase the y value, you go down the image. When you run the code above, you’ll end up with the following image:

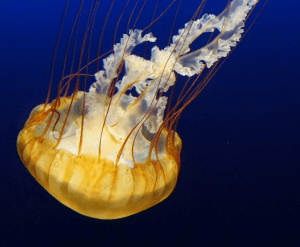
That’s a pretty boring crop. I want to crop the jellyfish’s “head”. To get the right coordinates quickly, I used Gimp to help me figure out what coordinates to use for my next crop.
>>> from PIL import Image >>> image = Image.open('/path/to/photos/jelly.jpg') >>> cropped = image.crop((177, 882, 1179, 1707)) >>> cropped.save('/path/to/photos/cropped_jelly2.png') If we run this code, we’ll end up with the following cropped version:
Using Filters
There are a variety of filters that you can use in Pillow to apply to your images. They are contained in the ImageFilter module. Let’s look at a couple of them here:
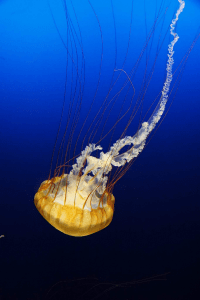
>>> from PIL import ImageFilter >>> from PIL import Image >>> image = Image.open('/path/to/photos/jelly.jpg') >>> blurred_jelly = image.filter(ImageFilter.BLUR) >>> blurred_jelly.save('/path/to/photos/blurry_jelly.png') This will blur the jellyfish photo slightly. Here’s the result I got:

Of course, most people like their images sharper rather than blurrier. Pillow has your back. Here’s one way to sharpen the image:
>>> from PIL import ImageFilter >>> from PIL import Image >>> image = Image.open('/path/to/photos/jelly.jpg') >>> blurred_jelly = image.filter(ImageFilter.SHARPEN) >>> blurred_jelly.save('/path/to/photos/sharper_jelly.png') When you run this code, you’ll end up with the following:
You can also use the ImageEnhance module for sharpening your photos, among other things.
There are other filters that you can apply too, such as DETAIL, EDGE_ENHANCE, EMBOSS, SMOOTH, etc. You can also write your code in such a way that you can apply multiple filters to your image.
You will likely need to download the images above to really be able to compare the differences in the filters.
Wrapping Up
You can do much more with the Pillow package than what is covered in this short article. Pillow supports image transforms, processing bands, image enhancements, the ability to print your images and much more. I highly recommend reading the Pillow documentation to get a good grasp of everything you can do.
Related Reading
- Python Pillow official website
- Pillow documentation
- Wikipedia article on the Python Imaging Library
- PyPI: PIL
Image Processing: PIL (pillow) Tutorial
Image processing is the computational transformation of images. This usually involves working with computer languages to work on image as a 2 dimensional signal through its pixel composition. Image processing also is a branch of signal processing.
Image Editing
Image editing can be the same outcomes of changing, altering, editing, enhancing the image but it usually implies doing those things through gui of image editing software and not as a vector or signal.
Image Processing vs Image Manipulation
Image manipulation, image processing and image editing can all be used interchangeably depending on the context however, one scenario image manipulation differs from image editing is that image manipulation can refer to more substantial changes such as moving objects, removing people, adding object, changing scene etc while image editing can be more appropriate for image enhancing, resizing, rotating type operations.
What is PIL (pillow)?
PIL is an imaging library for Python programming language.
Script is a piece of code that’s used to automate system oriented tasks. When you write code that carries out a practical task without needing compiling this can be called scripting.
PIL has very powerful image processing capabilities and it can handle many types of images (BMP, DIB, EPS, GIF, ICO, IM, JPEG, JPG, JPEG 2000, MSP, PCX, PNG, PPM, SGI, TGA, TIFF, WebP, XBM just to name a few formats) and image modes such as RGB, RGBA, B&W and monochrome.
PIL also works on practically all operating systems including, Windows, Linux, and MacOSX.
PIL v.s. pillow
Pillow is a fork of PIL, Python Imaging Library. PIL was released in late 2009 and maintained until 2011. In 2011 PIL development stopped. Luckily PIL fell on a soft place since pillow library picked up from where it’s left and it continues to exist as pillow today.
This can create some terminology confusion but it’s safe to say that pillow and PIL refer to the same thing in most situations today as the terms became somewhat synonymous.
Python PIL (pillow) Tutorials
Here are some basic and advanced tutorials we have created regarding PIL image processing library in Python.
Python Imaging Library (PIL) Tutorial

The Python Imaging Library or PIL is an amazing Python library used for image processing. This library provides so many features for working on images using Python. It is used as an image processing tool with other Python image processing libraries like OpenCV. If you’ve never used the Python Imaging Library (PIL) before, this article is for you. In this article, I will introduce you to a tutorial on the Python Imaging Library.
Python Imaging Library (PIL)
The PIL or Python Imaging Library is often confused with Pillow. Pillow is a fork of the PIL library in Python, that’s why to install PIL we write “pip install Pillow”, instead of “pip install PIL”. Some of the important features that this library offers you for image processing are:
- extensive file format support
- efficient internal representation
- creating thumbnails
- converting image files format
- applying filters to images
- also provides some powerful image processing capabilities
This Python library is already available in the Python standard library, but to use the latest version, I will recommend that you run the pip install command mentioned below before getting your hands on the Python Image Library:
As mentioned earlier, it is used as PIL but installed as Pillow. Now in the section below, I will take you through a tutorial on the Python Imaging Library.
Python Imaging Library (PIL): Tutorial
I will start by reading and visualizing the image that I am using for this tutorial:
# Read and Display Image from PIL import Image image = Image.open("aman.png") image.show() 
Now let’s see some of the details about the image:
# Image Details print(image.format) print(image.size) print(image.mode)
PNG (640, 640) RGB
Now let’s crop this image using random dimensions:
# Crop the Image dimensions = (100, 100, 500, 500) cropped = image.crop(dimensions) cropped.show()

Now here is how you can resize this image:
# Resize Image new = image.resize((200, 200)) new.show()

Rotating an image is also an amazing feature provided by this library. Here’s how to rotate an image:
# Rotate Image new = image.rotate(60) new.show()

The most helpful feature that I like about this library is that you can add filters to your image in just a few lines of code. It has some inbuilt filters that you can apply to your image. For example, have a look at the gaussian blur filter that I have applied to the image below:
# Adding Filter from PIL import ImageFilter new = image.filter(ImageFilter.GaussianBlur) new.show()

So this is how you can use the PIL or Python Imaging Library to work on your image datasets. You can explore more about this library from here.
Summary
The Python Imaging Library is an amazing Python library used for image processing. Some of the important features that this library offers you for image processing are:
- extensive file format support
- efficient internal representation
- creating thumbnails
- converting image files format
- applying filters to images
- also provides some powerful image processing capabilities
I hope you liked this article on a tutorial on Python Imaging Library. Feel free to ask your valuable questions in the comments section below.