gtk3 Getting started with gtk3 Installation or Setup
The easiest way to install GTK3 for Python is by using PyGObject for Windows. It offers an installer that installs most things you need to develop GTK appilcations.
The number of options the PyGObject installer offers can be daunting, but for most GTK projects the only option you have to select is GTK+ 3.xx .
C++
The C++ binding for Gtk+ is known as gtkmm.
On Microsoft Windows gtkmm can be installed through MSYS2 environment. Once MSYS2 environment is set up by installing the installer and updating the package list, install gtkmm with
pacman -S mingw-w64-x86_64-gtkmm3 #64 bit pacman -S mingw-w64-i686-gtkmm3 #32 bit Install pkg-config for easily obtaining compiler and linker flags and GNU autotools build integration
Now gtkmm application can be compiled, linked and run from within MSYS2 environment.
# enable C++ 14 support if needed # -mwindows flag is to suppress the background command-prompt window # for GUI applications g++ -mwindows -std=c++14 -o app.exe app.cpp `pkg-config --cflags --libs gtkmm-3.0` ./app.exe But the executable won’t run outside the MSYS2 shell because of missing standard environment variables for .dll lookup. The following .dlls need to be copied from \mingw64\lib\ (for 64-bit installation) into the application directory (where the .exe is located) manually. The version numbers may change according to the installation.
libatk-1.0-0.dll libatkmm-1.6-1.dll libbz2-1.dll libcairo-2.dll libcairo-gobject-2.dll libcairomm-1.0-1.dll libepoxy-0.dll libexpat-1.dll libffi-6.dll libfontconfig-1.dll libfreetype-6.dll libgcc_s_seh-1.dll libgdk_pixbuf-2.0-0.dll libgdk-3-0.dll libgdkmm-3.0-1.dll libgio-2.0-0.dll libgiomm-2.4-1.dll libglib-2.0-0.dll libglibmm-2.4-1.dll libgmodule-2.0-0.dll libgobject-2.0-0.dll libgtk-3-0.dll libgtkmm-3.0-1.dll libharfbuzz-0.dll libiconv-2.dll libintl-8.dll libpango-1.0-0.dll libpangocairo-1.0-0.dll libpangoft2-1.0-0.dll libpangomm-1.4-1.dll libpangowin32-1.0-0.dll libpixman-1-0.dll libpng16-16.dll libsigc-2.0-0.dll libstdc++-6.dll libwinpthread-1.dll zlib1.dll After this step the program should run. But it won’t find standard icon sets for Gtk+, i.e. the Adwaita icon theme, so icons may not load. The icons and a few other files need to be copied into application directory so that the application can load them.
mingw64 | +-- lib | +-- gdk-pixbuf-2.0 share | +-- icons | +-- Adwaita | +-- hicolor (fallback icon theme for Gtk+) To application directory, with same directory structure.
![]()
PDF — Download gtk3 for free
1. Installation
The first step before we start with actual coding consists of setting up PyGObject and its dependencies. PyGObject is a Python module that enables developers to access GObject-based libraries such as GTK+ within Python. It exclusively supports GTK+ version 3 or later.
1.1. Dependencies
1.2. Prebuilt Packages
Recent versions of PyGObject and its dependencies are packaged by nearly all major Linux distributions. So, if you use Linux, you can probably get started by installing the package from the official repository for your distribution.
1.3. Installing From Source
The easiest way to install PyGObject from source is using JHBuild. It is designed to easily build source packages and discover what dependencies need to be build and in what order. To setup JHBuild, please follow the JHBuild manual.
Once you have installed JHBuild successfully, download the latest configuration from 1. Copy files with the suffix .modules to JHBuild’s module directory and the file sample-tarball.jhbuildrc to ~/.jhbuildrc .
If you have not done it before, verify that your build environment is setup correctly by running:
It will print any applications and libraries that are currently missing on your system but required for building. You should install those using your distribution’s package repository. A list of package names for different distributions is maintained on the GNOME wiki. Run the command above again to ensure the required tools are present.
Executing the following command will build PyGObject and all its dependencies:
Finally, you might want to install GTK+ from source as well:
To start a shell with the same environment as used by JHBuild, run:
Getting Started
To get things started we will try to run a very simple GTK based GUI application using the PyGObject provided Python bindings. First create a small Python script called hello.py with the following content and save it somewhere:
import sys import gi gi.require_version("Gtk", "4.0") from gi.repository import GLib, Gtk class MyApplication(Gtk.Application): def __init__(self): super().__init__(application_id="com.example.MyGtkApplication") GLib.set_application_name('My Gtk Application') def do_activate(self): window = Gtk.ApplicationWindow(application=self, title="Hello World") window.present() app = MyApplication() exit_status = app.run(sys.argv) sys.exit(exit_status)
Before we can run the example application we need to install PyGObject, GTK and their dependencies. Follow the instructions for your platform below.
After running the example application have a look at the “Python GTK 3 Tutorial” for more examples on how to create GTK apps and the “PyGObject API Reference” for API documentation for all supported libraries. There are also typing stubs available here PyGObject-stubs.
Windows
- Go to http://www.msys2.org/ and download the x86_64 installer
- Follow the instructions on the page for setting up the basic environment
- Run C:\msys64\mingw64.exe — a terminal window should pop up
- Execute pacman -Suy
- Execute pacman -S mingw-w64-x86_64-gtk4 mingw-w64-x86_64-python3 mingw-w64-x86_64-python3-gobject
- To test that GTK is working you can run gtk4-demo
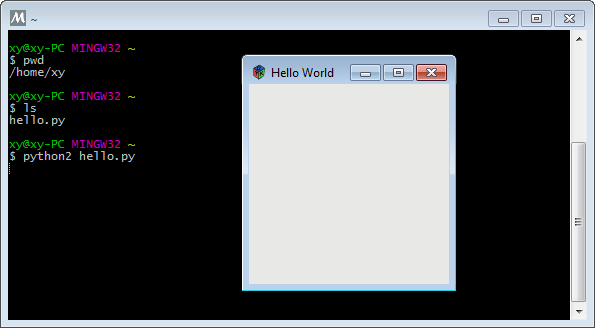
- Copy the hello.py script you created to C:\msys64\home\
- In the mingw32 terminal execute python3 hello.py — a window should appear.
Ubuntu / Debian
Installing the system provided PyGObject:
- Open a terminal
- Execute sudo apt install python3-gi python3-gi-cairo gir1.2-gtk-4.0
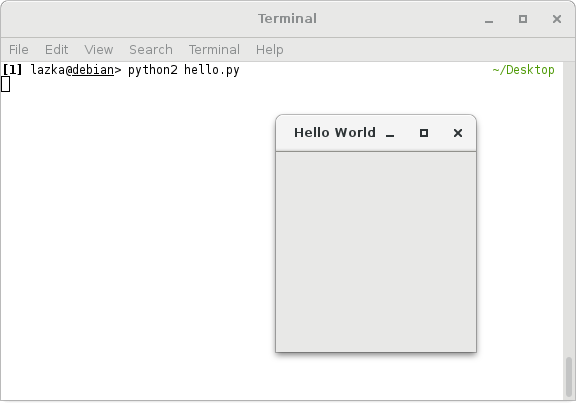
- Change the directory to where your hello.py script can be found (e.g. cd Desktop )
- Run python3 hello.py
Installing from PyPI with pip:
- Open a terminal and enter your virtual environment
- Execute sudo apt install libgirepository1.0-dev gcc libcairo2-dev pkg-config python3-dev gir1.2-gtk-4.0 to install the build dependencies and GTK
- Execute pip3 install pycairo to build and install Pycairo
- Execute pip3 install PyGObject to build and install PyGObject
- Change the working directory to where your hello.py script can be found
- Run python3 hello.py
Fedora
- Open a terminal
- Execute sudo dnf install python3-gobject gtk4
- Change the working directory to where your hello.py script can be found
- Run python3 hello.py
- Open a terminal and enter your virtual environment
- Execute sudo dnf install gcc gobject-introspection-devel cairo-gobject-devel pkg-config python3-devel gtk4 to install the build dependencies and GTK
- Execute pip3 install pycairo to build and install Pycairo
- Execute pip3 install PyGObject to build and install PyGObject
- Change the working directory to where your hello.py script can be found
- Run python3 hello.py
Arch Linux
- Open a terminal
- Execute sudo pacman -S python-gobject gtk4
- Change the working directory to where your hello.py script can be found
- Run python3 hello.py
- Open a terminal and enter your virtual environment
- Execute sudo pacman -S python cairo pkgconf gobject-introspection gtk4 to install the build dependencies and GTK
- Execute pip3 install pycairo to build and install Pycairo
- Execute pip3 install PyGObject to build and install PyGObject
- Change the working directory to where your hello.py script can be found
- Run python3 hello.py
openSUSE
- Open a terminal
- Execute sudo zypper install python3-gobject python3-gobject-Gdk typelib-1_0-Gtk-4_0 libgtk-4-1
- Change the directory to where your hello.py script can be found
- Run python3 hello.py
- Open a terminal and enter your virtual environment
- Execute sudo zypper install cairo-devel pkg-config python3-devel gcc gobject-introspection-devel to install the build dependencies and GTK
- Execute pip3 install pycairo to build and install Pycairo
- Execute pip3 install PyGObject to build and install PyGObject
- Change the working directory to where your hello.py script can be found
- Run python3 hello.py
macOS

- Go to https://brew.sh/ and install homebrew
- Open a terminal
- Execute brew install pygobject3 gtk4
- Change the working directory to where your hello.py script can be found
- Run python3 hello.py
For more details on how to use a virtualenv with PyGObject, see the “ Creating a Development Environment ” page.
How to Install PyGTK in Python on MacOS?
PyGTK is a Python package or module that enables developers to work with GTK+ GUI Toolkit. This is how WikiBooks describes GTK+:
“GTK+ is a highly usable, feature rich toolkit for creating graphical user interfaces which boasts cross platform compatibility and an easy to use API.”
And this is how gtk.org the official website of GTK markets it:
Offering a complete set of UI elements, GTK is suitable for projects ranging from small one-off tools to complete application suites.
Although Python comes with a built-in module called Tkinter which is used to make simple GUI applications. But many developers are unsatisfied by the appearance of the application made by it and it is not even feature-rich so as to help in making elaborate software. Therefore GTK+ in association with Python is considered to be a great alternative to Tkinter. Although the GTK library supports many programming languages such as C, JavaScript, Perl, Rust, and Vala. But it is most widely used in association with Python which employs a language wrapper to fully utilize the capabilities of the official GNOME binding to produce the most stable applications.
GTK library comes jam-packed with features that enable developers to do whatever they want. Here are some of the main selling points of GTK.
- Portability
- Stability
- Language Binging
- Interfaces
- OpenSource
- API
- Accommodation
- Foundations
Listing some of the famous applications which are made by this GTK are as follows:
- GIMP
- Transmission
- Evolution
- Polati
- Games of all sorts
- Etc.
Below we will go through all the steps to install PyGTK in the macOS operating system in detail.
Step 1: Install Python
Although Python comes pre-installed in most macOS, however, it should be upgraded for the best performance or better saying to avoid unwanted errors.
To check if Python is already installed in the system or not open the Terminal app and run the command below:
If the above command does not return any version number then, it means that Python is not pre-installed and if it returned any number such as 3. N.N then you may check if an upgrade is available or not. To see the full guide for the Python installation on macOS visit here.
Step 2: Install HomeBrew
Homebrew is open-source software that facilitated the management of packages in Mac and Linux-based operating systems. It basically gives developers the power to install, remove, upgrade, downgrade, etc a package from the terminal itself.
To install Homebrew in our system we only need to run a simple command in the terminal that is given below:
/bin/bash -c "$(curl -fsSL https://raw.githubusercontent.com/Homebrew/install/HEAD/install.sh)"
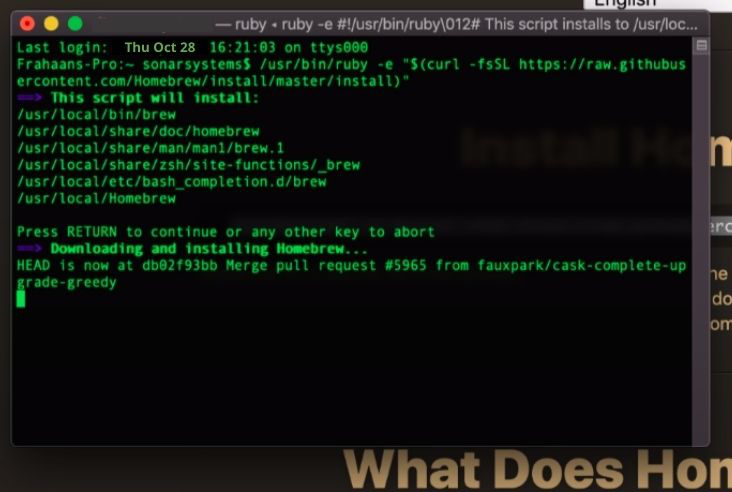
Once the above command gets executed you can check if it has been installed correctly by running the below command:
If it returns any output then our work is done properly, if not then re-installed homebrew using the above command.
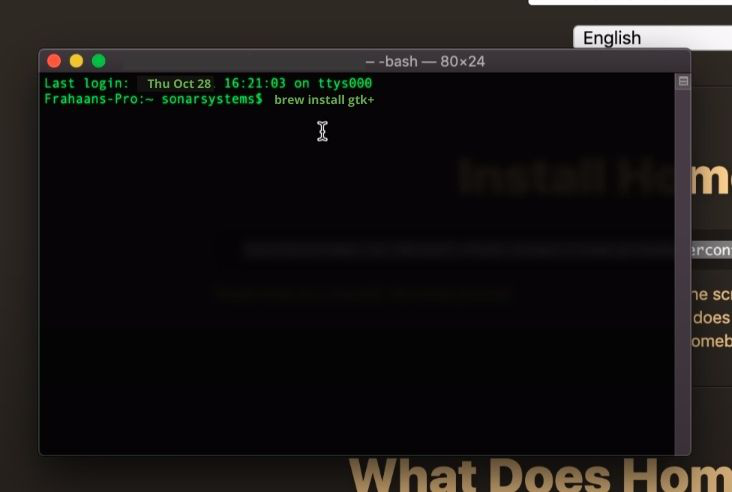
Step 3: Install GTK+
Now the last thing to do is to install GTK+ collection libraries in our system to later include this in Python projects. Since we have installed Homebrew in the previous step this step is going to be a breeze. All that is needed is the execution of the below command:
Once this process is done all you need is a quick reboot of the system and you should be ready to roll a new Python project with PyGTK in it. Although there is no quick way to find out GTK+ has been installed properly or not but you will surely find out while working with it. But one thing that we can do to be sure of that to run the same installation command again. What it will do is first it will check if the program is already installed or not. If it is not installed already then it will start the installation but now that we have installed it should return a warning.
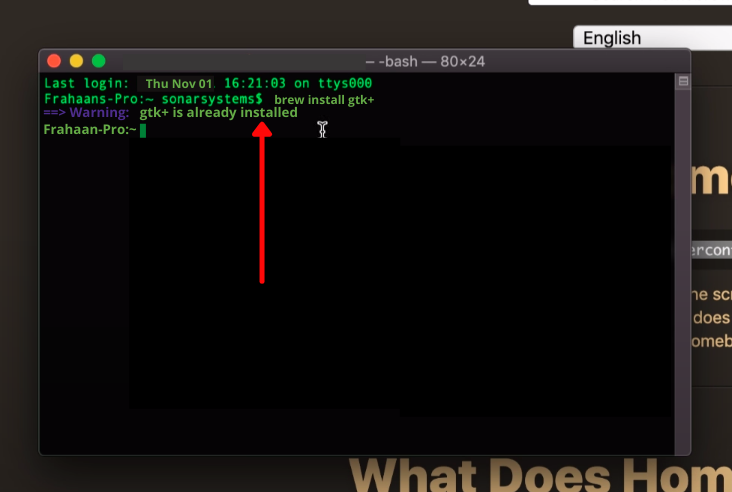
As we can see in the above image we get a warning that gtk+ is already installed, so that is our confirmation of the same. One other thing that one might do is, issue a command to check the version of gtk package. The command is given below.
So with everything set now, you are ready to roll a project!