- Python connect to oracle database
- Python python-oracledb on macOS
- Python python-oracledb on Linux
- Connect a Python Application to Oracle Database Cloud Service
- Before You Begin
- Background
- What Do You Need?
- Create a Python Application
- Prepare Your Application for Cloud Deployment
- Deploy the Application to Oracle Application Container Cloud Service
- Want to Learn More?
Python connect to oracle database
Depending on your Python installation, you may need to execute the python3 command instead. Adding the pip —user option may useful when you do not have permission to write to system directories. If you are behind an HTTP proxy, you can also add an option like —proxy=http://proxy.example.com:80 For further assistance and options see Installing python-oracledb on Windows.
- Using your favorite text editor, create a new Python file example.py in a directory of your choice. It should contain the following code. Make sure the indentation is the same as shown:
import getpass import oracledb pw = getpass.getpass("Enter password: ") connection = oracledb.connect( user="demopython", password=pw, dsn="localhost/xepdb1") print("Successfully connected to Oracle Database") cursor = connection.cursor() # Create a table cursor.execute(""" begin execute immediate 'drop table todoitem'; exception when others then if sqlcode <> -942 then raise; end if; end;""") cursor.execute(""" create table todoitem ( id number generated always as identity, description varchar2(4000), creation_ts timestamp with time zone default current_timestamp, done number(1,0), primary key (id))""") # Insert some data rows = [ ("Task 1", 0 ), ("Task 2", 0 ), ("Task 3", 1 ), ("Task 4", 0 ), ("Task 5", 1 ) ] cursor.executemany("insert into todoitem (description, done) values(:1, :2)", rows) print(cursor.rowcount, "Rows Inserted") connection.commit() # Now query the rows back for row in cursor.execute('select description, done from todoitem'): if (row[1]): print(row[0], "is done") else: print(row[0], "is NOT done") - User: Use your database username.
- Data Source Name (DSN): If you have a different database, put its connection string here.
After entering the user password, you should see a message that you connected to the database, five rows were inserted, and the task list with each task’s completion status returned to the terminal window. Congratulations! You have successfully queried the Oracle Database.
Now you have completed this tutorial, you should continue with the full Python and Oracle Database Tutorial or Getting Started with Python and Oracle Database LiveLabs Tutorial to learn more about using python-oracledb.
More information and resources on using python-oracledb are available here.
Python python-oracledb on macOS
- Install Oracle VM VirtualBox for «macOS Intel hosts»
- Install Vagrant
- Download and unzip the Oracle Database 21c XE Vagrant configuration ZIP file, or use git to clone the GitHub repository. Open a terminal window and change to the OracleDatabase/21.3.0-XE directory, then run vagrant up
At the conclusion, Oracle Database will be running. The confirmation message will display the password for the privileged accounts.
You may already have Python in /usr/bin/python3 . If so, use the full path and binary name in commands below. Otherwise install Python 3.8 or later. The steps below assume that the executable is called ‘python’. In some environments it might be called something like ‘python3.8’.
python -m pip install oracledbAdding the pip —user option may useful when you do not have permission to write to system directories. If you are behind an HTTP proxy, you can also add an option like —proxy=http://proxy.example.com:80 For further assistance and options, see Installing python-oracledb on macOS.
- Using your favorite text editor, create a new Python file example.py in a directory of your choice. It should contain the following code. Make sure the indentation is the same as shown:
import getpass import oracledb pw = getpass.getpass("Enter password: ") connection = oracledb.connect( user="demopython", password=pw, dsn="localhost/xepdb1") print("Successfully connected to Oracle Database") cursor = connection.cursor() # Create a table cursor.execute(""" begin execute immediate 'drop table todoitem'; exception when others then if sqlcode <> -942 then raise; end if; end;""") cursor.execute(""" create table todoitem ( id number generated always as identity, description varchar2(4000), creation_ts timestamp with time zone default current_timestamp, done number(1,0), primary key (id))""") # Insert some data rows = [ ("Task 1", 0 ), ("Task 2", 0 ), ("Task 3", 1 ), ("Task 4", 0 ), ("Task 5", 1 ) ] cursor.executemany("insert into todoitem (description, done) values(:1, :2)", rows) print(cursor.rowcount, "Rows Inserted") connection.commit() # Now query the rows back for row in cursor.execute('select description, done from todoitem'): if (row[1]): print(row[0], "is done") else: print(row[0], "is NOT done") - User: Use your database username.
- Data Source Name (DSN): If you have a different database, put its connection string here.
After entering the user password, you should see a message that you connected to the database, five rows were inserted, and the task list with each task’s completion status returned to the terminal window. Congratulations! You have successfully queried the Oracle Database.
Now you have completed this tutorial, you should continue with the full Python and Oracle Database Tutorial or Getting Started with Python and Oracle Database LiveLabs Tutorial to learn more about using python-oracledb.
More information and resources on using python-oracledb are available here.
Python python-oracledb on Linux
Using a recent version of Linux such as Oracle Linux 8 is recommended.
- If you do not already have access to an Oracle Database, then download and install Oracle Database XE following these instructions. More resources: Oracle Database XE Installation Guide for Linux
- Alternatively, if you would like to use an Oracle Autonomous Database in Oracle Cloud instead (for example from the Always Free service), then see the Developing Python Applications for Oracle Autonomous Database tutorial.
You may already have Python 3 installed. If not, see Python for Oracle Linux. The steps below assume that the executable is called ‘python3’. If you also have Python 2 installed, make sure to use the newer Python 3 binary.
python3 -m pip install oracledbMake sure you use the python3 executable. Adding the pip —user option may useful when you do not have permission to write to system directories. If you are behind an HTTP proxy, you can also add an option like —proxy=http://proxy.example.com:80 For further assistance and options, see Installing python-oracledb on Linux.
- Using your favorite text editor, create a new Python file example.py in a directory of your choice. It should contain the following code. Make sure the indentation is the same as shown:
import getpass import oracledb pw = getpass.getpass("Enter password: ") connection = oracledb.connect( user="demopython", password=pw, dsn="localhost/xepdb1") print("Successfully connected to Oracle Database") cursor = connection.cursor() # Create a table cursor.execute(""" begin execute immediate 'drop table todoitem'; exception when others then if sqlcode <> -942 then raise; end if; end;""") cursor.execute(""" create table todoitem ( id number generated always as identity, description varchar2(4000), creation_ts timestamp with time zone default current_timestamp, done number(1,0), primary key (id))""") # Insert some data rows = [ ("Task 1", 0 ), ("Task 2", 0 ), ("Task 3", 1 ), ("Task 4", 0 ), ("Task 5", 1 ) ] cursor.executemany("insert into todoitem (description, done) values(:1, :2)", rows) print(cursor.rowcount, "Rows Inserted") connection.commit() # Now query the rows back for row in cursor.execute('select description, done from todoitem'): if (row[1]): print(row[0], "is done") else: print(row[0], "is NOT done") - User: Use your database username.
- Data Source Name (DSN): If you have a different database, put its connection string here.
After entering the user password, you should see a message that you connected to the database, five rows were inserted, and the task list with each task’s completion status returned to the terminal window. Congratulations! You have successfully queried the Oracle Database.
Now you have completed this tutorial, you should continue with the full Python and Oracle Database Tutorial or Getting Started with Python and Oracle Database LiveLabs Tutorial to learn more about using python-oracledb.
More information and resources on using python-oracledb are available here.
 Connect a Python Application to Oracle Database Cloud Service
 Connect a Python Application to Oracle Database Cloud Service
Before You Begin
This 20-minute tutorial shows you how to build and package a simple Python application that connects to Oracle Database Cloud Service.
Background
Oracle Application Container Cloud Service lets you deploy Java SE, Node.js, PHP, and Python applications to the Oracle Cloud.
Official images pulled from DockerHub include just the language runtime but some applications need additional platform specific libraries installed. In addition to libraries, some Python modules also include platform specific components. As Oracle Application Container Cloud Service does not run deployed applications as root it is not possible to use Linux package installation utilities like dpkg-deb, apt-get , or yum in a startup script. This presents a challenge which this example shows how to overcome.
What Do You Need?
- Access to an instance of Oracle Application Container Cloud Service
- An instance and credentials of Oracle Database Cloud Service. See Oracle Database Cloud — Database as a Service Quick Start
- The Instant Client Package — Basic Light: instantclient-basiclite-linux.x64-12.2.0.1.0.zip
- The Instant Client Package — JDBC Supplement: instantclient-sdk-linux.x64-12.2.0.1.0.zip
- The Debian libaio package libaio1_0.3.110-1_amd64.deb
Create a Python Application
- Create the python-oracle-app project directory in your local system.
- In the python-oracle-app directory, create the app.py file and add the following content:
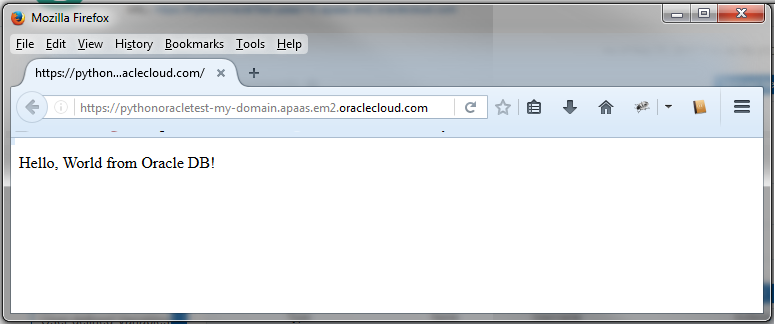
import os import cx_Oracle from flask import Flask db_user = os.environ.get('DBAAS_USER_NAME', 'SYSTEM') db_password = os.environ.get('DBAAS_USER_PASSWORD', 'Welcome1_') db_connect = os.environ.get('DBAAS_DEFAULT_CONNECT_DESCRIPTOR', "localhost:1521/ORCL") service_port = port=os.environ.get('PORT', '8080') app = Flask(__name__) @app.route('/') def index(): connection = cx_Oracle.connect(db_user, db_password, db_connect) cur = connection.cursor() cur.execute("SELECT 'Hello, World from Oracle DB!' FROM DUAL") col = cur.fetchone()[0] cur.close() connection.close() return col if __name__ == '__main__': app.run(host='0.0.0.0', port= int(service_port) ) Prepare Your Application for Cloud Deployment
#!/bin/sh # Define PYTHONPATH as local modules folder export PYTHONPATH=$/modules # Extract LIBAOI libs from Debian package (into ./lib/x86_64-linux-gnu) dpkg-deb -R libaio1_0.3.110-1_amd64.deb $ # Finalize OCI installation by creating required softlink ln -s $/lib/instantclient_12_2/libclntsh.so.12.1 $/lib/instantclient_12_2/libclntsh.so # Add OCI and LIBAIO to shared library path export LD_LIBRARY_PATH=$/lib/instantclient_12_2:$/lib/x86_64-linux-gnu # Install Python packages into local modules folder pip --no-cache-dir install -r requirements.txt -t $ --upgrade python $/app.py zip -r python-orcl-app-dist.zip manifest.json app.py requirements.txt start.sh lib *.debDeploy the Application to Oracle Application Container Cloud Service
- Open the Oracle Application Container Cloud Service console.
- In the Applications list view, click Create Application and select Python.
- If your account has access to Oracle Cloud Infrastructure regions, in the Region field select the same region than the region where your Oracle Database Cloud Service instance was created.
- In the Application section, enter a name for your application and click Browse.
- On the File Upload dialog box, select the python-orcl-app-dist.zip file you created in the previous section and click Open.
- Click More Options, then click Browse next to Deployment Configuration.
- On the File Upload dialog box, select the deployment.json file you created in the previous section and click Open.
- Keep the default values in the Instances and Memory fields and click Create.
- Wait until the application is created. The URL is enabled when the creation is completed.
- Click the URL of your application.