PyCharm Community. Основы работы
PyCharm – это одна из наиболее удобных сред разработки на языке Python. Существует в двух версиях:
- PyCharm Community – свободно-распространяемая версия с открытым исходным кодом.
- PyCharm Professional – проприетарная платная версия с триальным периодом.
В версии Community вы сможете программировать в основном на Python, в Professional – также на смежных языках (веб-программирование), использовать множество фреймворков.
В данном уроке мы рассмотрим создание проекта в PyCharm Community, первоначальную настройку среды и некоторые особенности работы в ней. Полную документацию смотрите на сайте разработчика данной IDE.
PyCharm не содержит самого интерпретатора Python, поэтому последний уже должен быть установлен в системе. В дистрибутивах Linux обычно это так и есть: пакет интерпретатора Python устанавливается вместе с операционной системой. Пользователи Windows, если еще не сделали этого, могут скачать интерпретатор Питона с официального сайта: https://www.python.org/downloads/
В Linux, распаковав установочный пакет PyCharm, вы найдете в нем файл Install***.txt , в котором описано, что надо сделать, чтобы установить и запустить среду разработки.

Процесс может выглядеть следующим образом:
- Перемещаем каталог с файлами среды разработки в директорию /opt командой
sudo mv pycharm-community-2022.3.3/ /opt/
cd /opt/pycharm-community-2022.3.3/bin/
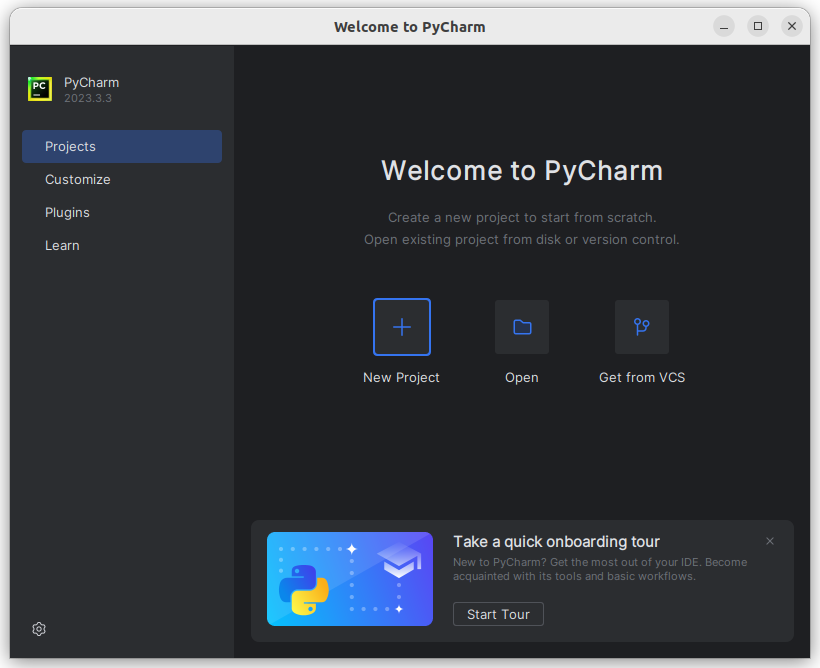
При первом запуске PyCharm будет предложено принять пользовательское соглашение, также появится окно с вопросом отправлять или нет анонимные данные о том, как вы используете продукт.
Далее появится приветственное окно, в котором среди прочего предлагается создать новый проект.
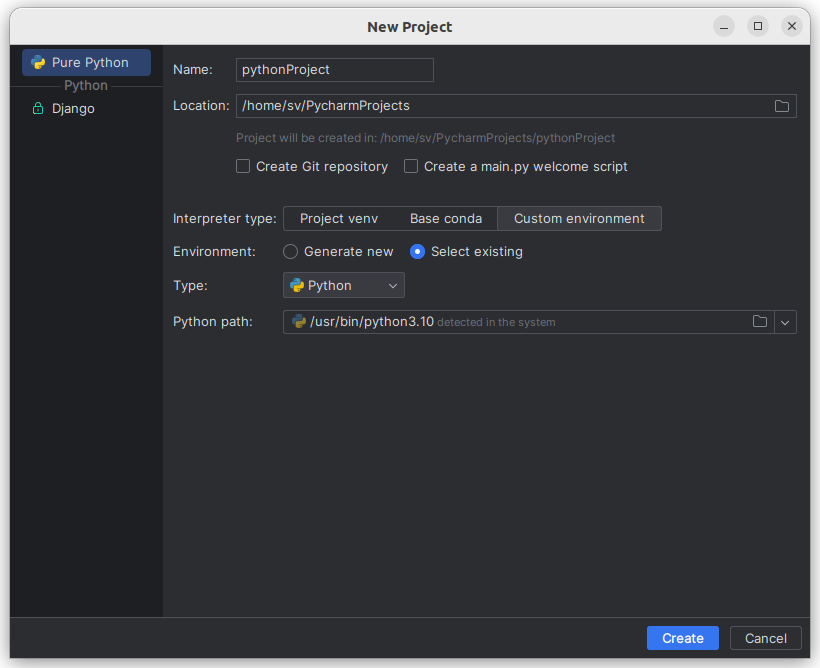
При создании проекта появляется диалоговое окно, в котором следует указать адрес нового каталога (или согласиться с заданным по-умолчанию), создавать ли для проекта собственное виртуальное окружение.
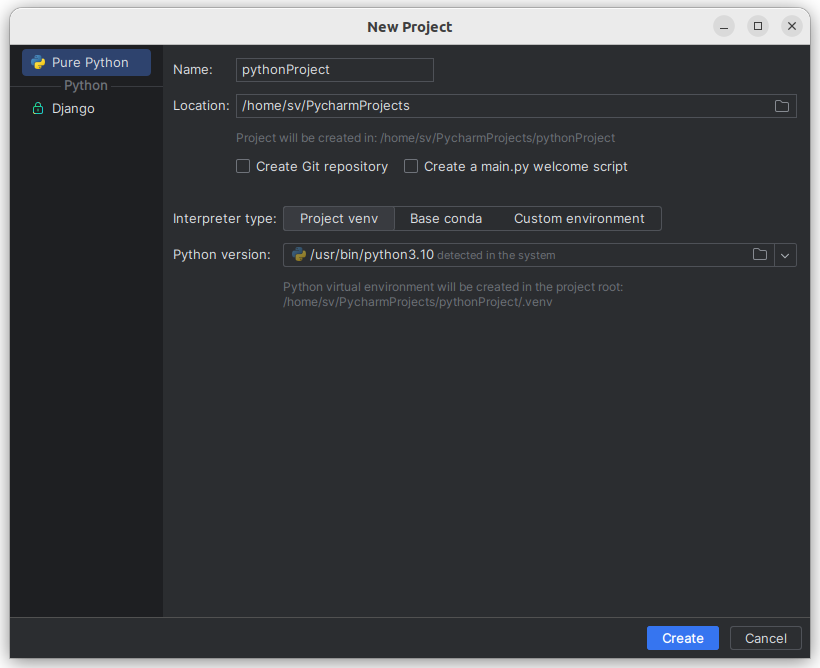
Если вы только учитесь языку Питона, во избежание большого количества непонятных файлов в каталоге проекта, может быть целесообразнее выбрать пункт Previously configured interpreter . После этого через список Interpreter: выбрать системный интерпретатор ( System Interpreter ), указав его адрес.
Вернувшись в предыдущее окно, снимем флажок Create a main.py welcome script .

Далее запустится среда разработки, в ней будет открыт только что созданный проект.
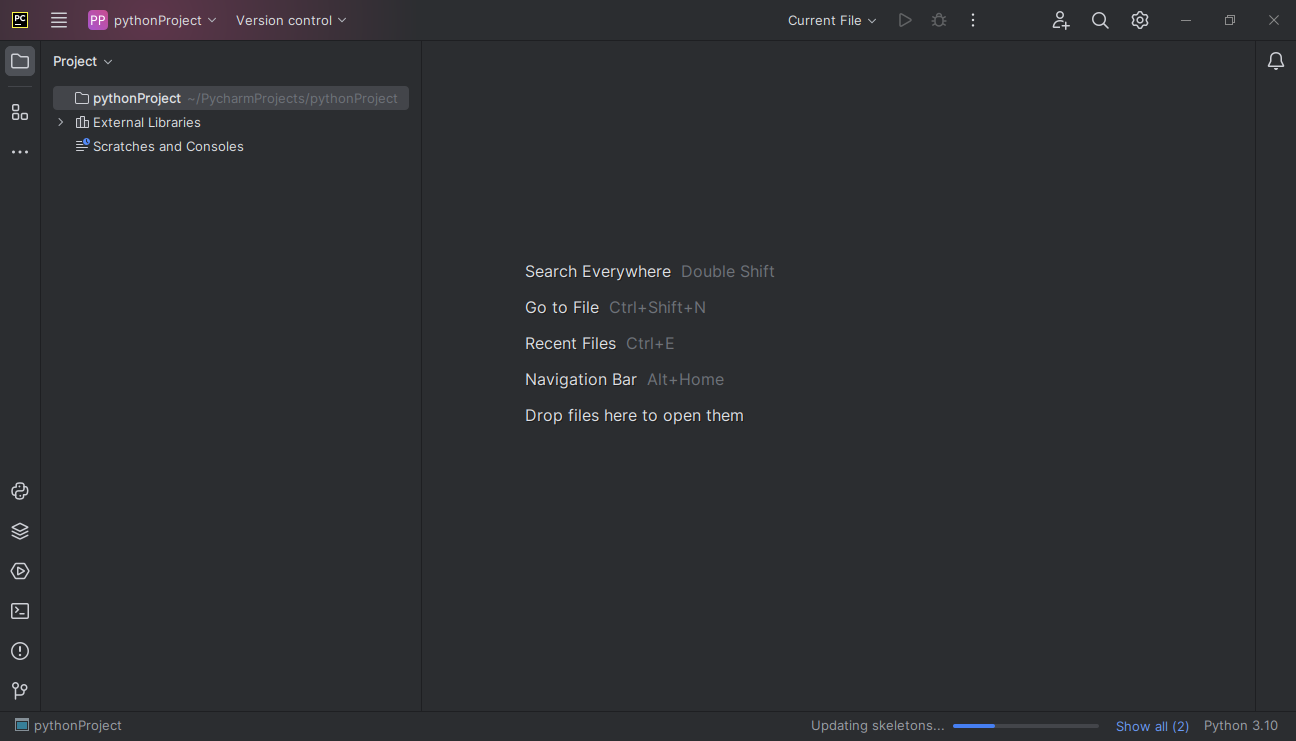
Окно Tip of the Day и сообщение Code With Me следует закрыть, если они появятся. Возможно потребуется подождать, пока среда настроит проект. Сообщение об этом вы увидите в строке состояния.
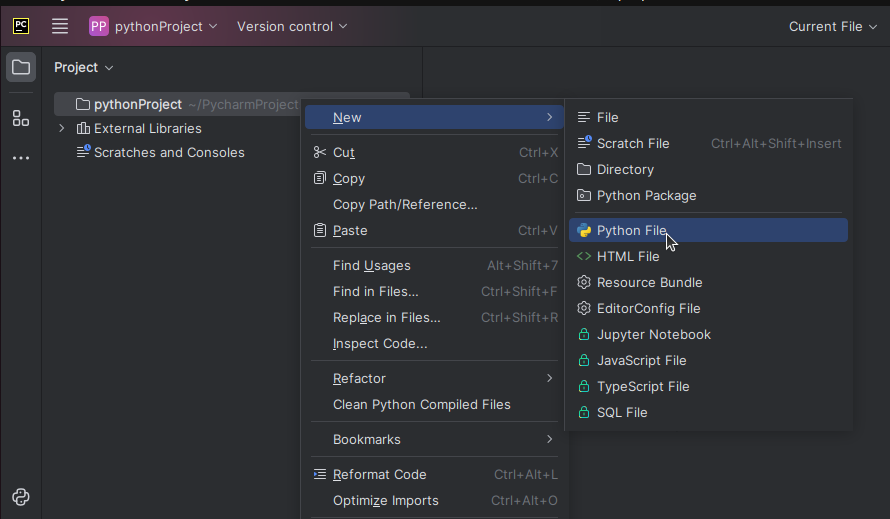
Слева на панели Project управляют файлами проекта. На скрине выше в каталоге pythonProject нет ни одного файла. Чтобы создать файл, в котором будет написана программа на Python, кликнем по этой папке правой кнопкой мыши. В контекстном меню выбираем New → Python File .
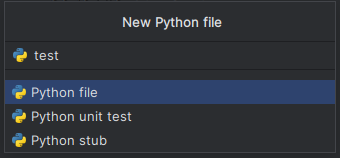
После этого в центральной части среды разработки появится небольшое окно, в которое вписываем имя файла.
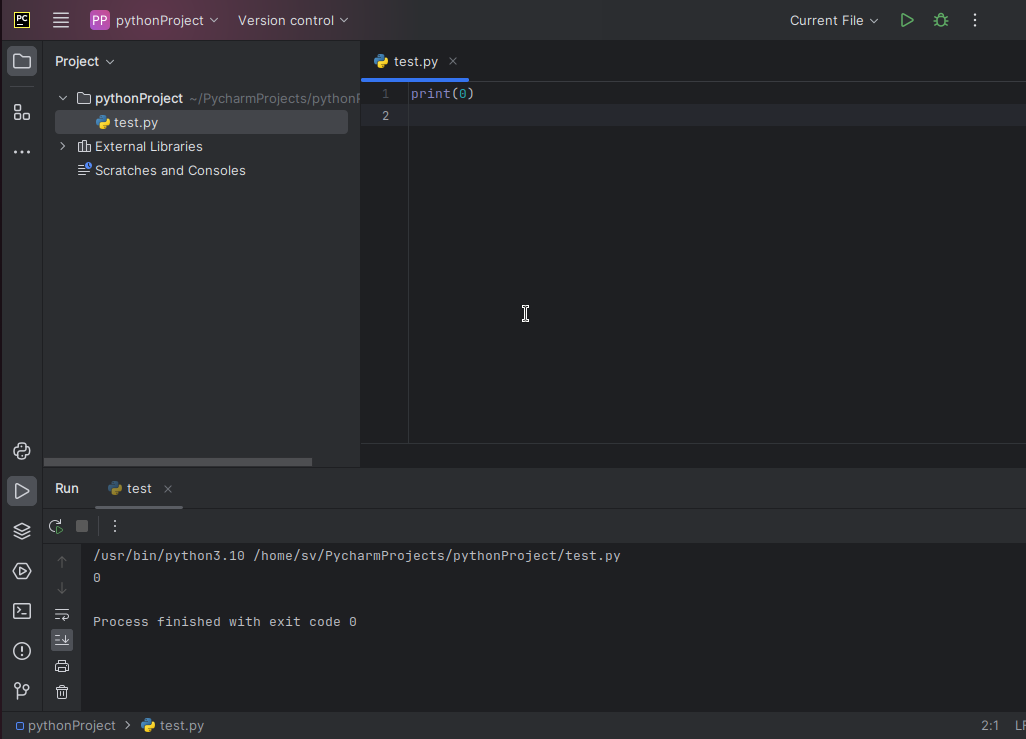
Нажав Enter , вы увидите файл на панели Project . Также он будет открыт в центральной части окна PyCharm.
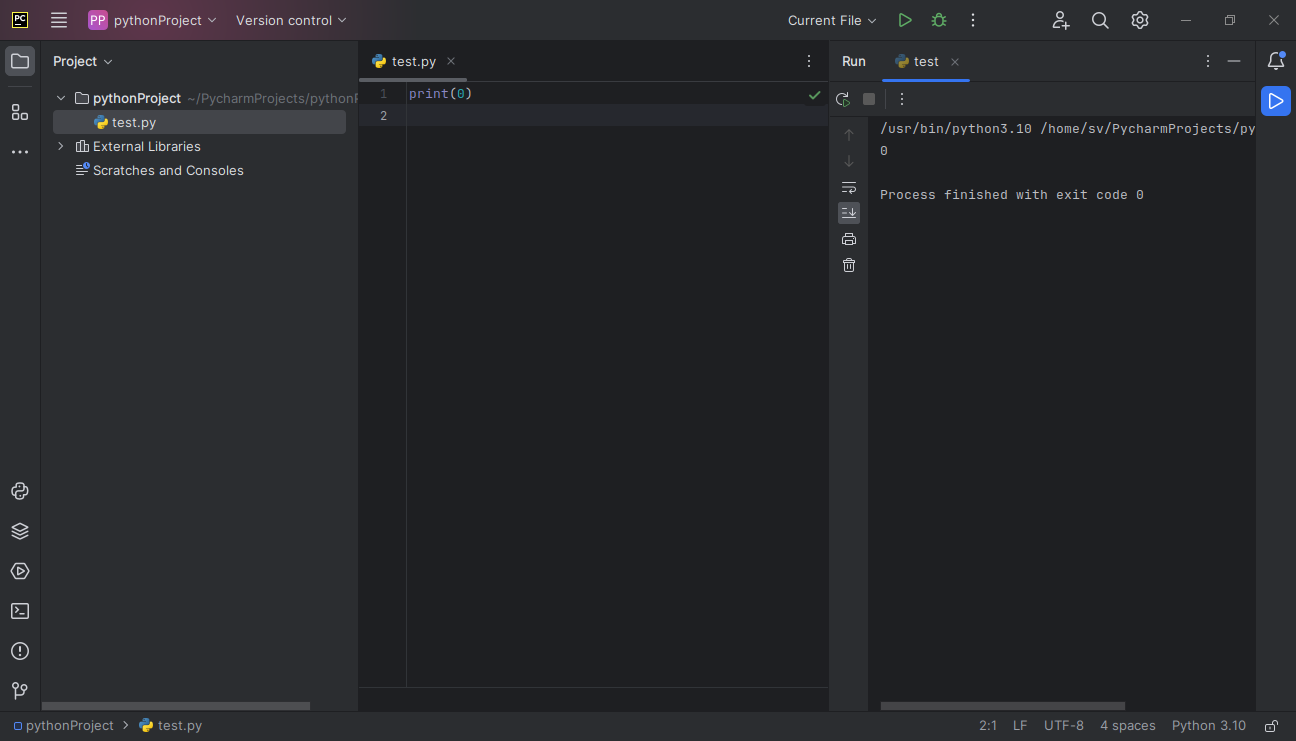
После того, как исходный код написан, чтобы первый раз запустить программу, проще всего нажать Ctrl+Shift+F10 . Внизу раскроется вкладка Run , в которой отобразиться результат выполнения.
Иногда удобнее, чтобы панель выполнения программы открывалась не снизу, а, например, справа. В этом случае в настройках панели (справа значок похожий на гайку) следует выбрать Move to → Right Top .
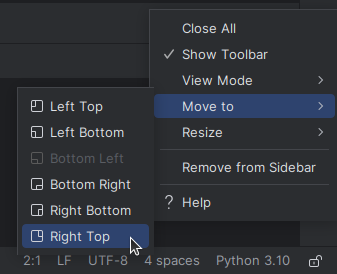
После этого интерфейс среды разработки примет такой вид:
Внешний вид среды и множество других ее свойств, поведение настраиваются в окне Settings (меню File → Settings ). На скрине ниже показано, как изменить темную тему оформления PyCharm на светлую.

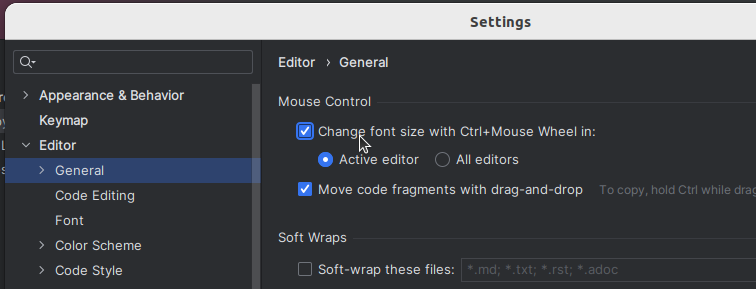
Бывает удобно менять размер шрифта в редакторе кода, зажав Ctrl и прокручивая колесо мыши. Чтобы воспользоваться этой возможностью в PyCharm, надо установить соответствующий флажок в разделе Editor → General окна настроек.
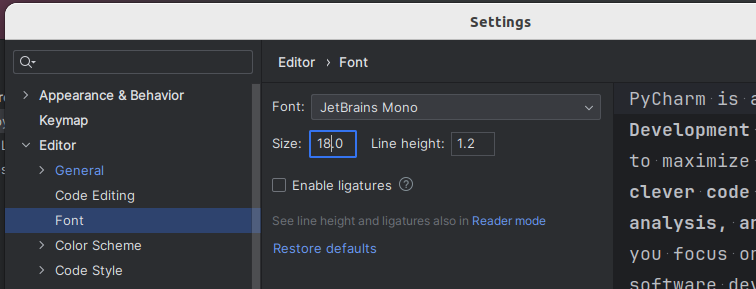
Изменить по-умолчанию заданный размер шрифта можно в разделе Editor → Font .
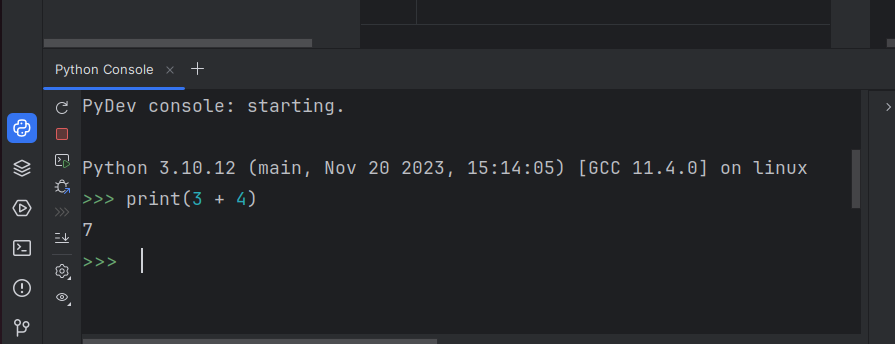
В PyCharm встроена интерактивная консоль, в которой выполняют небольшие фрагменты кода без создания файлов.
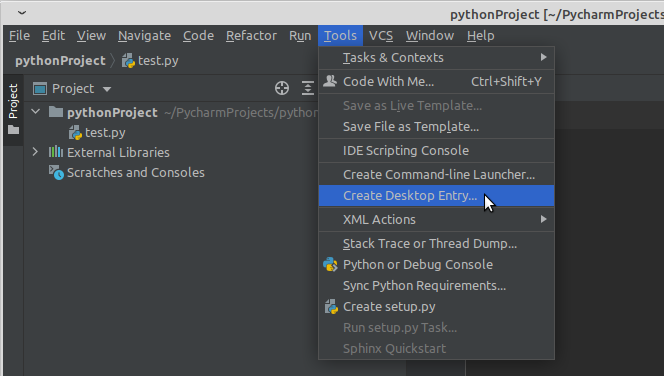
В дистрибутивах Linux обычно значок PyCharm не устанавливается в системное меню. И для последующего запуска среды вам снова надо будет обращаться к файлу pycharm.sh . Однако вы можете создать ярлык на приложение выполнив команду Tools → Create Desktop Entry… .
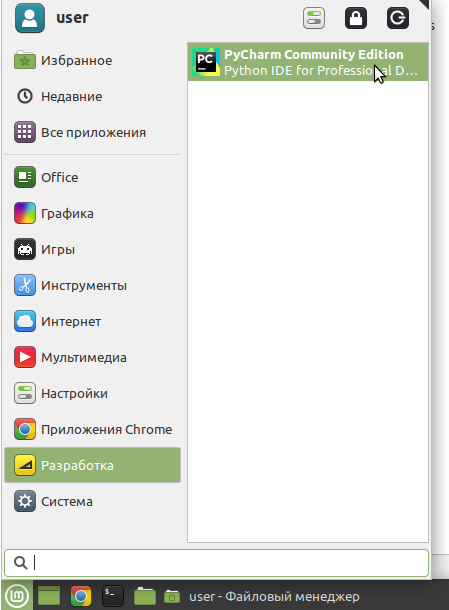
После этого в вашем системном меню должен появиться значок быстрого запуска. На скрине ниже показано, как это выглядит в Linux Mint.
Теперь рассмотрим некоторые особенности работы в PyCharm, точнее в его редакторе кода. Многие из них универсальны, характерны для других сред разработки. Так нажатие Ctrl + D дублирует строку, в которой находится курсор.
Ctrl + C копирует строку, в которой находится курсор, выделять строку при этом не надо. Потом копию можно вставить в любое место программы командой Ctrl + V .
Если надо скопировать или продублировать участок в несколько строк, его следует выделить.
Выделенный участок можно сдвинуть вправо (сделать вложенным), нажав Tab . Смещение влево (на внешний уровень) выполняется комбинацией Shift + Tab .
Поднять/опустить (поменять местами с предшествующей/нижестоящей) строку или выделенный участок можно с помощью сочетаний Shift + Ctrl + стрелка вверх или стрелка вниз клавиатуры.
Примеры решения и дополнительные уроки в pdf-версии курса
Python. Введение в программирование
[Solved] No python interpreter configured for the project
No python interpreter configured for the project is a common error message you may encounter in PyCharm. PyCharm is a very useful editor having nice features like debugging, testing, refactoring and code completion. However, it needs an external interpreter (Python.exe) to run Python code.
This message tells you that project configuration should be updated to use a valid Python installation. To open the related configuration, you can click on Configure Python interpreter link as shown below. Or alternatively, you can select File -> Settings from the menu and open Project -> Python Interpreter setting.

Python Interpreter setting shows that is selected for the project. To select (or create) a Python.exe interpreter click on Gear icon and select Show All… option.

In the Python Interpreters window that opens, the list is empty. To add a new Python Interpreter click on Plus (+) icon.

In Add Python Interpreter window, you can create a new virtual Python environment. My project is under C:\abcstudyguide\python directory, so I have created a folder venv under this directory to create a new virtual environment for my project.
You must then choose a Base interpreter. Base interpreter is the python.exe file installed on your system. When you create a virtual environment, it will be based on Python version specified here. If you need a specific version of Python (like 3.8, 3.7), you need show path of this Python version in Base interpreter filed.
If you don’t have Python installed on your system yet, you can download it from https://www.python.org/downloads/. Note that I installed Python in C:\Python\Python39 directory on my computer. However, default installation path is C:\Users\\AppData\Local\Programs\Python .

Virtual Environments in Python
Instead of creating a new virtual environment, you can also use the System Interpreter, but this method is not recommended.
You can work on many different Python projects. Virtual environments are useful for creating an isolated environment for each Python project. Consider you are working on two different projects (ProjectA and ProjectB). Both projects are using the same library (LibraryX) but they require different versions of LibraryX. ProjectA needs version 1.0 of LibraryX, ProjectB needs version 2.0.
To avoid version conflicts between third party libraries, each project should create and use its own virtual environment instead of using System Interpreter ( C:\Python\Python39\python.exe ).

When you create a new Python virtual environment and select it as Python Interpreter in your project settings, No python interpreter configured for the project message will be gone.
Configure a system interpreter
To work with your Python code in PyCharm, you need to configure at least one interpreter. A system interpreter is the one that comes with your Python installation. You can use it solely for all Python scripts or take it as a base interpreter for Python virtual environments.
Configure a system interpreter
- Ensure that you have downloaded and installed Python on your computer. Installing Python on Windows from Microsoft Store If you are on Windows, you can download Python from the Microsoft Store and install it as a Python interpreter. Once the Python application is downloaded from the Microsoft Store, it becomes available in the list of the Python executables.
 Note that interpreters added from the Microsoft Store installations come with some limitations. Because of restrictions on Microsoft Store apps, Python scripts may not have full write access to shared locations such as TEMP and the registry.
 - Do one of the following:
- Click the Python Interpreter selector and choose Add New Interpreter .
- Press Control+Alt+S to open Settings and go to Project: | Python Interpreter . Click the Add Interpreter link next to the list of the available interpreters.
- Click the Python Interpreter selector and choose Interpreter Settings . Click the Add Interpreter link next to the list of the available interpreters.
- Select Add Local Interpreter .
- In the left-hand pane of the Add Python Interpreter dialog, select System Interpreter .

- In the Interpreter field, type the fully-qualified path to the required interpreter executable, or click and in the Select Python Interpreter dialog that opens, choose the desired Python executable.
 You will need admin privileges to install, remove, and upgrade packages for the system interpreter. When attempting to install an interpreter package through an intention action, you might receive the following error message:
  As prompted, consider using a virtual environment for your project.
 - Click OK to complete the task.


For any of the configured Python interpreters (but Docker-based), you can:
How To Install Python Interpreter In PyCharm
This article will tell you how to install a python interpreter in the PyCharm project. Before start, you should make sure you had installed python on your system.
1. How To Install Python Interpreter In PyCharm.
1.1 On macOS.
- Open PyCharm IDE, I use PyCharm community edition with Anaconda plugin.
- Then click the PyCharm —> Preferences… menu item ( macOS) or Window —> Preferences menu item ( Windows OS ).
- In the popup Preferences window, click Project: Project-Name —> Project Interpreter menu item at the left panel. Then you can see there is no Project Interpreter that has been selected on the right panel.
- Click the Project Interpreter drop-down list on the right panel, then click Show All… item, it will pop up the Project Interpreters dialog window.
- There is a default PyCharm python interpreter in the dialog. You can select it as the project python interpreter.
- If you want to install another Python interpreter, you can click the plus button ( + ) at the bottom left corner of the Project Interpreters popup dialog window.
- Then it will popup Add Python Interpreter window. There list 4 types of python interpreters on the window left side, they are Virtualenv Environment, Conda Environment, System Interpreter, Pipenv Environment. You can select the python interpreter type from the left pane as you need.
- After you select one python interpreter in PyCharm, it will list all the modules package and version information that has been installed in that interpreter in the Preferences window, you can code and run your python program with that python interpreter.
1.2 On Windows.
- It is similar to macOS, the difference is that you should click the PyCharm File —> Settings… menu item to open the Settings dialog.
- The Settings dialog is the same as the Preferences dialog on macOS.
- Now you can follow steps 3 – 8 of section 1.1 On macOS to install the Python interpreter.