Product Filtering is an important functionality of eCommerce websites to allow users to filter products listing according to requirement.
So if you’re looking for solution to implement product search filtering in your project then you’re here at right place. In our previous tutorial you have learned to implement your own captcha script in PHP. In this tutorial you will learn how to implement Product Search Filtering using Ajax, PHP & MySQL.
We will cover this tutorial with live example with product filtering functionality just like eCommerce website to filter product with categories, brands, size, material and sort with latest product and price.
So let’s implement product search filtering with PHP & MySQL. The major files are:
Step1: Create MySQL Database Table
First we will create MySQL database table products to store product details and display with filter functionality.
CREATE TABLE `products` ( `id` int(11) NOT NULL, `sku_id` varchar(50) NOT NULL, `category_id` int(11) NOT NULL, `category_name` varchar(255) NOT NULL, `product_name` varchar(300) NOT NULL, `image` varchar(300) NOT NULL, `price` int(11) NOT NULL, `brand` varchar(100) NOT NULL, `material` varchar(100) NOT NULL, `size` varchar(20) NOT NULL, `qty` int(11) NOT NULL, `created_date` datetime NOT NULL, `updated_date` timestamp NOT NULL DEFAULT current_timestamp() ON UPDATE current_timestamp() ) ENGINE=InnoDB DEFAULT CHARSET=latin1;
Step2: Design Form with Filter Options
In index.php file, we will design HTML Form to display product filter options and product listing. We will also create a container with id results to list products.
Step3: Get Product Filter Options
In index.php file, we will call product filter options by calling methods from class Product.php .
We will implement these methods in class Product.php to get filter options values.
public function getCategories() < $sqlQuery = " SELECT category_id, category_name FROM ".$this->productTable." GROUP BY category_name"; return $this->getData($sqlQuery); > public function getBrand () < $sql = ''; if(isset($_POST['category']) && $_POST['category']!="") < $category = $_POST['category']; $sql.=" WHERE category_id IN ('".implode("','",$category)."')"; >$sqlQuery = " SELECT distinct brand FROM ".$this->productTable." $sql GROUP BY brand"; return $this->getData($sqlQuery); > public function getMaterial () < $sql = ''; if(isset($_POST['brand']) && $_POST['brand']!="") < $brand = $_POST['brand']; $sql.=" WHERE brand IN ('".implode("','",$brand)."')"; >$sqlQuery = " SELECT distinct material FROM ".$this->productTable." $sql GROUP BY material"; return $this->getData($sqlQuery); > public function getProductSize () < $sql = ''; if(isset($_POST['brand']) && $_POST['brand']!="") < $brand = $_POST['brand']; $sql.=" WHERE brand IN ('".implode("','",$brand)."')"; >$sqlQuery = " SELECT distinct size FROM ".$this->productTable." $sql GROUP BY size"; return $this->getData($sqlQuery); >
Step4: Products Listing with Filter
In script.js file, we will implement functionality to load products from MySQL database using product filter by making ajax request to load_products.php file to load products details.
var totalRecord = 0; var category = getCheckboxValues('category'); var brand = getCheckboxValues('brand'); var material = getCheckboxValues('material'); var size = getCheckboxValues('size'); var totalData = $("#totalRecords").val(); var sorting = getCheckboxValues('sorting'); $.ajax(< type: 'POST', url : "load_products.php", dataType: "json", data:, success: function (data) < $("#results").append(data.products); totalRecord++; >>); $(window).scroll(function() < scrollHeight = parseInt($(window).scrollTop() + $(window).height()); if(scrollHeight == $(document).height())< if(totalRecord , success: function (data) < $("#results").append(data.products); $('.loader').hide(); totalRecord++; >>); > > >);
Step5: Get Products from MySQL Database
In load_products.php file, we will include class Product.php and call method getProducts() to get products and return as JSON data to load product listing.
You can view the live demo from the Demo link and can download the source from the Download link below. Demo Download
6 thoughts on “ Product Search Filtering using Ajax, PHP & MySQL ”
Dear Webdamn, thank you for this script. It’s possible add a slider range price selection?, I have try many times without success. I dont’ understand how pass value to ajax with other element different from checkboxes. Thank you very much for you help.
Shopping Cart is very important part of any online store, it not only allows user to accumulate list of items for final purchase, but also calculates total amount of all the products. Since my last article on PayPal Express Checkout with PHP, I have received few emails asking how to create a simple PHP session based shopping cart for the website. So, keeping that in mind, today we are going to create a shopping cart, which is simple and can be integrated easily in any website that runs on PHP. I have created 4 files for our shopping cart:
Config.php (MySql credentials)
Index.php (list of product information from database)
Cart_update.php (Updates cart items and redirects back to products list page)
View_cart.php (Product summery view before the payment)
Products List
All our products information should be stored in MySql table, for that we can create a table named «products» using MySql statement below, you can insert the products details manually using PhpMyAdmin, OR use MySql file in downloadable zip, which you can import in PhpMyAdmin.
CREATE TABLE IF NOT EXISTS `products` ( `id` int(11) NOT NULL AUTO_INCREMENT, `product_code` varchar(60) NOT NULL, `product_name` varchar(60) NOT NULL, `product_desc` tinytext NOT NULL, `product_img_name` varchar(60) NOT NULL, `price` decimal(10,2) NOT NULL, PRIMARY KEY (`id`), UNIQUE KEY `product_code` (`product_code`) ) AUTO_INCREMENT=1 ;
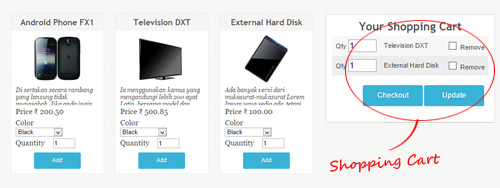
Once you have database table, you can create a list of products, similar to picture below:
Purpose of the config file is to store various information we need for our script. Here we are just going to enter MySql authentication details to access database table. Just enter the MySql details in the configuration file.
12, 'Service Tax' => 5 ); //connect to MySql $mysqli = new mysqli($db_host, $db_username, $db_password,$db_name); if ($mysqli->connect_error) < die('Error : ('. $mysqli->connect_errno .') '. $mysqli->connect_error); > ?>
Product List (Index.php)
This will be the page where you want to display the list the products you want to sell. If you have lots of products, it is better to group them in pages using some sort of pagination. And on the right side of the page will be our shopping-cart box, which will keep track of items user going to purchase later.Since we are working with sessions, we must activate PHP session in our script by including session_start() on top of the code, then we can start writing other codes or include file:
Listing Products from Database
We will basically fetch the records from database and display them on the page. We will also create a HTML form with Add to Cart button. Important part here is the HTML form, notice the hidden input values? Each item contains a form with these hidden values, product code and the return URL, which we will send to cart_update.php using POST method.
Shopping Cart Box
On the right side of the page we will display small shopping cart box to keep track of user items. The main task of the shopping-cart is to look for session variable called $_SESSION[«cart_products»], which holds the collection of user items in an array, and then retrieve and display its content in the box.
0) < echo '
Your Shopping Cart'; echo ''; echo '
'; > ?>
Updating Cart
The role of the Cart_update.php is to add and remove items in the shopping cart. When user clicks «Add to Cart» button, the form sends some hidden values such as product code and quantity to Cart_update.php using POST method, which we will use to retrieve product info from the database verifying the existence of the product, and then we create or update $_SESSION[«cart_products»] with new array variables. Removing item works similar way, please go though comment lines below, most of the code is self explanatory.
0) < foreach($_POST as $key =>$value) < //add all post vars to new_product array $new_product[$key] = filter_var($value, FILTER_SANITIZE_STRING); >//remove unecessary vars unset($new_product['type']); unset($new_product['return_url']); //we need to get product name and price from database. $statement = $mysqli->prepare("SELECT product_name, price FROM products WHERE product_code=? LIMIT 1"); $statement->bind_param('s', $new_product['product_code']); $statement->execute(); $statement->bind_result($product_name, $price); while($statement->fetch()) < //fetch product name, price from db and add to new_product array $new_product["product_name"] = $product_name; $new_product["product_price"] = $price; if(isset($_SESSION["cart_products"]))< //if session var already exist if(isset($_SESSION["cart_products"][$new_product['product_code']])) //check item exist in products array < unset($_SESSION["cart_products"][$new_product['product_code']]); //unset old array item >> $_SESSION["cart_products"][$new_product['product_code']] = $new_product; //update or create product session with new item > > //update or remove items if(isset($_POST["product_qty"]) || isset($_POST["remove_code"])) < //update item quantity in product session if(isset($_POST["product_qty"]) && is_array($_POST["product_qty"]))< foreach($_POST["product_qty"] as $key =>$value) < if(is_numeric($value))< $_SESSION["cart_products"][$key]["product_qty"] = $value; >> > //remove an item from product session if(isset($_POST["remove_code"]) && is_array($_POST["remove_code"])) < foreach($_POST["remove_code"] as $key)< unset($_SESSION["cart_products"][$key]); >> > //back to return url $return_url = (isset($_POST["return_url"]))?urldecode($_POST["return_url"]):''; //return url header('Location:'.$return_url);
View Item Summary
Now we have everything ready, its time for final page where user can view their products and proceed to payment. It’s good idea to add taxes, shipping and transaction fees along with total amount in this page for the users to see. You can generate any type of data here for the Payment gateway, most Payment gateway prefer HTML form, so I have create some hidden input fields, you can modify them to suit your needs.
!['.$product['product_name'].'](data:image/svg+xml,%3Csvg%20xmlns='http://www.w3.org/2000/svg'%20viewBox='0%200%200%200'%3E%3C/svg%3E) '; $productHTML .= '
'; $productHTML .= '!['.$product['product_name'].'](https://webdamn.com/product-search-filtering-using-ajax-php-mysql/images/'.$product['image'].') '; $productHTML .= '
'; $productHTML .= '