- 27 Amazing CSS Product Cards
- Latest Post
- 55 Cool CSS Calendars
- 19 Barcodes in CSS
- 25 CSS Masonry Layout Examples
- 23 CSS Card Layouts
- 27 CSS Subscribe Forms
- Tailored Jeans
- How To Create a Product Card
- Example
- Tailored Jeans
- Example
- COLOR PICKER
- Report Error
- Thank You For Helping Us!
- 26 CSS Product Cards
- Related Articles
- Author
- Links
- Made with
- About a code
- Pure CSS Product Card
- Author
- Links
- Made with
- About a code
- Simple Product Card UI Design
- Author
- Links
- Made with
- About a code
- Card UI Design
- Author
- Links
- Made with
- About a code
- Responsive Product Card
- Author
- Create Product Card Using HTML and CSS
- CSS Code For Product Card:-
- JavaScript Code For Product Card
- Final Output Of Product Card Using HTML, CSS, and JavaScript:-
- Live Preview Of Product Card:-
- See the Pen Porduct delivery status card for website by Aryankapoor (@codewitharyann) on CodePen.
- Video Output Of Product Card:
27 Amazing CSS Product Cards
If you need inspiration for your product page check these hand picked CSS product card designs.
You may also like
Card UI Design
Dev: samuel garcia
Simple Product Card UI Design using Html – CSS
Dev: samuel garcia
Material Product Card
Dev: Thomas d’Aubenton
E-commerce Product (Delicious Apples)
Dev: John Mantas
Strawberry Week – UI
Dev: Amit Soni
Product Card
Dev: jakzaizzat
Responsive Product Card View With Change Color/Image Functionality
Dev: Anuz Pandey
Product card animation
Dev: Cassandra Rossall
Product Card TO Code
See the Pen Product Card TO Code by Muhammad Fatih Takey (@fatihtakey) on CodePen.
Dev: Muhammad Fatih Takey
Product Card
Dev: Alexander Haniotis
Product Card
Dev: George V.
Product Card wip
Dev: Marko Bolliger
Product Card
See the Pen Product Card by Deni Kurniawan (@wingerdstok) on CodePen.
Dev: Deni Kurniawan
Product Card
Dev: Jorge Aguilar
UI to Code – Star Wars Product Card
Dev: Praveen Bisht
Product Card
Dev: LittleSnippets.net
Product Card
Dev: Ricardo Oliva Alonso
HTML CSS Product Card UI design
Dev: Md Shifut Hossain
E-Commerce Shop
Material design Product Card
Product Card
Dev: Jonathan Obino
Product Card
Dev: Aleksandar Čugurović
Product Card
See the Pen Product Card by Alexandra K (@ff0004-red) on CodePen.
Dev: Alexandra K
UI Design – Product Card
Dev: CodeFrog
Pure CSS Product Card
Dev: Adam Kuhn
Product Card
Product Card UI / CSS
Dev: Omar Dsooky
Latest Post
55 Cool CSS Calendars
19 Barcodes in CSS
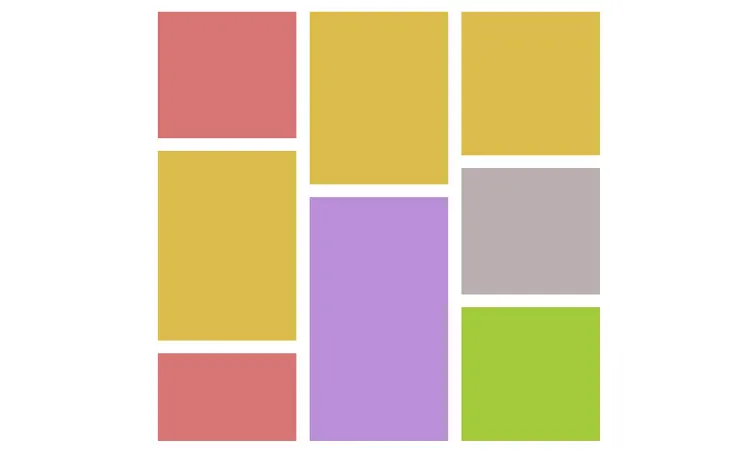
25 CSS Masonry Layout Examples
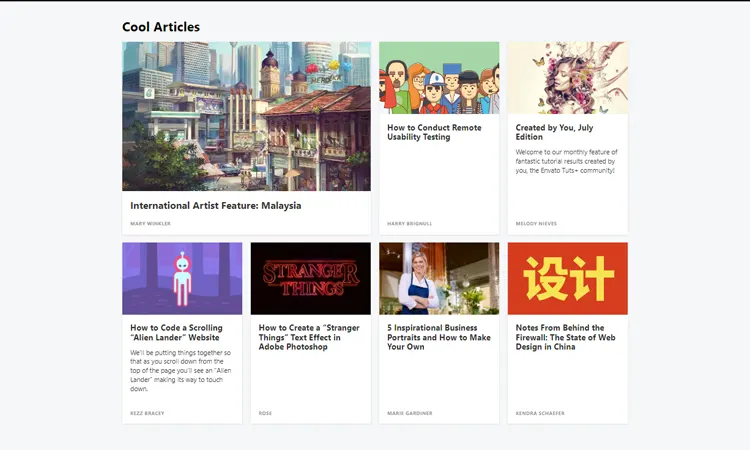
23 CSS Card Layouts
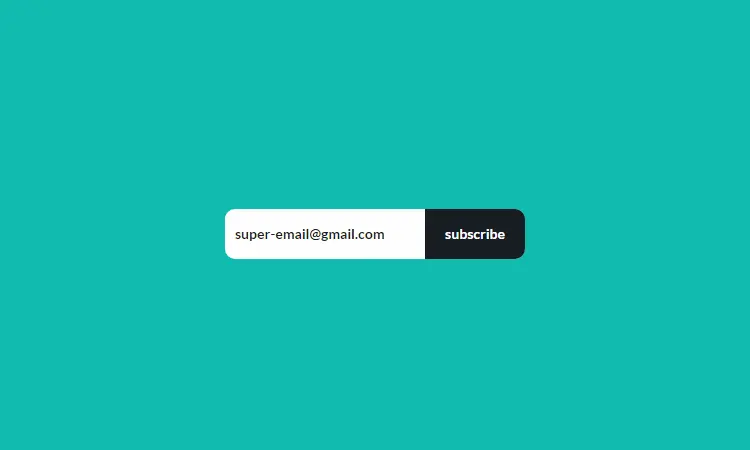
27 CSS Subscribe Forms

We use cookies to ensure that we give you the best experience on our website. If you continue to use this site we will assume that you are happy with it. Ok
Tailored Jeans

Some text about the jeans. Super slim and comfy lorem ipsum lorem jeansum. Lorem jeamsun denim lorem jeansum.
How To Create a Product Card
Step 1) Add HTML:
Example

Tailored Jeans
Some text about the jeans..
Step 2) Add CSS:
Example
.card <
box-shadow: 0 4px 8px 0 rgba(0, 0, 0, 0.2);
max-width: 300px;
margin: auto;
text-align: center;
font-family: arial;
>
.price color: grey;
font-size: 22px;
>
.card button border: none;
outline: 0;
padding: 12px;
color: white;
background-color: #000;
text-align: center;
cursor: pointer;
width: 100%;
font-size: 18px;
>
.card button:hover opacity: 0.7;
>

COLOR PICKER


Report Error
If you want to report an error, or if you want to make a suggestion, do not hesitate to send us an e-mail:
Thank You For Helping Us!
Your message has been sent to W3Schools.
Top Tutorials
Top References
Top Examples
Get Certified
W3Schools is optimized for learning and training. Examples might be simplified to improve reading and learning. Tutorials, references, and examples are constantly reviewed to avoid errors, but we cannot warrant full correctness of all content. While using W3Schools, you agree to have read and accepted our terms of use, cookie and privacy policy.
26 CSS Product Cards
Collection of free HTML and CSS product card code examples from Codepen, GitHub and other resources. Update of November 2021 collection. 4 new items.
Related Articles
- CSS Cards
- CSS Blog Cards
- CSS Card Hover Effects
- CSS Card Layouts
- CSS Flip Cards
- CSS Material Design Cards
- CSS Movie Cards
- CSS Credit Cards
- CSS Profile Cards
- CSS Recipe Cards
- CSS Business Cards
- Bootstrap Product Cards
Author
Links
Made with
About a code
Pure CSS Product Card
Compatible browsers: Chrome, Edge, Firefox, Opera, Safari
Author
Links
Made with
About a code
Simple Product Card UI Design
Simple product card UI design using HTML and CSS.
Compatible browsers: Chrome, Edge, Firefox, Opera, Safari
Author
Links
Made with
About a code
Card UI Design
Compatible browsers: Chrome, Edge, Firefox, Opera, Safari
Author
Links
Made with
About a code
Responsive Product Card
Responsive product card view with change color/image functionality.
Compatible browsers: Chrome, Edge, Firefox, Opera, Safari

Author
Create Product Card Using HTML and CSS
Hello Coder! Welcome to the Codewithrandom blog. In this blog, we learn how to create a Product Card Using HTML and CSS. We use html code for creating the structure of product information. And use Css For Styling our product Card and use JavaScript for this Product delivery Information shown on the card.
A product card is an essential part of any web store. Product labels should be responsive and designed for mobile and desktop devices.A product card is used in different components of the website it contains the product details price etc.

CSS Code For Product Card:-
@import url(‘https://fonts.googleapis.com/css?family=Roboto:400,500,700’); * < -webkit-font-smoothing: antialiased; -moz-osx-font-smoothing: grayscale; >body < font-family: 'Roboto', sans-serif; font-weight: 400; background-color: #CFDBEA; >a < text-decoration: none; color: white; >.container < display: flex; justify-content: center; align-content: flex-start; position:relative; height: 100vh; width: 100vw; >.iphone < margin-top: 10px; background-color: #F4F4FB; height: 812px; width: 375px; box-shadow: 0 1px 5px -1px rgba(0, 0, 0, 0.3), inset 0 0 0 1px rgba(0, 0, 0, 0.15); overflow: hidden; position: relative; z-index: 2; transform:scale(0.8); transform-origin: top center; >.header < display: flex; justify-content: space-between; align-items: center; height: 20%; >.order-summary < margin-left: 1.5rem; padding: 1rem; display: flex; flex-direction: column; >.order-summary > div < margin: 6px; >.order-status < color: #338A9A; font-size: 0.9rem; font-weight: 700; letter-spacing: 0.5px; >.order-date < font-size: 1.5rem; font-weight: 700; >.order-day < color: #338A9A; font-size: 0.9rem; font-weight: 300; letter-spacing: 0.5px; >.back-btn < margin-right: 50px; font-size: 1rem; width: 40px; height: 40px; border-radius: 50%; text-align: center; box-shadow: 5px 5px 25px 0px rgba(0,0,0,0.2); display: flex; justify-content: center; align-items: center; transition: all 0.2s; cursor: pointer; >.back-btn:hover < transform: scale(1.2); box-shadow: 0 14px 28px rgba(0,0,0,0.25), 0 10px 10px rgba(0,0,0,0.22); >.hero-img-container < width: 100%; height: 300px; display: flex; justify-content: center; align-items: center; position: relative; padding-bottom: 20px; >.hero-img-container::before < height: 20px; width: 20px; background-color: #0268EE; position: absolute; top: 25px; right: 150px; content:''; border-radius: 50%; >.arc < border: 1px solid #000; display: inline-block; min-width: 200px; min-height: 200px; padding: 0.5em; border-radius: 50%; border-top-color: transparent; border-left-color: transparent; border-bottom-color: transparent; opacity: 0.4; position:absolute; transform: rotate(-40deg); left: -10px; >.pattern < width: 50px; height: 50px; background-image: url("data:image/svg+xml;base64,PHN2ZyB4bWxucz0naHR0cDovL3d3dy53My5vcmcvMjAwMC9zdmcnIHdpZHRoPScxMCcgaGVpZ2h0PScxMCc+CiAgPHJlY3Qgd2lkdGg9JzEwJyBoZWlnaHQ9JzEwJyBmaWxsPSd3aGl0ZScgLz4KICA8Y2lyY2xlIGN4PSc0JyBjeT0nNCcgcj0nNCcgZmlsbD0nYmxhY2snLz4KPC9zdmc+"); opacity: 0.1; position: absolute; right: 30px; top: 30px; transform: scale(1.2); >.triangle1 < width: 0; height: 0; border-style: solid; border-width: 0 10px 20px 10px; border-color: transparent transparent #767EEF transparent; position: absolute; top: 50px; left: 130px; transform:rotate(-45deg); >.hero-img < width: 80%; >.order-status-container < z-index: 3; display:flex; width: 100%; height: 30%; justify-content: space-evenly; align-items: center; background-color: white; border-top-right-radius: 50px; border-top-left-radius: 50px; position: relative; box-shadow: 0 14px 28px rgba(0,0,0,0.02), 0 10px 10px rgba(0,0,0,0.2); >.order-status-container::before < content:''; position:absolute; width: 70px; height: 3px; background-color: #EAEBFF; opacity: 0.8; border-radius: 2px; top:20px; >.status-item < display:flex; flex-direction:column; justify-content: flex-start; align-items: center; height: 150px; padding-top: 20px; >.status-item > div < margin: 10px; >.status-circle < height: 20px; width: 20px; background-color: #665CF5; border-radius: 50%; border: 5px solid white; box-shadow: 0 10px 20px rgba(0,0,0,0.19), 0 6px 6px rgba(0,0,0,0.23); z-index: 5; transition: all 0.2s; cursor: pointer; >.status-circle:hover < transform: scale(1.2); box-shadow: 0 14px 28px rgba(0,0,0,0.25), 0 10px 10px rgba(0,0,0,0.22); >.status-text < font-size: 0.8rem; font-weight: 500; >.status-text span < display: block; text-align: center; padding: 2px; >.green < color: #338A9A; >.first::before < content:''; height: 4px; width: 70px; background-color: #5858EF; position:absolute; z-index:4; top: 83px; left: 60px; >.second::before < content:''; height: 4px; width: 210px; background-color: #5858EF; position:absolute; z-index:4; top: 83px; left: 100px; opacity:0.2; >.order-details-container < position: relative; z-index: 6; height: 900px; background-color: #767EEF; border-top-right-radius: 50px; border-top-left-radius: 50px; padding-top: 20px; transform:translateY(-45px); box-shadow: 0 10px 20px rgba(0,0,0,0.19), 0 6px 6px rgba(0,0,0,0.23); cursor: default; >.odc-header < display: flex; justify-content: center; align-items: flex-start; >.cta-text < margin-top: 40px; margin-right: 25px; color: white; font-size: 0.9rem; text-shadow: 1px 1px 2px rgba(255,255,255,0.18); >.cta-button < margin-top:20px; padding: 20px 40px; background-color: #4E4DED; border: 0; border-radius: 10px; color: white; font-size: 1rem; font-weight: 500; box-shadow: 0 10px 20px rgba(0,0,0,0.10), 0 6px 6px rgba(0,0,0,0.05); animation: shadow-pulse 1s infinite; cursor:pointer; >@keyframes shadow-pulse < 0% < box-shadow: 0 0 0 0px rgba(255, 255, 255, 0.2); >100% < box-shadow: 0 0 0 35px rgba(255, 255, 255, 0); >> .cta-button:focus < outline:none; >.order-details-container::before < content:''; position:absolute; width: 70px; height: 3px; background-color: #EAEBFF; opacity: 0.8; border-radius: 2px; top:20px; left: 150px; >.odc-wrapper < margin:30px; >.odc-header-line < margin-top:30px; color: white; font-size: 1.5rem; font-weight: 500; margin-bottom: 40px >.odc-header-details < color:white; font-weight: bold; margin-bottom: 20px; >.product-container < background-color: #828AF1; border-radius: 20px; padding: 10px; >.product < display: flex; justify-content: flex-start; align-items: center; >.product span < display: block; color: white; margin-left: 25px; margin-bottom: 8px; flex-grow: 1; >.product span:first-child < font-weight: 300; font-size: 0.8rem; >.product span:last-child < font-weight: 500; font-size: 1.3rem; >.img-photo < width: 90px; transform: rotate(-35deg) >.cancellation < margin-top: 20px; background-color: #828AF1; border-radius: 20px; padding: 30px 20px; color:white; font-weight: bold; margin-bottom: 20px; text-align: center; >.shipping-desc < color:white; font-weight: bold; margin-bottom: 20px; >.shipping-address < margin-top: 20px; background-color: #828AF1; border-radius: 20px; padding: 20px 20px; color:white; font-weight: bold; margin-bottom: 20px; >.footer < position: absolute; bottom: 15px; right: 15px; font-size: 0.9rem; >.footer small < font-size: 0.7rem; >.footer a < color: #3273dc; cursor: pointer; text-decoration: none; border-bottom: 2px solid rgba(50,115,220,.1); padding-bottom: 2px; >.footer a:hover
Step1:In order to create the product card structure, we will first use the div element to create the container for our product card. Then, inside the div tag, we will use the div tag to create the header for the anticipated delivery, where we will add the heading and the date in that order.

Do you want to learn HTML to JavaScript? 🔥
If yes, then here is our Master Frontend: Zero to Hero eBook! 📚 In this eBook, you’ll learn complete HTML, CSS, Bootstrap, and JavaScript from beginner to advance level. 💪 It includes 450 Projects with source code.
We will now add an image to our product card using the img tag, and we will make a progress bar to monitor the order for our product delivery using the div tag. Then we will add the button for our product card using the basic button tag property, and we will also add the shipping location inside our product card using the div tag.
Step2:We will now style our container by adding formatting using the class selector (.cotainer), setting the display property to “flex,” and centering the content using the justify-content property. Our receptacle has the dimensions “100vh” and “100vw,” respectively.
We’ll now style the heading for our product card using the class selector. The display will be set to “flex” using the display property, and the content will be justified to the middle using the justify-content property. We will style our hero picture in addition to the header. We’ll set the width to 100%, the height to 300px using the height property, and the centering of the elements using the align item property.
Step3 :We’ll do the styling now to the order state. We’ll use the z index property, the display property, and the display properties to change the backdrop colour property to “white,” the display property to “flex,” and the z index property to 3. Following the application of styling to each element, the content will be centered, the display flex and content justification properties will be defined, and each element will receive styling.
Now, using the background colour property, we will set the background of the product card to “purple.” Next, using the media query property, we will add responsiveness so that as the screen size decreases below the preset screen size, the content will automatically change its size.
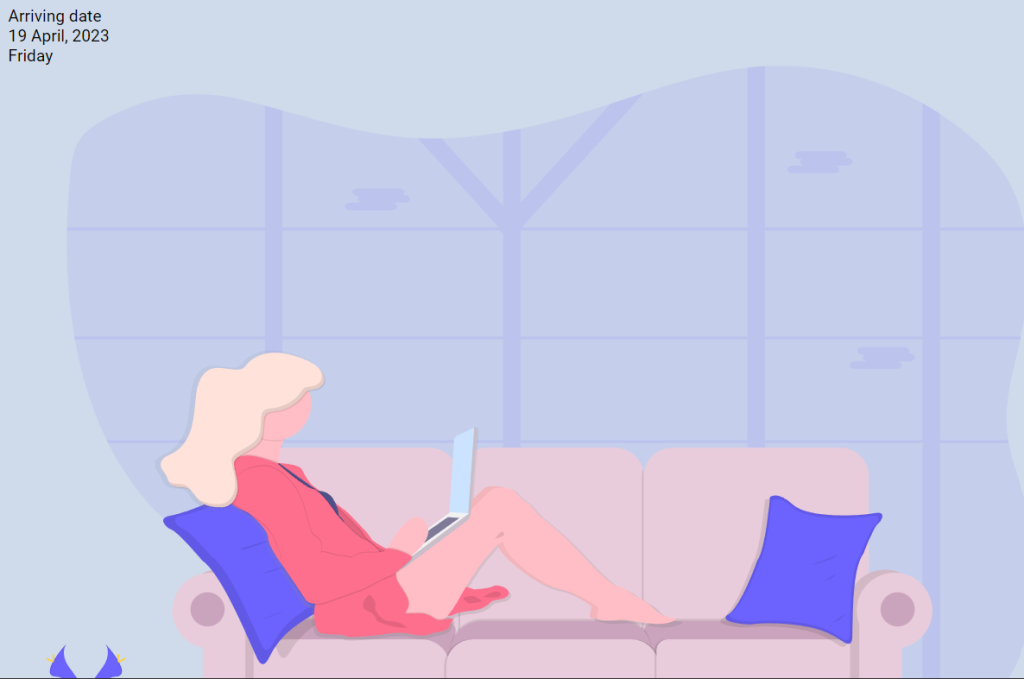
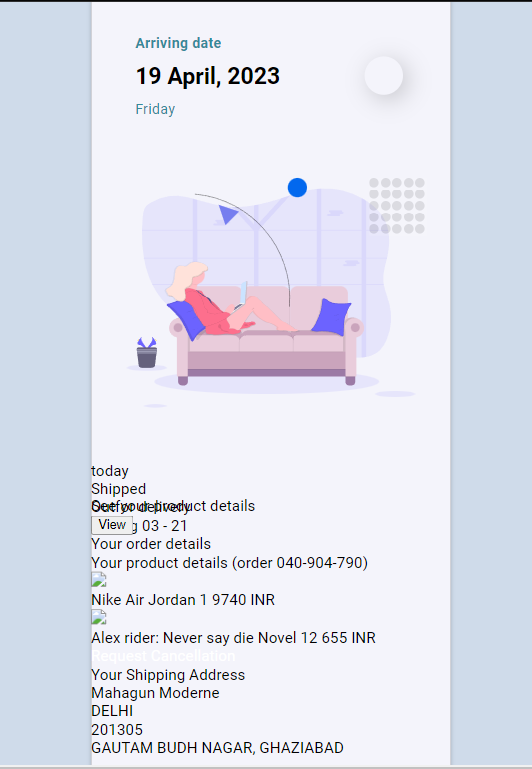
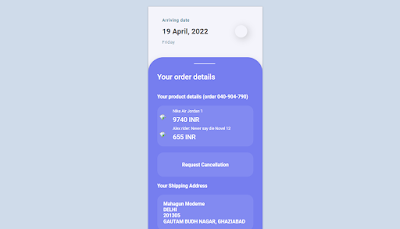
Here is our updated output With Html and Css.
Html + Css Output product card
Note: we use JavaScript code for showing the card more information on click on the card and the information pop-up.
JavaScript Code For Product Card
//anime.js library let drawer_open = false; document.querySelector(«.cta-button»).addEventListener(«mouseup»,function()< cta_button_hide.play(); >) document.querySelector(«.back-btn»).addEventListener(«mouseup»,function() < if(drawer_open) < slidedown.play(); cta_button_show.play(); >>) let cta_button_show = anime( < targets: ['.cta-button','.cta-text'], translateY: ['-15','0'], opacity: ['0','1'], easing: 'easeInOutSine', delay: anime.stagger(200), autoplay: false, // loop: false duration: 500, complete: function()< >>); let cta_button_hide = anime( < targets: ['.cta-button','.cta-text'], translateY: ['0','-15'], opacity: ['1','0'], easing: 'easeInOutSine', delay: anime.stagger(200), autoplay: false, // loop: false duration: 500, complete: function()< slideup.play(); drawer_open = true; >>); let slidedown = anime( < targets: '.order-details-container', translateY: ['-560','-40px'], duartion: 1000, autoplay: false, begin: function()< show_hideCTA("block"); drawer_open = false; >>) let slideup = anime( < targets: '.order-details-container', translateY: ['-40px','-560px'], autoplay: false, begin: function()< show_hideCTA("none"); >>) function show_hideCTA(param)
First, we’ll make a boolean variable with the value “false” using the let keyword. Then, using the document.queryselector, we’ll select the html element, and using the addEventListener, we’ll add an event to mouse up, which will cause the function “cta_button_hide.play” to be called.(). The animation will begin after we determine whether the mouse button is up by using the slidshow.play() function. A loop will be created for the merchandise card.
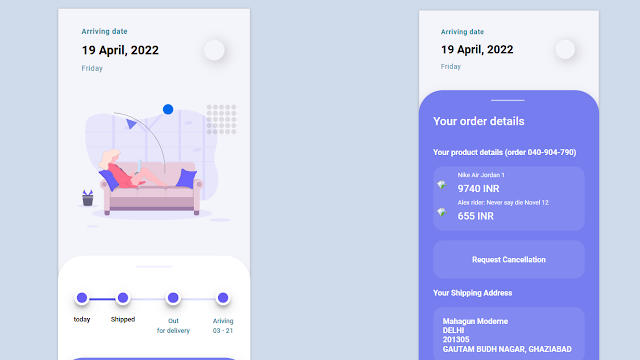
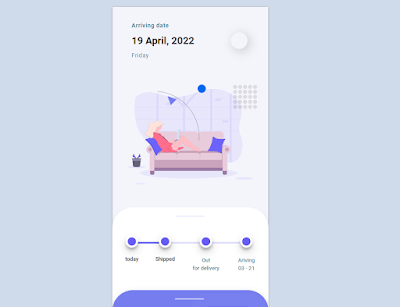
Final Output Of Product Card Using HTML, CSS, and JavaScript:-

Live Preview Of Product Card:-
See the Pen
Porduct delivery status card for website by Aryankapoor (@codewitharyann)
on CodePen.
Video Output Of Product Card:
Now we have completed our Product Card. Here is our updated output with Html, Css, and JavaScript. Hope you like the Product card. you can see the output video and project screenshots. See our other blogs and gain knowledge in front-end development.
In this post, we learn how to create a Product Card using Html, Css, and JavaScript. If we made a mistake or any confusion, please drop a comment to reply or help you in easy learning.
Written by – Code With Random/Anki