- Java/Первое окно
- Начнем с простого [ править ]
- Делаем что-то полезное [ править ]
- Дизайн [ править ]
- Скелет программы [ править ]
- Добавляем функциональность [ править ]
- addCrow [ править ]
- removeCrow [ править ]
- updateCrowCounter [ править ]
- Конечный результат [ править ]
- «Hello World!» for Microsoft Windows
- A Checklist
- Creating Your First Application
- Create a Source File
- Compile the Source File into a .class File
- Run the Program
- Шаг №45. Создаем оконное приложение на Java для логгера
Java/Первое окно
Так как в большинстве своем сегодняшние начинающие программисты не любят окно командной строки — приведу пример оконного приложения.
Начнем с простого [ править ]
import javax.swing.JFrame; public class MyWindowApp extends JFrame //Наследуя от JFrame мы получаем всю функциональность окна public MyWindowApp() super("My First Window"); //Заголовок окна setBounds(100, 100, 200, 200); //Если не выставить //размер и положение //то окно будет мелкое и незаметное setDefaultCloseOperation(JFrame.EXIT_ON_CLOSE); //это нужно для того чтобы при //закрытии окна закрывалась и программа, //иначе она останется висеть в процессах > public static void main(String[] args) //эта функция может быть и в другом классе MyWindowApp app = new MyWindowApp(); //Создаем экземпляр нашего приложения app.setVisible(true); //С этого момента приложение запущено! > >
Вот у нас и получилось ничего не делающее приложение!
Делаем что-то полезное [ править ]
Это конечно замечательно уметь показывать пустое окно, но мы хотим, чтобы оно приносило пользу! Создадим форму для подсчета ворон на заборе. Для этого будем отображать текущее количество ворон и с помощью двух кнопок добавлять или вычитать по одной.
Дизайн [ править ]
Это то, что мы примерно хотим увидеть:
| Вороносчет | |
| Ворон на заборе : 666 | |
| Ворона прилетела | Ворона улетела |
Скелет программы [ править ]
import java.awt.*; import java.awt.event.*; import javax.swing.*; public class VoronCalc extends JFrame private int voron = 0; private JLabel countLabel; private JButton addCrow; private JButton removeCrow; public VoronCalc() super("Crow calculator"); //Подготавливаем компоненты объекта countLabel = new JLabel("Crows:" + voron); addCrow = new JButton("Add Crow"); removeCrow = new JButton("Remove Crow"); //Подготавливаем временные компоненты JPanel buttonsPanel = new JPanel(new FlowLayout()); //Расставляем компоненты по местам buttonsPanel.add(countLabel, BorderLayout.NORTH); //О размещении компонент поговорим позже buttonsPanel.add(addCrow); buttonsPanel.add(removeCrow); add(buttonsPanel, BorderLayout.SOUTH); setDefaultCloseOperation(JFrame.EXIT_ON_CLOSE); > public static void main(String[] args) VoronCalc app = new VoronCalc(); app.setVisible(true); app.pack(); //Эта команда подбирает оптимальный размер в зависимости от содержимого окна > >
После компиляции и запуска — получится что-то такое:

Добавляем функциональность [ править ]
Пришло время добавить немного интерактивности. Нам нужно сделать 3 вещи:
- Научить кнопку addCrow добавлять 1 к переменной voron.
- Научить кнопку removeCrow вычитать 1 из переменной voron.
- Научить countLabel — обновлять свое значение в зависимости от содержимого переменной voron.
addCrow [ править ]
Добавляем listener для кнопки addCrow.
addCrow.addActionListener(new ActionListener() public void actionPerformed(ActionEvent e) voron = voron+1; //Добавляем одну ворону countLabel.setText("Crows:" + voron); //Сообщаем приложению, что количество ворон изменилось > >);
removeCrow [ править ]
Добавляем listener для кнопки removeCrow.
removeCrow.addActionListener(new ActionListener() public void actionPerformed(ActionEvent e) if( voron > 0 ) voron = voron - 1; countLabel.setText("Crows:" + voron); //Сообщаем приложению, что количество ворон изменилось > > >);
updateCrowCounter [ править ]
private void updateCrowCounter() countLabel.setText("Crows:" + voron); >
Конечный результат [ править ]
«Hello World!» for Microsoft Windows
It’s time to write your first application! The following instructions are for users of Windows Vista, Windows 7, and Windows 8. Instructions for other platforms are in «Hello World!» for Solaris OS, Linux, and Mac OS X and «Hello World!» for the NetBeans IDE.
A Checklist
To write your first program, you’ll need:
- The Java SE Development Kit 8 (JDK 8) You can download the Windows version now. (Make sure you download the JDK, not the JRE.) Consult the installation instructions.
- A text editor In this example, we’ll use Notepad, a simple editor included with the Windows platforms. You can easily adapt these instructions if you use a different text editor.
These two items are all you’ll need to write your first application.
Creating Your First Application
Your first application, HelloWorldApp , will simply display the greeting «Hello world!». To create this program, you will:
- Create a source file A source file contains code, written in the Java programming language, that you and other programmers can understand. You can use any text editor to create and edit source files.
- Compile the source file into a .class file The Java programming language compiler ( javac ) takes your source file and translates its text into instructions that the Java virtual machine can understand. The instructions contained within this file are known as bytecodes.
- Run the program The Java application launcher tool ( java ) uses the Java virtual machine to run your application.
Create a Source File
To create a source file, you have two options:
- You can save the file HelloWorldApp.java on your computer and avoid a lot of typing. Then, you can go straight to Compile the Source File into a .class File.
- Or, you can use the following (longer) instructions.
First, start your editor. You can launch the Notepad editor from the Start menu by selecting Programs > Accessories > Notepad. In a new document, type in the following code:
/** * The HelloWorldApp class implements an application that * simply prints "Hello World!" to standard output. */ class HelloWorldApp < public static void main(String[] args) < System.out.println("Hello World!"); // Display the string. >> Be Careful When You Type
Note: Type all code, commands, and file names exactly as shown. Both the compiler ( javac ) and launcher ( java ) are case-sensitive, so you must capitalize consistently.
HelloWorldApp is not the same as helloworldapp .
Save the code in a file with the name HelloWorldApp.java . To do this in Notepad, first choose the File > Save As . menu item. Then, in the Save As dialog box:
- Using the Save in combo box, specify the folder (directory) where you’ll save your file. In this example, the directory is myapplication on the C drive.
- In the File name text field, type «HelloWorldApp.java» , without the quotation marks.
- From the Save as type combo box, choose Text Documents (*.txt).
- In the Encoding combo box, leave the encoding as ANSI.
When you’re finished, the dialog box should look like this .
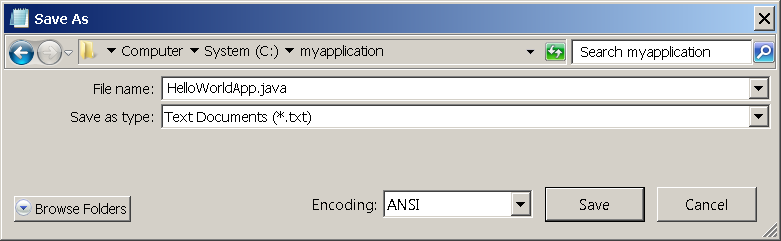
The Save As dialog just before you click Save.
Now click Save, and exit Notepad.
Compile the Source File into a .class File
Bring up a shell, or «command,» window. You can do this from the Start menu by choosing Run. and then entering cmd . The shell window should look similar to the following figure .
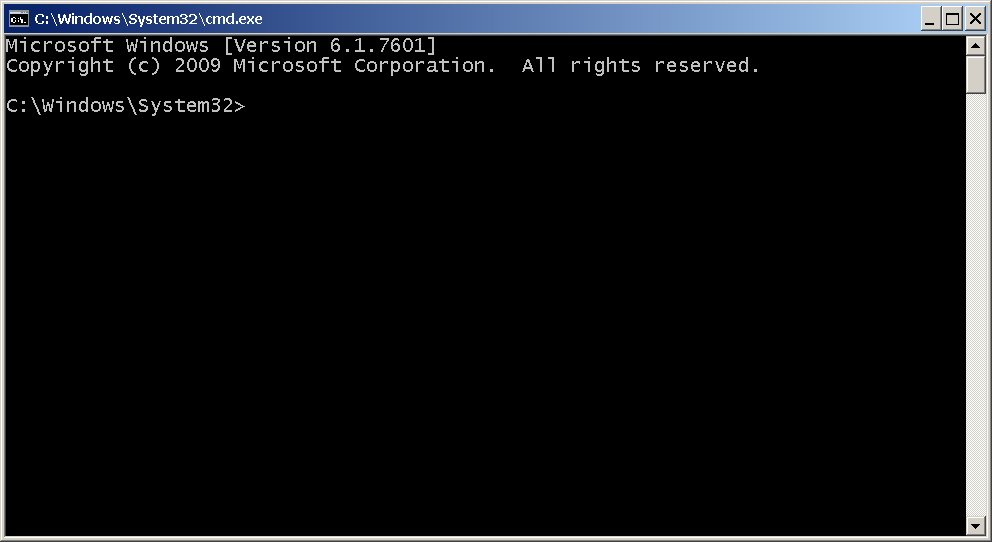
The prompt shows your current directory. When you bring up the prompt, your current directory is usually your home directory for Windows XP (as shown in the preceding figure.
To compile your source file, change your current directory to the directory where your file is located. For example, if your source directory is myapplication on the C drive, type the following command at the prompt and press Enter:
Now the prompt should change to C:\myapplication> .
To change to a directory on a different drive, you must type an extra command: the name of the drive. For example, to change to the myapplication directory on the D drive, you must enter D: , as follows:
C:\>D: D:\>cd myapplication D:\myapplication>
If you enter dir at the prompt, you should see your source file, as follows:
C:\>cd myapplication C:\myapplication>dir Volume in drive C is System Volume Serial Number is F2E8-C8CC Directory of C:\myapplication 2014-04-24 01:34 PM . 2014-04-24 01:34 PM .. 2014-04-24 01:34 PM 267 HelloWorldApp.java 1 File(s) 267 bytes 2 Dir(s) 93,297,991,680 bytes free C:\myapplication>
Now you are ready to compile. At the prompt, type the following command and press Enter.
The compiler has generated a bytecode file, HelloWorldApp.class . At the prompt, type dir to see the new file that was generated as follows:
C:\myapplication>javac HelloWorldApp.java C:\myapplication>dir Volume in drive C is System Volume Serial Number is F2E8-C8CC Directory of C:\myapplication 2014-04-24 02:07 PM . 2014-04-24 02:07 PM .. 2014-04-24 02:07 PM 432 HelloWorldApp.class 2014-04-24 01:34 PM 267 HelloWorldApp.java 2 File(s) 699 bytes 2 Dir(s) 93,298,032,640 bytes free C:\myapplication>
Now that you have a .class file, you can run your program.
If you encounter problems with the instructions in this step, consult the Common Problems (and Their Solutions).
Run the Program
In the same directory, enter the following command at the prompt:
You should see the following on your screen:
C:\myapplication>java -cp . HelloWorldApp Hello World! C:\myapplication>
Congratulations! Your program works!
If you encounter problems with the instructions in this step, consult the Common Problems (and Their Solutions).
Previous page: «Hello World!» for the NetBeans IDE
Next page: «Hello World!» for Solaris OS, Linux, and Mac OS X
Шаг №45. Создаем оконное приложение на Java для логгера

Всем привет. Как Вы помните в предыдущей статье мы перешли на язык Java для написания небольших приложений по обработки данных, на компьютере, полученных с устройств на микроконтроллере. Также мы условились, что дальнейший материал требует знание начального уровня java. Если его нет, то не расстраивайтесь, самые основы похожи на Си, но объектно-ориентированную часть придется подучить. Литературу я приводил в предыдущей статье.
Итак приступим. Сегодня мы создадим оконное приложение (кнопка и текстовое поле) используя фреймворк awt. Также добавим код обработки событий по нажатию на кнопку и закрытия окна. Хочется сказать о том что вариантов написания кода — много, и с помощью какой библиотеки и как создавать приложение решать только Вам. В дальнейшем мы будем работать с данным языком проектируя Android-приложение под умный дом. Ниже приведен код, который выполняет выше описанную задачу.
import java.awt.*; /*Подключаем библиотеку для создания апплетов и независимых
приложений с графическим интерфейсом.*/
import java.awt.event.ActionEvent;
import java.awt.event.ActionListener;
import java.awt.event.WindowAdapter;
import java.awt.event.WindowEvent;
public class logWindow extends Frame < /*Создаем подкласс logWindow класса Frame*/
public logWindow () /*Конструктор класса*/
<
super («Логгер»); /*Вызываем конструктор суперкласса и передаем ему параметр, в данном случае имя программы*/
setSize (200,200); /*Метод суперкласса для установкиразмеров окна, в пикселях*/
//Создаем объекты
Button myButton = new Button («Мониторинг»); /*Создаем кнопку и надпись на ней*/
Label myLabel = new Label («Данные логгера»); / Создаем текстовое поле и надпись в нем*/
add (myLabel, BorderLayout.NORTH); /* С помощью менеджера размещения, располагаем текстовое поле в северной части окна*/
add (myButton, BorderLayout.SOUTH); /*Кнопку в южной части*/
myButton.addActionListener (new ActionListener () < /*Для кнопки выбираем событие слушателя, и создаем новое событие в скобках.*/
public void actionPerformed (ActionEvent e) <
myLabel.setText («Мониторинг»); /*Выполняется действие, т.е. при нажатии на кнопку в поле выводится сообщение «Мониторинг» */
>
>);
>
public static void main (String[] args) < //Точка входа программы
logWindow log = new logWindow (); //Создаем объект класса
log.setVisible (true); //Устанавливаем видимость окна
/*Наше окно запускается и отображается, при нажатии на кнопку меняется надпись в текстовом поле. Что бы закрыть окно необходимо добавить код обработки события, который работает следующим образом: мы вызываем для объекта log метод addWindowListener для того, чтобы назначить слушателя оконных событий. В качестве параметра создаем объект абстрактного класса WindowAdapter, в котором создаем класс и переопределяем метод для обработки события закрытия окна — dispose.*/
log.addWindowListener (new WindowAdapter () <
public void windowClosing (WindowEvent e) < // в качестве аргумента передаем событие
e.getWindow ().dispose (); // уничтожает объект Frame
>
>);
>
>

Слева на рисунке внешний вид нашего простого оконного приложения на java. На данный момент нас устроит простое меню с одной кнопкой для дальнейших экспериментов. В следующей статье мы научимся мониторить COM — порт, для приема информации с наших устройств, в данном случае такой же строки, которую мы вывели на терминал в статье №42.
Выше использовалась библиотека awt для построения графического интерфейса. Н иже пример разработки приложения с использованием JavaFX и интеграцию в него в качестве FrontEnd SVG c javascript — ом. Скрины приложения ниже. Полный код по ссылке на GitHub :

Справа скрин анимированного splash screen for java application. Использование заставки с применением JavaFX , SVG c javascript — ом.
Ниже скрин самого приложения с графическим интерфейсом. Описание программы в статье Java Collection for diagnostic software. Step №109 . Полный код по ссылке выше.