- Display html data from database as flash?
- 3 Answers 3
- Создание системы Flash Flash Login с использованием PHP и MySQL – часть 1
- Окончательный результат предварительного просмотра
- Шаг 1: Получить MAMP или другой локальный сервер
- Шаг 2: Импорт
- Шаг 3: Настройка класса документа AS3
- Шаг 4: Создание кода базового класса
- Создание системы Flash Flash Login с использованием PHP и MySQL – часть 2
- Шаг 1: Настройка класса документа
- Шаг 2. Настройка структуры кода
- Шаг 3: Создайте интерфейс формы реестра
- Шаг 4. Настройка полей формы
- Шаг 5: Создать кнопку регистрации
- Шаг 6: Создайте текст результата
- Шаг 7: Получить активы из части 1
- Шаг 8. Создание настроек объекта – кнопка «Регистрация»
- Шаг 9: Настройка кнопки «Регистрация»
- Шаг 10: Проверьте форму
- php — Display html data from database as flash?
- Answer
- Solution:
- Answer
- Solution:
- Answer
- Solution:
- Create a Flash Login System Using PHP and MySQL – Part 2
- Step 1: Setup Document Class
- Step 2: Setup Code Structure
- Step 3: Create The Registry Form Interface
- Step 4: Setup The Form Fields
- Step 5: Create The Register Button
- Step 6: Create The Result Text
- Step 7: Get Assets From Part 1
- Step 8: Create Object Settings — Register Button
- Step 9: Setting up The Register Button
- Step 10: Validate the Form
Display html data from database as flash?
I want to display html(text) data into flash .Is there any way to do this dynamically? I am able to do this by creating an external xml file but how is it possible to do the same job without creating the external xml file using php and database? thnks..
3 Answers 3
Flash is a client side script and to access Database you need to use server side scripting which is PHP. Follow these steps:
- Use PHP to connect to DB
- Obtain Data or Store Data using MVC or simple PHP file whichever you are comfotable with.
- Obtain Data in XML format or Store it by parsing from a POST variable as you do in HTML forms.
- Use flash to talk to PHP rather than direct Database.
If you are worried about direct access to PHP then find a way to encrypt your call to PHP so it only responds from flash and not from any other headers. Maybe someone else can put some more details in for you.
Headers can be easily spoofed, however I don’t see any problem in having flash talk directly to PHP. I would be more scared if the flash applet itself contained the credentials to talk directly to the DB somehow. PHP is done server-side.
An alternative to having Flash contact the a php page to get the text is to have the server generate the flash dynamically (providing it is not too complex) using, for example, the Ming or SWF Libraries.
You also have the option to use some of Flash’s more advanced built-in remoting tools. If you are running PHP on your back-end, for instance, you could set up AMFPHP or ZendAMF. What this does is open a binary socket connection between the server and your client, and if you set it up right then you can alias remote classes to local classes and vice versa. So for instance you could define a «UserModel» class in Flash and a UserModel class in PHP, and then tell Flash to treat them as aliases of each other.
What this basically lets you do is make remote server calls as though they were local method calls.
Every major Flash project I’ve been on has used this approach. It’s much faster than XML, you don’t need to worry about parsing XML or JSON, and you can make remote method calls nicely. This works best if coupled with some sort of MVCS framework like RobotLegs, because then you can abstract away the server calls entirely — but that may be more complex than what you need, depending on what you’re doing.
But, the long and short of it is that Flash can’t talk to a database directly.
Создание системы Flash Flash Login с использованием PHP и MySQL – часть 1
Из этого туториала Вы узнаете, как создать простую, но профессиональную систему входа в систему Flash, используя три разных языка программирования; AS3, PHP и MYSQL. Расширенные разделы, такие как логика приложения, интеграция PHP и MYSQL с Flash, станут нашими основными темами для обсуждения. Давайте застрять в!
Окончательный результат предварительного просмотра
Давайте посмотрим на конечный результат, просто нажмите кнопку демонстрации в верхней части этого урока.
Попробуйте войти в систему, используя имя пользователя admin и пароль password , или имя пользователя test1 и пароль password1 . Вы увидите простой фрагмент текста, соответствующий этому пользователю.
В этой части мы получим действительный вход в систему, а во второй части мы позволим пользователям зарегистрироваться через SWF.
Шаг 1: Получить MAMP или другой локальный сервер
Если у вас нет веб-сервера, который поддерживает базы данных mysql и php, загрузите MAMP (для Mac), WAMP (для Windows) или другой локальный сервер.
MAMP – это локальный сервер с открытым исходным кодом, который позволяет запускать php, создавать и хранить данные в базах данных mysql с локального жесткого диска. MAMP автоматически создает сервер при загрузке, поэтому я рекомендую использовать его на других локальных серверах.
Вы также можете использовать свой веб-сервер, если он поддерживает mysql и php.
Установите phpMyAdmin на сервер, мы будем использовать его позже.
Шаг 2: Импорт
Вот вещи, которые вам понадобятся для создания конечного продукта.
Теперь у нас есть все, что нам нужно, пришло время настроить наш класс документов.
Шаг 3: Настройка класса документа AS3
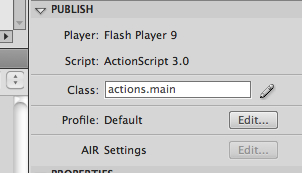
Создайте новый файл .as и AS3 .fla. Сохраните файл .as как main.as в новой папке, которая называется action.
Сохраните файл fla в корневой папке нашего приложения. Теперь в нашем .fla файле введите имя основного класса (и classpath) на панели свойств, как указано ниже:
Шаг 4: Создание кода базового класса
Откройте файл main.as и добавьте следующий код:
Создание системы Flash Flash Login с использованием PHP и MySQL – часть 2
В первой части мы создали систему входа в систему, чтобы пользователи могли вводить свои данные. В этом уроке мы создадим форму реестра, которая позволит пользователям регистрироваться. Затем они добавят свои данные в базу данных, после чего они смогут войти в систему.
Шаг 1: Настройка класса документа
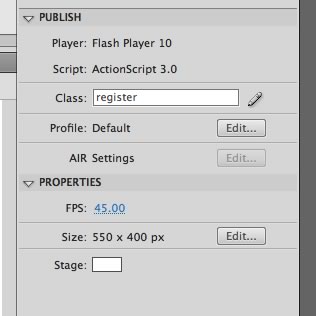
Во-первых, давайте настроим наш класс документа и файл Flash. Откройте новый файл Flash, затем назовите его register.fla . Затем создайте файл ActionScript и назовите его register.as
Затем введите register в текстовом поле класса на панели свойств.
Шаг 2. Настройка структуры кода
Теперь мы соединили наш документ с нашим кодом, нам нужно создать наш класс в файле as.
Шаг 3: Создайте интерфейс формы реестра
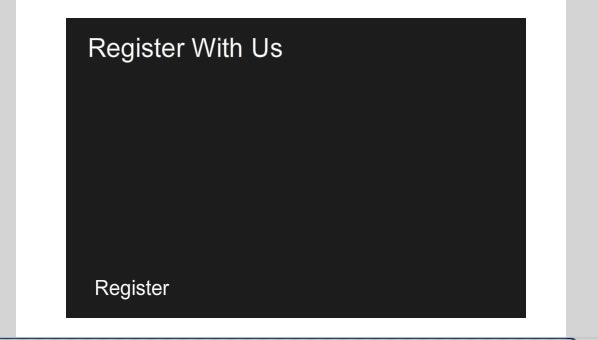
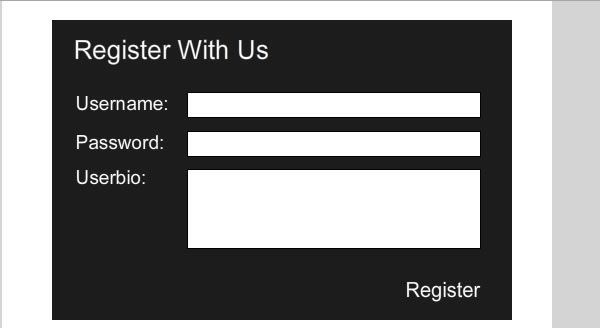
Нарисуйте прямоугольник с заливкой размером 460×300 пикселей и выберите цвет фона. Создайте заголовок – Зарегистрируйтесь у нас – и текстовое поле – Зарегистрируйтесь.
Ваш интерфейс должен выглядеть так:
Шаг 4. Настройка полей формы
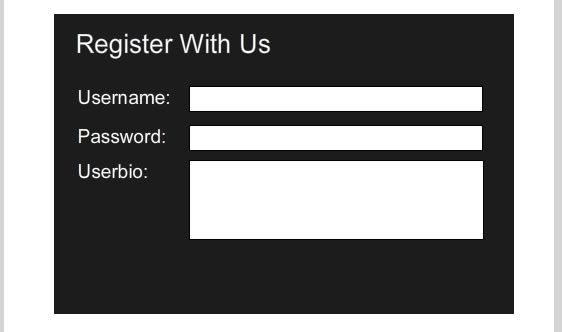
Создайте три поля ввода текста с именами экземпляров username_text , password_text и userbio_text .
Шаг 5: Создать кнопку регистрации
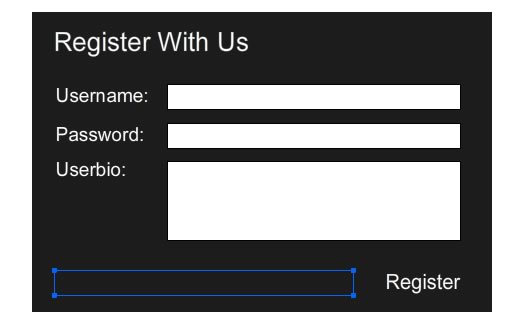
Щелкните по текстовому полю «Зарегистрировать», которое вы создали на шаге 3, и преобразуйте его в фрагмент ролика. Дайте ему имя экземпляра register_button .
К настоящему времени ваш интерфейс должен выглядеть так:
Шаг 6: Создайте текст результата
Создайте новое динамическое текстовое поле рядом с регистром и result_text ему имя экземпляра result_text . Мы завершили все объекты, которые нам нужны. Наш готовый интерфейс должен выглядеть следующим образом.
Шаг 7: Получить активы из части 1
Чтобы сэкономить ваше время, я не буду описывать соединение в этой части, поскольку вы можете узнать об этом в части 1. Получите файл connect.php из папки php в части 1. Я также включил его в zip-загрузку исходного кода для части 2.
Это все, что нам нужно из первой части. Теперь давайте создадим код ActionScript.
Шаг 8. Создание настроек объекта – кнопка «Регистрация»
Сначала нам нужно дать кнопке «регистр» курсор при наведении курсора. Мы делаем это с помощью свойства buttonMode .
Это все, что нам нужно сделать, чтобы отформатировать нашу кнопку регистрации.
Шаг 9: Настройка кнопки «Регистрация»
Теперь нам нужна кнопка регистрации, чтобы запустить функцию, которая проверяет ввод пользователя. Мы можем сделать это, добавив прослушиватель событий и запустив функцию, когда пользователь нажимает кнопку.
Шаг 10: Проверьте форму
Прежде чем пользователь сможет отправить форму, он должен заполнить все поля. Не забудьте импортировать классы flash.events.* файл AS. Следите за комментариями …
php — Display html data from database as flash?

I want to display html(text) data into flash .Is there any way to do this dynamically? I am able to do this by creating an external xml file but how is it possible to do the same job without creating the external xml file using php and database? thnks..


Answer
Solution:
Flash is a client side script and to access Database you need to use server side scripting which is PHP. Follow these steps:
- Use PHP to connect to DB
- Obtain Data or Store Data using MVC or simple PHP file whichever you are comfotable with.
- Obtain Data in XML format or Store it by parsing from a POST variable as you do in HTML forms.
- Use flash to talk to PHP rather than direct Database.
If you are worried about direct access to PHP then find a way to encrypt your call to PHP so it only responds from flash and not from any other headers. Maybe someone else can put some more details in for you.
Answer
Solution:
An alternative to having Flash contact the a php page to get the text is to have the server generate the flash dynamically (providing it is not too complex) using, for example, the Ming or SWF Libraries.
Answer
Solution:
You also have the option to use some of Flash’s more advanced built-in remoting tools. If you are running PHP on your back-end, for instance, you could set up AMFPHP or ZendAMF. What this does is open a binary socket connection between the server and your client, and if you set it up right then you can alias remote classes to local classes and vice versa. So for instance you could define a «UserModel» class in Flash and a UserModel class in PHP, and then tell Flash to treat them as aliases of each other.
What this basically lets you do is make remote server calls as though they were local method calls.
Every major Flash project I’ve been on has used this approach. It’s much faster than XML, you don’t need to worry about parsing XML or JSON, and you can make remote method calls nicely. This works best if coupled with some sort of MVCS framework like RobotLegs, because then you can abstract away the server calls entirely — but that may be more complex than what you need, depending on what you’re doing.
But, the long and short of it is that Flash can’t talk to a database directly.
Create a Flash Login System Using PHP and MySQL – Part 2
In Part 1 we created the front end login system for users to enter their details. In this tutorial we will create a registry form that will allow users to register. This will then add their details to the database, after which they will be able to login.
Step 1: Setup Document Class
Firstly, let’s setup our document class and Flash file. Open a new Flash file, then call it register.fla . Next, create an actionscript file and call it register.as
Then type register in the class text field in the Properties panel.

Step 2: Setup Code Structure
Now we have connected our document to our code, we need to create our class in the as file.
public class register extends MovieClip
public function register ():void
Step 3: Create The Registry Form Interface
Draw a 460x300px filled rectangle and choose what background color you like. Create the title — Register With Us — and a text field — Register.
Your interface should look like this:


Step 4: Setup The Form Fields
Create three input text fields with the instance names of username_text , password_text and userbio_text .


Step 5: Create The Register Button
Click the text field with «Register» that you created in Step 3 and convert it to a movie clip. Give it an instance name of register_button .
By now your interface should look like this:


Step 6: Create The Result Text
Create a new dynamic textfield next to the register and give it an instance name of result_text . We have completed all the objects we need. Our finished interface should look like this.


Step 7: Get Assets From Part 1
To save you time I will not cover the connection in this Part as you can learn that in Part 1. Get the connect.php from the php folder in Part 1. I have also included it in the Part 2 Source zip download.
That’s all we need from Part 1. Now let’s create the actionscript code.
Step 8: Create Object Settings — Register Button
First we need to give the register button a rollover cursor. We do this by using the buttonMode property.
register_button.buttonMode = true;
That is all we need to do to format our register button.
Step 9: Setting up The Register Button
We now need our register button to run a function that validates the input of a user. We can do this by adding an event listener and triggering the function when the user presses the button.
when register button is pressed then the checkForm function runs. register_button.addEventListener(MouseEvent.MOUSE_DOWN, checkForm);
Step 10: Validate the Form
Before the user can submit the form they have to fill in all the fields. Remember to import the flash.events.* classes into your AS file. Follow the comments.
public function checkForm (e:MouseEvent):void
If all of the fields have more than one character sendForm() inits. If not then the result_text will tell them to fill them all in. if (username_text.text != "" && password_text.text != "" && userbio_text.text != "")