- User management
- Creating a new user
- Editing an existing user
- Deleting a user
- Assigning privileges to user for a specific database
- Configurable menus and user groups
- How to Create New WordPress Admin User via phpMyAdmin
- Prerequisites
- Create WordPress Admin User via phpMyAdmin
- Add WordPress Admin User with phpMyAdmin
- Add WordPress Admin
- Additional Notes
User management
User management is the process of controlling which users are allowed to connect to the MySQL server and what permissions they have on each database. phpMyAdmin does not handle user management, rather it passes the username and password on to MySQL, which then determines whether a user is permitted to perform a particular action. Within phpMyAdmin, administrators have full control over creating users, viewing and editing privileges for existing users, and removing users.
Within phpMyAdmin, user management is controlled via the User accounts tab from the main page. Users can be created, edited, and removed.
Creating a new user
To create a new user, click the Add user account link near the bottom of the User accounts page (you must be a “superuser”, e.g., user “root”). Use the textboxes and drop-downs to configure the user to your particular needs. You can then select whether to create a database for that user and grant specific global privileges. Once you’ve created the user (by clicking Go), you can define that user’s permissions on a specific database (don’t grant global privileges in that case). In general, users do not need any global privileges (other than USAGE), only permissions for their specific database.
Editing an existing user
To edit an existing user, simply click the pencil icon to the right of that user in the User accounts page. You can then edit their global- and database-specific privileges, change their password, or even copy those privileges to a new user.
Deleting a user
From the User accounts page, check the checkbox for the user you wish to remove, select whether or not to also remove any databases of the same name (if they exist), and click Go.
Assigning privileges to user for a specific database
Users are assigned to databases by editing the user record (from the User accounts link on the home page). If you are creating a user specifically for a given table you will have to create the user first (with no global privileges) and then go back and edit that user to add the table and privileges for the individual table.
Configurable menus and user groups
By enabling $cfg[‘Servers’][$i][‘users’] and $cfg[‘Servers’][$i][‘usergroups’] you can customize what users will see in the phpMyAdmin navigation.
This feature only limits what a user sees, they are still able to use all the functions. So this can not be considered as a security limitation. Should you want to limit what users can do, use MySQL privileges to achieve that.
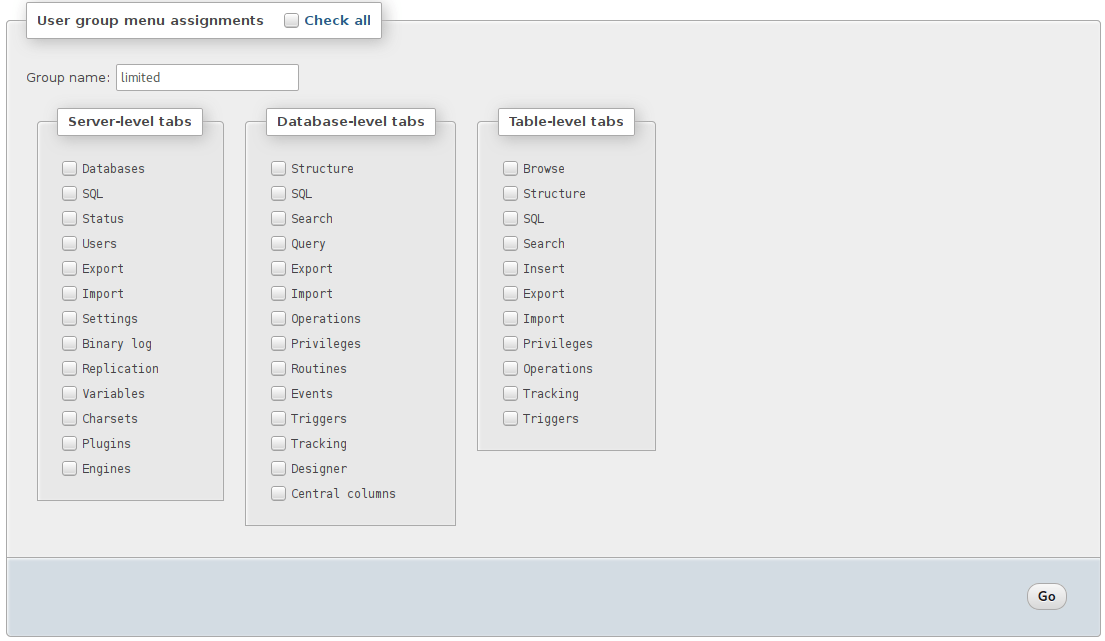
With this feature enabled, the User accounts management interface gains a second tab for managing User groups , where you can define what each group will view (see image below) and you can then assign each user to one of these groups. Users will be presented with a simplified user interface, which might be useful for inexperienced users who could be overwhelmed by all the features phpMyAdmin provides.
© Copyright 2012 — 2021, The phpMyAdmin devel team Revision a90c7970 .
How to Create New WordPress Admin User via phpMyAdmin
There are several reasons why you would want to have a new WordPress Admin user to manage and customize your site in relation to privileged actions related to the site’s layout, appearance, and content.
The most common reason is that you underestimated what WordPress could achieve and now you are dealing with impressive user web traffic towards your site.
For this reason, you will need more users with privileged Admin roles to manage other users and content published through the WordPress site. A second reason to create a new WordPress admin user is that the role of the previously active Admin user has expired and a new privileged user needs to take charge.
Prerequisites
You are encouraged to access the phpMyAdmin dashboard with an alternate MySQL/MariaDB database user credential instead of the root MySQL/MariaDB user.
You can create this alternate privileged user by referencing the following command sequences in the server if you have access.
$ mysql -u root -p MariaDB ([none])> CREATE USER 'linuxshelltips_star'@'localhost' IDENTIFIED BY 'Pa55word'; MariaDB ([none])> GRANT ALL PRIVILEGES ON *.* TO 'linuxshelltips_star'@'localhost' WITH GRANT OPTION;
Create WordPress Admin User via phpMyAdmin
The URL syntax for accessing the phpMyAdmin site looks like the following:
http://domain_name_or_ip_address/phpmyadmin
Since am on localhost, I will access the admin site with the following URL.
Key in your dedicated database user login credentials and log in to the phpMyAdmin dashboard.
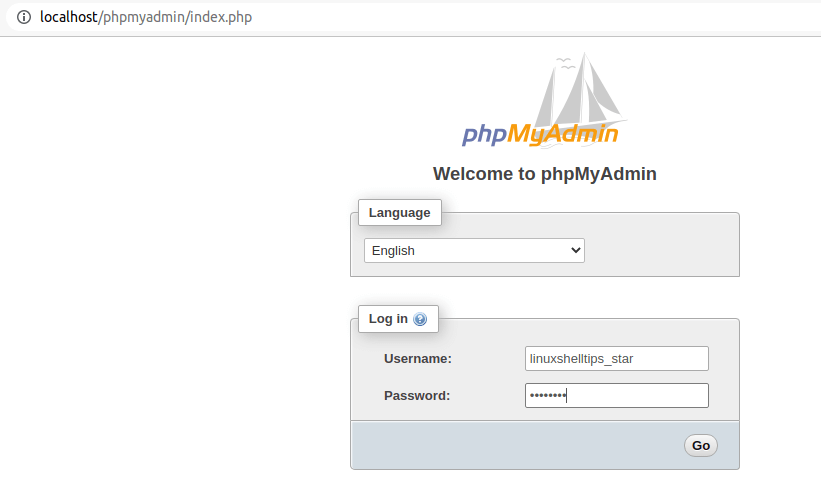
You should be able to see the main phpMyAdmin site’s dashboard area.

On the left dashboard panel of the phpMyAdmin interface, you will see a list of MySQL/MariaDB databases that you are allowed to manage. Trace the one associated with your WordPress site and click on it.
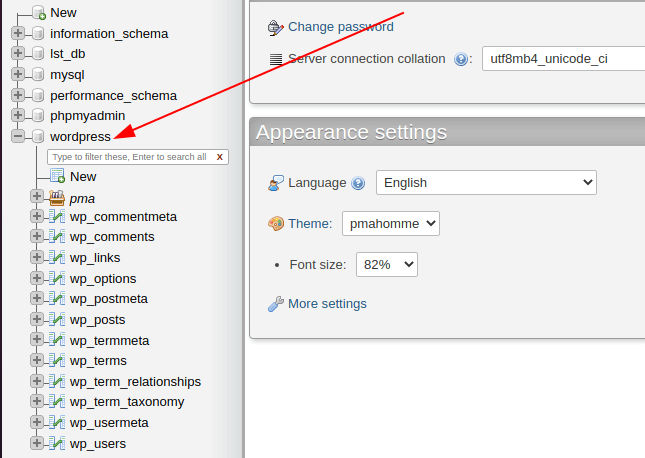
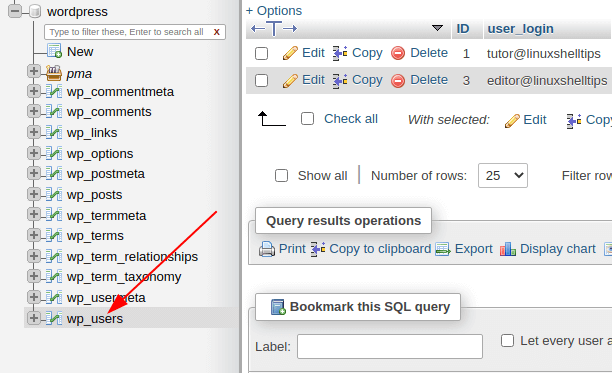
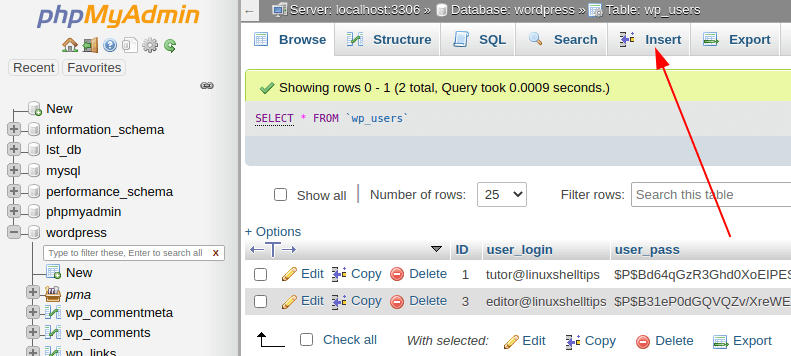
The wordpress database opens a list of linked database tables associated with your WordPress site. Find the table wp_users and click on it. It is the table that holds all the users of your WordPress site. Therefore, if we are going to add a new Admin user entry, the user’s associated credentials will reside on this table.
We are now going to use the SQL insert function to add new user details to this wp_users table. Locate this insert tab and click on it.
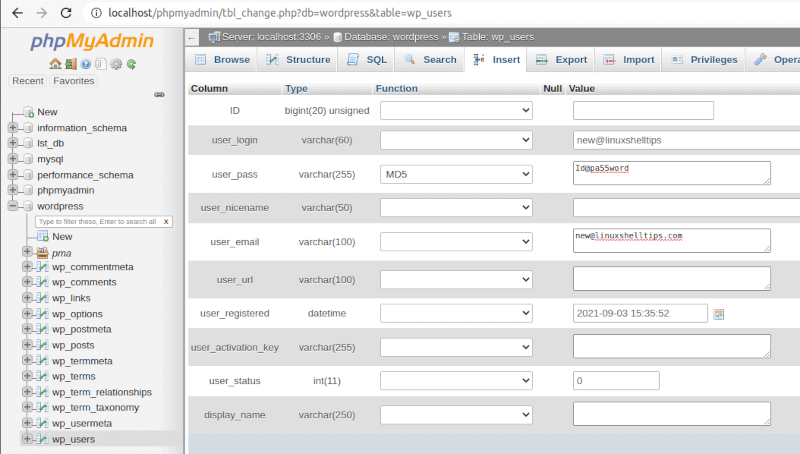
You will be met with several database table fields that you need to fill out.

Note that you do not need to fill out all these database table fields. The five important database table fields to consider are:
- user_login: key in the username for the new admin user.
- user_pass: key in the password credential for the new admin user. Should be under MD5.
- user_email: key in the email address associated with the new admin user.
- user_registered: key in the user registration date.
- user_status: It is usually auto-populated with the value 0.
Let us populate the wp_users database table while keeping these key user details in mind.
Afterward, click on [Go] to execute this SQL insert query.
INSERT INTO wordpress.wp_users (user_login,user_pass,user_nicename,user_email,user_url,user_registered,user_activation_key,user_status,display_name) VALUES ('[email protected]',MD5('[email protected]'),'','[email protected]','','2021-09-03 15:35:52','',0,''); 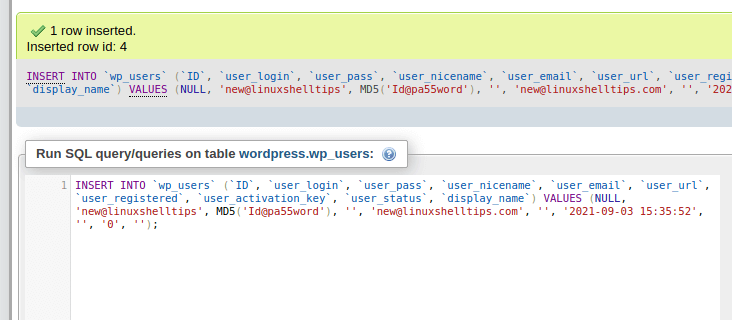
Go back to the wp_users database table and note the ID assigned to this new user.
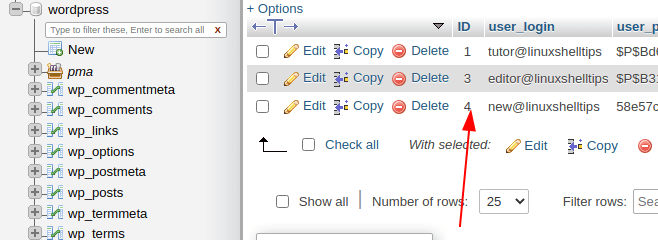
The associated user ID is 4. So far, this WordPress user has no Admin privileges. To make this user an Admin, we need to visit the wp_usermeta table above the wp_users table. This table holds key values to transforming a normal WordPress user into an Admin user.
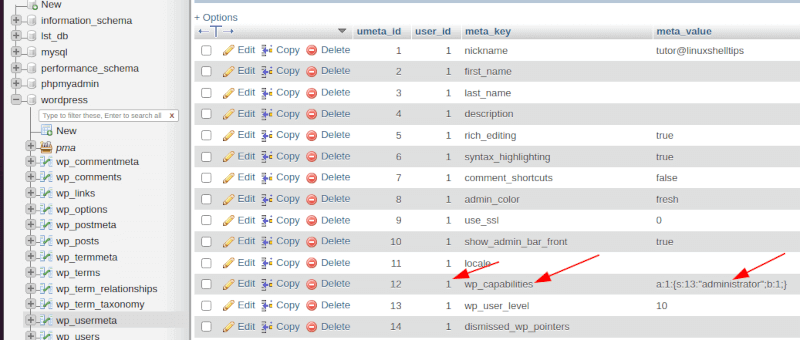
Take note of the meta_key column entry wp_capabilities and meta_value column entry a:1: .
The meta_value column entry might be different on your end. These table entries make the above WordPress user with user_id 1; where user_id , an admin user.
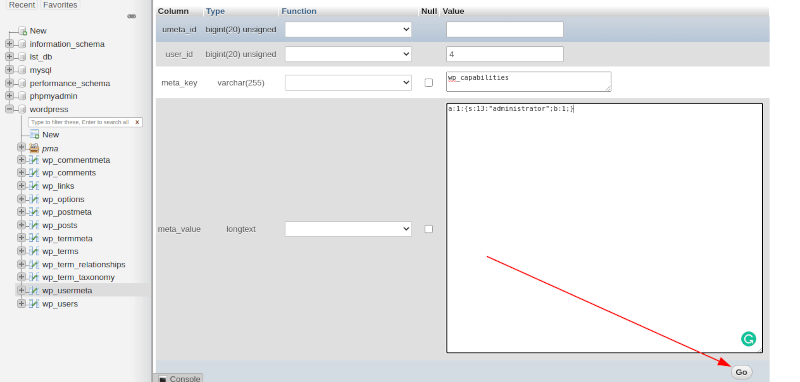
To make our user [email protected] an admin, we will insert this user’s ID value alongside the meta_key column entry wp_capabilities and meta_value column entry a:1: to the wp_usermeta table.
user_id: 4 meta_key: wp_capabilities meta_value: a:1:
The meta_value could be different on your end, remember to check and Hit on [Go].
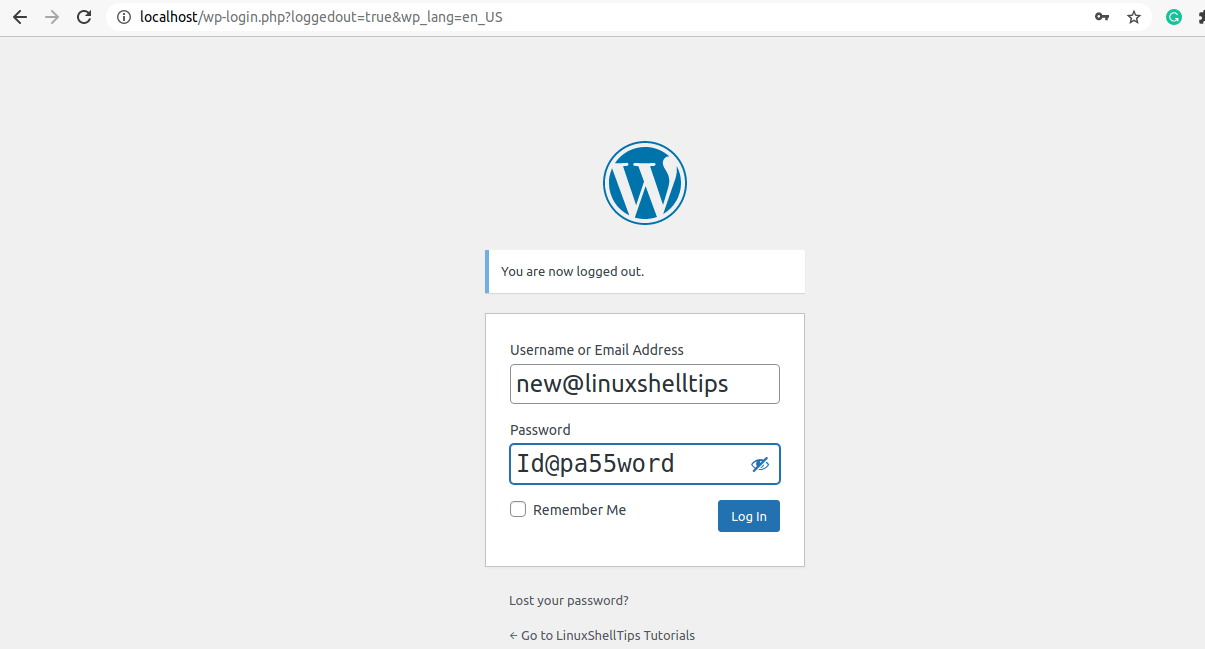
Time to log in to your WordPress site with the new admin user.
The admin interface login was a success!
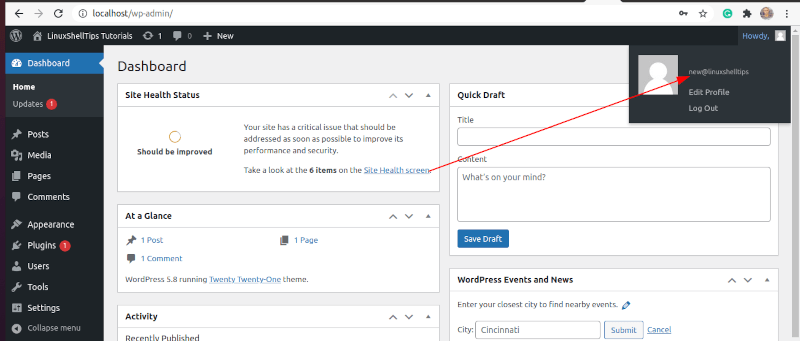
With this tutorial, you can now easily create an extra admin user to help you manage your cumulative WordPress site tasks. You do not have to worry about troubleshooting typos like the case of using MySQL command-line to create an admin user.
Add WordPress Admin User with phpMyAdmin
You can create a new WordPress admin user directly from the database. Use this method if you need to add a new user to the site without having to sign in to the WordPress dashboard.
Add WordPress Admin
- Open the User Portal
- Select the Environment name to edit
- Click phpMyAdmin at the top
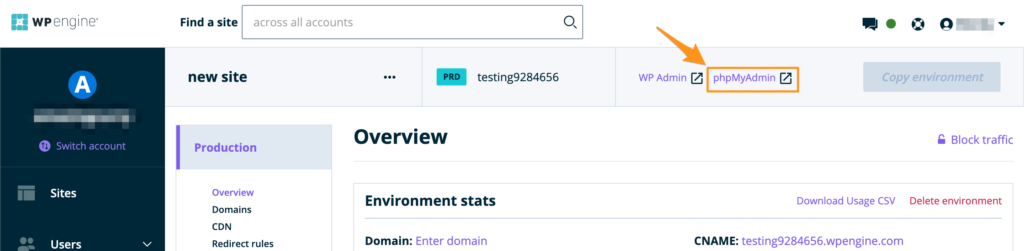
- Select your database
- wp_environment — Primary database for this environment
- Select the wp_users table
- If you have a custom database prefix this will instead be yourprefix_users. Be sure to take this into account in later steps as well.

- If you have a custom database prefix this will instead be yourprefix_users. Be sure to take this into account in later steps as well.
- Click Insert at the top
- Fill out the required new user data
- ID — Enter any available ID number. You’ll need to know this ID number later!
- user_login — The username for this user.
- user_pass — The raw password the user will login with.
- NOTE: The function dropdown to the left must be set to MD5 or the password WILL NOT WORK.
- user_nicename — The author slug or name (EX: your-name).
- user_email — The email address associated with this user.
- user_status — Set this to 0
- display_name — The display name for the user (EX: Your Name)
- Click Go at the bottom
- Click Go again on the query page
- You should get a green check mark and success banner.
- If you get a red error at the bottom the user has not been inserted. Follow the error message to correct the issue until you are successful.
- On the left hand menu click wp_usermeta
- Click Insert at the top
- Fill out the following required fields for user capabilities:
- user_id — Same ID from Step 8
- meta_key – wp_capabilities
- meta_value — a:1:
- Click Go at the bottom
- Click Go again on the query
- You should get a green check mark and success banner.
- If you get a red error at the bottom the user has not be inserted. Follow the error message to correct the issue until you get a success.
- Click Insert at the top again
- user_id – Same ID from step 8
- meta_key – wp_user_level
- meta_value – 10
- Click Go at the bottom


You should now be able to access the site with your new admin user. If you have issues recheck that each step is done exactly as described.
If you have a custom database prefix, ensure you’ve done each step in the respective custom prefix table name.
Additional Notes
If your newly created user is unable to use the visual editor within WordPress after creation, ensure the visual editor is not disabled. This can be set in two ways:
From the admin dashboard:
- Login to the WordPress admin dashboard with your new user
- At the top right, click your username
- Click Edit my profile
- Ensure Disable the visual editor when writing is not checked
Or, from the database: