- nebulak / cert-curl.php
- Authenticating with X.509 client certificates
- Why should I use X.509 authentication?
- Configuring the server
- Creating a certification authority
- Configuring the client
- Requesting resources with a client certificate
- X.509 authentication in Symfony
- X.509 authentication in PHP
- Conclusion
- whois VeeWee
- Hi there!
- Как прочитать SSL сертификат из PHP
- Результат:
- Вывод основных данных
nebulak / cert-curl.php
This file contains bidirectional Unicode text that may be interpreted or compiled differently than what appears below. To review, open the file in an editor that reveals hidden Unicode characters. Learn more about bidirectional Unicode characters
| //source: http://www.zedwood.com/article/php-curl-connect-with-ssl-client-certificate |
| class SecureRequest |
| private m_publicCertPath; //»/public_cert.pem» |
| private m_privateCertPath; //»/private.pem») |
| private m_caInfoPAth; //»/etc/ssl/certs/ca-certificates.crt» |
| public function init ( $ publicCertPath , $ privateCertPath , $ caInfoPath ) |
| $ this -> m_publicCertPath = $ publicCertPAth ; |
| $ this -> m_privateCertPath = $ privateCertPath ; |
| $ this -> m_caInfoPath = $ caInfoPath ; |
| > |
| public function post ( $ url , $ data ) |
| return $ this -> sendRequest (» POST «, $ url , $ data ); |
| > |
| public function get ( $ url , $ data ) |
| $ queryData = http_build_query( $ data ); |
| $ urlWithData = $ url . ‘?’ . $ queryData ; |
| return $ this -> sendRequest (» GET «, $ urlWithData , array ()); |
| > |
| private function sendRequest ( $ method , $ url , $ data ) |
| //TODO: enforce https://-url |
| //$data = array(‘key’=>’value’); |
| $ ch = curl_init(); |
| curl_setopt( $ ch , CURLOPT_URL , $ url ); |
| curl_setopt( $ ch , CURLOPT_PORT , 443 ); |
| curl_setopt( $ ch , CURLOPT_VERBOSE , 0 ); |
| curl_setopt( $ ch , CURLOPT_HEADER , 0 ); |
| curl_setopt( $ ch , CURLOPT_SSLCERT , $ this -> m_publicCertPath ); |
| curl_setopt( $ ch , CURLOPT_SSLKEY , $ this -> m_privateCertPath ); |
| curl_setopt( $ ch , CURLOPT_CAINFO , $ this -> m_caInfoPath ); |
| curl_setopt( $ ch , CURLOPT_SSL_VERIFYPEER , 1 ); |
| curl_setopt( $ ch , CURLOPT_RETURNTRANSFER , 1 ); |
| if ( strtoupper( $ method ) == » POST » ) |
| curl_setopt( $ ch , CURLOPT_POST , 1 ); |
| curl_setopt( $ ch , CURLOPT_POSTFIELDS , http_build_query( $ data )); |
| > |
| $ response = curl_exec( $ ch ); |
| //$info =curl_errno($ch)>0 ? array(«curl_error_».curl_errno($ch)=>curl_error($ch)) : curl_getinfo($ch); |
| //print_r($info); |
| curl_close( $ ch ); |
| return $ response ; |
| > |
| > |
| ?> |
Authenticating with X.509 client certificates

Last week, I was diving in different authentication systems for API’s. One of the better ways of authentication is through X.509 client certificates. This one is a bit is harder to set-up, but sure is secure, manageable and powerful. While searching for documentation on the subject, I was surprised there weren’t a lot of good articles. In this article, I will try to explain every step as easy as possible.
Why should I use X.509 authentication?
The main advantage is that the client is not sending a username or password to the server. This means that a man-in-the-middle attack is nearly impossible. It is much easier to steal a username/password login, for example by bruteforcing, then stealing a certificate. Because the certificate is signed, it is only possible to connect to the real server. It is possible to revoke and manage these certificates in an easy way.
Configuring the server
Client Certificate authentication can only be done while running HTTPS. So first of all, make sure the server is running HTTPS. This can be done with a self-signed or a signed certificate. Your apache VHost configuration should look more or less like this:
Now that you got HTTPS up and running, you should be able to browse to your application through HTTPS.
Creating a certification authority
A certification authority (CA) hands out a digital certificate in which the CA says that a public key in the certificate, belongs to the person, organization, server or entity that is mentioned in the certificate. In our example, this will be done based on the e-mail address that is provided in the certificate. The task of the CA is to control the identity of the issuer, so that the client that is using the certificates from the CA can be trusted.
First we will need to create the CA private key and certificate:
Note: Make sure to set the CN to a valid server domain. Otherwise this might result in exceptions!
Now that we have the CA key and certificate, we can register it to Apache to validate the client certificates:
As you can see the client certificate verification is optional. This will make it possible to add another type of authentication like basic authentication when there is nog client certificate. The verify depth is set to 1 so that it only accepts certificates signed by the configured CA. Finally, the StdEnvVars are registered so that the additional SSL server variables are available in PHP.
Configuring the client
Now that we got or server fully configured, it is time to create a client certificate. Following commands should be ran on the client machine to create a Certificate Signing Request (CSR):
Note: Make sure to set the CN to a valid server domain. Otherwise this might result in exceptions!
Note: The email field will be used to authenticate the user.
The CSR file is useless when it is not signed by the CA. So the logical next step is to transfer the certificate to the server and sign it with the CA.
The command above results in a useful client certificate. To make it easier to use the certificate, we will pack the client private key and the certificate in one file. This action should run on the client machine:
In above example the CSR was created on the client, to make it clear that the certificate + key should only be known by the client. However, it is perfectly possible to run all these commands on the server and send the pem file to the client who will be using the certificate. This means that the creation of the client certificate can be automated. You could create your own user interface to make the keys manageable per user of the application. This can for example be done with the built-in openssl extension of PHP. When the certification file is generated on the server, you should transfer this certificate in a trusted way. For example a download over HTTPS in the back-end of your application.
Requesting resources with a client certificate
Ok, we configured our server and requested a client certificate. Now how do I use this certificate to get my resources? The easiest way is the add the «-cert» attribute to the curl command. Since we are using Guzzle for HTTP requests, the client configuration will look like this:
As you can see it is possible to specify the certificate in the request.options part of the configuration. Another option is the ssl.certificate_authority. This one can be used to specify which CA that should be used. By default the built-in CA file is being used. You can choose to disable ssl verification or add your own ca file. For example, when using self-signed certificates, you can run following command:
This ca-file.pem file will contain the certificate of the certification authority and mark it as trusted. Now it can be used in the PHP configuration as followed:
X.509 authentication in Symfony
One of the less known features of Symfony is X.509 authentication. It can easily be configured with the default x509 authentication security adapter. The configuration is pretty easy:
As you can see HTTPS is enforced and authentication will try X.509 authentication by default. When a valid client certificate is found, Symfony will try to match the email that is configured inside the certificate with a user in the client_certificate user provider. In this case we are using an in-memory provider that links an e-mail to a security role.
X.509 authentication in PHP
That was easy! But how does it work? By adding the «SSLOptions +StdEnvVars» configuration in Apache, there are some additional «SSL_» environment variables available. These variables contain the email in the client certificate. For example:
Now that we have the e-mail, it is possible to search this email in the list of configured client_certificates. Symfony will throw an exception when the email can’t be found.
Conclusion
Even though it is a lot of work to get this type of authentication running, it sure is a powerful type of authentication. The users of your application will be able to connect to your application in an improved and secure way. It also comes in very handy for server to server communication in which you don’t always want to hardcode user credentials. Your customers will surely thank you for the extra effort you made!
whois VeeWee
Hi there!
Glad you made it to my blog. Please feel free to take a look around. You will find some interesting stuff, mostly about web development and PHP.
Still can’t get enough of me? Quick! Take a look at my Speakerdeck, Twitter, PHPC.Social, or Github account.
Как прочитать SSL сертификат из PHP
SSL сертификат можно получить с помощью контекста потоков (Stream Context), а разобрать его поможет функция openssl_x509_parse() . Если сертификат отсутствует или просрочен, то код ошибки и текст будет в переменных $err_no и $err_str .
$url = 'ssl://snipp.ru:443'; $context = stream_context_create( array( 'ssl' => array( 'capture_peer_cert' => true, 'verify_peer' => false, // Т.к. промежуточный сертификат может отсутствовать, 'verify_peer_name' => false // отключение его проверки. ) ) ); $fp = stream_socket_client($url, $err_no, $err_str, 30, STREAM_CLIENT_CONNECT, $context); $cert = stream_context_get_params($fp); if (empty($err_no))
Результат:
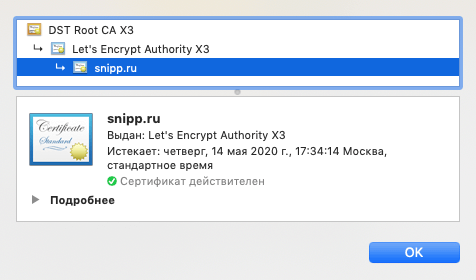
Array( [name] => /CN=snipp.ru [subject] => Array( [CN] => snipp.ru ) [hash] => d29c8ea7 [issuer] => Array( [C] => US [O] => Let's Encrypt [CN] => Let's Encrypt Authority X3 ) [version] => 2 [serialNumber] => 295366585736462130072577585684820136690675 [serialNumberHex] => 0364011F3441AE879CE07F8A1018FDFA03F3 [validFrom] => 200214143414Z [validTo] => 200514143414Z [validFrom_time_t] => 1581690854 [validTo_time_t] => 1589466854 [signatureTypeSN] => RSA-SHA256 [signatureTypeLN] => sha256WithRSAEncryption [signatureTypeNID] => 668 [purposes] => Array( [1] => Array( [0] => 1 [1] => [2] => sslclient ) [2] => Array( [0] => 1 [1] => [2] => sslserver ) [3] => Array( [0] => 1 [1] => [2] => nssslserver ) [4] => Array( [0] => [1] => [2] => smimesign ) [5] => Array( [0] => [1] => [2] => smimeencrypt ) [6] => Array( [0] => [1] => [2] => crlsign ) [7] => Array( [0] => 1 [1] => 1 [2] => any ) [8] => Array( [0] => 1 [1] => [2] => ocsphelper ) [9] => Array( [0] => [1] => [2] => timestampsign ) ) [extensions] => Array( Php https client certificate => Digital Signature, Key Encipherment [extendedKeyUsage] => TLS Web Server Authentication, TLS Web Client Authentication [basicConstraints] => CA:FALSE [subjectKeyIdentifier] => 93:5E:0E:54:E4:68:87:51:61:07:15:45:04:76:EB:AC:53:69:00:AE [authorityKeyIdentifier] => keyid:A8:4A:6A:63:04:7D:DD:BA:E6:D1:39:B7:A6:45:65:EF:F3:A8:EC:A1 [authorityInfoAccess] => OCSP - URI:http://ocsp.int-x3.letsencrypt.org CA Issuers - URI:http://cert.int-x3.letsencrypt.org/ [subjectAltName] => DNS:snipp.ru, DNS:www.snipp.ru [certificatePolicies] => Policy: 2.23.140.1.2.1 Policy: 1.3.6.1.4.1.44947.1.1.1 CPS: http://cps.letsencrypt.org ) )Вывод основных данных
echo 'Домен: ' . $info['subject']['CN'] . "\r\n"; echo 'Выдан: ' . $info['issuer']['CN'] . "\r\n"; echo 'Истекает: ' . date('d.m.Y H:i', $info['validTo_time_t']);Домен: snipp.ru Выдан: Let's Encrypt Authority X3 Истекает: 14.05.2020 17:34