- # PHP Extensions
- # Installing extensions
- # Add a custom module to PHP with CustomBuild
- # Manually compiling an extension for PHP
- How to Add Custom File Extension for PHP in Apache and Nginx
- Apache Web Server – Add to mime_module
- Apache Web Server – Using .htaccess file
- Nginx Web Server – Add custom extension
- Php extensions for apache
# PHP Extensions
The default PHP is compiled with most common modules and extensions. You may list all enabled modules simply by running this command:
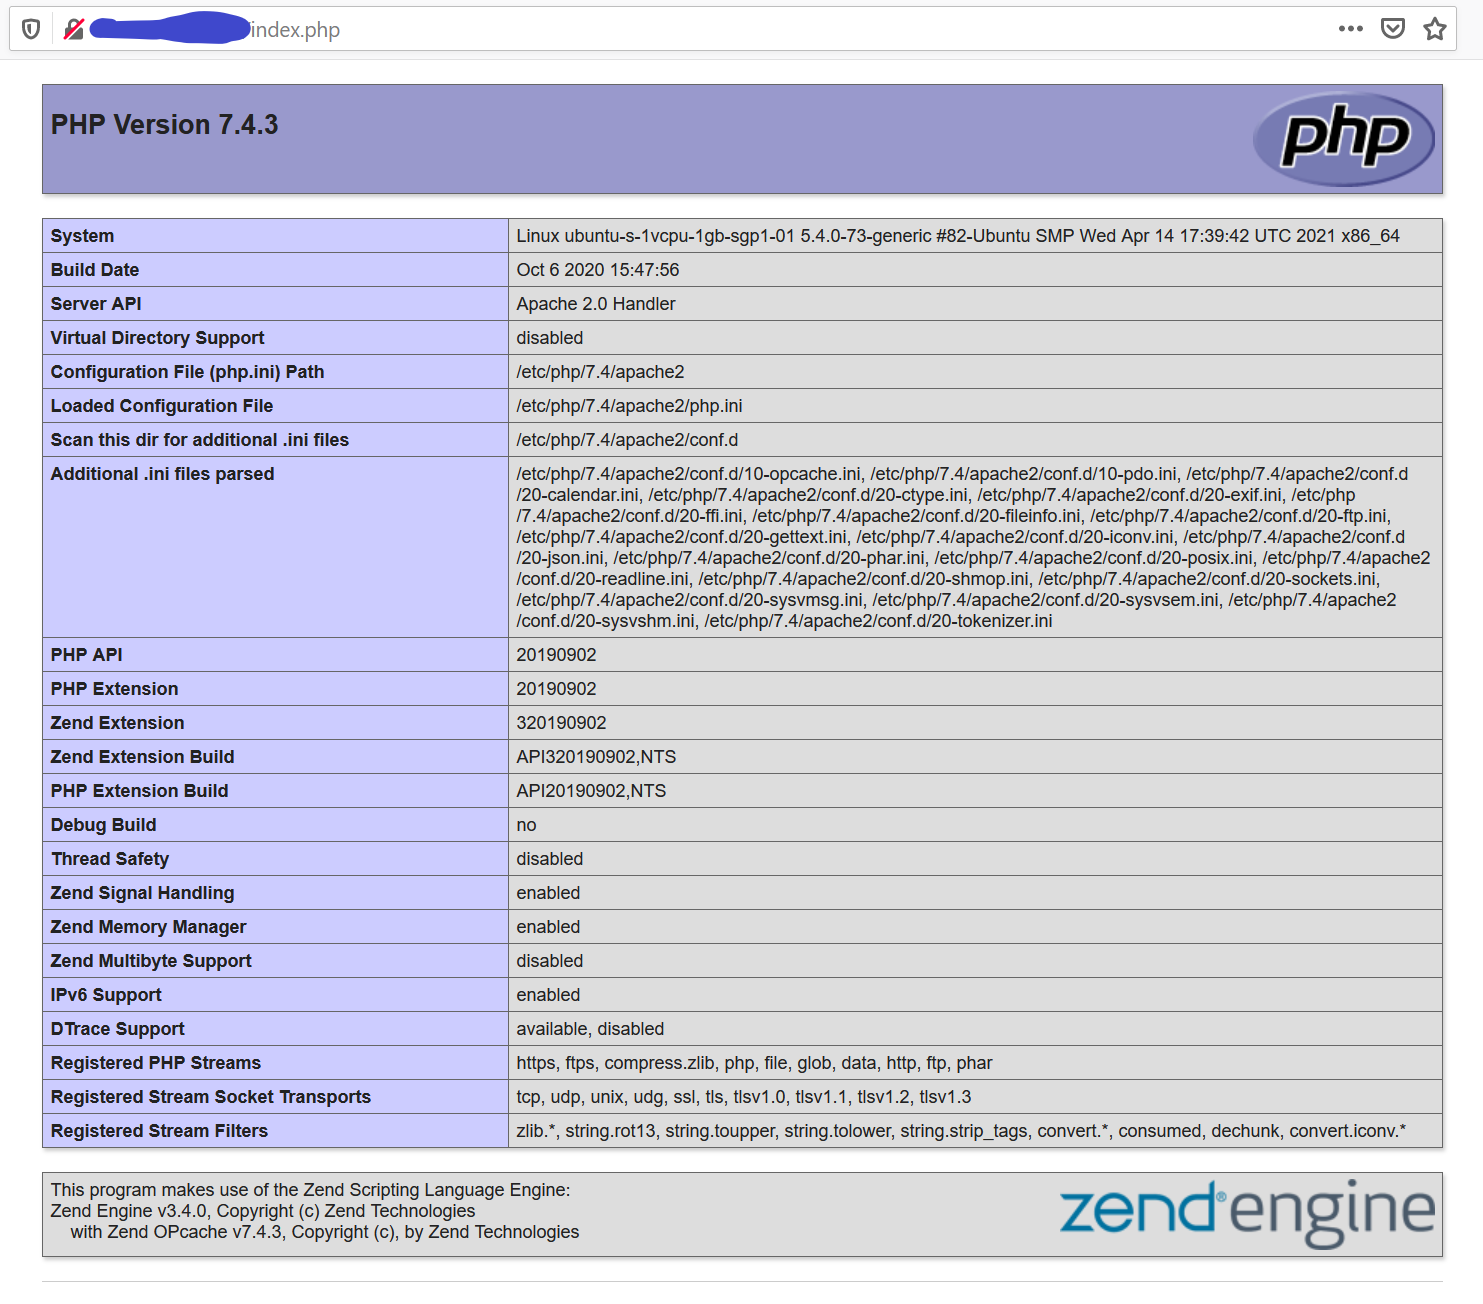
Or create a phpinfo() page and open it in a browser.
Various websites may require some additional modules and extensions. You may extend your PHP functionality by using our CustomBuild tool.
All extensions are mainly maintained by PECL, which stands for PHP Extension Community Library. It has extensions written in C, which can be loaded into PHP to provide additional functionality.
PHP maintains an alphabetical list of all the available extensions via the php.net website
# Installing extensions
DirectAdmin already provides a set of possible extensions to be easily compiled using our CustomBuild tool, including:
bz2 gmp htscanner igbinary imagick imap ioncube ldap opcache phalcon redis readline suhosin snuffleupagus xmlrpc zend Those can be installed using the following commands:
cd /usr/local/directadmin/custombuild ./build update ./build set_php "imap" yes ./build "php_imap" We can add more extensions to the list. You can create a feature request here
# Add a custom module to PHP with CustomBuild
You may want to compile your PHP with a custom module. It can be done by using the —with-module flag.
cd /usr/local/directadmin/custombuild ./build used_configs | grep configure.php PHP (default) configuration file: /usr/local/directadmin/custombuild/configure/php/configure.php74 Please pay attention to whether your file is located in: /usr/local/directadmin/custombuild/**configure**/php/configure.php74 or
/usr/local/directadmin/custombuild/**custom**/php/configure.php74
In case you’re already using a custom configuration file, you can skip step 2.
Please specify which filename is currently in use:
- To start customizing the compilation parameters, first we need to create a custom compilation file:
cd /usr/local/directadmin/custombuild mkdir -p custom/php cp -fp "configure/php/configure.php74" "custom/php/configure.php74" - Add your —with-module line to the end of the custom/php/> file, and make sure the \ character exists at the end of all lines except the last one. The \ character tells the configure line to loop to the next line, making the line easier to read. Without the \ character to trigger the wrap, the next line is incorrectly read as a separate command. Once set, type:
service httpd restart service php-fpm74 restart Please keep in mind that any changes to your stock DirectAdmin setup are beyond our technical support, and you do so at your own risk.
A common error people run into looks like this:
/usr/local/directadmin/custombuild/custom/php/configure.php74: line 32: --with-module: command not found which simply means that the \ character was not correctly added on the line before the last —with-module.
# Manually compiling an extension for PHP
Consider the example using the APCu extension for PHP version (without dots e.g. 56, 70, 71).
Where possible, use OpCache instead of APC/APCu.
A common optimization that can be done for PHP to improve performance is to install and Opcode caching module such as Alternative PHP Cache (APCu, or APC for php version < 5.6).
What it does is caches PHP files in memory in their parsed and compiled state. This removes the need for re-reading, parsing and compiling for each request, thus greatly lowering your system load. The cost of using this module is an increased memory usage, since that’s where the cache lives.
Take a download location for a desired extension from https://www.php.net/manual/en/extensions.alphabetical.php
wget https://github.com/krakjoe/apcu/archive/master.zip unzip master.zip cd apcu-master "/usr/local/php72/bin/phpize" ./configure --with-php-config="/usr/local/php72/bin/php-config" make make install How to Add Custom File Extension for PHP in Apache and Nginx
Typically you’ll see .php as the extension for PHP files that are served by a webserver. Sometimes you might also have a php file that has an extension other than .php, and in those cases, the webserver might not be able to serve that file. For discussion purpose, let us assume that you have written PHP server side coding in a file with “.myext” extension. For some reason, you want to keep the file extension this way for testing purpose, without having to rename it to .php
This tutorial explains how you can allow either your Apache or Nginx to serve this .myext PHP file.
Apache Web Server – Add to mime_module
On Linux, you will find httpd.conf file under “/etc/apache2/” (or under /usr/local/apache2/conf, if you’ve installed Apache 2 from source). On Windows, you’ll find “apache/conf” folder on the drive in which you have installed Apache server. If you are using XAMPP, on Windows, you will find it under “c:\xampp\apache\conf” folder. Since we want to allow .myext, add the following line under the mime_module section of the httpd.conf file
AddType application/x-httpd-php .myext
You can also add your custom extension .myext to default page stack. Find the lines “DirectoryIndex index.php index.htm index.html”, add add the new extension as shown below.
DirectoryIndex index.php index.htm index.html index.myext
Apache Web Server – Using .htaccess file
Addhandler application/x-httpd-php .html .php .myext
Nginx Web Server – Add custom extension
location ~ .*\.php$ < root /var/www/html/www.domain.com; if (!-f $request_filename) < rewrite ^/(.*)$ /index.php?q=$1; break; >include fastcgi_params; #root html; fastcgi_pass 127.0.0.1:9000; fastcgi_intercept_errors off; fastcgi_index index.php; fastcgi_param SCRIPT_FILENAME /var/www/html/www.domain.com$fastcgi_script$ >
Edit the first line shown above, and change it to the following to add “.myext” as custom file extension.
Restart your Nginx server. You can also use .htaccess with Nginx in the same way as explained for Apache. After performing any one of the above changes, you should be able to serve both .php and .myext PHP server files.
Php extensions for apache
PHP is a programming language that is widely used all around the world. Facebook, the biggest social media platform nowadays also begin its journey with PHP as well. In order to host your web application written in PHP or any kind of PHP framework such as Laravel, Cake PHP, etc, you have to install PHP with a fit compatible version in your development environment after finishing installing Apache2 which is written in a post «How to install apache2 on your cloud server ubuntu 10.04»
Step 1: Update your server
First, you have to update your server. By executing the below command doesn’t actually install new versions of software on the server. Instead, it updates the package lists for upgrades for packages that need upgrading, as well as welcomes a new package that has just been added into the repositories.
Step 2: Installing PHP 7.4
Finding the correct version of PHP is crucial for production deployment as well as the development environment or staging/testing environment. We have to make sure we have the same version of PHP in all environments to prevent any method deprecation that might happen in the higher version or not supported method in the old version. This is also the reason why docker exists. we will cover the docker in another post later.
sudo apt-get install php7.4 Step 3: Installing Common PHP 7.4 Extensions
When you install PHP with the above command, you only got the core feature of PHP. If you want more features in your application like working with MySQL database you have to install PHP extension that works perfectly with MySQL (php7.4-mysql). If you work with XML you have to install php7.4-xml. Below are list of common extensions which we usually work with.
sudo apt-get install php7.4-bcmath php7.4-bz2 php7.4-intl php7.4-gd php7.4-mbstring php7.4-mysql php7.4-zip php7.4-fpm php7.4-curl php7.4-json php7.4-cgi php7.4-xsl php7.4-xml php7.4-soap php7.4-zip php7.4-commonStep 4: Check installed version on PHP
Once everything is installed, you can check whether your PHP is running properly by using the below command. Remember that you can have multiple versions in your server so make sure which version and configuration you are actually using with to configure your application.
php --version PHP 7.4.3 (cli) (built: Oct 6 2020 15:47:56) ( NTS ) Copyright (c) The PHP Group Zend Engine v3.4.0, Copyright (c) Zend Technologies with Zend OPcache v7.4.3, Copyright (c), by Zend Technologies Step 5: Create index.php file to check PHP info on web browser
This step is just a small snippet of code we can do you list information of php as well as common extensions that we just installed using function phpinfo();
Open your web browser and type HTTP://your_ip_address/index.php