- Chunk File Upload with JavaScript using PHP
- Uploader HTML Elements
- Initialize Plupload Uploader with JavaScript
- Server-side Upload Handler with PHP
- Conclusion
- How to Implement Chunk Upload in PHP
- Related Articles
- Laravel Livewire Crud with Bootstrap Modal Example
- PHP Chunk File Upload using JavaScript Example
- PHP Chunk File Upload using Javascript - Mywebtuts.com
Chunk File Upload with JavaScript using PHP
There are a few ways to deal with large file uploads in PHP. The easiest way is to increase the maximum upload size limit in the PHP configuration file (php.ini) on the server. If you don’t want to modify the server setting in PHP, the Chunk Upload method is one of the best alternatives for large file upload with PHP. In chunk upload, the large file is split into small parts and uploaded in chunks. You can upload large files above 500MB or GB to the server using PHP. This tutorial will show you how to handle large file upload with the chunking feature in PHP.
Normally, the entire file is posted to the server-side for upload. But, if the file is huge (about several gigabytes) in size, the standard upload may fail due to settings in the server’s constraints on uploaded file size. To overcome this issue, we can integrate the chunk upload functionality. The chunk file upload method slices the file into chunks and sends them one by one to the server in PHP.
We will use the Plupload library to split file into chunks on the client-side and post them to the server-side using JavaScript. Plupload is a JavaScript library that handles the chunk upload process on the client-side.
Uploader HTML Elements
Define HTML elements to select the file, upload button, and file queue.
div class="form-group"> label>b>Select File: b> label> input type="file" class="form-control" id="fileInput"> div> div id="fileList"> div> div class="form-group"> a id="uploadBtn" href="javascript:;" class="btn btn-success">Upload a> div>
Additionally, we have added a progress bar that indicates the upload progress in a percentage format.
Initialize Plupload Uploader with JavaScript
First, include the Plupload JS library.
script src="plupload/js/plupload.full.min.js"> script>
Define Plupload uploader with configuration options using JavaScript.
- browse_button : Element ID of the file browse button.
- url : The URL of the server-side script that handles the file upload process.
- multi_selection : Set true if you want to allow select multiple files at once.
- max_file_size : Maximum file size that is allowed to upload.
- mime_types : Type of the files that are allowed to upload.
Initialize Plupload uploader with init() method.
script> // Define Plupload uploader with configuration options var uploader = new plupload.Uploader(< runtimes : 'html5,flash,silverlight,html4', browse_button : 'fileInput', // you can pass an id. url : 'upload.php', flash_swf_url : 'plupload/js/Moxie.swf', silverlight_xap_url : 'plupload/js/Moxie.xap', multi_selection: false, filters : < max_file_size : '500mb', mime_types: [ "Image files", extensions : "jpg,jpeg,gif,png">, "Video files", extensions : "mp4,avi,mpeg,mpg,mov,wmv">, "Zip files", extensions : "zip">, "Document files", extensions : "pdf,docx,xlsx"> ] >, init: < PostInit: function( ) < document.getElementById('fileList').innerHTML = ''; document.getElementById('uploadBtn').onclick = function( ) < if (uploader.files.length < 1) < document.getElementById('statusResponse').innerHTML = 'Please select a file to upload.
'; return false; >else< uploader.start(); return false; > >; >, FilesAdded: function(up, files) < plupload.each(files, function(file) < document.getElementById('fileList').innerHTML += ''">' + file.name + ' (' + plupload.formatSize(file.size) + ')'; >); >, UploadProgress: function(up, file) < document.getElementById(file.id).getElementsByTagName('b')[0].innerHTML = '' + file.percent + "%"; document.querySelector(".progress").innerHTML = ''%;">'+file.percent+'%'; >, FileUploaded: function(up, file, result) < var responseData = result.response.replace('", ').replace('>"', '>'); var objResponse = JSON.parse(responseData); document.getElementById('statusResponse').innerHTML = ''
+ objResponse.result.message + ''; >, Error: function(up, err) < document.getElementById('statusResponse').innerHTML = 'Error #'
+ err.code + ': ' + err.message + ''; > > >); // Initialize Plupload uploader uploader.init(); script>
Server-side Upload Handler with PHP
This script handles the file uploaded process with chunk functionality.
- Get selected file data using the PHP $_FILES method.
- Check whether Chunking is requested and enabled.
- Upload file in chunks to the server using PHP.
In the $targetDir variable, specify the folder name where the uploaded files will be stored.
// Make sure file is not cached (as it happens for example on iOS devices)
header("Expires: Mon, 26 Jul 1997 05:00:00 GMT");
header("Last-Modified: " . gmdate("D, d M Y H:i:s") . " GMT");
header("Cache-Control: no-store, no-cache, must-revalidate");
header("Cache-Control: post-check=0, pre-check=0", false);
header("Pragma: no-cache");

// Settings
$targetDir = 'uploads';
$cleanupTargetDir = true; // Remove old files
$maxFileAge = 5 * 3600; // Temp file age in seconds


// Create target dir
if (!file_exists($targetDir)) <
@mkdir($targetDir);
>

// Get a file name
if (isset($_REQUEST["name"])) <
$fileName = $_REQUEST["name"];
> elseif (!empty($_FILES)) <
$fileName = $_FILES["file"]["name"];
> else <
$fileName = uniqid("file_");
>

$filePath = $targetDir . DIRECTORY_SEPARATOR . $fileName;

// Chunking might be enabled
$chunk = isset($_REQUEST["chunk"]) ? intval($_REQUEST["chunk"]) : 0;
$chunks = isset($_REQUEST["chunks"]) ? intval($_REQUEST["chunks"]) : 0;


// Remove old temp files
if ($cleanupTargetDir) <
if (!is_dir($targetDir) || !$dir = opendir($targetDir)) <
die(', "id" : "id">');
>

while (($file = readdir($dir)) !== false) <
$tmpfilePath = $targetDir . DIRECTORY_SEPARATOR . $file;

// If temp file is current file proceed to the next
if ($tmpfilePath == "$filePath>.part") <
continue;
>

// Remove temp file if it is older than the max age and is not the current file
if (preg_match('/\.part$/', $file) && (filemtime($tmpfilePath)  time() - $maxFileAge)) <
@unlink($tmpfilePath);
>
>
closedir($dir);
>


// Open temp file
if (!$out = @fopen("$filePath>.part", $chunks ? "ab" : "wb")) <
die(', "id" : "id">');
>

if (!empty($_FILES)) <
if ($_FILES["file"]["error"] || !is_uploaded_file($_FILES["file"]["tmp_name"])) <
die(', "id" : "id">');
>

// Read binary input stream and append it to temp file
if (!$in = @fopen($_FILES["file"]["tmp_name"], "rb")) <
die(', "id" : "id">');
>
> else <
if (!$in = @fopen("php://input", "rb")) <
die(', "id" : "id">');
>
>

while ($buff = fread($in, 4096)) <
fwrite($out, $buff);
>

@fclose($out);
@fclose($in);

// Check if file has been uploaded
if (!$chunks || $chunk == $chunks - 1) <
// Strip the temp .part suffix off
rename("$filePath>.part", $filePath);
>

// Return Success JSON-RPC response
die('>');
Conclusion
In most cases, your server does not allow access to the PHP configuration file (php.ini) which lead difficult to allow large files to be uploaded. The chunk file upload can make it possible to upload a large file to the server without any changes in PHP configurations (php.ini). This example script allows you to implement chunk upload functionality to upload large files using PHP. You can allow the user to upload large files to the server in chunks without page refresh using JavaScript and PHP.
Are you want to get implementation help, or modify or enhance the functionality of this script? Click Here to Submit Service Request
If you have any questions about this script, submit it to our QA community — Ask Question
How to Implement Chunk Upload in PHP
Recently one of our readers asked about chunk uploading in PHP. They want to upload large files in a fast and reliable way. By implementing chunk uploading you can upload/move large files on a server easily. In this article, I will write a PHP code for chunk uploading which can be useful for uploading/moving large files.
Sometimes in the web application, you need to deal with large files. It may be video or zip files that need to move to a specific location on the server.
It’s very easy to implement chunk upload in PHP. In the code below we are moving the source file inside the ‘uploads’ directory. We read the file in chunks of 256 bytes and write it to the destination file. This process will continue until the script reads all bytes from the source file and write these bytes to the destination file. For this operation, I am using PHP native functions – fopen, fread, fwrite, and fseek.
Let’s say you have a ‘video.mp4’ file that you want to move under the ‘uploads’ folder. Below is the code which moves a file in chunks to the destination folder.
fclose($handle); fclose($fp); echo "File uploaded successfully.";That’s it! It’s that much simple to implement chunk upload in PHP. I would like to hear your thoughts or suggestions in the comment section below.
Related Articles
If you liked this article, then please subscribe to our YouTube Channel for video tutorials.
Laravel Livewire Crud with Bootstrap Modal Example
Hello Friends, In this blog, I would like to share with you how perform crud opeartion with bootstrap modal livewire in laravel application.I will.
PHP Chunk File Upload using JavaScript Example
I am going to explain you how to PHP chunk file upload using Javascript. You will learn upload files in chunk using PHP and JavaScript. In side this article we will see how to implement chunk upload in PHP.
This article will give you simple example of uploading large files with JavaScript using PHP. We will use get simple how to JavaScript PHP chunk file upload.
I will give you simple Example of how to upload chunks of file via JavaScript and PHP.
So, let’s see bellow solution:
PHP Chunk File Upload using Javascript - Mywebtuts.com
die(json_encode(["ok"=>$ok, "info"=>$info])); > // INVALID UPLOAD if (empty($_FILES) || $_FILES['file']['error']) < index(0, "Failed to move uploaded file."); >// THE UPLOAD DESITINATION - CHANGE THIS TO YOUR OWN $filePath = __DIR__ . DIRECTORY_SEPARATOR . "uploads"; if (!file_exists($filePath)) < if (!mkdir($filePath, 0777, true)) < index(0, "Failed to create $filePath"); >> $fileName = isset($_REQUEST["name"]) ? $_REQUEST["name"] : $_FILES["file"]["name"]; $filePath = $filePath . DIRECTORY_SEPARATOR . $fileName; // DEAL WITH CHUNKS $chunk = isset($_REQUEST["chunk"]) ? intval($_REQUEST["chunk"]) : 0; $chunks = isset($_REQUEST["chunks"]) ? intval($_REQUEST["chunks"]) : 0; $out = @fopen(".part", $chunk == 0 ? "wb" : "ab"); if ($out) < $in = @fopen($_FILES['file']['tmp_name'], "rb"); if ($in) < while ($buff = fread($in, 4096)) < fwrite($out, $buff); >> else < index(0, "Failed to open input stream"); >@fclose($in); @fclose($out); @unlink($_FILES['file']['tmp_name']); > else < index(0, "Failed to open output stream"); >// CHECK IF FILE HAS BEEN UPLOADED if (!$chunks || $chunk == $chunks - 1) < rename(".part", $filePath); > index(1, "Upload OK"); ?>
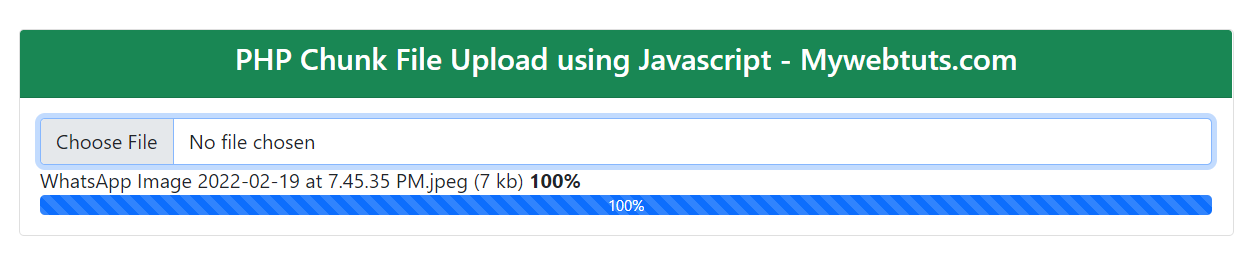
Output:
✌️ Like this article? Follow me on Twitter and Facebook. You can also subscribe to RSS Feed.