- Opencv for android java
- Building application native part from command line
- Building application native part from Eclipse (CDT Builder)
- Добавление библиотеки OpenCV в проект Android Studio
- 1. Загрузка OpenCV SDK для Android
- 2. Установка OpenCV в проект Android Studio
- 3. Разработка примера приложения OpenCV для Android
- Заключение
- Android
- What you should know
- How to start
- Online resources
- User Communities:
- OpenCV4Android documentation:
- Information on OpenCV:
- 3rd-party samples and tutorials:
- Providing feedback
- Contacts
- Become a Member
Opencv for android java
This is the minimal file Android.mk , which builds C++ source code of an Android application. Note that the first two lines and the last line are mandatory for any Android.mk .
Usually the file Application.mk is optional, but in case of project using OpenCV, when STL and exceptions are used in C++, it also should be created. Example of the file Application.mk :
Note We recommend setting APP_ABI := all for all targets. If you want to specify the target explicitly, use armeabi for ARMv5/ARMv6, armeabi-v7a for ARMv7, x86 for Intel Atom or mips for MIPS.
Building application native part from command line
Here is the standard way to compile C++ part of an Android application:
We strongly recommend using cmd.exe (standard Windows console) instead of Cygwin on Windows. Use the latter if only you’re absolutely sure about, what you’re doing. Cygwin is not really supported and we are unlikely to help you in case you encounter some problems with it. So, use it only if you’re capable of handling the consequences yourself.
- Open console and go to the root folder of an Android application
Note On Windows we recommend to use ndk-build.cmd in standard Windows console (cmd.exe) rather than the similar bash script in Cygwin shell.

After that the Java part of the application can be (re)compiled (using either Eclipse or Ant build tool).
Note Some parameters can be set for the ndk-build: Example 1: Verbose compilation
Building application native part from Eclipse (CDT Builder)
There are several possible ways to integrate compilation of native C++ code by Android NDK into Eclipse build process. We recommend the approach based on Eclipse CDT(C/C++ Development Tooling) Builder.
OpenCV for Android package since version 2.4.2 contains sample projects pre-configured CDT Builders. For your own projects follow the steps below.
- Define the NDKROOT environment variable containing the path to Android NDK in your system (e.g. «X:\\Apps\\android-ndk-r8» or «/opt/android-ndk-r8»). On Windows an environment variable can be set via My Computer -> Properties -> Advanced -> Environment variables. On Windows 7 it’s also possible to use setx command in a console session. On Linux and MacOS an environment variable can be set via appending a «export VAR_NAME=VAR_VALUE» line to the «~/.bashrc» file and logging off and then on. Note It’s also possible to define the NDKROOT environment variable within Eclipse IDE, but it should be done for every new workspace you create. If you prefer this option better than setting system environment variable, open Eclipse menu Window -> Preferences -> C/C++ -> Build -> Environment, press the Add. button and set variable name to NDKROOT and value to local Android NDK path. #. After that you need to restart Eclipse to apply the changes.
- Open Eclipse and load the Android app project to configure.
- Add C/C++ Nature to the project via Eclipse menu New -> Other -> C/C++ -> Convert to a C/C++ Project.
Добавление библиотеки OpenCV в проект Android Studio

Добрый день, уважаемые читатели! Всем давно известно, что мобильные устройства всё чаще комплектуются мощным аппаратным обеспечением. Процессоры современных смартфонов почти сравнялись с настольными аналогами, а проблемы с возможной нехваткой оперативной и внешней памяти уходят на второй план. Сегодня уже не встретишь телефоны или планшеты без внушительной программной платформы вроде Android, iOS или Windows, а кроме того, все мобильные устройства имеют те или иные встроенные модули, вроде фотокамеры. В данной статье речь пойдёт о встраивании библиотеки компьютерного зрения OpenCV в проект приложения для Android. Вероятно, данная статья не имела бы никакой значимой ценности, однако все инструкции в ней предназначены для Android Studio, новой официальной среды разработки от Google. К тому же, в статье описывается статическая инициализация OpenCV в Android без использования OpenCV Manager. Ниже представлен план руководства:
- Загрузка OpenCV SDK для Android
- Установка OpenCV в проект Android Studio
- Разработка примера приложения OpenCV для Android
1. Загрузка OpenCV SDK для Android
Для того, чтобы использовать OpenCV в своих приложениях, необходимо загрузить соответствующий SDK. Сделать это можно на официальном сайте opencv.org. На рисунке ниже показана ссылка на скачивание нужного архива:
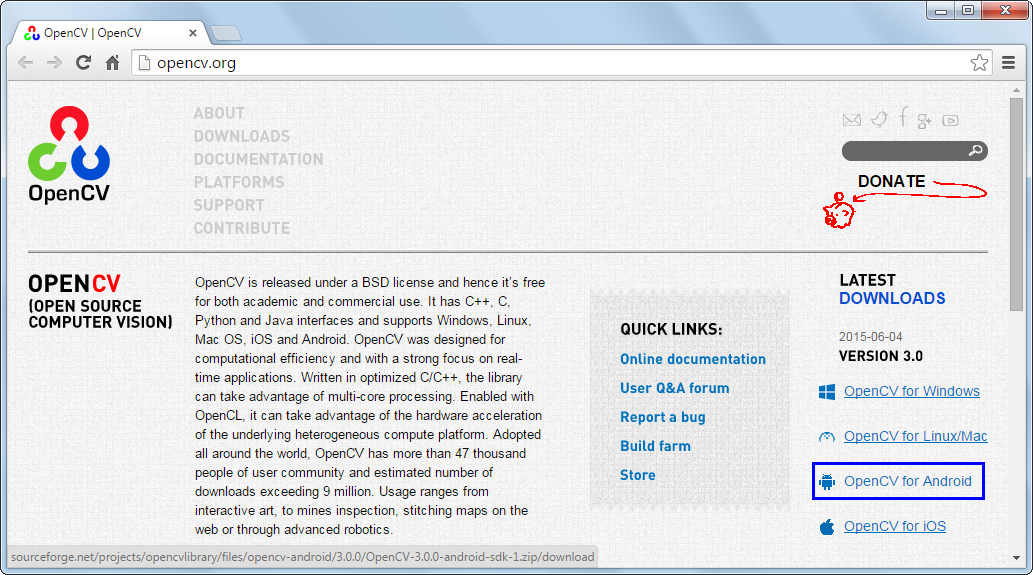
В архив OpenCV SDK для Android входят двоичные файлы библиотек под разные архитектуры микропроцессоров, обёртка на языке программирования Java, которая использует Java Native Interface (JNI) для вызова функций из платформо-зависимых библиотек, исходные коды примеров программ и файлы .apk для установки OpenCV Manager. Следующий шаг — добавление модуля OpenCV в проект Android Studio.
2. Установка OpenCV в проект Android Studio
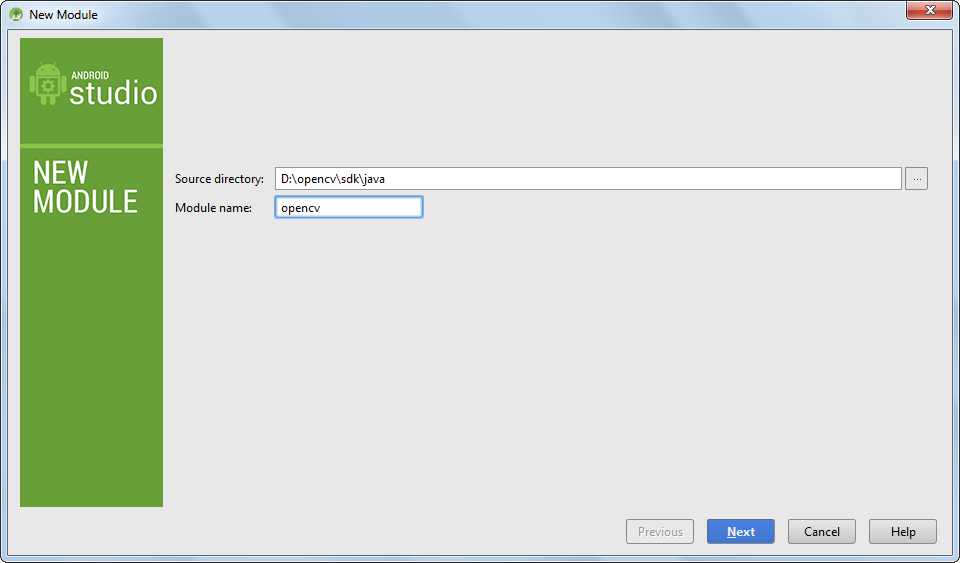
Импорт модуля OpenCV в проект Android Studio не представляет труда. Для этого нужно выбрать меню File -> New -> Import Module. и указать путь sdk/java из распакованного архива SDK. Все остальные настройки импорта менять не обязательно. На рисунке ниже показано окно мастера с указанием пути импорта модуля и его нового имени в проекте:
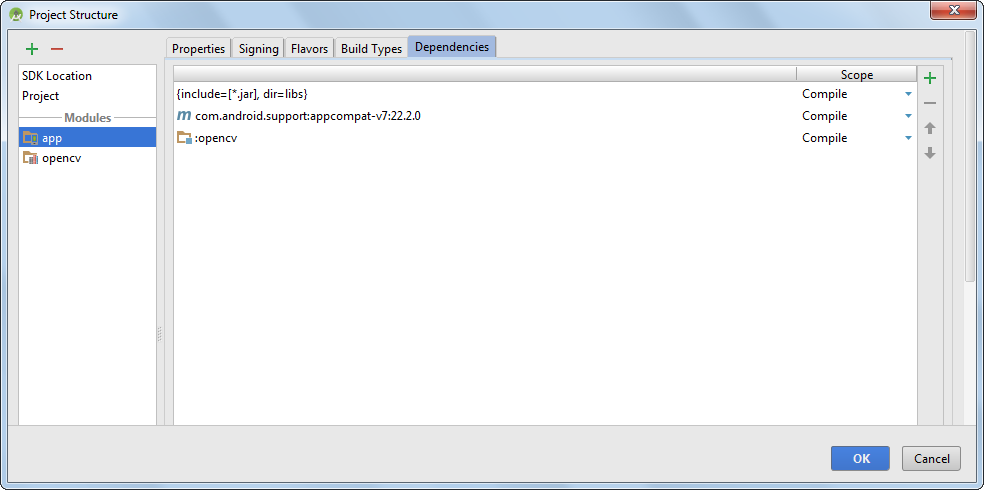
После импорта модуля в его build.gradle нужно обязательно обновить параметры compileSdkVersion, buildToolsVersion, minSdkVersion и targetSdkVersion, чтобы они совпадали с соответствующими параметрами из модуля приложения. После того, как модуль OpenCV был добавлен, его нужно присоединить в качестве зависимости к модулю приложения. Для этого нужно выбрать меню File -> Project Structure. и для модуля app указать зависимость от opencv. На рисунке ниже показано окно настройки зависимостей:
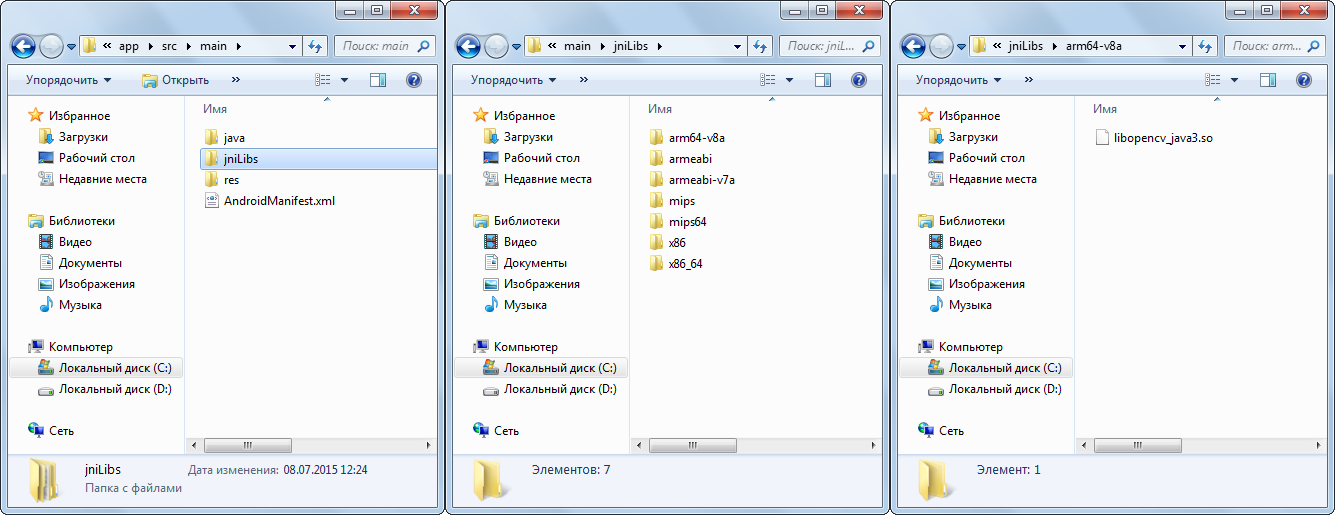
Последнее, что осталось сделать — добавить двоичные библиотеки OpenCV в проект, чтобы при сборке они были упакованы в .apk приложения. Для этого нужно скопировать папку sdk/native/libs из OpenCV SDK в папку проекта по пути app/src/main. Затем нужно переименовать папку libs в jniLibs. Следует отметить, что не нужно упаковывать статические библиотеки OpenCV (расширение .a) в .apk и хранить их в проекте. В образовавшейся папке jniLibs для каждой архитектуры можно оставить только файлы с расширением .so. На рисунке ниже показана получившаяся структура папок в Проводнике Windows:
3. Разработка примера приложения OpenCV для Android
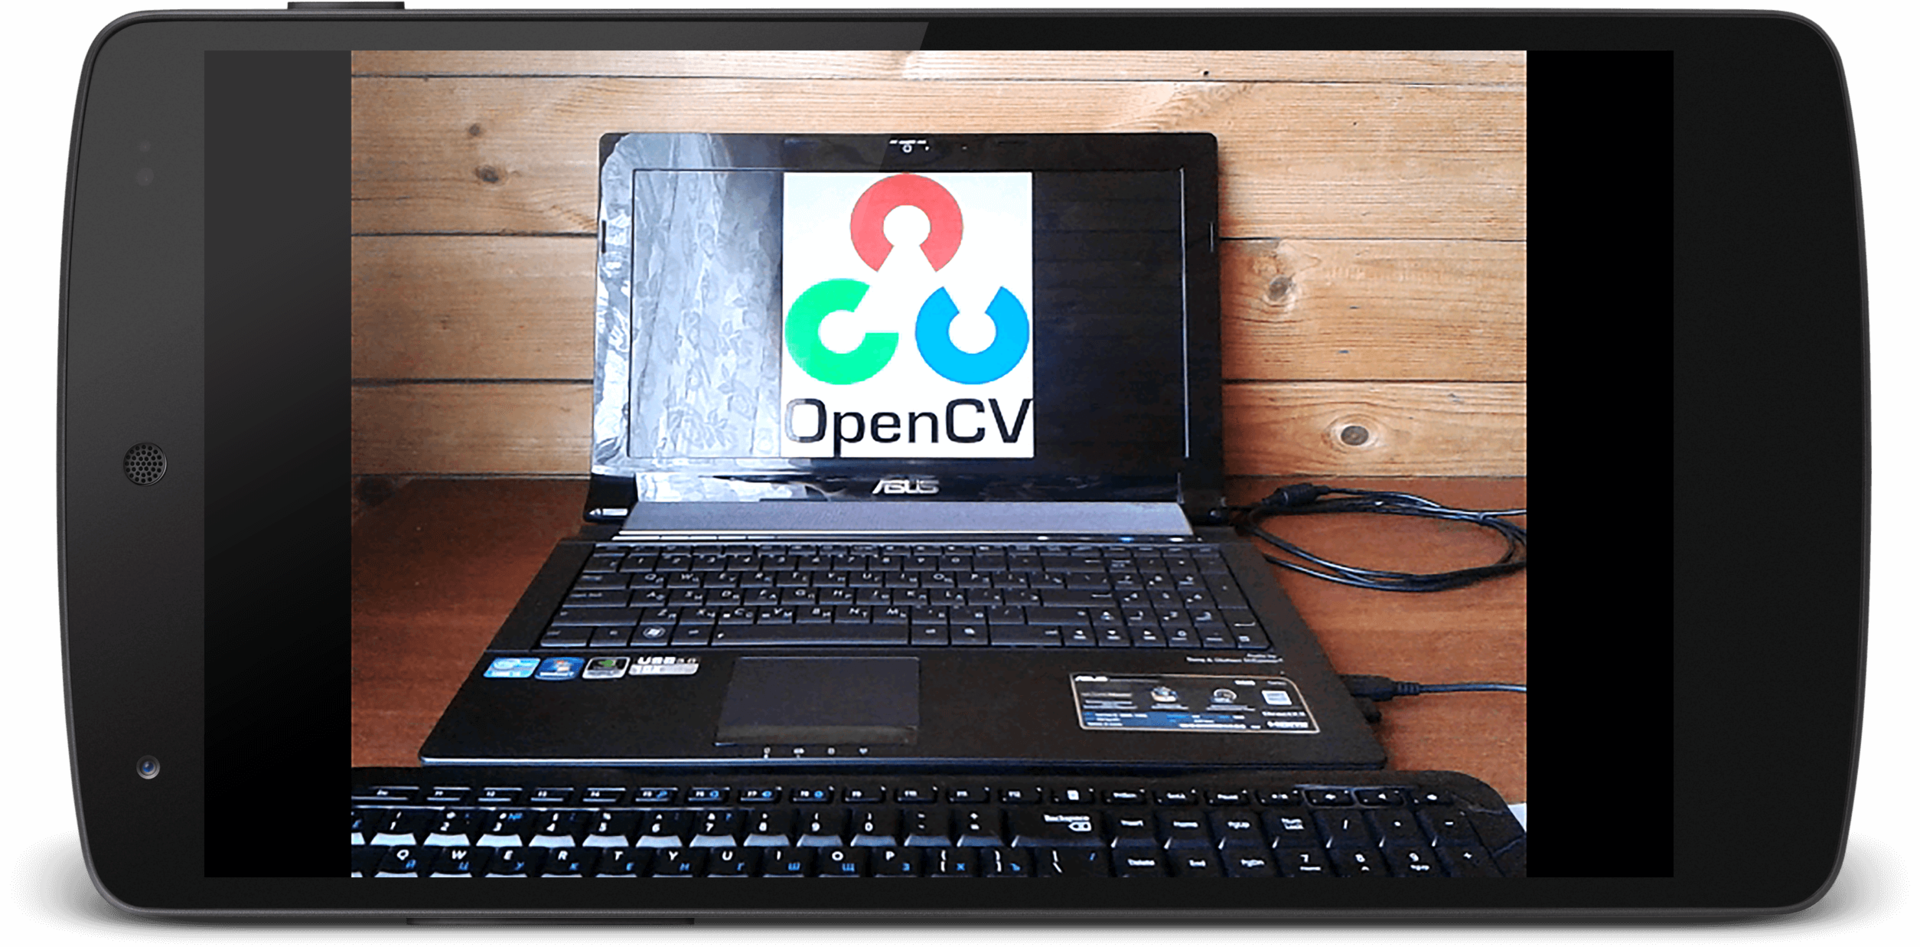
Для того, чтобы быстрее начать работу с OpenCV, разработаем простое приложение для вывода изображения с камеры. Ниже приведено содержимое исходных файлов, которые необходимо изменить для запуска программы:
package com.androidcv; import android.app.Activity; import android.os.Bundle; import android.view.SurfaceView; import android.view.WindowManager; import org.opencv.android.CameraBridgeViewBase; import org.opencv.android.CameraBridgeViewBase.CvCameraViewFrame; import org.opencv.android.CameraBridgeViewBase.CvCameraViewListener2; import org.opencv.android.OpenCVLoader; import org.opencv.core.Mat; public class MainActivity extends Activity implements CvCameraViewListener2 < private CameraBridgeViewBase mOpenCvCameraView; @Override protected void onCreate(Bundle savedInstanceState) < super.onCreate(savedInstanceState); getWindow().addFlags(WindowManager.LayoutParams.FLAG_KEEP_SCREEN_ON); setContentView(R.layout.activity_main); mOpenCvCameraView = (CameraBridgeViewBase) findViewById(R.id.view); mOpenCvCameraView.setVisibility(SurfaceView.VISIBLE); mOpenCvCameraView.setCvCameraViewListener(this); >@Override public void onPause() < super.onPause(); if (mOpenCvCameraView != null) mOpenCvCameraView.disableView(); >@Override public void onResume() < super.onResume(); OpenCVLoader.initDebug(); mOpenCvCameraView.enableView(); >public void onDestroy() < super.onDestroy(); if (mOpenCvCameraView != null) mOpenCvCameraView.disableView(); >public void onCameraViewStarted(int width, int height) < >public void onCameraViewStopped() < >public Mat onCameraFrame(CvCameraViewFrame inputFrame) < return inputFrame.rgba(); >> На рисунке ниже показан результат работы приложения:
Заключение
В заключение нужно сказать, что хотя статическое связывание библиотек OpenCV представляется удобным, разработчики предписывают использовать этот способ только на этапе отладки. При выпуске приложения, например, в Google Play, лучше использовать OpenCV Manager.
- android
- android os
- android apps
- android studio
- android development
- android sdk
- opencv
- computer vision
- artificial intelligence
- ai
- андроид
- андроид разработка
- компьютерное зрение
- искусственный интеллект
Android
Want a Quick Start link? Use this tutorial: “OpenCV for Android SDK”.
What you should know
There are two major types of OpenCV4Android beginners, first group is new to Android, and the second – to OpenCV. We’ll try to provide some advice for both:
- If you’re an experienced OpenCV adept and you want to start with Android, you should remember, that Android is not desktop OS, you should prepare yourself for mobile development. We’re not aiming to teach you all about Android, so in case you’re not really familiar with the platform, you may consider consulting the official website for developers, or some short introduction like this one. At the same time, we’ve prepared a special “Introduction into Android Development” tutorial and a set of samples helping you to become familiar with Android specifics. What’s important, is that you can reuse your C++ desktop code. It’s even recommended to develop and debug your algorithms in familiar environment, using your PC and favourite IDE. Of course you have to keep efficiency in mind, but please avoid premature optimization. OpenCV was designed to be high-performance, so measure your actual performance before you start to worry. Keep in mind, that majority of modern mobile devices is surprisingly powerful.
- If you’re a confident Android developer, but you need some information on OpenCV, please have a look at the documentation and use the user-support resources if needed: forum and issue tracker. And do not forget to look into tutorials, they will help you to quickly understand what you can easily accomplish with OpenCV. Computer Vision field has a long history, but some problems are still unsolved. If you’re not sure if OpenCV could help you with your task, just ask your question at our forum, people there like to solve quirky problems.
How to start
OpenCv4Android is available as a SDK with a set of samples and Javadoc documentation for OpenCV Java API. It also contains prebuilt apk-files, which you can run on your device instantly. There are three OpenCV tutorials aimed to help you start:
- “Introduction into Android Development” would be useful for the absolute beginner, because it shows you how to setup Android development environment.
- Detailed instructions on SDK are available in the “OpenCV for Android SDK” tutorial. You’ll see a couple of sample applications, which you can use as a basis for your own developments.
- “Android development with OpenCV” shows you how to add OpenCV functionality into your Android application. For those who want to reuse their C++ code, we’ve created a special section: “Native/C++”. We propose this way for the professional developers, since native development is a bit harder, but gives you larger opportunities. Face detection sample shows an example of wrapping a C++ class to the Java.
If you need additional information on OpenCV usage models, you can check this page.
Online resources
User Communities:
- OpenCV Q&A forum: http://answers.opencv.org. Use it as a major resource for Computer Vision and OpenCV consultancy.
- Read-only OpenCV4Android group: https://groups.google.com/group/android-opencv. This group was replaced by the Q&A forum from above, but its archive is still available.
OpenCV4Android documentation:
- Tutorials: “Introduction into Android Development”, “OpenCV for Android SDK”, “Android development with OpenCV”.
- Documentation on “OpenCV Manager”: please check these slides.
- Javadoc html-files are included into the distribution and available online.
- Android Samples
- Android Best Practices
Information on OpenCV:
- Official documentation for the latest public release: http://docs.opencv.org.
- Daily documentation build: http://docs.opencv.org/master/.
- And please pay special attention to the tutorials and C++ cheatsheet!
3rd-party samples and tutorials:
- Open Source Google Glass samples by Jared Burrows and Andre Compagno
- Eyes detection and tracking on Android sample by Roman Hošek (the “face-detection” sample extension)
Providing feedback
- You know, we love contributions, especially pull requests on the GitHub!
- If you think you’ve found a new bug, let’s double-check it:
- Please check that you use the latest version of OpenCV4Android.
- Please check the open “Android issues” on the tracker.
- Ask OpenCV community about your problem.
- If you’re still suspecting that you’re probably the first human who met such problem, let’s file a bug! Instructions are here.
Contacts
- Use OpenCV Q&A forum for most of your questions. And please help others, this is good for your karma!
- Email: android at opencv dot org. Again, please use the group first of all, we do not provide private consultancy!
- Twitter: https://twitter.com/OpenCV4Android.
Become a Member
Stay up to date on OpenCV and Computer Vision news