How to Fix «Java Runtime Environment not found» error
In this post, we will solve the «Java Runtime Environment not found error». This java error is one of the common errors faced by developers or end-users. Whenever you try to install any software which requires java like eclipse or Minecraft. Also, if you are new to java development, JDK or Java Development Kit is necessary for you.
Following this tutorial will help you to resolve all Java runtime errors. Additionally, you will learn to install, remove and set java variables in Windows10 and Ubuntu.
These are the very common errors you will find related to Java.
- java runtime environment not found
- java runtime environment not found windows 10
- eclipse java runtime environment not found
- eclipse java runtime environment not found path
- java SE runtime environment not found
- java runtime environment not found at bin javaw.exe
- unable to load java runtime environment
- cannot determine a valid java home
- java runtime environment not found mac
Let’s understand some basic concepts of Java runtime first. Check out this post, if you are getting a java command not found error.
- What is a runtime environment?
- JRE vs JDK
- How to install Java runtime environment step by step
- How to install java runtime environment in Windows 10
- How to set the environment variable for java in windows10
- How to check what version of java I have?
- Video tutorial-JRE error solved for Windows
- How to install java runtime environment in Ubuntu 20.04
- A.) How to install java or JRE in Ubuntu 20.04 using the apt command
- How to Remove java from Ubuntu 20.04
- B.) How to install the latest java or JDK in Ubuntu 20.04 from oracle (manually)
- Java JRE download steps —
- How to set the «JAVA_HOME» variable in Ubuntu 20.04
- Remove java runtime environment package using dpkg command
- Video Tutorial — JRE error solved for Ubuntu
- Frequently Asked Questions (FAQs)
- Where is the java runtime environment on Windows 10?
- What does Java Runtime Environment do?
- What is the java runtime environment used for?
- What is the java runtime environment?
- How to set the java runtime environment in windows 10?
- Ending notes
- About The Author
- Dev
- 3 Ways to Solve «No JVM installation found. Please install a 64-bit JDK» — Android Studio Example
- Solution 1 — You are running Android Studio on 32-bit Machine
- Solution 2 — No JAVA_HOME variable
- Solution 3 — Android Studio icon pointing to studio.bat file
What is a runtime environment?
- JRE (Java Runtime Environment)
- CLR (Common Language Runtime) for .net framework
The target would be JRE or CLR for your program, need to decide by you. As soon as you execute any program, it’s in run time.
JRE vs JDK

How to install Java runtime environment step by step
Let’s solve 1 st reason for «Java runtime environment not found», Because java is not installed.
First, check for any pre-installed java version —
Open the command prompt with «Run as administrator» and run java command.

How to install java runtime environment in Windows 10

Once Download completes. Browse to the «jdk-15.0.1_windows-x64_bin.exe» file and double-click on it, to run the installer. Click Next.
I recommend keeping «C:\Program files\java\jdk-15.0.1 (64-bit)» as the default installation folder. Select Next.

You may select different installation folders also. For example, if you are installing a second instance of java software. Click on change and browse for the target folder.
Let installation complete, it may take a few minutes.

Click close. Now you are done with java installation on windows 10.

How to set the environment variable for java in windows10
Set the Environment variable for java in windows 10 by these steps —

Type «environment» in the search window. Click «open» on «Edit the system environment variables«
Click on Environment variables.


Select «Path» > Then click Edit.
Select New > Give path of java installation directory > For example, «C:\Program files\java\jdk-15.0.1\bin» in my case. If you have selected a different folder for java installation in step4. You can enter your path to the bin folder.

Click OK.
Set «classpath» for java. Click «New» in the environment variable window. It allows to set up the new environment variables.


In «Variable name», enter «classpath«. Also in «variable value» provide path to your java installation till «lib» folder. In my case it is «C:\program files\java\jdk-15.0\lib > Select OK
Close all open environment variables windows by selecting OK.
How to check what version of java I have?
Installation and java variables have been set up. Now, Let’s validate the java installation and version.

Open the command prompt with «run as administrator» rights in windows 10.
Run the «java» command to check your Java and JRE (Java Runtime Environment) version.

Check java SDK version with javac command

Video tutorial-JRE error solved for Windows

«Java Runtime Environment not found» error fixed for windows 10

Select the java program and click Uninstall.
Java software will go from the window. You can clean up java variables also, set up in step10 and 11 earlier.
How to install java runtime environment in Ubuntu 20.04
There are two ways to download and install java or JDK in Ubuntu 20.04
A.) Using the apt command
B.) Download the Oracle JDK package and install it manually
Let’s see both options one by one-
A.) How to install java or JRE in Ubuntu 20.04 using the apt command
To install Java in Ubuntu using the repository, Follow these commands
Update package index using apt command

Check if you have any old java versions installed in the system. In my case, java is not installed.
Command ‘java’ not found, but can be installed with:
sudo apt install openjdk-11-jre-headless # version 11.0.9.1+1-0ubuntu1~20.04, or
sudo apt install default-jre # version 2:1.11-72
———————-output-truncated————————————
Run the «apt» command to install java or JRE. I will install default-jre version 2:1.11-72 in my Ubuntu system from the list.
$ sudo apt install default-jre

Select «Y» and press Enter. Let installation complete. it will take a few minutes.
Check the java version

output
How to Remove java from Ubuntu 20.04
Run apt command to remove JRE package installed. Press Y and then enter.
$ sudo apt autoremove "JRE package name"
B.) How to install the latest java or JDK in Ubuntu 20.04 from oracle (manually)
Java JRE download steps —

Visit oracle.com and download JDK 15 or the latest available .deb and transfer to your system. I am downloading Debian package jdk-15.0.1_linux-x64_bin.deb.
Alternatively, you can download java using wget command.
$ sudo wget "download link"
Reference output
Rename the .deb file using mv command, if required. Then install the Debian package using the dpkg command.
$ sudo dpkg -i ".deb-file-path"
output
Default installation directory path of java would be «/usr/lib/jvm/jdk-15.0.1/«. So, make a note of it, as it will be required to set up a Java_HOME variable.
How to set the «JAVA_HOME» variable in Ubuntu 20.04
Set the JAVA_HOME variable for all users in Ubuntu by editing the environment file.
Edit /system/environment file
Add path «/usr/lib/jvm/jdk-15.0.1/bin» to the last of the environment file. Then, save and exit.

Run source command to execute changes made in the environment file.
$ sudo source /etc/environment
Check your java version

Remove java runtime environment package using dpkg command
Run the dpkg command with the —purge option to completely clean java from Ubuntu 20.04
$ sudo dpkg --purge "package-name"

Video Tutorial — JRE error solved for Ubuntu
Video on «How to fix java runtime environment error in Ubuntu 20.04»
Frequently Asked Questions (FAQs)
Where is the java runtime environment on Windows 10?
The default installation folder for java runtime is «C:\Program files\java\jdk-15.0.1\bin» in the case of windows 10.
What does Java Runtime Environment do?
Java Runtime Environment (JRE) helps to run java programs like the eclipse.
What is the java runtime environment used for?
Java runtime environment helps to run java programs like Tomcat, eclipse and Jenkins.
What is the java runtime environment?
Java runtime environment JRE is a software that runs on the operating system. Which provides class libraries and resources to run java programs.
How to set the java runtime environment in windows 10?
Type «environment» in the search window. Click «open» on «Edit the system environment variables«
Click on Environment variables.
Select «Path» > Then click Edit.
Select New > Give path of java installation directory > For example, «C:\Program files\java\jdk-15.0.1\bin«
Click OK
Ending notes
I hope after reading this article, you will be able to solve the «Java Runtime Environment not found error». Because majorly reasons for java related errors are, either Java is not installed or the java variable is not set.
if you still have issues, please comment and let me know, I will try to help you.
About The Author
Dev
Hi, My Name is Dev and as an Information Technology professional, My Life revolves around Gadgets, Servers, Storage, Software, Operating system, Internet and Cloud computing. My philosophy is “being healthy” and follow your “passion or hobbies” to make your life interesting. Please feel free to contact me for any questions, feedback and suggestions.
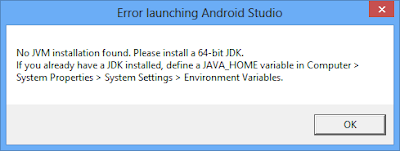
3 Ways to Solve «No JVM installation found. Please install a 64-bit JDK» — Android Studio Example
You are an enthusiastic Java programmer who just learned about developing Android apps in Java. To start with you have installed Android Studio, which is the official Integrated Development Environment (IDE) for Android app development, based on IntelliJ IDEA, but as soon as you click on the Android Studio Desktop Icon to start Android Studio you are getting «No JVM installation found. Please install a 64-bit JDK» error? How do you solve this problem? Well, even though the error message is the same, every problem is different depending upon your machine, the Java version, whether your desktop or laptop has 32-bit or 64-bit OS e.g. Windows 8.1 or Windows 10. Whether you have installed 32-bit Java or 64-bit JDK e.g. JDK 1.8.0 and what is the value of the JAVA_HOME environment variable or whether you have defined it or not.
I’ll go through a couple of examples to solve the «No JVM installation found. Please install a 64-bit JDK» error based upon some common scenarios. Most likely you would be able to solve your problem by following these steps, but if you are not then just paste the following details and we should be able to help you out
— Android Studio version you are installing
— Operation System e.g. Windows 8 or Windows 10 or Mac OS X
— whether OS is 32-bit or 64-bit
— Installed Java version e.g. JDK 1.8.0
— whether JVM is 32-bit or 64-bit
— How you are starting Android Studio, via batch file or via desktop icon
And, if you are new to the Android world and want to learn Android app development then you can also check out these Android online courses by Rob Percival and Nick Walter on Udemy. It’s a great hands-on course to learn Android in depth.
Solution 1 — You are running Android Studio on 32-bit Machine
If you are running Android Studio on 32-bit machine e.g. Windows 7 then you need to make sure that Android Studio is also instructed to use that. You can do so by setting your JAVA_HOME to point to your 32-bit JDK and then changing the target exe file of Android Studio desktop shortcut. By default start icon of Android Studio refers to studio64.exe file, which requires 64-bit Java installation. Just change it to refer studio.exe, which can run on 32-bit JVM.
In short,
— Make sure JAVA_HOME points to 32-bit Java, if you don’t know how to set JAVA_HOME, see here
— Make sure Android desktop icon point to studio.exe instead of the studio64.exe file.
Solution 2 — No JAVA_HOME variable
The Android Studio make use of JAVA_HOME environment variable to find the JVM installation. If you have not set the JAVA_HOME then you must do so by going into My Computer -> System Properties -> System Settings ->Environment Variables . Make sure your JAVA_HOME points to 64-bit JDK installation e.g. JDK 1.8.0. You can download 64-bit Java from Oracle’s download website.
Remember, you can install both 32-bit and 64-bit JVM on a 64-bit operating system like Windows 10. So, please ensure you download the correct Java installer i.e. the 64-bit JDK installer. If you are also first time starting development with Android, I suggest you reading Head First Android Development, the best book to start with Android.

Solution 3 — Android Studio icon pointing to studio.bat file
If you have installed an Android Studio where Android studio icon is pointing to a studio.bat file instead of studio64.exe then you follow these steps to solve «No JVM installation found. Please install a 64-bit JDK» error
goto the AndroidStudio installation folder.
goto bin folder and open studio.bat in text editor
add set JAVA_HOME=C:\Program Files\Java2\jdk1.8.0//your java path after the ECHO line.
goto Start -> All Programmes -> Android Studio ->
right click on Android Studio and click on properties.
You will see the Target something like