- Kotlin Android – Set OnClickListener for Button
- Code – Button.setOnClickListener()
- Example – Kotlin Androide Button.setOnClickListener()
- Conclusion
- Kotlin Android Button: работа с кнопками на примерах
- Пример Kotlin Android Button
- Activity_main.xml
- MainActivity.kt
- Android Button using Kotlin and XML
- Android Button Overview
- Creating a Button in XML Layout
- Button Click Listeners
- Android Button using Kotlin
- 1. Project Structure
- 2. Kotlin Button Code
Kotlin Android – Set OnClickListener for Button
Android Button widget is a UI element generally used to receive user actions as input. You can click on a Button, long press, etc.
In this tutorial, we shall learn to set OnClickListener for Button.
Code – Button.setOnClickListener()
Following code helps you to set on-click listener for Button.
// get reference to button val btn_click_me = findViewById(R.id.btn_click_me) as Button // set on-click listener btn_click_me.setOnClickListener
What we have done here is, we got the reference to the Button and then used setOnClickListener method to trigger an action when the button is clicked.
Example – Kotlin Androide Button.setOnClickListener()
Now we shall look into the layout xml file and Activity(Kotlin file) to set OnClickListener for a Button.
Create an Android Application with Kotlin Support and replace activity_main.xml and MainActivity.kt with the following content.
activity_main.xml
MainActivity.kt
package com.tutorialkart.myapplication import android.support.v7.app.AppCompatActivity import android.os.Bundle import android.widget.Button import android.widget.Toast class MainActivity : AppCompatActivity() < override fun onCreate(savedInstanceState: Bundle?) < super.onCreate(savedInstanceState) setContentView(R.layout.activity_main) // get reference to button val btn_click_me = findViewById(R.id.btn_click_me) as Button // set on-click listener btn_click_me.setOnClickListener < // your code to perform when the user clicks on the button Toast.makeText(this@MainActivity, "You clicked me.", Toast.LENGTH_SHORT).show() >> >
Build and Run the Android Application. You would see the Android screen as shown in the following screenshot.
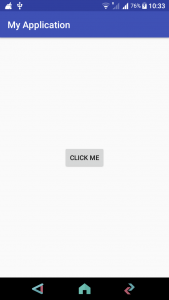
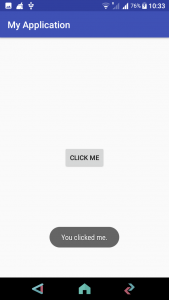
Button.setOnClickListener() will be triggered and the code in this setOnClickListener<> block will run.
Conclusion
In this Android Tutorial – Kotlin Button OnclickListener, we have learnt to set OnClickListener for Button in Kotlin Android using Button. setOnClickListener() method.
Kotlin Android Button: работа с кнопками на примерах
Kotlin Android Button — это кнопка, используемая для выполнения событий и обработки при ее нажатии. Это компонент пользовательского интерфейса, относящийся к классу android.widget.Button. Чтобы узнать больше о кнопке Android, обратитесь к примеру кнопки Android.
Используя Котлин, мы можем выполнять события на кнопке Android разными способами:
1. Реализация setOnClickListener кнопки
button1.setOnClickListener()
2. Реализация View.OnClickListner и переопределение его функции.
button2.setOnClickListener(this) . . override fun onClick(view: View) < // TODO("not implemented") //To change body of created functions use File | Settings | File Templates. > 3. Добавление атрибута onClick кнопки в файл макета и реализация его функции.
4. Программное создание кнопки и установка ее на макете.
button4.setLayoutParams(ViewGroup.LayoutParams(ViewGroup.LayoutParams.WRAP_CONTENT, ViewGroup.LayoutParams.WRAP_CONTENT)) button4.setId(button4_Id) button4.x = 250f button4.y = 500f button4.setOnClickListener(this) constraintLayout.addView(button4)
Пример Kotlin Android Button
В этом примере мы создадим кнопку и выполним для нее событие. Нажав на кнопку, отобразится всплывающее сообщение.
Activity_main.xml
Добавьте три кнопки из палитры виджетов в файл макета activity_main.xml. Его код приведен ниже. Кнопка с идентификатором button3 добавила атрибут onClick, а имя ее функции реализовано в файле класса MainActivity.
MainActivity.kt
Добавьте следующий код в класс MainActivity.kt. В этом классе мы реализуем прослушиватель setOnClickListener для кнопки, реализуем OnClickListener класса View(View.OnClickListener) и переопределяем его функцию onClick. В этом классе мы также программно создаем кнопку(button4), определяем ее свойства и устанавливаем на макете.
package example.javatpoint.com.kotlinbutton import android.support.v7.app.AppCompatActivity import android.os.Bundle import android.view.View import android.view.ViewGroup import android.widget.Button import android.widget.Toast import kotlinx.android.synthetic.main.activity_main.* class MainActivity : AppCompatActivity() , View.OnClickListener < val button4_Id: Int = 1111 override fun onCreate(savedInstanceState: Bundle?) < super.onCreate(savedInstanceState) setContentView(R.layout.activity_main) button1.setOnClickListener()< Toast.makeText(this,"button 1 clicked", Toast.LENGTH_SHORT).show() >button2.setOnClickListener(this) // add button dynamically val button4 = Button(this) button4.setText("Button 4 added dynamically") button4.setLayoutParams(ViewGroup.LayoutParams(ViewGroup.LayoutParams.WRAP_CONTENT, ViewGroup.LayoutParams.WRAP_CONTENT)) button4.setId(button4_Id) button4.x = 250f button4.y = 500f button4.setOnClickListener(this) constraintLayout.addView(button4) > override fun onClick(view: View) < // TODO("not implemented") //To change body of created functions use File | Settings | File Templates. when(view.id) < R.id.button2 ->Toast.makeText(this,"button 2 clicked", Toast.LENGTH_SHORT).show()//single line code button4_Id-> > > fun clickButton(v: View) < val mToast = Toast.makeText(applicationContext,"button 3 clicked", Toast.LENGTH_SHORT) mToast.show() >> Android Button using Kotlin and XML

While we believe that this content benefits our community, we have not yet thoroughly reviewed it. If you have any suggestions for improvements, please let us know by clicking the “report an issue“ button at the bottom of the tutorial.
Android Button Overview
Android Button class extends TextView. Button is a UI widget that is used to get click interactions from the user to trigger an action in the application. A button can be created in the XML layout as well as the Kotlin Activity class in the Android Studio Project.
Creating a Button in XML Layout
- android:id is used to set the unique identifier on the Button.
- The android:text is used to set the text inside the button. By default text is displayed in capital letters.
- android:onClick is used to define the Kotlin function to be invoked in the activity when the button is clicked. It is a click listener.
- The android:background is used to set the background color/drawable on the Button.
Tip: To prevent displaying all letters in captial, use the attribute android:textAllCaps=»false»
For more details on how to customize your Buttons in XML Layout refer to the Android Buttons Tutorial.
Button Click Listeners
We can set button listeners programmatically too. Following are the two major listeners:
- setOnClickListener — triggers when a button is clicked.
- setOnLongClickListner — triggers when a button is pressed for a longer duration.
Following code snippets has the setOnClickListener set over a button.
button.setOnClickListener(object : View.OnClickListener < override fun onClick(v: View?) < //your implementation goes here >>) The above code can be converted in a lambda expression to make it short.
Similarly, a setOnLongClickListener can be defined in the following manner.
button.setOnLongClickListener < textView.text = "Androidly Button Long click" true >//or button.setOnLongClickListener
In the above code, the last statement in each of the expressions is the return statement.
- If the setOnLongClickListener returns true, it means that the setOnClickListener won’t be triggered.
- If the setOnLongClickListener returns false, it means that the setOnClickListener will be triggered.
This is known as consuming events. The first case consumes the event.
Android Button using Kotlin
We’ll be developing an application that increments the counter of the TextView on a Button click. We will use Kotlin to create the button. We’ll also learn about the different Button click handlers.
1. Project Structure

Create a new Android Studio Project. Ensure that in the initial setup, you enable Kotlin Support. Once you’re done, following is the Project Structure that you shall see.
2. Kotlin Button Code
The activity_main.layout file looks like the following code.

We’ve used LinearLayout that holds the views linearly (horizontally or vertically). It’s recommended to set the strings in the strings.xml file instead of hardcoding them. To fetch a string resource we use @string/name_of_string . The function addOne(view: View) is defined in the MainActivity.kt Kotlin class. The code for the MainActivity.kt class is given below.
package net.androidly.androidlybuttons import android.support.v7.app.AppCompatActivity import android.os.Bundle import android.support.v4.content.ContextCompat import android.view.View import android.view.ViewGroup import android.widget.Button import android.widget.LinearLayout import kotlinx.android.synthetic.main.activity_main.* class MainActivity : AppCompatActivity(), View.OnClickListener < override fun onCreate(savedInstanceState: Bundle?) < super.onCreate(savedInstanceState) setContentView(R.layout.activity_main) var androidlyButton = Button(this) androidlyButton.apply < layoutParams = LinearLayout.LayoutParams(LinearLayout.LayoutParams.MATCH_PARENT, ViewGroup.LayoutParams.WRAP_CONTENT) text = "Double the value" setAllCaps(false) textSize = 20f >androidlyButton.setOnClickListener(this) linearLayout.addView(androidlyButton) androidlyButton = Button(this) androidlyButton.apply < layoutParams = LinearLayout.LayoutParams(LinearLayout.LayoutParams.WRAP_CONTENT, ViewGroup.LayoutParams.WRAP_CONTENT) text = "RESET" textSize = 20f setTextColor(ContextCompat.getColor(this@MainActivity, R.color.colorPrimaryDark)) setOnLongClickListener < txtCounter.text = 0.toString() true >> androidlyButton.setOnClickListener(this) linearLayout.addView(androidlyButton) > override fun onClick(v: View?) < when (v?.id) < R.id.btnDouble -> < txtCounter.text = (txtCounter.text.toString().toInt() * 2).toString() >R.id.btnReset -> < txtCounter.text = (-100).toString() >else -> < >> > fun addOne(view: View) < txtCounter.text = (txtCounter.text.toString().toInt() + 1).toString() >> - import kotlinx.android.synthetic.main.activity_main.* statement automatically gets the view IDs from the xml in our class. Hence saving us from using findViewById.
- The fun addOne(view: View) is triggered when the btnIncrementByOne is clicked. The (view: View) parameter must be defined in the function declaration.
- Create a Button programmatically and set it in the parent view(LinearLayout here) using the following code.
var androidlyButton = Button(this) linearLayout.addView(androidlyButton) 
Thanks for learning with the DigitalOcean Community. Check out our offerings for compute, storage, networking, and managed databases.