- Tailwind CSS
- Before you start
- Install Tailwind CSS
- Complete Tailwind classes
- Preview the resulting CSS
- Edit your tailwind.config.js
- Configure Tailwind options
- Pycharm – интеграция HTML и CSS
- муравей
- Создание файлов HTML и CSS
- Создание CSS файла
- Live Edit in HTML, CSS, and JavaScript
- Before you start
- Activate and configure Live Edit in JavaScript
- Use Live Edit
Tailwind CSS
PyCharm integrates with the Tailwind CSS framework including completion for Tailwind classes in HTML files and completion suggestions for pseudo-class variants, preview of the resulting CSS on hovering over classes in HTML and CSS files or on autocompletion. PyCharm recognizes tailwind.config.js files and provides completion based on customization you make to them.
Before you start
- Make sure you have Node.js on your computer. Also make sure that your Node.js version complies with the Tailwind CSS requirements. For example, Tailwind CSS v2.0 requires Node.js 12.13 or later. Learn more from the Tailwind CSS Upgrade guide.
- Configure a Node.js interpreter in your project as described in Configuring a local Node.js interpreter, or in Using Node.js on Windows Subsystem for Linux, or in Configuring remote Node.js interpreters.
- Make sure the CSS and Tailwind CSS bundled plugins are enabled in the Installed tab of the Settings | Plugins page as described in Managing plugins.
Install Tailwind CSS
- Open the embedded Terminal ( Alt+F12 ) .
- To install Tailwind CSS, type: npm install -D tailwindcss
- To generate a configuration file, type: npx tailwindcss init As result, a tailwind.config.js configuration file is created in the root of your project.
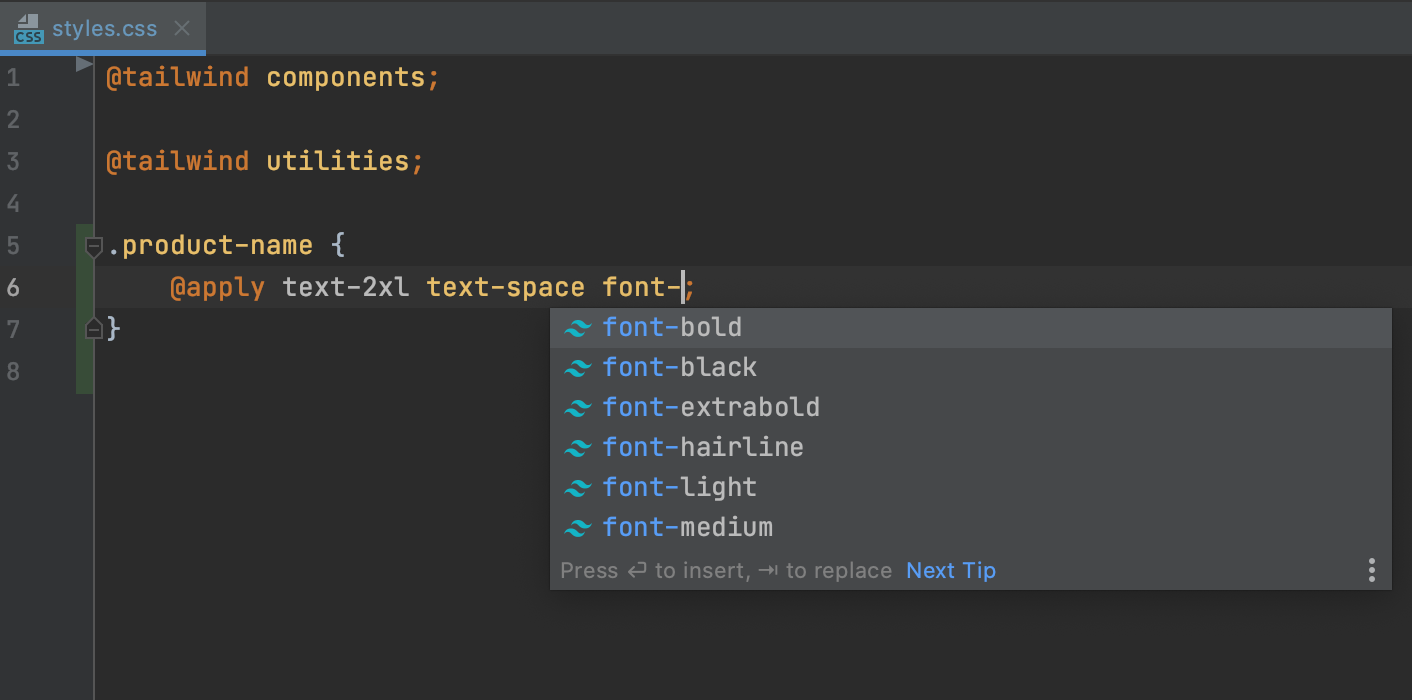
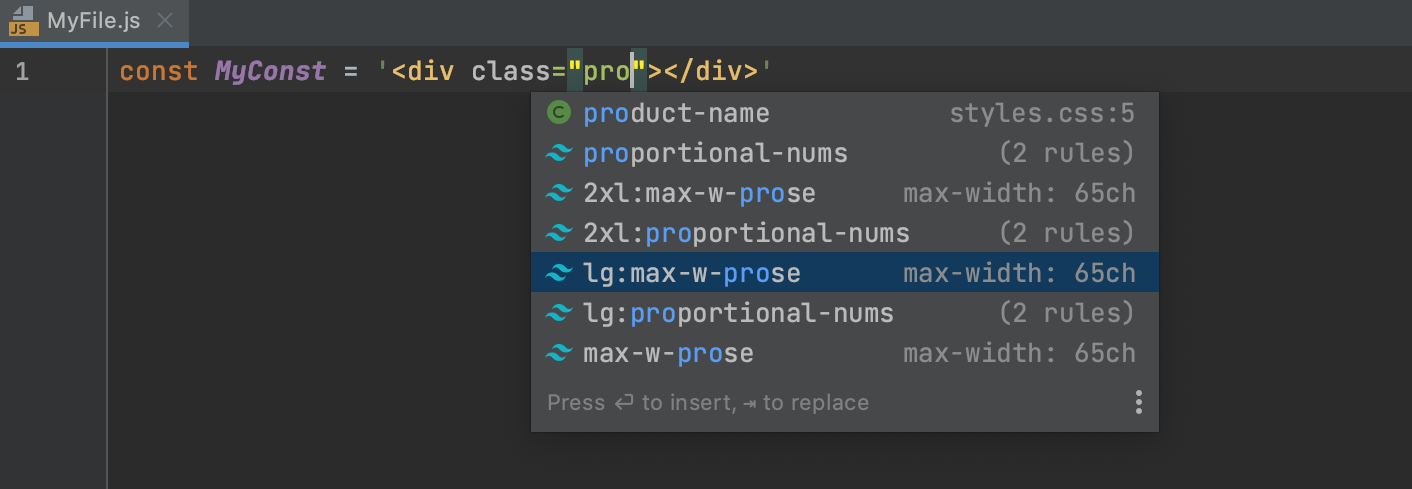
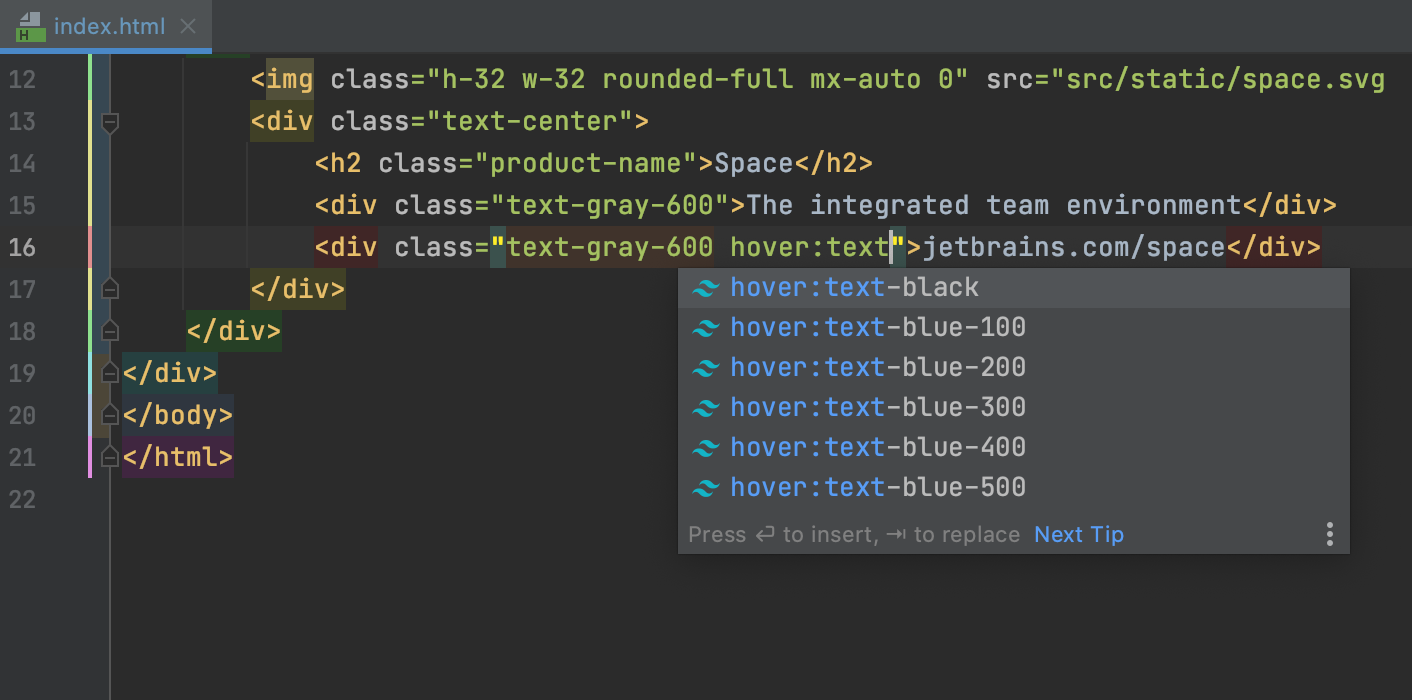
Complete Tailwind classes
PyCharm autocompletes Tailwind classes in HTML files and in CSS files after the @apply directive.
PyCharm suggests Tailwind classes for completion in JavaScript string literals.
Completion suggestions are also shown for pseudo-class variants.
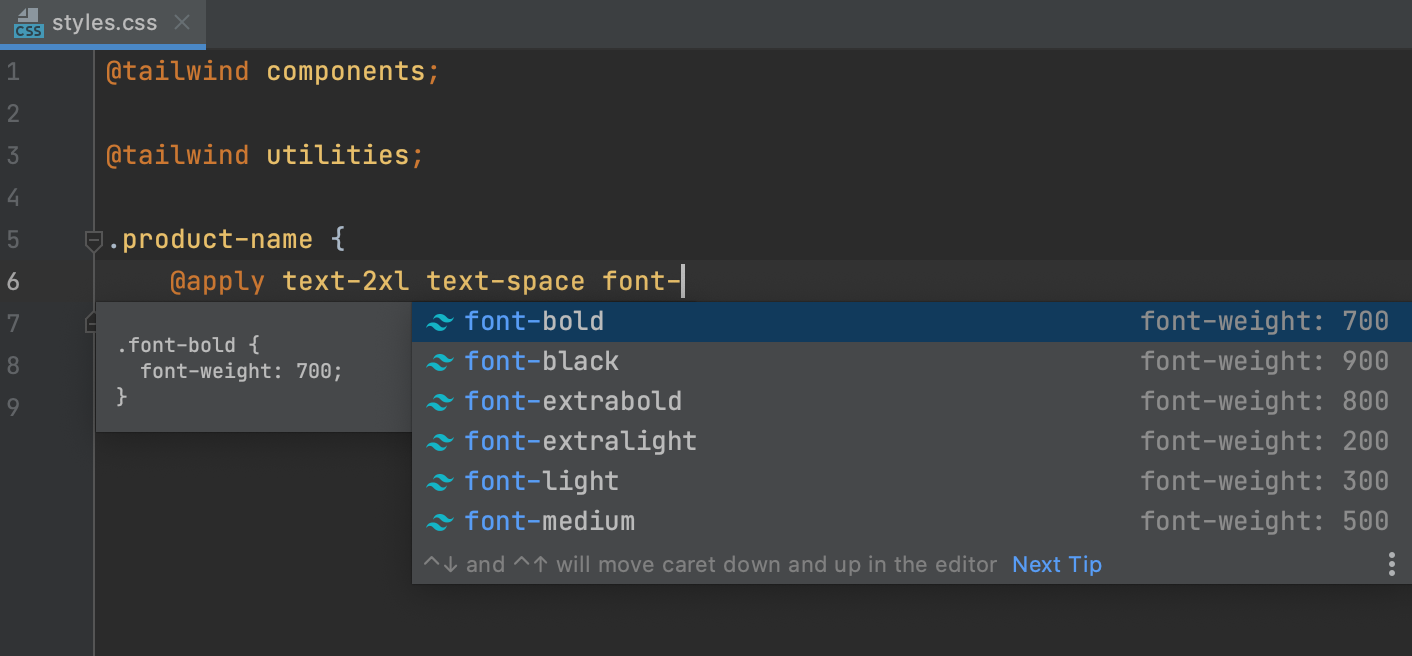
Preview the resulting CSS
When you hover over a Tailwind class in an HTML or CSS file, PyCharm shows you the preview of the resulting CSS.
The preview is also shown in the Documentation popup ( Control+Q ) when you complete your code.
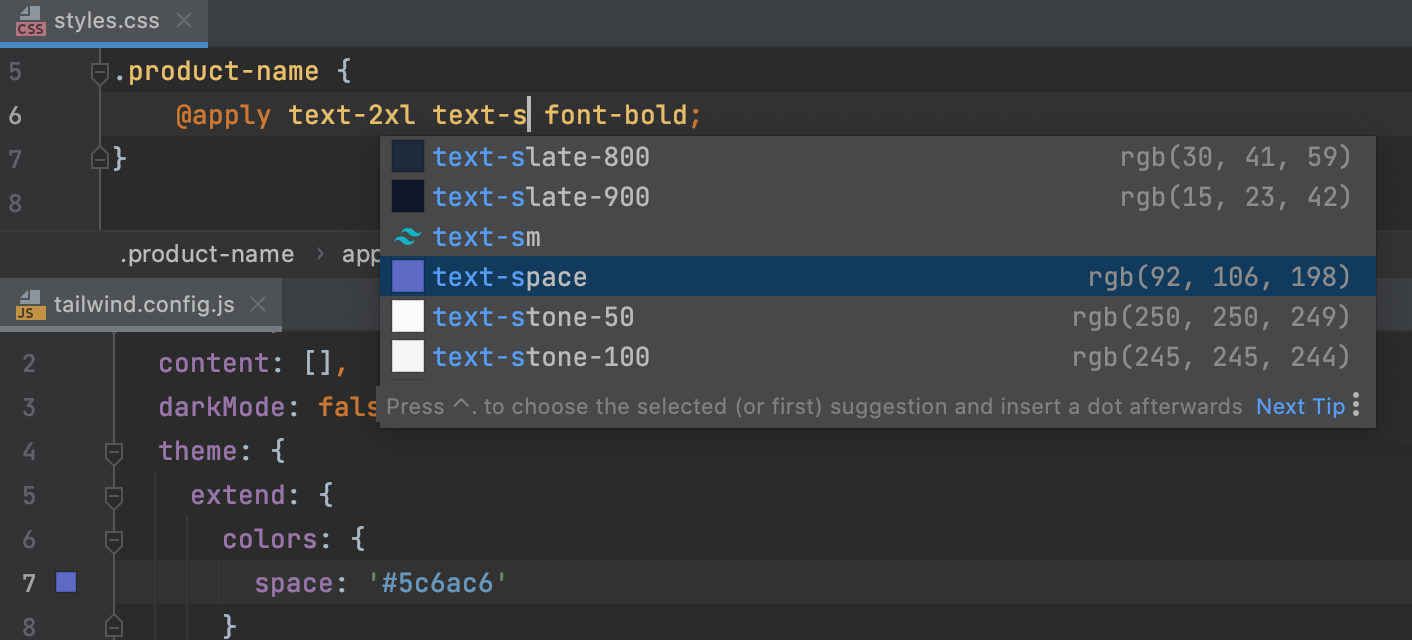
Edit your tailwind.config.js
PyCharm provides code completion based on the customization you make through your tailwind.config.js configuration files. For example, if you define a custom theme with new colors, newly generated classes with the name of the custom color will be shown in the completion popup.
Configure Tailwind options
You can also customize the default Tailwind configuration options. For example, you may want to tune the HTML attributes list for which to provide class completions or use an experimental regular expression format to specify additional places where completions should be triggered.
- Open the Settings dialog ( Control+Alt+S ) and go to Languages and Frameworks | Style Sheets | Tailwind CSS .
- Update the properties to add configuration options.
Pycharm – интеграция HTML и CSS
HTML и CSS хорошо поддерживаются в редакторе PyCharm. PyCharm Editor включает в себя специальные сокращения и обеспечивает завершение тегов для HTML.
муравей
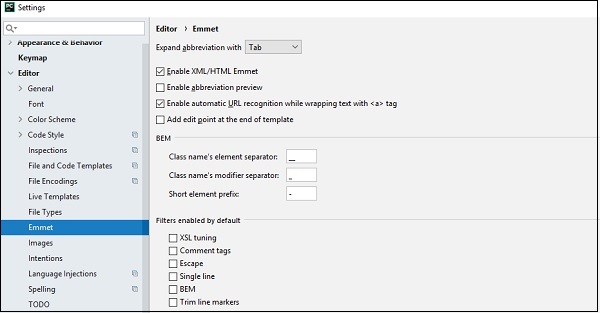
Emmet – сокращение, используемое в редакторе PyCharm. Он включает в себя различные функции, такие как предварительный просмотр аббревиатуры, автоматическое распознавание URL и точки редактирования для файлов HTML и CSS. Пользовательский интерфейс раздела настроек показан на снимке экрана, представленном ниже –
Создание файлов HTML и CSS
PyCharm включает в себя встроенную функцию для создания файлов HTML и CSS. Основные шаги для создания новых файлов HTML и CSS:
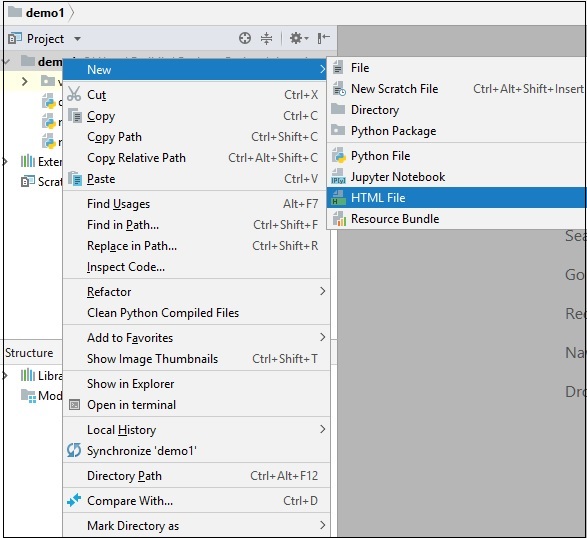
Теперь упомяните имя файла при создании файлов HTML в проекте, как показано ниже –
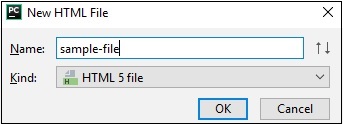
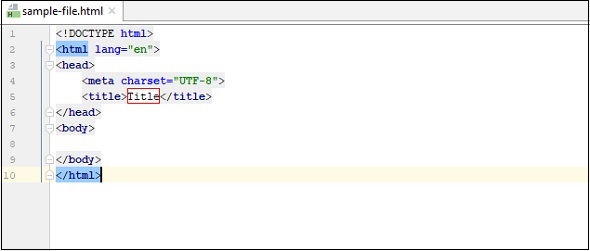
Это создает файл sample-file.html, как показано ниже –
Создание CSS файла
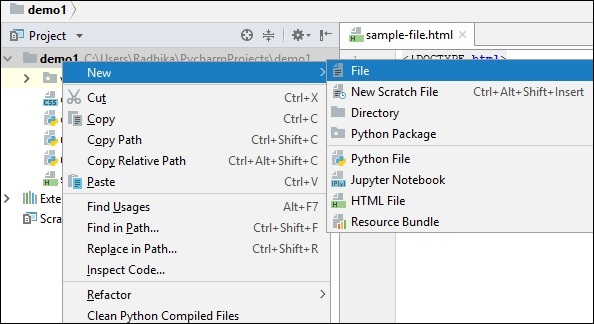
Шаги для создания файла CSS показаны здесь –
В меню « Новый» выберите « Файл», как показано ниже.
Укажите имя CSS во время его создания, как показано здесь –

Вы можете увидеть полную структуру проекта с различными файлами, упомянутыми в различных цветовых комбинациях, как показано ниже –
Live Edit in HTML, CSS, and JavaScript
With the Live Edit functionality, the changes you make to your HTML, CSS, or JavaScript code are immediately shown in the browser without reloading the page.
Live Edit works for other file types that contain or generate HTML, CSS, or JavaScript. You can also use Live Edit when debugging a Node.js application. See Live Edit in Node.js application for details.
By default, Live Edit is enabled only for HTML and CSS files.
Before you start
- Make sure the JavaScript and TypeScript bundled plugin is enabled in the settings. Press Control+Alt+S to open the IDE settings and select Plugins . Click the Installed tab. In the search field, type JavaScript and TypeScript . For more details about plugins, see Managing plugins.
- Make sure the JavaScript Debugger bundled plugin is enabled in the settings. Press Control+Alt+S to open the IDE settings and select Plugins . Click the Installed tab. In the search field, type JavaScript Debugger . For more details about plugins, see Managing plugins.
- Install and enable the LiveEdit plugin on the Settings | Plugins page, tab Marketplace , as described in Installing plugins from JetBrains repository.
- Configure the built-in debugger as described in Configuring JavaScript debugger. To have the changes you make to your HTML, CSS, or JavaScript code immediately shown in the browser without reloading the page, activate the Live Edit functionality. For more details about the live editing functionality, see Live Edit in HTML, CSS, and JavaScript .
Activate and configure Live Edit in JavaScript
- In the Settings dialog ( Control+Alt+S ), go to Build, Execution, Deployment | Debugger | Live Edit .
- On the Live Edit page that opens, select the Update application in Chrome on changes in checkbox.
- By default, PyCharm shows on-the-fly preview only for HTML and CSS code. To enable Live Edit in JavaScript, select the JavaScript, HTML and CSS option.
- Specify the time-delay between changing the code in the editor and showing this change in the browser: accept the default value 300 ms or specify a custom value using the spin box next to the corresponding field.
- To enable reloading of JavaScript files that are executed by Node.js, select the Update Node.js application on change checkbox. Use the spin box to specify the elapsed time for upload, the default value is 300 .
- To enable Live Edit in code that can be compiled into JavaScript, HTML, or CSS, for example, in TypeScript, Pug, or SCSS, select the Track changes in files compiled to JavaScript, HTML or CSS checkbox. All the changes made in such files are automatically saved to trigger compilation and then appear in the browser. Note that a changed file is saved shortly after the update, contrary to regular autosave triggered by closing a file, a project, or PyCharm, or by other events.
- To configure highlighting, select the Highlight current element in browser on caret change checkbox. Otherwise, during a debugging session, you will have to hold Shift and hover over the element in the editor to highlight it in the browser.
- Select the Restart if hotswap fails checkbox to allow PyCharm to reload the page automatically if the changes couldn’t be applied without that.
Use Live Edit
- Start a debugging session.
- Update your HTML, CSS, or JavaScript code as necessary. The changes are reflected in the browser immediately without reloading the page.