- 4 Free IDE for JavaScript
- Eclipse:
- Aptana Studio 3:
- NetBeans:
- Free JavaScript Editor:
- How to write JavaScript in Eclipse IDE
- How to Download and Install Eclipse IDE?
- Writing My First JavaScript Program in Eclipse IDE
- How to Run JavaScript Code in Eclipse IDE?
- Creating JavaScript External File using Eclipse IDE
4 Free IDE for JavaScript
Here, are 4 IDE for JavaScript, available for free.
JavaScript is an extremely popular and widely-used scripting language for developing web applications. JavaScript is very lightweight; that is why it is used in billions of web-based applications all over the world. Moreover, it can be easily inserted into HTML pages. JavaScript is used in several web applications to customize pages based on different browser versions, validating forms, and providing feedback to user-generated actions. Apart from that, it is sometimes used in some non-web related applications as well.
To make it easier for you to develop web applications using JavaScript, we have found some really good Integrated Development Environments for JavaScript, which provides you a convenient environment to code, edit, test, and debug applications written in JavaScript. Let’s have a look on all of them, one by one. You may also try some free PHP IDE for Windows.
Eclipse:
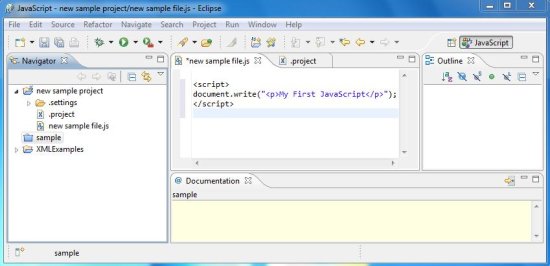
The Eclipse IDE is really a nice and powerful IDE for developing web applications. It provides an appropriate environment to develop professional web-based applications in almost all the latest web technologies including JavaScript, PHP, C/C++, SQL, and many more. The Eclipse platform is basically a collection of various plug-ins; each providing particular functionality. Eclipse is highly customizable and can be used as an integrated tool for web developers.
Eclipse is very handy and easy to use. It allows users to quickly develop efficient web applications by providing features like auto-complete, code checking, code formatting, syntax checking, and code previewing. Eclipse is a powerful web editor with WYSIWYG support and can be run on various platforms including Windows, Linux, and Mac.
Aptana Studio 3:
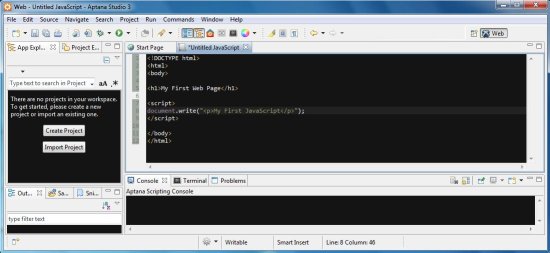
Aptana Studio 3 is probably the best suited IDE for JavaScript. It’s a handy, open source tool that allows you to develop professional applications using JavaScript. Apart from that, it also provides support for CSS and HTML5, and some other server-side languages like Ruby, Rails, and PHP. It provides powerful code assist features, which includes displaying matching tags, sample snippets, and graphical information for developing applications for major web browsers.
Aptana also has an integrated debugger which shows powerful debugging capabilities for Ruby & Rails, and JavaScript. It lets you set breakpoints and inspect elements, to remove all potential bugs from your code.
It also features code change highlighting which enables highlighting every line number where you made changes, the last time you saved your project. This helps in separately notifying all the changes, you made to your code.
This free IDE for JavaScript also provides built-in deployment wizard to automatically publish your web applications to hosting services like Engine Yard and Heroku.
Aptana IDE is based on Eclipse, and is available both as an Eclipse plugin, and a stand-alone application for Windows PC.
NetBeans:

NetBeans is another powerful IDE for JavaScript that supports building professional web applications written in JavaScript, CSS, PHP, Groovy, HTML, and other web programming languages. NetBeans is an open source web development platform that allows you to develop multiple Java applications for mobile, desktop, and the web.
NetBeans provides support for latest java technologies, including Java EE 6, JDK 7, and JavaFX 2. Apart from that, it offers a blend of rich features and integrated tools, code samples, and templates to let you easily and quickly develop multiple web applications. The basic editing features include syntax highlighting, code formatting, code completion, semantic highlighting, type analysis, testing support, code filtering, page inspection, and multiple browser support. Apart from that, it provides an integrated JavaScript debugger to help you easily debug your web applications.
NetBeans is totally Java based and works great with all major operating systems including Windows, Linux, and Mac.
Free JavaScript Editor:
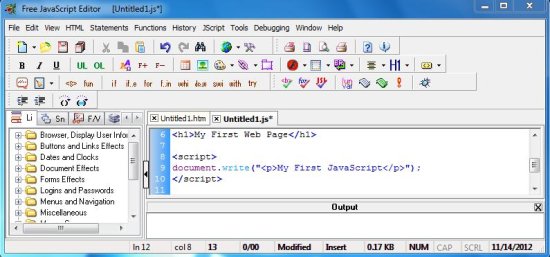
Free JavaScript Editor is an advanced Integrated Development Environment, especially dedicated towards building JavaScript applications. It is developed by Yandex Software, and is available both as free and paid versions. It lets you easily create, edit, and debug JavaScript applications, and also lets you add animations and other special effects to multiple web pages.
This free IDE for JavaScript provides support for other programming languages as well, including HTML and CSS. Apart from that, it works as an AJAX Editor, and allows AJAX programmers to create and validate AJAX applications within its own development environment.
This Free IDE for JavaScript also features Intellisense, which is a prominent functionality offered by any web editor. Intellisense helps in auto-completing text, which makes it easier for you to quickly develop error-free web applications. But the downside is that it is available only for the first 21 days with the free edition.
Free JavaScript Editor is a complete freeware, and can be run on any Windows version.
How to write JavaScript in Eclipse IDE

Eclipse is another popular free, open-source IDE among web developers and developers who use other programming languages.
It was built for Java development but now included many tools for working with other programming languages: HTML, CSS, JavaScript, Ruby, Python, PHP, etc.
Eclipse can handle entire web projects and even can be integrated with any other popular development tools required to create web applications into a single interface.
In addition, it also supports various plugins and anyone can create plugins to extend Eclipse’s functionality. Due to so many features included in Eclipse, we can also use this IDE for web development.
To use Eclipse IDE for the web development project, you will need to download eclipse and install it. So, let’s understand step by step download and installation process.
How to Download and Install Eclipse IDE?
There are the following steps to download, install Eclipse, and set up the development environment for JavaScript. They are as follows:
Step 1 : Download the eclipse from the given link: https://eclipse.org/downloads
Choose the latest stable version of the eclipse IDE and make sure that if your computer system is 64-bit, choose 64-bit eclipse.
Step 2 : Once the download is completed, click on elipse.exe to open the eclipse that will ask to select a local directory as its workspace. Workspace is the folder or place where eclipse will store your projects.
Step 3 : Create or select a local directory on C drive where you want to store your JavaScript project, and click on the OK button to start eclipse.
You can also create a folder with a suitable name for your JavaScript project on C drive and browse that folder from the workspace launcher.
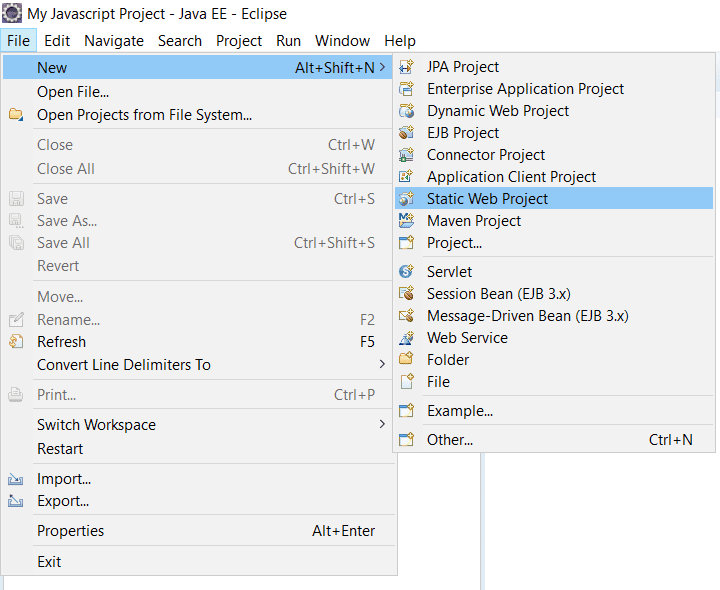
Step 4 : Once the eclipse opens, navigate as File -> New -> Static Web Project. Click on the link as shown below in the screenshot.
Step 5 : It will open up a window dialogue box that will ask you to enter the name of the project. Enter the project name “JavaScript Project” and click on the ‘Finish’ button as shown in the below screenshot.

Step 6 : Expand the JavaScript project directory on the left-hand side of Eclipse (project explorer) and right-click on the ‘WebContent’ folder.
To create an HTML file in the current JavaScript project, navigate to New -> HTML File as shown below in the screenshot.

Step 7 : It will open up a window dialogue box that will ask you to write the file name. Please type the file name “myJavascriptProgram” and click on the ‘Finish’ button as shown below. It will create an HTML file for the current static web project.

At this point, we have successfully completed the development setup for JavaScript programming with project structure as shown in the below screenshot.

In the next section, we are going to write our first JavaScript program using this setup.
Writing My First JavaScript Program in Eclipse IDE
In the last section, we created an HTML file named myJavascriptProgram.html. Now it’s time to write the first JavaScript program.
Let’s write the following JavaScript code snippet in the editor as shown below and then save it.
In the above JavaScript program, we have placed some JavaScript code between the opening body
tag and closing body tag of the HTML file.In the next section, we will learn how to run a Javascript program in Eclipse IDE.
How to Run JavaScript Code in Eclipse IDE?
To run JavaScript program code in Eclipse, right-click on myJavascriptProgram and navigate to New -> Open with -> web browser and click on it as shown below.

Eclipse will open the web browser in the editor and display the following output.
Output of code: Welcome to my first JavaScript program
Creating JavaScript External File using Eclipse IDE
There are the following steps to create JavaScript external file in Eclipse that is as follows:
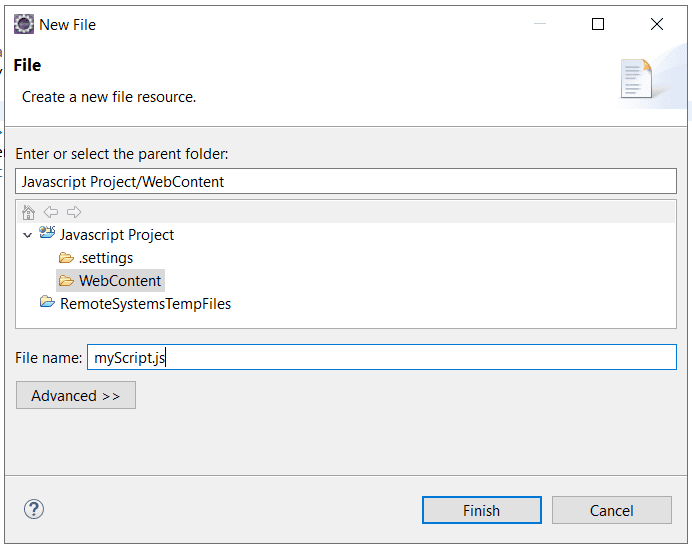
Step 1 : Create a new file to write JavaScript code by choosing New and then File from the File menu.
The New File dialog box will open where we will write myscript.js in the File name text box, as shown below, and click on the Finish button.
Step 2 : Eclipse will add a new empty JavaScript file named “myScript.js” to your project. If this file doesn’t open automatically in the editor, right-click on the myScript.js file in Project Explorer, choose Open With, and then click Text Editor.
Now you will see two files named “myJavascriptProgram” and “myScript.js” on the screen.
Step 3 : Write the following code snippet in the JavaScript file named “myScript.js” and save it using Ctrl+S. You can also save it by selecting Save from the File menu.
document.write("Creating an external JavaScript file in Eclipse"); Step 4 : Now add the following code in the script “myJavascriptProgram.html” and save it. In the code snippet, src is an attribute and “myScript.js” is the value of attribute src. We have added src attribute to the opening tag.
The complete code structure is given below:
Step 5 : Right-click on myJavascriptProgram.html in the Project Explorer and navigate to Open with, and then click on Web Browser.
Eclipse will open a browser window in the editor, where you will see output of code snippet on the web page.
Output of code: Creating an external JavaScript file in Eclipse
This is a basic primer about JavaScript development with Eclipse that is completed. If you want to get more information besides, I will recommend visiting the Eclipse website.
Hope that this tutorial has covered almost all the important steps related to how to write JavaScript program in Eclipse IDE. I hope that you will have understood how to run JavaScript in eclipse.
In the next tutorial, we will learn how to add JavaScript in HTML document.
Thanks for reading.
Next ⇒ How to add JavaScript in HTML document ⇐ Prev Next ⇒