- Мультиклассы
- Синтаксис
- Браузеры
- CSS по теме
- Mastering CSS: How to Apply Same CSS for Two Classes in HTML
- Introduction
- Multiple CSS Declarations
- Multiple classes for more efficient CSS
- Multiple Classes
- Separate Classes in CSS
- Grouped CSS Selectors
- The add() Method in JavaScript
- HTML Element with Multiple Classes
- CSS Specificity and :not() Selector
- Other examples of simple code for applying the same CSS to two classes in HTML
- Conclusion
- How to add multiple classes to HTML elements
- HTML multiple classes for styling purpose
- Learn JavaScript for Beginners 🔥
- About
- Search
- Tags
Мультиклассы
К любому тегу одновременно можно добавить несколько классов, перечисляя их в атрибуте class через пробел. В этом случае к элементу применяется стиль, описанный в правилах для каждого класса. Поскольку при добавлении нескольких классов они могут содержать одинаковые стилевые свойства, но с разными значениями, то берется значение у класса, который описан в коде ниже.
Синтаксис
Здесь E — обозначает любой тег.
В стилях допустимо использовать запись следующего вида.
В таком случае стиль применяется только для элементов, у которых одновременно заданы классы class1 и class2 , т. е. в коде HTML используется конструкция .
HTML5 CSS 2.1 IE Cr Op Sa Fx
Paint.NET Photoshop цвет фон палитра слои свет панели линия прямоугольник пиксел градиент Результат данного примера показан на рис. 1.
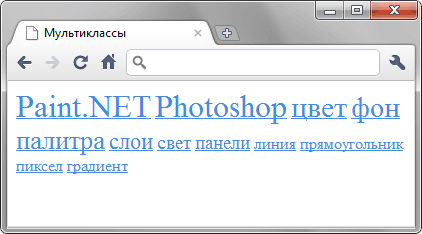
Рис. 1. Цвет и размер ссылок, заданный через классы
Браузеры
Браузер IE до версии 7.0 некорректно работает с мультиклассами и понимает запись .a.b как .b , т.е. воспринимает только имя последнего класса, что приводит к ошибкам.
CSS по теме
Mastering CSS: How to Apply Same CSS for Two Classes in HTML
Learn the best practices to apply the same CSS style to two different classes in HTML. Explore multiple CSS declarations, grouping CSS selectors, and dynamic JavaScript methods. Experiment with multiple classes in CSS and take your web development skills to the next level.
- Introduction
- Multiple CSS Declarations
- Multiple classes for more efficient CSS
- Multiple Classes
- Separate Classes in CSS
- Grouped CSS Selectors
- The add() Method in JavaScript
- HTML Element with Multiple Classes
- CSS Specificity and :not() Selector
- Other examples of simple code for applying the same CSS to two classes in HTML
- Conclusion
- How do you add the same CSS to two classes?
- How to apply multiple CSS classes in HTML?
- Can you have multiple classes with same name CSS?
- Can an element have 2 CSS classes?
CSS is a crucial aspect of web development, as it enables developers to style HTML elements and create visually appealing websites . When working with CSS, it is common to apply the same style to multiple elements or classes. In this article, we will discuss different methods to apply the same CSS style to two different classes in HTML.
Introduction
When working with CSS, it is essential to know how to apply the same style to multiple classes. This knowledge can save developers a lot of time and effort. In this article, we will explore various methods to apply the same CSS style to two different classes in HTML.
Multiple CSS Declarations
One way to apply the same CSS style to two different classes is by using multiple CSS declarations. In CSS, multiple declarations for the same properties can be applied to different classes by separating them with commas.
For example, suppose we want to apply the same font style to two different classes, “class1” and “class2.” In that case, we can use the following CSS code:
.class1, .class2 font-family: Arial, sans-serif; > This code will apply the font style to both “class1” and “class2” classes.
Using multiple CSS declarations has the benefit of saving time by reducing the amount of code you need to write.
Multiple classes for more efficient CSS
If multiple CSS classes share identical attributes, it may be more efficient to remove those Duration: 4:28
Multiple Classes
Another way to apply the same CSS style to two different classes is by using multiple classes. To apply two css classes to a single element , multiple classes can be used inside the class attribute of the element, separated by whitespace.
For example, suppose we have two classes, “class1” and “class2,” and we want to apply both to a single element. In that case, we can use the following HTML code:
div class="class1 class2"> . div> This code will apply both “class1” and “class2” classes to the “div” element.
Using multiple classes has the benefit of making your code more readable and easier to maintain.
Separate Classes in CSS
Another way to apply the same CSS style to two different classes is by separating classes in CSS and still calling them using the class attribute with a space between them.
For example, suppose we have two classes, “class1” and “class2,” and we want to apply the same style to both. In that case, we can use the following CSS code:
.class1 color: red; > .class2 color: red; > Using this method allows you to keep your CSS organized and makes it easier to modify styles later on.
Grouped CSS Selectors
Grouping CSS selectors is another way to apply the same styles to several different elements without repeating the styles in the stylesheet. CSS selectors can be grouped by separating them with commas.
For example, suppose we want to apply the same font style to all headings and paragraphs on our webpage. In that case, we can use the following CSS code:
h1, h2, h3, p font-family: Arial, sans-serif; > This code will apply the font style to all headings and paragraphs on our webpage.
Using grouped CSS selectors can significantly reduce the amount of CSS code you need to write, making your code easier to manage.
The add() Method in JavaScript
The add() method can be used to assign multiple classes to an element dynamically in JavaScript. This method adds one or more class names to the existing class attribute of an HTML element.
For example, suppose we have a button element that we want to assign two classes, “class1” and “class2.” In that case, we can use the following JavaScript code:
document.querySelector('button').classList.add('class1', 'class2'); This code will assign both “class1” and “class2” classes to the button element.
Using the add() method in JavaScript allows you to dynamically modify the styles of your webpage based on user interactions or other events.
HTML Element with Multiple Classes
Multiple classes can be added to an HTML element by placing spaces between each class in the HTML code.
For example, suppose we have two classes, “class1” and “class2,” and we want to add them to an HTML element. In that case, we can use the following HTML code:
div class="class1 class2"> . div> This code will assign both “class1” and “class2” classes to the “div” element.
Using this method allows you to add multiple classes to an HTML element without having to modify your CSS code.
CSS Specificity and :not() Selector
CSS specificity determines which style rules apply to elements in the document tree. The :not() selector can be used to exclude elements from the selection.
For example, suppose we have two classes, “class1” and “class2,” and we want to apply a different style to “class1” than “class2.” In that case, we can use the following CSS code:
.class1 color: red; > :not(.class1).class2 color: blue; > This code will apply a different color to “class2” elements that do not have the “class1” class.
Understanding CSS specificity and the :not() selector can help you write more efficient and effective CSS code.
Other examples of simple code for applying the same CSS to two classes in HTML
In Css , in particular, css two classes together
In Css , for instance, css multiple classes same rule code sample
.bucket1, .bucket2, .bucket3 < >.bucket4, .bucket5, .bucket6
Conclusion
In this article, we discussed different methods to apply the same CSS style to two different classes in HTML. We explored using multiple CSS declarations, multiple classes, separating classes in CSS, grouped CSS selectors, the add() method in JavaScript, HTML element with multiple classes, CSS specificity and the :not() selector. Knowing these methods can save developers time and effort when working with CSS. So, experiment with multiple classes in CSS and share your results!
How to add multiple classes to HTML elements

Last Updated Jun 18, 2022
Any HTML element can have as many different classes as needed to style the element using CSS effectively.
To assign multiple classes to a single HTML element, you need to specify each class name inside the class attribute separated with a blank space.
For example, the following
element is assigned one class called heading :
The following example below shows how to assign two classes: heading and font-large to the same paragraph:
A class name that has more than one word is commonly joined with a dash ( - ) this is also known as the kebab-case.
There is no limit to how many class names you can add to a single HTML element. But keep in mind that you need to keep the class names intuitive and descriptive.
I’d recommend you put 10 class names at maximum in a single HTML element to keep your project maintainable.
HTML multiple classes for styling purpose
HTML classes are used for styling the elements rendered on the browser.
By creating multiple classes that serve different styling purposes, you can reuse the classes in many different elements without having to repeat the styling.
For example, you can have a class called font-small to adjust the font-size property to smaller than regular font size, while the font-large class will make the font-size larger than regular.
Suppose you have a style sheet with the following CSS rules:
You can add the CSS classes above to your HTML elements.
Here’s an example of adding the classes to a element:
- What property will this class modify? Use it as the first part of your class name.
- What is the value of the property being modified by this class? Use it as the second part of your class name
For example, if you’re changing the background-color property to grey , then the class name .bg-color-grey would be a good choice.
If the value of the property is not exact, then you can use a word that would describe the output relative to a regular element.
For example, font-small describes that the font size for the assigned element will be smaller than a regular element, so you can use that instead of font-size-12 although the latter is more precise.
Sometimes you can also abbreviate small as sm and create an xs style for extra-small :
Writing good HTML class names takes practice and time because classes can be used by both CSS and JavaScript to manipulate the presentation and the interactivity of HTML pages.
You’re going to get better as you write more code, and the rule of two above will help you start on the right mindset 👍
Now you’ve learned how to assign multiple classes to a single HTML element. Nice work!
Learn JavaScript for Beginners 🔥
Get the JS Basics Handbook, understand how JavaScript works and be a confident software developer.
A practical and fun way to learn JavaScript and build an application using Node.js.

About
Hello! This website is dedicated to help you learn tech and data science skills with its step-by-step, beginner-friendly tutorials.
Learn statistics, JavaScript and other programming languages using clear examples written for people.
Search
Type the keyword below and hit enter
Tags
Click to see all tutorials tagged with: