- Add php file to php server
- Загрузка файла
- Ограничения и настройка загрузки
- Мультизагрузка
- Загрузка файла
- PHP File Upload
- Configure The «php.ini» File
- Create The HTML Form
- Create The Upload File PHP Script
- Check if File Already Exists
- Limit File Size
- Limit File Type
- Complete Upload File PHP Script
- Complete PHP Filesystem Reference
- PHP Include Files
- PHP include and require Statements
- Syntax
- PHP include Examples
- Example 1
- Example
- Welcome to my home page!
- Example 2
- Example
- Welcome to my home page!
- Example 3
- Example
- Welcome to my home page!
- PHP include vs. require
- Example
- Welcome to my home page!
- Example
- Welcome to my home page!
Add php file to php server
Чтобы загрузить файл на сервер, нам надо использовать форму с параметром enctype=»multipart/form-data» и массив $_FILES . Итак, создадим файл upload.php со следующим содержимым:
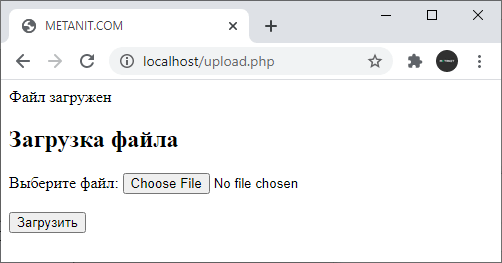
?>Загрузка файла
Здесь определена форм с атрибутом enctype=»multipart/form-data» . Форма содержит специальное поле для выбора файла.
Все загружаемые файлы попадают в ассоциативный массив $_FILES . Чтобы определить, а есть ли вообще загруженные файлы, можно использовать конструкцию if: if ($_FILES)
Массив $_FILES является двухмерным. Мы можем загрузить набор файлов, и каждый загруженный файл можно получить по ключу, который совпадает со значением атрибута name .
Так как элемент для загрузки файла на форме имеет name=»filename» , то данный файл мы можем получить с помощью выражения $_FILES[«filename»] .
У каждого объекта файла есть свои параметры, которые мы можем получить:
- $_FILES[«file»][«name»] : имя файла
- $_FILES[«file»][«type»] : тип содержимого файла, например, image/jpeg
- $_FILES[«file»][«size»] : размер файла в байтах
- $_FILES[«file»][«tmp_name»] : имя временного файла, сохраненного на сервере
- $_FILES[«file»][«error»] : код ошибки при загрузке
Также мы можем проверить наличие ошибок при загрузке. Если у нас нет ошибки, то поле $_FILES[«filename»][«error»] содержит значение UPLOAD_ERR_OK .
При отправке файла на сервер он сначала загружается во временное место, из которого затем с помощью функции move_uploaded_file() он перемещается в каталог сервера, где расположен скрипт «upload.php».
Также мы можем указать другой путь, например, допустим, на сервере есть папка «upload», тогда, чтобы загружать в нее файлы, необходимо указать соответствующий путь:
if ($_FILES && $_FILES["filename"]["error"]== UPLOAD_ERR_OK) < $name = "upload/" . $_FILES["filename"]["name"]; move_uploaded_file($_FILES["filename"]["tmp_name"], $name); echo "Файл загружен"; >
Функция move_uploaded_file() принимает два параметра путь к загруженному временному файлу и путь, куда надо поместить загруженный файл.
Ограничения и настройка загрузки
По умолчанию размер загружаемых файлов ограничен 2 мб. Однако можно настроить данный показатель в файле конфигурации. Изменим этот показатель, например, до 10 мб. Для этого найдем в файле php.ini следующую строку:
Также мы можем настроить папку для временных загружаемых файлов. Для этого в файле php.ini найдем следующую строку:
upload_tmp_dir = "C:/php/upload"
Также в каталоге php нам надо создать папку upload .
Мультизагрузка
Изменим скрипт upload.php так, чтобы он поддерживал множественную загрузку:
$error) < if ($error == UPLOAD_ERR_OK) < $tmp_name = $_FILES["uploads"]["tmp_name"][$key]; $name = $_FILES["uploads"]["name"][$key]; move_uploaded_file($tmp_name, "$name"); >> echo "Файлы загружены"; > ?>Загрузка файла
Каждое поле выбора файла имеет атрибут name=»uploads[]» , поэтому сервер будет рассматривать набор отправленных файлов как единый массив.
Затем используя цикл foreach , проходим по все файлам и сохраняем их в каталог веб-сайта.
PHP File Upload
However, with ease comes danger, so always be careful when allowing file uploads!
Configure The «php.ini» File
First, ensure that PHP is configured to allow file uploads.
In your «php.ini» file, search for the file_uploads directive, and set it to On:
Create The HTML Form
Next, create an HTML form that allow users to choose the image file they want to upload:
Some rules to follow for the HTML form above:
- Make sure that the form uses method=»post»
- The form also needs the following attribute: enctype=»multipart/form-data». It specifies which content-type to use when submitting the form
Without the requirements above, the file upload will not work.
- The type=»file» attribute of the tag shows the input field as a file-select control, with a «Browse» button next to the input control
The form above sends data to a file called «upload.php», which we will create next.
Create The Upload File PHP Script
The «upload.php» file contains the code for uploading a file:
$target_dir = «uploads/»;
$target_file = $target_dir . basename($_FILES[«fileToUpload»][«name»]);
$uploadOk = 1;
$imageFileType = strtolower(pathinfo($target_file,PATHINFO_EXTENSION));
// Check if image file is a actual image or fake image
if(isset($_POST[«submit»])) $check = getimagesize($_FILES[«fileToUpload»][«tmp_name»]);
if($check !== false) echo «File is an image — » . $check[«mime»] . «.»;
$uploadOk = 1;
> else echo «File is not an image.»;
$uploadOk = 0;
>
>
?>
- $target_dir = «uploads/» — specifies the directory where the file is going to be placed
- $target_file specifies the path of the file to be uploaded
- $uploadOk=1 is not used yet (will be used later)
- $imageFileType holds the file extension of the file (in lower case)
- Next, check if the image file is an actual image or a fake image
Note: You will need to create a new directory called «uploads» in the directory where «upload.php» file resides. The uploaded files will be saved there.
Check if File Already Exists
Now we can add some restrictions.
First, we will check if the file already exists in the «uploads» folder. If it does, an error message is displayed, and $uploadOk is set to 0:
// Check if file already exists
if (file_exists($target_file)) echo «Sorry, file already exists.»;
$uploadOk = 0;
>
Limit File Size
The file input field in our HTML form above is named «fileToUpload».
Now, we want to check the size of the file. If the file is larger than 500KB, an error message is displayed, and $uploadOk is set to 0:
// Check file size
if ($_FILES[«fileToUpload»][«size»] > 500000) echo «Sorry, your file is too large.»;
$uploadOk = 0;
>
Limit File Type
The code below only allows users to upload JPG, JPEG, PNG, and GIF files. All other file types gives an error message before setting $uploadOk to 0:
Complete Upload File PHP Script
The complete «upload.php» file now looks like this:
$target_dir = «uploads/»;
$target_file = $target_dir . basename($_FILES[«fileToUpload»][«name»]);
$uploadOk = 1;
$imageFileType = strtolower(pathinfo($target_file,PATHINFO_EXTENSION));
// Check if image file is a actual image or fake image
if(isset($_POST[«submit»])) $check = getimagesize($_FILES[«fileToUpload»][«tmp_name»]);
if($check !== false) echo «File is an image — » . $check[«mime»] . «.»;
$uploadOk = 1;
> else echo «File is not an image.»;
$uploadOk = 0;
>
>
// Check if file already exists
if (file_exists($target_file)) echo «Sorry, file already exists.»;
$uploadOk = 0;
>
// Check file size
if ($_FILES[«fileToUpload»][«size»] > 500000) echo «Sorry, your file is too large.»;
$uploadOk = 0;
>
// Check if $uploadOk is set to 0 by an error
if ($uploadOk == 0) echo «Sorry, your file was not uploaded.»;
// if everything is ok, try to upload file
> else if (move_uploaded_file($_FILES[«fileToUpload»][«tmp_name»], $target_file)) echo «The file «. htmlspecialchars( basename( $_FILES[«fileToUpload»][«name»])). » has been uploaded.»;
> else echo «Sorry, there was an error uploading your file.»;
>
>
?>
Complete PHP Filesystem Reference
For a complete reference of filesystem functions, go to our complete PHP Filesystem Reference.
PHP Include Files
The include (or require ) statement takes all the text/code/markup that exists in the specified file and copies it into the file that uses the include statement.
Including files is very useful when you want to include the same PHP, HTML, or text on multiple pages of a website.
PHP include and require Statements
It is possible to insert the content of one PHP file into another PHP file (before the server executes it), with the include or require statement.
The include and require statements are identical, except upon failure:
- require will produce a fatal error (E_COMPILE_ERROR) and stop the script
- include will only produce a warning (E_WARNING) and the script will continue
So, if you want the execution to go on and show users the output, even if the include file is missing, use the include statement. Otherwise, in case of FrameWork, CMS, or a complex PHP application coding, always use the require statement to include a key file to the flow of execution. This will help avoid compromising your application’s security and integrity, just in-case one key file is accidentally missing.
Including files saves a lot of work. This means that you can create a standard header, footer, or menu file for all your web pages. Then, when the header needs to be updated, you can only update the header include file.
Syntax
PHP include Examples
Example 1
Assume we have a standard footer file called «footer.php», that looks like this:
To include the footer file in a page, use the include statement:
Example
Welcome to my home page!
Some text.
Some more text.
Example 2
Assume we have a standard menu file called «menu.php»:
All pages in the Web site should use this menu file. Here is how it can be done (we are using a element so that the menu easily can be styled with CSS later):
Example
Welcome to my home page!
Some text.
Some more text.
Example 3
Assume we have a file called «vars.php», with some variables defined:
Then, if we include the «vars.php» file, the variables can be used in the calling file:
Example
Welcome to my home page!
echo «I have a $color $car.»;
?>
PHP include vs. require
The require statement is also used to include a file into the PHP code.
However, there is one big difference between include and require; when a file is included with the include statement and PHP cannot find it, the script will continue to execute:
Example
Welcome to my home page!
echo «I have a $color $car.»;
?>
If we do the same example using the require statement, the echo statement will not be executed because the script execution dies after the require statement returned a fatal error:
Example
Welcome to my home page!
echo «I have a $color $car.»;
?>
Use require when the file is required by the application.
Use include when the file is not required and application should continue when file is not found.