Menu with background images css
That’s a great tutorial, but please, you may want to update “Start with an un-ordered list ” to say “Start with an un-ordered list “
Paul Wilkins
Edit:
That’s a great tutorial, but please, you may want to update the “Start with an un-ordered list” piece so that it doesn’t use an OL tag but instal an UL tag.
Jonny Haynes
Hi nice tutorial, however you made a mistake – may confuse some people – see below … you mention a un-ordered list but show the tag for an ordered list.
Great work though … keep it up!
3. HTML source
When you are done with the graphics, let’s start coding. Start with an un-ordered list .
Christina
This is a great tutorial, I have a slightly different way of doing the same thing. I place the span tags around the link text like this –> About
So when you declare – span – it hides the text.
Christina
^ ^ Sorry that should say span>About/span>
Christina
Grr! How do you show tags using these comments??
Grant
Mike
You can achieve pretty much the same effect – but without the use of non-semantic span tags – by applying the background image directly to the a tag, and setting the width and height on that.
Unless I’m missing something specific with the span…?
Olivier
Mike
Actually, looking back at the code and what I just wrote – you’d need to do the following:
Combine the ‘out’ and ‘over’ graphics into a single image – ‘out’ state at the top, ‘over’ state at the bottom.
Use the css background-position property to set the background image at the top of the ‘a’ tag when it’s inactive, and set the background-position at bottom on the ‘a:hover’. You’ll need to check your specicivity to make sure the right image is displayed on the right li.
Set the display of the ‘a’ tags to ‘block’, and set the width and height (you may need to float the ‘li’s).
Set the text-indent on the ‘a’ tags to a fairly large negative number.
That *should* be your lot (although I’m probably missing something out!) – no non-semantic span tags, and single image rollovers which should save on both bandwidth and server requests (and make your css a tiny bit leaner).
Ryan Scherf
When you are done with the graphics, let’s start coding. Start with an un-ordered list .
Carly
Wow… this is great. I’ve only skimmed the coding but with all that positioning does the menu work correctly in every single browser/resolution combo?
I can’t wait to try this out though…!
noway
excellent ! … je vais le tester tout de suite !
Elliot Jay Stocks
It’s funny you should post this, Nick – I posted my own very similar tutorial at the weekend! I think I prefer the way you’ve laid yours out, though, and the hover effect with the is a really nice touch. Well done… again! 🙂
Duluoz
Mike – You are correct. The added span and extra graphic can be consolidated to a single sprite graphic with less CSS required as you mentioned.
eshark
Great you have this tip continued and put it to the next level.. a Must Read tutorials indeed.. Bravo again!
Nick
@Mike – Yes, alternatively you can put all the button graphics in one single GIF image, but by separating the graphics it gives better control. I can simply change the button location by the top and left property (without going to Photoshop, editing the image, and then changing the CSS again).
chris
nice tutorial, but using 7 images here seems a bit bulky when it could be done with 2. check out elliot’s tutorial above or alistaprt for the css sprite method.
Rahul Joshi
nice one… i was waiting for such a tutorial….
actually i wanted to implement a horizontal navigation menu in a wordpress theme, where normal and hover states are different images. This tutorial is a bit close to that, but can u please help me out and let me know how can i achieve such menu in wordpress?
andrej
what function does the “outline:none” on the “#menu a” element have?
Nick
@andrej – the outline property is to remove the dotted border around the link in Firefox on click.
andrej
thank you, nick. great article by the way.
I was wondering if there is any negative search engine outcome when using css-properties such as text-indent: -900% to remove search engine relevant html code from the users eye.
In your case it is not critical, however what about properties like display:none, are capable of removing whole blocks of text.
Víctor
Wow. Exelent man, as always. You’re like my heroe, every day i learn more and more XHTML tips but this is just great.
Timothy Diokno
@Nick: Yes, it can be done in two images.Why seven? It’s because of the amount of time consumed when loading the whole image needed for the sprites?
Mike
@ andrej: As far as I’ve found, there are no negative search engine outcomes to using a negative margin on the text – the text is still in the markup and is fully readable by search engines and screenreaders. On the other hand, some search engine robots and screenreaders ignore any text that’s hidden by display:none (or so I’ve read) so that would have an impact. Both methods fall down when images are turned off and CSS is turned on in a user’s browser, but there are a couple of ways around this (which require non-semantic span tags, unfortunately) – mezzoblue has a list of different methods with advantages and pitfalls.
For most sites I design/build, I use a semantic single-image negative margin method with the background image, display:block and dimensions applied directly to the ‘a’ tag. It’s served me well so far, and it’s reasonably quick to do.
Chris
@Mike: Search engines discourage what they call cloaking, basically intentionally showing the search engine something different than what your site shows a user. Sites that use a heavy amount of Flash often cloak to get their site content in the search engines. I do not think negative margin would be considered cloaking.
Search Engine Spiders cannot read CSS or JS so I doubt that they are paying attention to whether or not an element is set to: display:none or visibility:hidden.
Just turn off your CSS in FF and that is most likely what Google sees.
CSS меню для начинающих

Данное руководство поможет Вам создать CSS меню для вашего сайта, оно не будет обычным, оно будет привлекать внимание пользователей, не сомневайтесь. И так приступим…
Фон для меню
Для начала создадим background, я конечно не мастер PhotoShop’a, но вот что у меня получилось за пару минут:

Графические кнопочки
Создаем изображения которые у нас будут использовать как ссылки в меню. Для этого воспользуемся PhotoShop’ом:
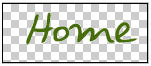
- Создаем новый файл размером этак 144x58px. (размер ссылки для первого элемента в меню)
- Наполняем графическим содержимым сей пункт меню (у меня это лишь надпись выполненная забавным шрифтом):

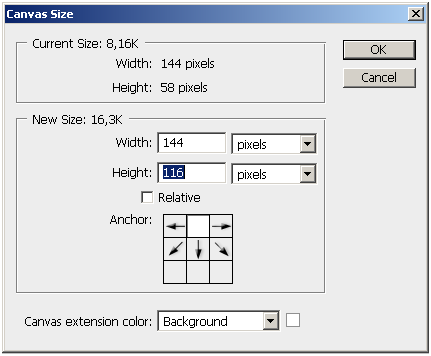
- Далее увеличим размер полотна в два раза
- И дорисуем внешний вид элемента меню для реализации события hover
Как сия конструкция будет работать? Да очень просто — ссылке мы явно указываем размер 144x58px, а но событие mouseover перемещаем фоновое изображение вверх: - Создадим новый файл с произвольным размером и текстом — это будет наша подсказка к ссылке
- Повторим все предыдущие пункты для создания всех пунктов меню, в результате анаших манипуляций у нас должен получиться вот такой набор изображений:


HTML код
CSS код
#menu
Для начала убираем padding и margin у меню, list-style выставляем в none, position указываем как relative. Указываем высоту и ширину меню (см. размеры menu-bg.jpg). Добавляем фоновое изображение.
#menu list-style: none;
padding: 0;
margin: 0;
width: 774px;
height: 210px;
background: url(images/menu-bg.jpg) no-repeat;
position: relative;
>
Для элементов span параметр display выставляем в none (по умолчанию не будут отображаться). Так же выставляем position как absolute.
Для ссылок нам необходимо спрятать текст, для этого параметру text-indent присваиваем негативное значение (-900%), и текст будет скрыт.
#menu a:hover
Теперь мы хотим сдвинуть картинку на линке по событию mouseover, для этого добавим в CSS следующий код:
#menu a:hover span
Так же по событию mouseover необходимо отобразить подсказку
Теперь нам необходимо правильно расставить элементы меню. Для начала укажем размер элемента и фоновое изображение, а затем займемся позиционированием, будем изменять параметры left и top пока не почувствуем морального удовлетворения от внешнего вида меню:
#menu .home width: 144px;
height: 58px;
background: url(images/home.gif) no-repeat;
left: 96px;
top: 96px;
>
#menu .home span
Теперь проведем подобную операцию для всплывающей подсказки
#menu .home span width: 86px;
height: 14px;
background: url(images/home-over.gif) no-repeat;
left: 28px;
top: -20px;
>
Копируем всё что мы сделали для элемента .home и переименовываем в .about. Подгоняем размер и расположение, так же заменяем фон.
#menu .about width: 131px;
height: 51px;
background: url(images/about.gif) no-repeat;
left: 338px;
top: 97px;
>
#menu .about span width: 40px;
height: 12px;
background: url(images/about-over.gif) no-repeat;
left: 44px;
top: 54px;
>
#menu .rss width: 112px;
height: 47px;
background: url(images/rss.gif) no-repeat;
left: 588px;
top: 94px;
>
#menu .rss span width: 92px;
height: 20px;
background: url(images/rss-over.gif) no-repeat;
left: 26px;
top: -20px;
>
Всё в одном
#menu list-style: none;
padding: 0;
margin: 0;
width: 774px;
height: 210px;
background: url(images/menu-bg.jpg) no-repeat;
position: relative;
>
#menu span display: none;
position: absolute;
>
#menu a display: block;
text-indent: -900%;
position: absolute;
outline: none;
>
#menu a:hover background-position: left bottom;
>
#menu a:hover span display: block;
>
#menu .home width: 144px;
height: 58px;
background: url(images/home.gif) no-repeat;
left: 96px;
top: 73px;
>
#menu .home span width: 86px;
height: 14px;
background: url(images/home-over.gif) no-repeat;
left: 28px;
top: -20px;
>
#menu .about width: 131px;
height: 51px;
background: url(images/about.gif) no-repeat;
left: 338px;
top: 97px;
>
#menu .about span width: 40px;
height: 12px;
background: url(images/about-over.gif) no-repeat;
left: 44px;
top: 54px;
>
#menu .rss width: 112px;
height: 47px;
background: url(images/rss.gif) no-repeat;
left: 588px;
top: 94px;
>
#menu .rss span width: 92px;
height: 20px;
background: url(images/rss-over.gif) no-repeat;
left: 26px;
top: -20px;
>
Это всё, протестировать меню можете тут, а скачать пример тут.