HTML Nested Form
In this article, we will see if can we create a nested form in HTML. Creating multiple forms within a form using tag is called a nested form. But we can’t create nested forms. Even if we create a nested form, it will automatically create separately. Let’s see an example:

In this example code, we have created a form and inside it another form. Outside the form, we have gotten a “Name” input and created a “Submit” button. Inside the inner form, we have gotten “Email”, and “Password” and created a “Submit” button.

See the above output, outer and inner form is successfully displayed. But see the element’s output below:
The child form is automatically merged with the parent form. Understand that, even if we create a nested form it will be merged, So we can create forms separately like:
Here, we have created two forms separately. This also gives us the same output. So, if you want to create a group form together, you need to use the or tags.
In summary, although it is possible to create a nested form in HTML, it may cause browser compatibility issues and is not recommended as it violates the HTML specification. It’s best to use other HTML elements to group related form elements together
Как отправить из html формы только часть данных

Бывает ситуация, когда нужно отправить форму с данными, которая уже вложена в другую форму. Обычно потребности могут быть при написании админской части web-приложения. Но вложенные формы стандартом HTML не допускаются. Вложенная форма при этом не работает. Предлагаем два метода решения данной проблемы.
Первый способ
В этом случае обработка и сортировка поступившей информации ложится целиком на сторону сервера. Сначала определяем какая из кнопок была нажата, затем на основании этой информации из всех данных выбираются нужные. Данный метод универсален с точки зрения работы в любой среде, работает во всех случаях, даже если у пользователя в браузере отключены скрипты. Недостаток способа в том, что передаются все поля из формы, а не только нужные.
Второй способ
Этот способ заключается в том, что из формы берутся нужные поля, затем динамически формируется новая форма и отправляется на сервер. Для этого придется сделать несколько вспомогательных действий. Разметка страницы может разная, мы укажем такую:
//-------------------------------------------------------------------- // Создать временную форму и перенести в нее все элементы //-------------------------------------------------------------------- function ds(f) < var e=document.getElementById(f); if (!e) return false; // Создать временную форму var tmp_form = document.createElement("form"); tmp_form.method='get'; tmp_form.action='process.php'; // Адрес скрипта-обработчика формы tmp_form.style.display='none'; document.getElementsByTagName('body')[0].appendChild(tmp_form); // Перенести в нее все элементы cf(e,tmp_form); // Отправить созданную форму tmp_form.submit(); >//-------------------------------------------------------------------- // Перенести значения полей в форму //-------------------------------------------------------------------- function cf(e,f) < for (var i=0; i// Флажок checkbox case 'checkbox': < if (el.checked) < var tmp_el = document.createElement("input"); tmp_el.name=el.name; tmp_el.type='checkbox'; tmp_el.value=el.value; f.appendChild(tmp_el); tmp_el.checked=true; >break; > // Флажок radio case 'radio': < if (el.checked) < var tmp_el = document.createElement("input"); tmp_el.name=el.name; tmp_el.type='radio'; tmp_el.value=el.value; f.appendChild(tmp_el); tmp_el.checked=true; >break; > // Текстовое поле case 'hidden': < var tmp_el = document.createElement("input"); tmp_el.name=el.name; tmp_el.type='hidden'; tmp_el.value=el.value; f.appendChild(tmp_el); break; >// Поле ввода пароля case 'password': < var tmp_el = document.createElement("input"); tmp_el.name=el.name; tmp_el.type='hidden'; tmp_el.value=el.value; f.appendChild(tmp_el); break; >// Любые другие input'ы default: < break; >> > // Обработка textarea else if (elName=='textarea' && el.name!='') < var tmp_el = document.createElement("textarea"); tmp_el.name=el.name; tmp_el.value=el.value; f.appendChild(tmp_el); >// Обработка select else if (elName=='select' && el.name!='') < var tmp_el = document.createElement("input"); tmp_el.name=el.name; tmp_el.type='hidden'; tmp_el.value=el.value; f.appendChild(tmp_el); >else < // Обработать вложенный тег (рекурсия) cf(el,f); >> > © 2008 — 2022, ELsof.ru. Создание и поддержка сайтов. Раскрутка сайтов. Разработка Android приложений. Php скрипты
Login and Registration Form in HTML CSS & JavaScript
Hey friends, today in this blog, you’ll learn how to create an Animated Login and Registration Form in HTML CSS & JavaScript. Earlier I shared many blogs on How to Create a Login Form using HTML & CSS but, I haven’t shared a particular blog related to Login and Registration Forms in HTML. So, it’s time to create this one.
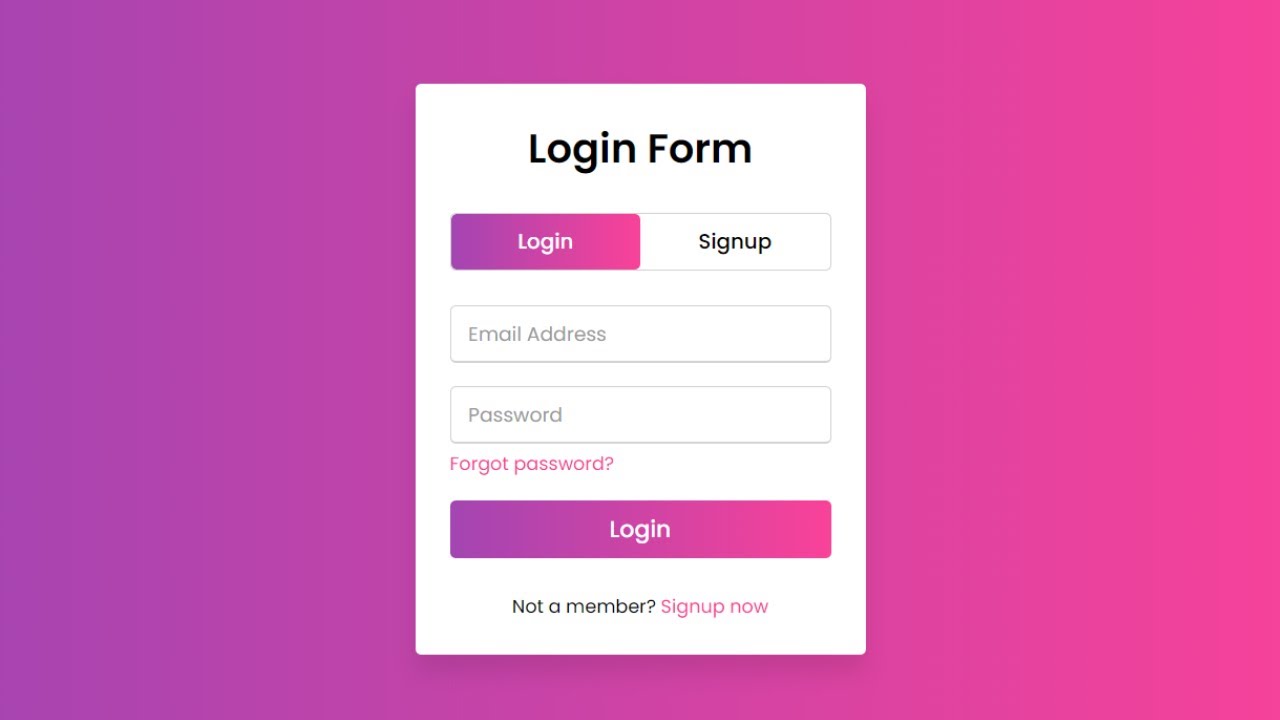
In this Form (Login and Registration Form in HTML), on the webpage, there is a login form and two toggle buttons at the top of the form labeled Login and Signup as you can see in the preview image above.
When you click on the signup button, the login form smoothly slides from the right to the left side and shows you the signup form.
And again after clicking the login button, the signup form slide from the left to the right side and shows you the login form. In this form, the login and signup forms both are on the same page and it is done with a little bit of JavaScript codes.
If you’re feeling difficult to understand what I am saying, you can watch a full video tutorial of this form (Login and Registration Form in HTML).
Video Tutorial of Login and Registration Form in HTML
In the video, you have seen an animated Login and Registration Form that is created using HTML CSS & JavaScript. I hope you’ve understood the basic codes behind creating this form.
I used just a few lines of JavaScript codes to complete this form, so you can easily create this type of login and registration form in HTML even if you’re a beginner.
JavaScript is used only to slide the form on button click and the toggle tab that slides from login to signup text and signup to login text is wholly based on pure HTML & CSS with the help of HTML tag.
If you liked this login form and want to get source codes or files, you can get them from the bottom of this page.
You might like this:
Login and Registration Form in HTML [Source Codes]
To create this form (Login and Registration Form in HTML). First, you need to create two Files one HTML File and another one is CSS File. After completing these files paste the following codes into your file.
First, create an HTML file with the name index.html and paste the given codes into your HTML file. Remember, you’ve to create a file with a .html extension.
Login FormSignup Form